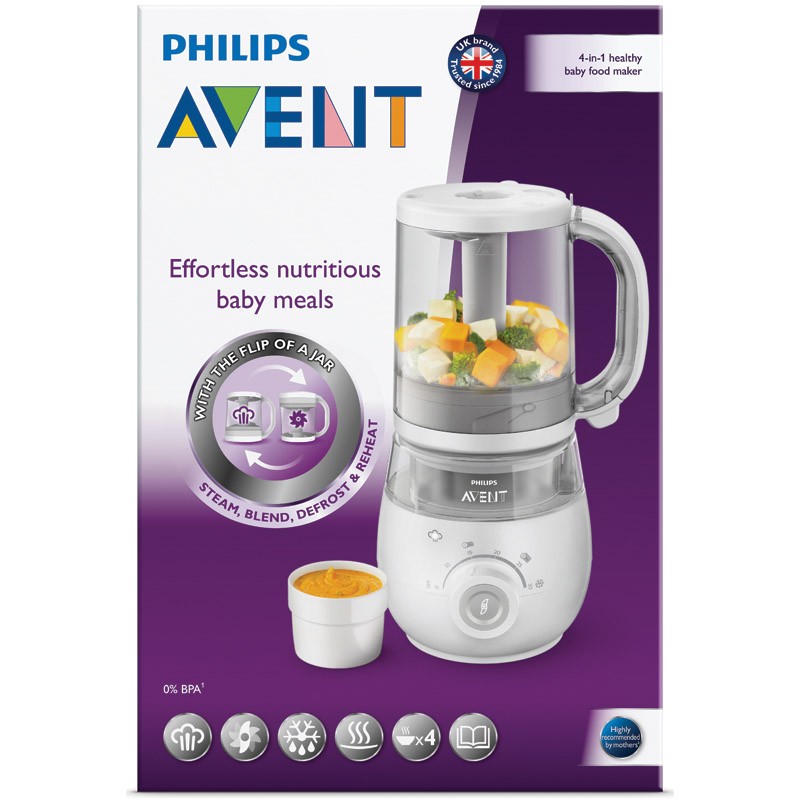
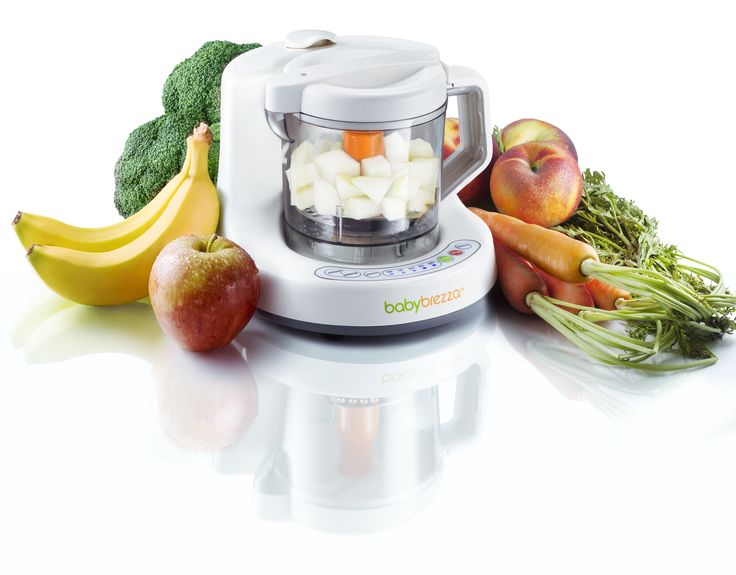
Blend baby food
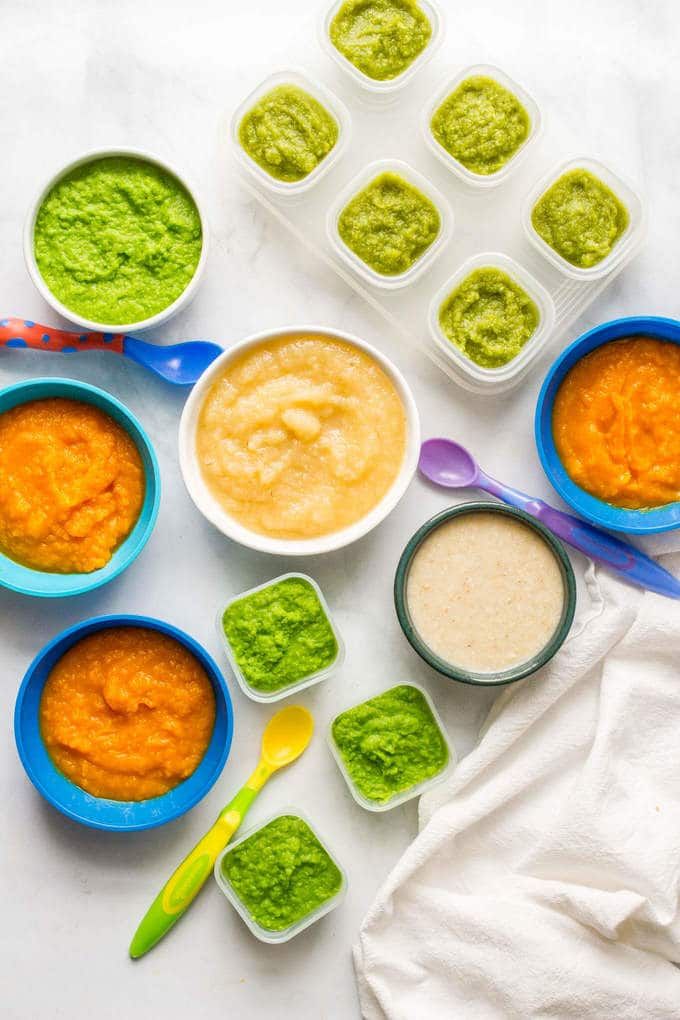
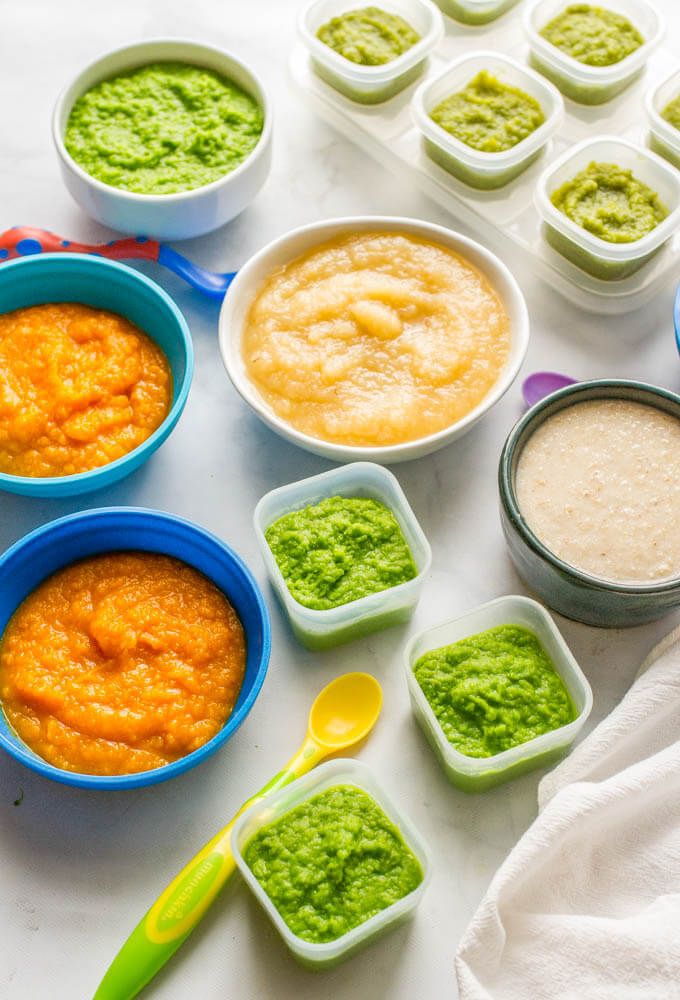
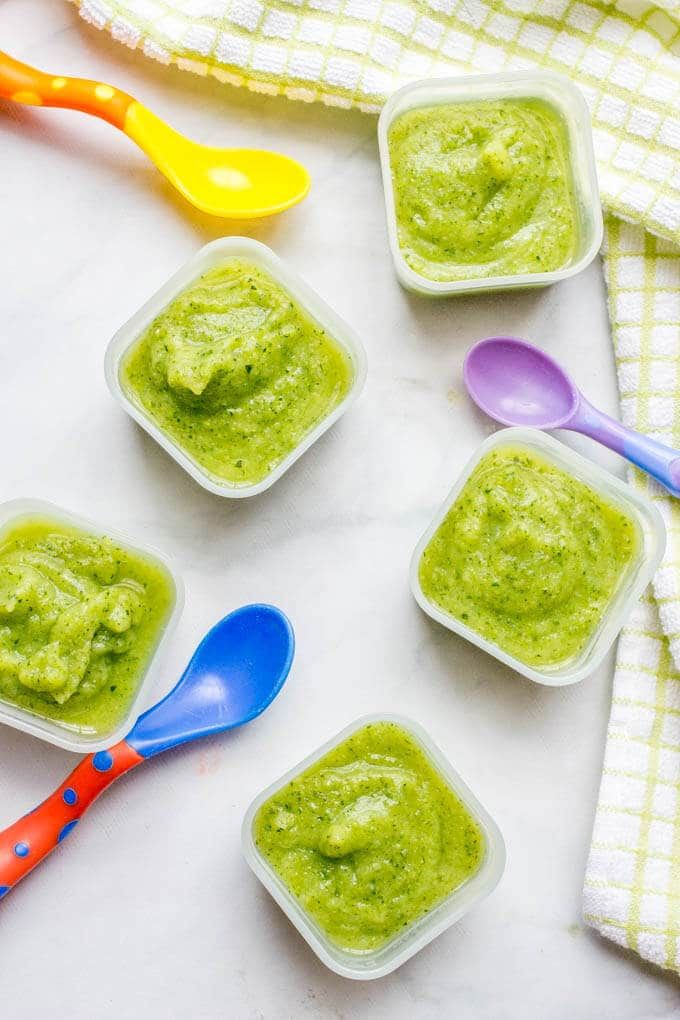
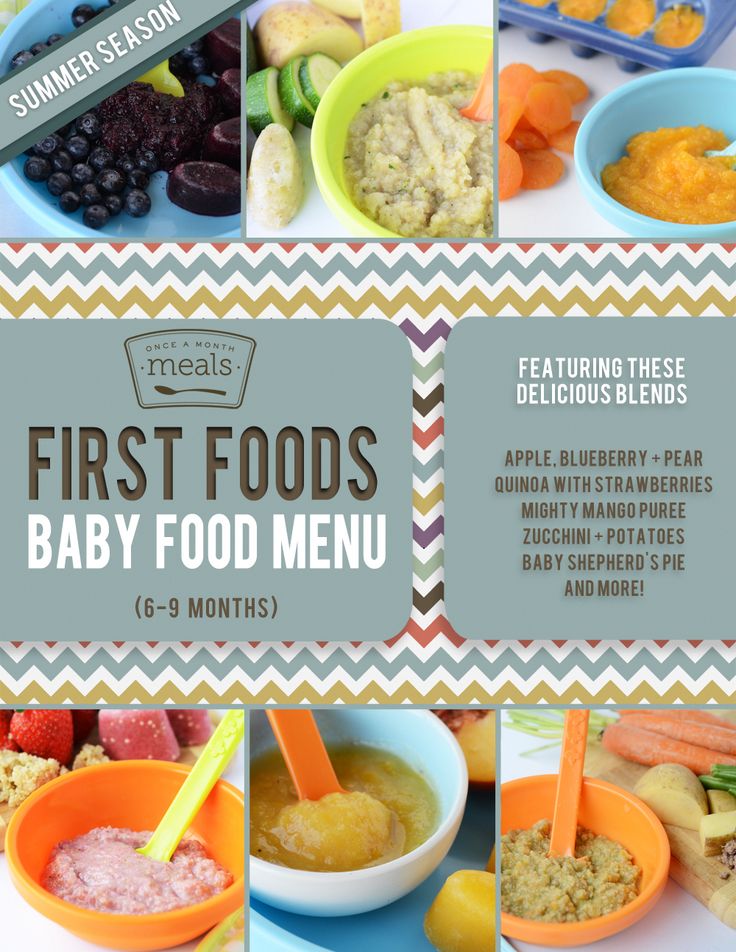
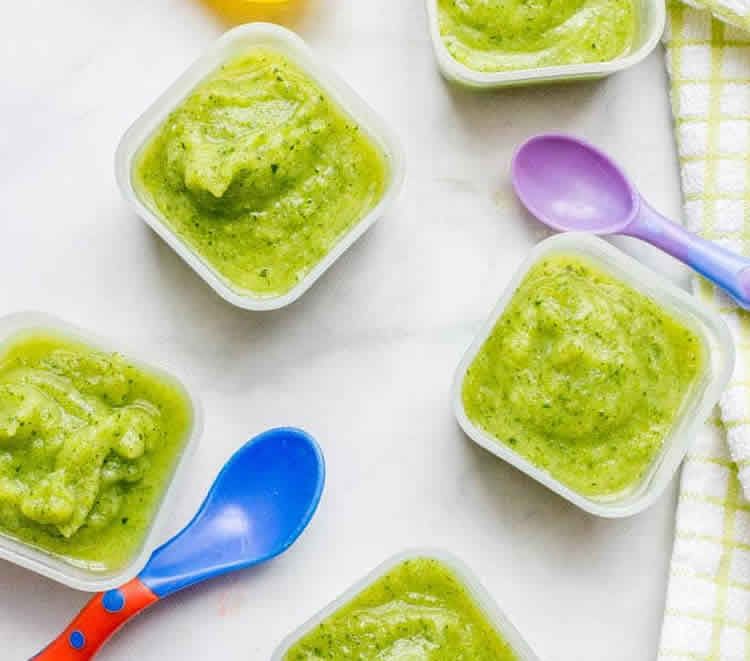
15 Stage One Baby Food Purees (4-6 Months)
Home » Feeding Style » Baby Food Purees » Stage One » 15 Stage One Baby Food Purees
These 15 Stage One Baby Food Recipes will tempt your baby’s taste buds! These simple, homemade baby food recipes are made with nutrient-dense fruits and vegetables with an added pinch of spice that makes these purees out-of-this-world delicious! They’re great for babies 4-6+ months of age!
Medically reviewed and co-written by Jamie Johnson, Registered Dietitian Nutritionist (RDN), and Lauren Braaten, Pediatric Occupational Therapist (OT).
Stage One Baby Food PureesAre you looking to make your baby homemade purees, but don’t know where to start? Does the process intimidate you?
Then you have come to the right place! Here you will find 15 of my all-time favorite starter baby food purees that have been viewed (and made) millions of times by my readers and combined have over 400 5-star reviews!
I would also like to personally welcome you to the wonderful world of baby food, this is a fun (and yummy) club to be in.
Does your baby’s first bite need to be boring?
Of course not!
Baby’s food can (and should be) delicious from the very start!
While it may seem daunting at first, making your own baby food is super easy once you get the hang of it.
And I’m here to walk you through it every step of the way.
First time making homemade baby food? Then I suggest you start this journey by reading my in-depth Guide on How to Make Homemade Baby Food. The detailed guide goes over all the important information such as the best cooking tools to have on hand, safe storage, how to know when baby is ready for solids, how to introduce purees, the best first foods for baby, and so much more! You can also check out my best-selling cookbook for even more information and recipes!
15 Stage One Baby Puree Video
While the recipes themselves are simple, in this video I will show you how to add in a pinch of cinnamon, rosemary, curry, or mint to quickly roasted or steamed fruits and vegetables that enhance their natural flavors.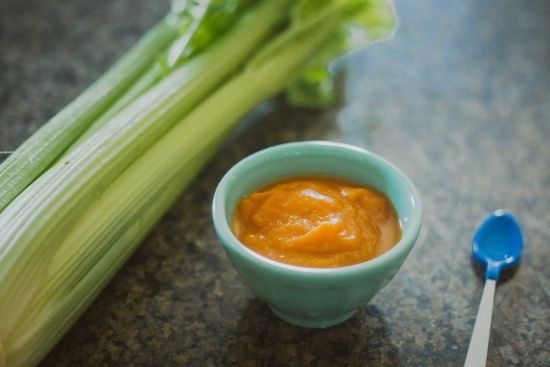 In other words, these are simple purees that I am pretty sure you will want to eat as well!
What is In Each Puree Recipe
After going through this guide, you will want to check out some (or all!) of the homemade baby food recipes below. Each recipe goes into detail about the:
- produce that is in the puree
- benefits of that produce for your baby
- recipe cooking options
- detailed photos and videos with step-by-step instructions
Reminder: The homemade baby food recipes below are made for babies that want to try the most delicious food from the very first bite! 😋
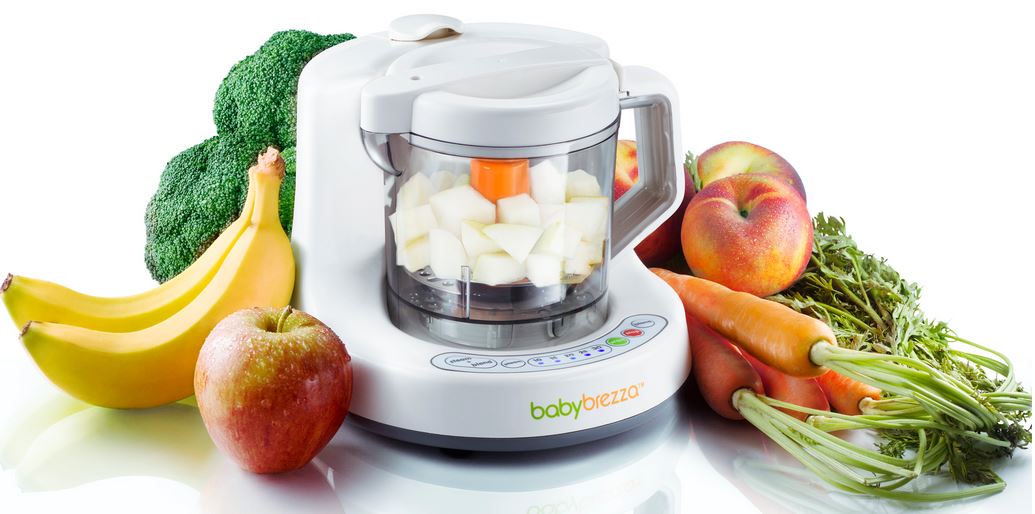
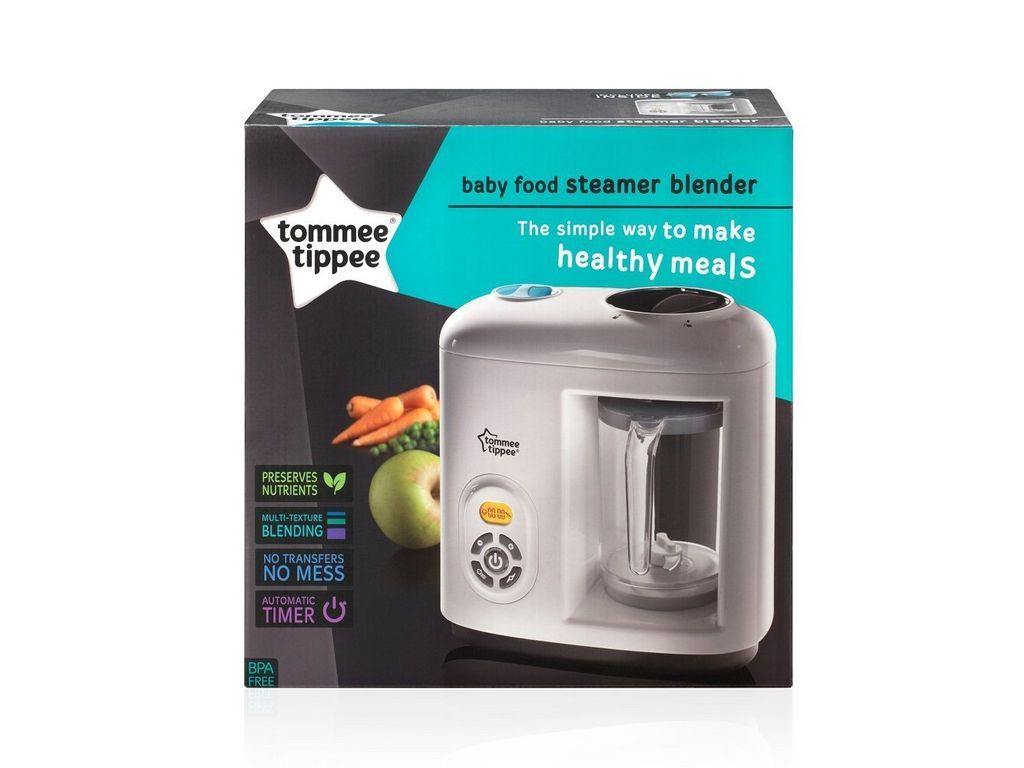
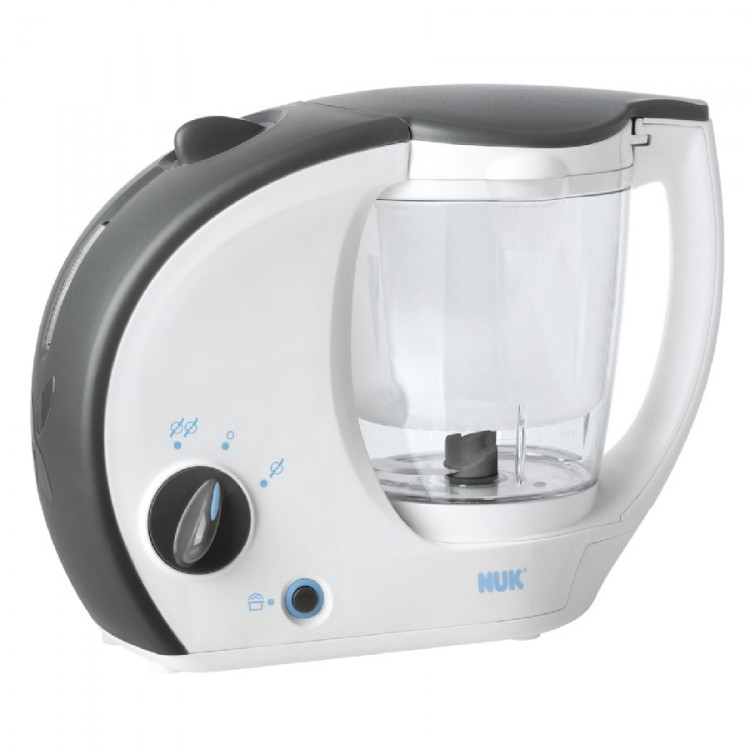
Helpful ToolsLet’s start with a few of my favorite kitchen essentials to make the best homemade baby food purees! These kitchen tools will help make the process of cooking, blending, and freezing baby food hassle-free. You can find a full list of my favorite baby and toddler food making tools in my online Shop.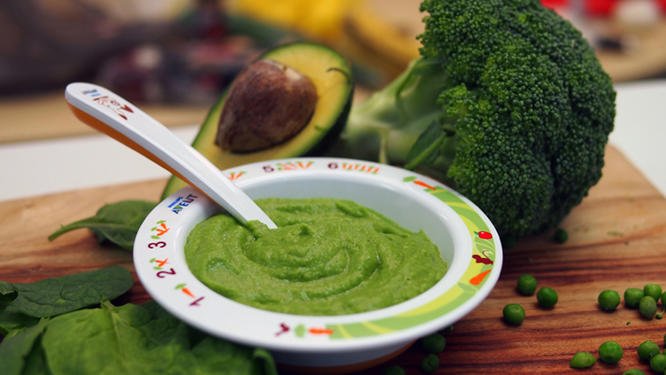
- Blender or Food Processor
- Freezer Storage Tray
- Fridge Storage Containers
- Stasher Bag
- Baking Sheet
- Steamer Basket
- Medium Saucepan
- Reusable Pouches
- High Chair
- Suction Bowl and Spoon Set
- Bib with Food Catcher
Learning Resources: looking for the best high chair, cups or spoons for your baby? Then we’ve got you covered! Here you will find How to Find the Best High Chair for Baby, an easy guide on Best First Open Cups for Baby (plus 4 tips when introducing a cup) as well as 3 Tips on How To Spoon Feed Baby (plus – our favorite spoons for purees or BLW).
Frequently Asked QuestionsCan babies have spices in their food?
Yes, yes, yes! Babies can absolutely have spices mixed into their purees from the very first bite.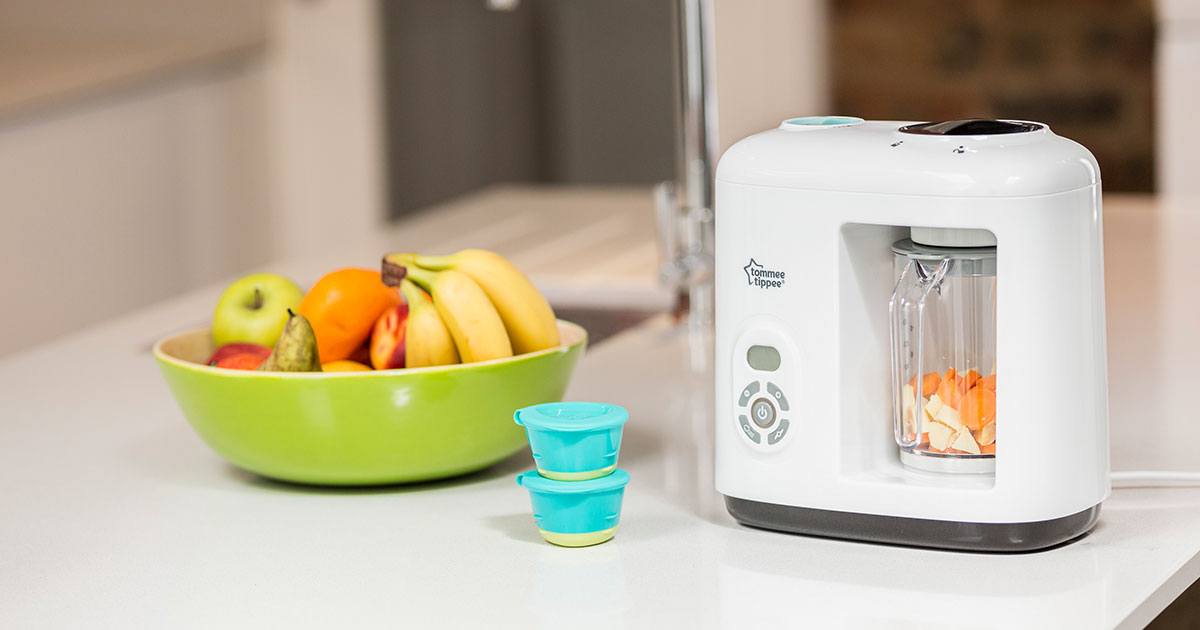 Adding a pinch of spice or herbs to a baby’s food makes it taste better and gives the food additional medicinal properties. Read more here. But as I always say — you do you! If you don’t want to add spices to your baby’s food, you can certainly leave them out. Don’t worry, I give instructions on each recipe card for both.
What about allergies? Can spices cause an allergic reaction?
My rule of thumb is that unless there is an immediate family member that has a true allergy to a certain spice or food, then introducing your baby to spices at the same time as new food is completely acceptable. Spice and herb allergies in babies and adults are very rare. But remember, it’s always recommended to keep an eye on your baby when introducing any new food or spices.
At what age should I start my baby on baby food purees?
When a baby can start on solid foods is determined by their own rate of development, which generally comes between 4-6 months of age. Some of the developmental milestones babies need to reach to start solids include: if your baby has solid control of their head and neck, if your baby has doubled in weight, and if your baby is reaching for or opening their mouth when you eat (see my guide here). Before you start your baby on purees, you should consult with your pediatrician to make sure your child is developmentally ready for solids.
All of our baby food recipes are designed to enhance the natural taste of the fruits and veggies while keeping as many nutrients intact as possible. In other words, the goal is to make a puree that’s both healthy and delectable.
There are several ways you can cook baby food purees, but the main techniques I use are:
- Steaming
- Roasting
- Simmering
- Raw
Keep in mind, that as long as the produce is cooked until soft, that there isn’t a right or wrong way to cook it for baby food.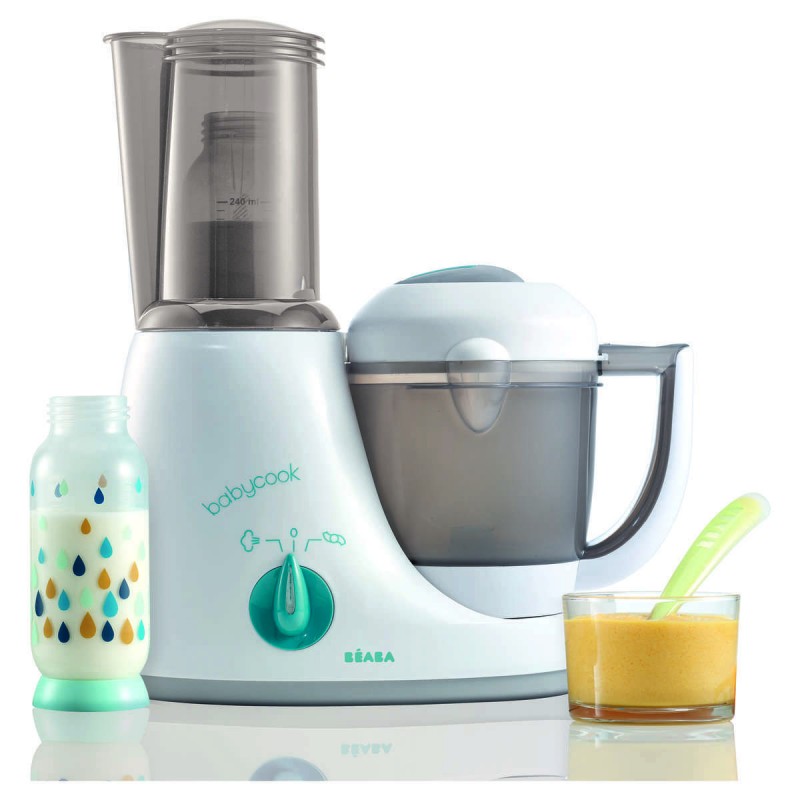
If a recipe for broccoli calls for steaming but you want to roast it because you will already be roasting some broccoli for yourself for dinner, then go ahead and roast the broccoli for your baby’s puree. Play around and have some fun with it!
Adding Spices to Baby PureesIt’s encouraged that you can serve your baby a homemade puree with a pinch of spices or herbs from the very first bite.
Benefits of Spices
- boost and compliment any fruit or vegetable puree
- broaden baby’s emerging palate
- add more flavor and depth into their foods
- decrease picky eating in the years to come
- have medicinal properties in them — they can help with digestive issues, boost brain functions, repair muscle tissues, and so on.
While each puree recipe on this site has a selection of spices or herbs that complement the flavors of the fruit or vegetable in the puree, it’s up to you if you want to add them.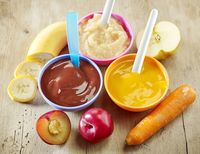 You do you! Either way, the puree recipes on this site will be delicious.
Top Spices to Add to Baby’s Puree
- Cinnamon
- Cloves
- Nutmeg
- Basil
- Mint
- Parsley
- Mild Curry Powder
- Fresh Lemon Juice
- Garlic
- Rosemary
Every recipe below has specific instructions on how to store that particular puree, but these are the general guidelines.
How to Freeze Baby FoodYour freezer is about to become your new best friend, allowing you to keep several weeks’ worth of baby purees at the ready. Whenever you make a puree, put several ounces in the fridge for your little one to enjoy that week, then freeze the rest of the batch for your baby to eat at a later date. Please make sure you get it in the puree into the fridge or freezer within 1 hour of cooking to prevent bacteria growth.
- Make a puree.
- Let it cool slightly.

- Transfer the puree to freezer trays or freezer jars.
- Cover the freezer trays with a lid or plastic wrap.
- Label with date and name of puree.
- Place the tray in the freezer.
- Let it freeze for at least 5 hours.
- Take the tray out of the freezer.
- Crack the purees out of the trays.
- Place the frozen purees into zip-lock baggies or stasher bags.
How to Store Baby Food
Purees can be stored for up to four days in an airtight container in the fridge or 4 months in the freezer.
How to Thaw Baby Food
Thawing may seem like a no-brainer, but it never hurts to know your options. There are three different ways to thaw purees.
Microwave- Take the frozen puree cubes that you want to serve out of your freezer.
- Place them in a glass microwave-safe container.
- Microwave in 20-second increments, stirring every time.
- The puree is ready when it is just warm to your touch.
- Grab two clean spoons, one for you and one for your baby, and test your puree before serving.
Heating Tip: To prevent the microwave from unevenly heating the puree, which can leave it with cold and really hot spots and can burn your baby’s mouth, make sure you stir between each interval and taste test it before serving to your baby.
Refrigerator
This one takes the longest time, but it is an excellent alternative to using a microwave.
- Take the frozen puree cubes you want to serve out of your freezer.
- Place the cubes in an air-tight glass container.
- Place the container in the fridge and let the cubes thaw for 8 to 12 hours, usually overnight.
- Do not leave the puree in the container to thaw on the counter or anywhere out of the fridge, as bacteria will start to grow at a rapid rate — which is definitely not recommended.
- Note that the puree will be cold but thawed. So if your baby likes their puree warmed, you’ll have to finish the job using the microwave or stovetop method.
- In a small saucepan, add the frozen puree cubes you want to serve to your baby.
- Over medium-low heat, gently cook the puree until warm, stirring occasionally.
Thawing Tip: Some infants like their puree cold, warm, or really warm, and some will eat it no matter the temperature. You will get to know your baby’s personal preferences as the two of you bond over food.
Feeding Tips
- Make sure baby is showing readiness signs for eating – good control of their head and trunk, sitting with minimal assistance, bringing hands or toys to their mouth, and appearing interested in your food when you’re eating.
- Follow your baby’s lead – when feeding purees from a spoon, sometimes there’s a tendency to keep offering bites past the point of your baby being full. Always follow your baby’s cues for when they are done eating. Turning away from the spoon, closing her mouth, or pushing food away are all signs that your baby is finished with the meal.
- Throwing spoons – is a common phase that all babies go through at one point or another. One of the best ways to handle spoon throwing is to ignore it and keep feeding your baby as usual (with an extra spoon you already have at the table). If your baby ends up also throwing back up spoons #2 AND #3, simply encourage your baby to eat with their hands until they appear to be finished with the meal.
Top Rated Baby Food Purees
Pea Baby Puree (Stage One)
4.90 stars (79 ratings)
A delicious way to introduce peas to baby. Mild peas paired with a fresh hint of mint – a mouth-watering combo!
Get the recipe
Apples Baby Food Puree
4.75 stars (56 ratings)
This Apple Baby Puree recipe is a wonderful first food for baby! A delicious nutrient-dense puree that baby will go gaga over!
Get the recipe
The Best Sweet Potato Baby Food
5 stars (51 ratings)
This Homemade Sweet Potato with Curry Baby Food Puree is a fun and exotic first puree for baby! Great for 4+ months and is completely freezer-friendly!
Get the recipe
Broccoli Baby Food
4. 79 stars (66 ratings)
This Broccoli Baby Food with olive oil recipe is a great way to introduce healthy green vegetables into your baby's diet. A delicious puree full of essential vitamins and healthy fats for growing baby
Get the recipe
Oatmeal for Babies (Stage One)
5 stars (39 ratings)
This Oatmeal Recipe for Baby is made with simple nutrient-dense ingredients in less than 10 minutes, and it's perfect for baby's first bite or added into their favorite fruit or veggie puree. Great for 4+ months and up.
Get the recipe
Avocado for Baby – Puree & BLW
5 stars (15 ratings)
Avocados are a superfood and great first food for babies 6 months and up. Serve them pureed, smashed, or as a finger food for baby-led weaning.
Get the recipe
WeeSprout Baby Food Freezer Tray
My all-time favorite freezer tray! Individual servings pop out easily.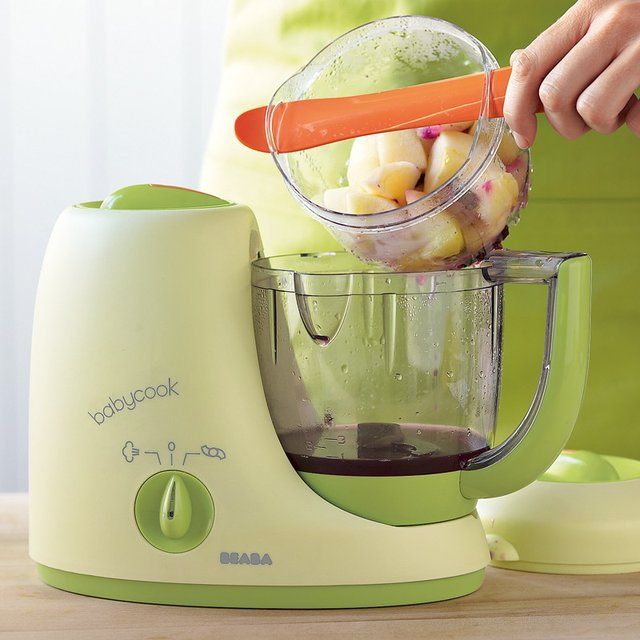 The hard plastic lid snaps on with ease and allows for convenient stacking of freezer trays. Dishwasher safe!
View Product
Butternut Squash Baby Food
5 stars (30 ratings)
This homemade Roasted Butternut Squash Baby Food Puree not only contains calcium, folate, vitamins A and C and fiber but it is also a deliciously smooth way to introduce butternut squash to your baby!
Get the recipe
Green Bean Baby Food
5 stars (33 ratings)
Green beans are steamed until just tender, this puree has a mild taste for baby's palette.
Get the recipe
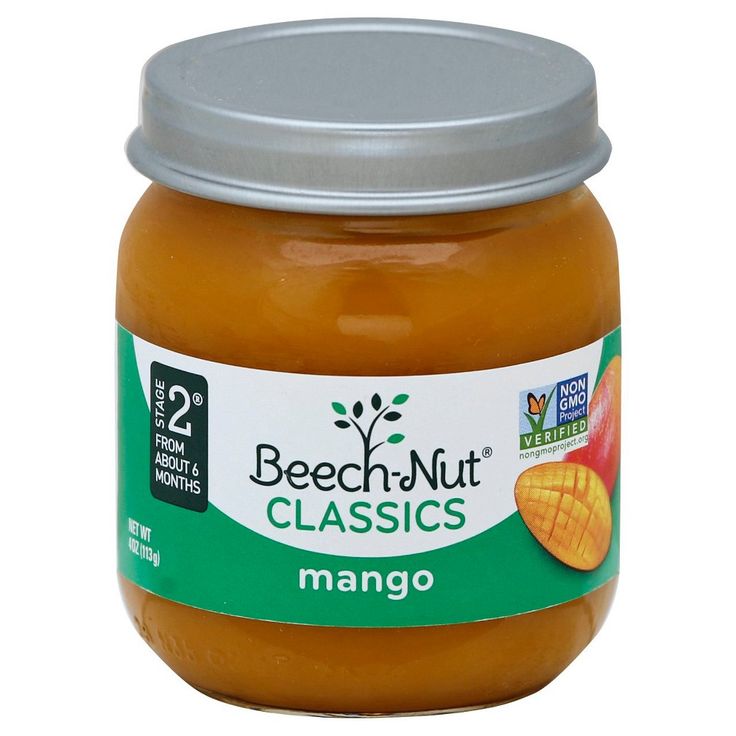
Creamy Mango-licious Baby Food Puree
4.85 stars (26 ratings)
This 5-minute Mango Baby Food Puree is a great way to introduce baby to the magical taste of one of the world's healthiest fruits – MANGOS!
Get the recipe
Pear Baby Puree (Stage One)
5 stars (19 ratings)
This smooth and creamy homemade Pear Baby Puree is a wonderful first puree for baby – easy on the taste buds and great for their growing bodies!
Get the recipe
Peach Baby Puree (Stage One)
5 stars (13 ratings)
Smooth and creamy, this homemade Peach Baby Puree delivers big on taste with naturally sweetened peaches and flecks of vanilla bean.
Get the recipe
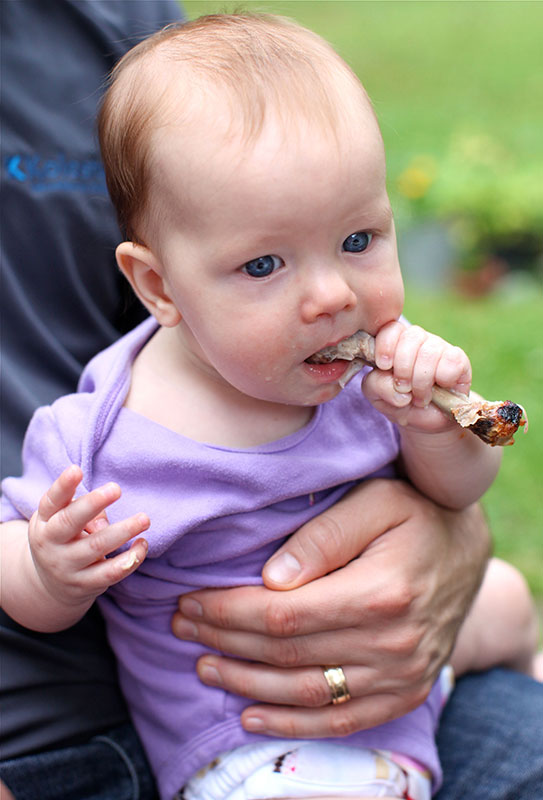
Basic Chicken Baby Food
4.41 stars (194 ratings)
This homemade Basic Chicken Baby Food is a great puree to add to any of your baby’s favorite fruit or veggie purees. Great for extra protein and flavor!
Get the recipe
Homemade Baby Rice Cereal
4.88 stars (48 ratings)
Using only 1-ingredient, this Homemade Baby Rice Cereal is a simple and easy recipe to make baby!
Get the recipe
Red Pepper Baby Puree
4.88 stars (33 ratings)
This Red Pepper Baby Puree recipe is a smooth, creamy and naturally sweet puree that is loaded with vitamin A, B6 and C. Great for 4+ months and older (or stage 1 puree).
Get the recipe
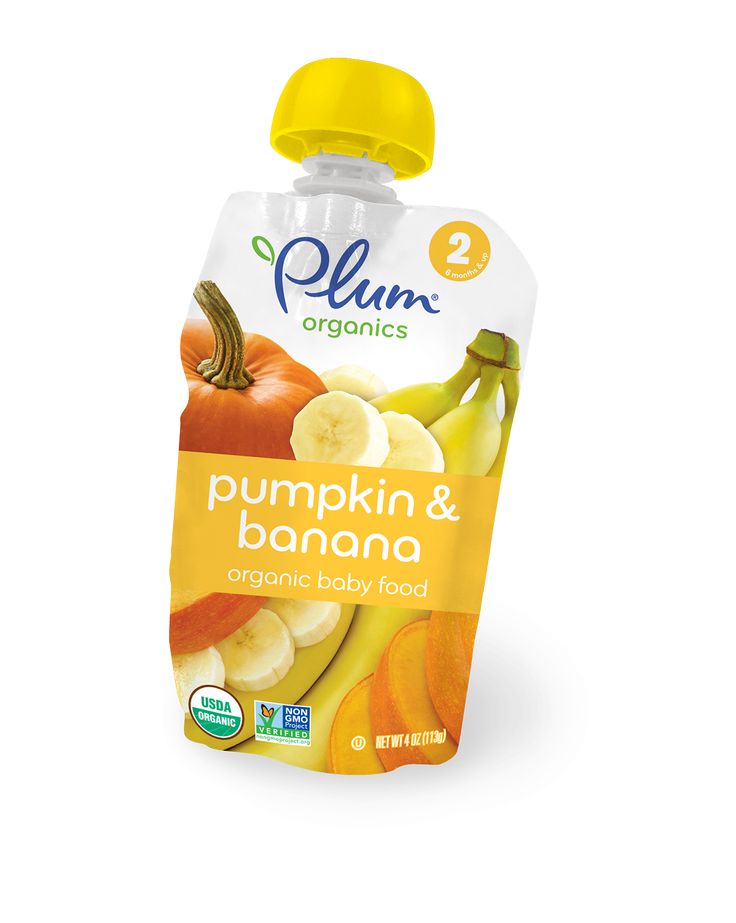
More Baby Fooe Purees
- Strawberry Baby Puree
- Blueberry Baby Puree
- Pumpkin Baby Puree
- Rasberry Baby Food
- Banana Puree
- Homemade Quinoa Baby Cereal
Pea Baby Food Puree
- 2 cups peas, fresh or frozen
- 1 medium zucchini, roughly chopped (optional)
- 4 mint leaves, roughly chopped (optional)
Sweet Potato Baby Food Puree
- 2 large sweet potatoes
- 1/4 tsp mild curry powder (optional)
- 1/4-1 cup liquid, (water, fresh breast milk, formula or sodium-free chicken stock) for pureeing
Roasted Banana Puree
- 4 bananas, cut lengthwise
- 1/8 tsp fresh rosemary, finely chopped (optional)
Carrot Baby Food Puree
- 2 pounds carrots, trimmed, peeled and roughly chopped
- 1/4 tsp nutmeg (optional)
- 1/2-1 cup liquid, (water, reserved water, fresh breast milk, formula or low-sodium stock) for pureeing
Apples Baby Food Puree
- 6 apples, peeled, cored and chopped
- 1/2 cup water
- 1/4 tsp cinnamon (optional)
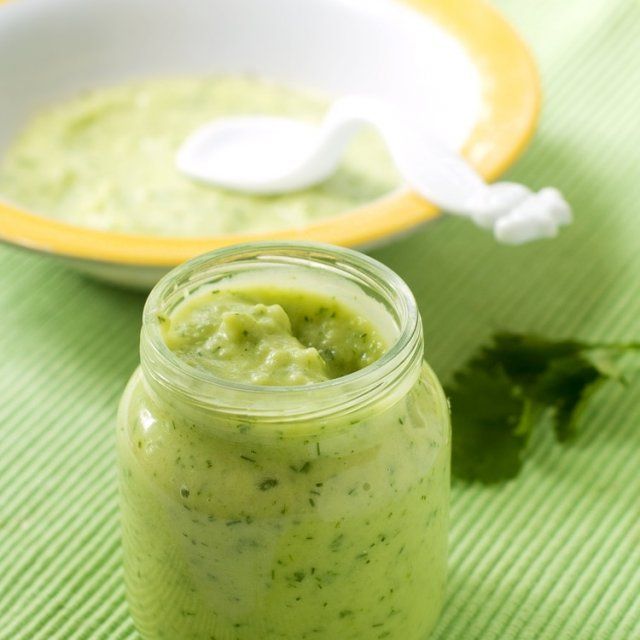
Broccoli Baby Food Puree
- 2 cups broccoli, chopped into small florets
- 1 small white potato, apple or pear, peeled and roughly chopped, roughly 1/2 cup (optional)
- 1 tbsp good quality olive oil (optional)
Butternut Squash Baby Puree
- 1 butternut squash
- 1 tsp fresh thyme, roughly chopped (optional)
- 1-2 tsp olive oil (optional)
- 1/2-1 cup liquid (water, fresh breast milk, formula, low or no-sodium stock or bone broth), for pureeing
Green Bean Baby Food Puree
- 1 pound green beans, fresh or frozen, trimmed
- 1 big pinch fresh basil, cilantro or parsley, finely chopped (optional)
Creamy Mango-licious Baby Food Puree
- 2 cups fresh or frozen mango, deseed, peeled and roughly chopped.
 If using frozen mangos, thaw first
 - 1 medium banana (optional)
- 1 pinch nutmeg (optional)
Pear Baby Food Puree
- 6 pears, peeled and roughly chopped
- 1/8 tsp cardamom or cinnamon (optional)
- 1/4 cup water
Peach Baby Puree
- 3 fresh peaches or 12oz frozen peaches, do not thaw frozen peaches – use frozen
- 1/4 cup water
- 1/2 tsp vanilla bean pod (optional)
- 1 pinch pinch nutmeg (optional)
Basic Chicken Baby Puree
- 1 8-ounce boneless skinless chicken breast or thighs, cubed
- 1 cups chicken or veggie stock, low-sodium or sodium-free
- 1 tsp dried parsley (optional)
Homemade Baby Rice Cereal
- 1 cup brown rice, I prefer organic short grain
- 2 cups water for cooking
- 1-2 cups of liquid for blending, (water, fresh breastmilk or formula)
Red Pepper Baby Puree
- 2 red bell peppers, deseeded and roughly chopped
- 1/2 cup white potato, apple or pear, peeled and roughly chopped
Oatmeal for Babies
- 2 cup water
- 1 cup old fashioned oats
- 1/2 tsp chia seeds (optional)
- 1/2 tsp hemp seeds (optional)
Avocado for Baby
- 1/4 avocado
- 1 tsp breast milk, formula or water
Pea Baby Food Puree
In a medium saucepan, bring 2″ of water to a boil over medium heat.
 Place the zucchini in a steamer basket, and place over boiling water. Cover and steam for 5 minutes.
Add in the peas, and steam for an additional 3-5 minutes. Reserve steamer water. Let cool slightly.
Add the zucchini, peas and mint leaves to a blender or food processor and puree for 1 minute or until you have achieved the desired texture. If the puree is too thick, add in 1/4 cup of the reserved steamer water until you have the right consistency.
Note on Zucchini: while this is a 2 vegetable starter puree, zucchini allergies are very low, so I added it to this recipe to give the peas a mild taste and smoother texture. You can completely leave them out if you prefer. Just steam the peas as directed.
Sweet Potato Baby Food Puree
Heat oven to 400°. Line baking sheet with tin foil, parchment paper or a silicone mat.
Wash and dry the sweet potatoes.
 Prick with a fork in several places and then place the sweet potatoes on the baking sheet. Bake for 45 minutes – 1 hour or until a fork can easily prick the sweet potato. Let sit until cool to touch.
Make a cut into the skin of the potato lengthwise and peel away the skin of the potato. Scoop out the sweet potato meat and place into a blender or food processor, adding in the mild curry powder and water.
Puree on high for 1-2 minutes or until smooth, adding in additional liquid in 1/4 cup increments if needed. I had to add in 1 cup of water to the puree pictured. Serve or freeze for a later meal.
Additional Spices: Feel free to use the following spices instead of the curry – 1/2 tsp of cumin, 1/4 tsp of nutmeg, 1/2 tsp of cloves, 1 fresh garlic clove, 1/2 tsp of chopped fresh thyme, 3-4 basil leaves, 1/2 tsp chopped rosemary or even a big pinch of fresh ginger or 1/2 tsp ginger powder.
 Or you can leave out the spices altogether.
Roasted Banana Baby Puree
Heat oven to 325 degrees F. Line baking sheet with parchment paper.
Place bananas on a baking sheet and roast for 10-12 minutes or until golden brown. Let cool slightly.
Place bananas and rosemary into a blender or food processor and puree for 1-2 minutes or until completely smooth. You may need to add additional water, so start by adding in 1/4 cup increments until you get the desired consistency.
Additional Spices: This recipe is also great with 1 tsp cinnamon, 1/2 tsp cloves, 1/2 tsp nutmeg, or for a fun twist, 1/2 tsp mild curry.
Note on Bananas: while any ripeness of bananas will work, I have found that the bananas that are ripe to very ripe tend to work best in this recipe.
Carrot Baby Food Puree
In a medium saucepan, bring 2″ of water to a boil over medium heat.

Place the carrots into a steamer basket, cover and cook for 9-11 minutes or until tender. Reserve steamer water. Let cool slightly.
Place the carrots, nutmeg and 1/2 cup of liquid into a blender or food processor and puree for 1-2 minutes on high, adding 1/4 cup liquid at a time until you achieve the desired consistency. Serve and enjoy, or freeze for later.
Notes on Nutmeg: adding in spices to babies first purees are completely optional, but totally safe. Nutmeg rounds out the acidic taste carrots sometimes have and make this puree taste grounded and full-bodied.
Additional Spices: Feel free to substitute 1/2 tsp ginger powder or 1/4 fresh ginger, 1/2 tsp mild curry powder, 1/4 tsp cloves, 1/2 tsp finely minced fresh chives or 1/2 garlic clove instead of the nutmeg.
Apples Baby Food Puree
In a medium saucepan, place the apples, water and cinnamon.
 Cover and heat on medium-low for 15-20 minutes or until apples are tender. Let cool slightly.
Transfer all of the ingredients into a blender or food processor and blend for 1-2 minutes or until completely smooth. For a chunky puree, quickly pulse the ingredients 10-15 times or until you receive your desired consistency. Serve or freeze for later.
Additional Spices: Feel free to sub in these spices instead of the cinnamon for this recipe – 1/8 tsp of cloves, 1/8 tsp of nutmeg, 1-2 leaves of fresh mint, 1-2 leaves of fresh basil, a pinch of fresh or 1/4 tsp of ginger powder or even 1/4 of coriander for a fun twist.
Apples: you can use any sweet apple in this recipe – Gala, Honeycrisp, Fuji, McIntosh, etc.
Broccoli Baby Food Puree
In a medium saucepan, bring 2 inches of water to a boil over medium heat. Place the broccoli and potato (or apple/pear) into a steamer basket and place over boiling water, cover and steam for 10-12 minutes or until the broccoli and potato are tender.
Reserve water from the steamer. Let cool slightly.
Add the broccoli, potato and olive oil into a blender or food processor and puree until smooth, adding the reserved water from the steamer basket in 1/4 cup increments if needed.
Adding In Spices: Feel free to add in 1 tsp of chopped chives, 2-3 mint leaves, 1 tsp of chopped cilantro, 1/2 tsp cumin or a squeeze of fresh lemon juice.
Butternut Squash Baby Puree
Heat oven to 450 degrees F. Line baking sheet with a silicone mat, tin foil or parchment paper.
Cut butternut squash in half, deseed and place flesh side up, skin side down. Optional – Feel free to drizzle the squash with 1-2 teaspoons of olive oil for some added healthy fat.
Bake for 45 minutes or until you can easily prick the squash with a fork. Let cool until you can handle the squash with your hands.
Scrape off the skin and discard. Place the butternut squash into a blender or food processor. Add thyme and puree for 1-2 minutes, adding water in 1/4 cup increments until you have your desired consistency. I had to add 3/4 cup of water to my puree shown below.
Additional Spices: Feel free to sub the thyme for 4 basil leaves, 1 tsp chopped rosemary, 1 tsp ginger powder, or 1 big pinch of fresh ginger, 1/2 teaspoon nutmeg, or even 1/2 tsp of coriander.
Green Bean Baby Food Puree
Fill a medium saucepan with 2” of water and bring to boil over medium heat. Place the green beans (fresh or frozen) into a steamer basket over the boiling water, cover, and cook for 10 minutes or until tender. Let cool slightly. Reserve steamer water.
Transfer the green beans and herb to a blender or food processor and puree for 1-2 minutes or until smooth, adding reserved steamer water in 1/4 cup increments if needed until you reach your desired consistency.
Adding Spices: you can add a big pinch of roughly chopped basil, cilantro, mint, parsley, or chives to this puree before blending.
Creamy Mango-licious Baby Food Puree
Place the mango, banana and nutmeg (if using) into a blender or food processor. Puree for 1 minute or until completely smooth. If your mango is not ripe enough, you might need to add in up to 1/4 cup of water while blending to get the right consistency. Serve or freeze for later.
Mango Tip: I usually find that organic frozen mangos are easier and cheaper to find than fresh organic mangos, but if mangos are in season when you are making this recipe, by all means, you can use fresh over frozen. For fresh mangos, simply peel and chop.
Pear Baby Food Puree
In a medium saucepan, place the pears, cardamon and water, cover and heat on medium-low heat for 10-15 minutes, or until tender.
 Let cool slightly.
Using a slotted spoon, scoop the pears out of the saucepan, leaving water behind, and into a blender or food processor. Blend for 1-2 minutes until you have your desired consistency. If your pear puree is too thick, add the leftover cooking water in 1/4 cup increments.
Peach Baby Puree
If using fresh peaches, peel, pit and slice the peaches. If using the fresh vanilla bean pod, cut in half and then slice open lengthwise. Take the back of your knife or spoon and scrape out all of the vanilla bean, reserve.
In a medium saucepan, add the peaches and water, cook over medium-low heat for 5 minutes (fresh peaches) – 10 minutes (frozen peaches). Right before the peaches are done cooking, add in the vanilla and nutmeg (or any other spices you prefer) and stir until incorporated—Cook for 1 more minute.
Using a slotted spoon, transfer the peaches to a blender or food processor, leaving all excess water in the saucepan.
 You do not want to add any additional liquids, or the puree might be too thin. Starting on low and increasing to high speed, puree the peaches until smooth and creamy. Serve to baby or freeze for later.
Basic Chicken Baby Puree
In a medium saucepan, bring the cubed chicken, broth, and parsley to a boil over medium heat. Turn the heat down to low and simmer, covered, for 15 minutes or until chicken is just cooked through. Let cool slightly.
Using a slotted spoon, transfer the chicken to a blender or food processor, leaving the broth in the saucepan. Reserve the broth.
Starting on low and working your way up to high-speed, puree the chicken until you reach your desired consistency, adding in broth in 1/4 cup increments if needed. I had to add in just 1/4 cup of broth to get the consistency seen in this photo.
Extra Healthy Fat: For some extra healthy fat, this puree is also wonderful, with a teaspoon of grass-fed butter (salt-free) added to the blender right before pureeing.
Homemade Baby Rice Cereal
IMPORTANT STEP: Place the rice in a fine-mesh colander and rinse with water until the water runs clear.
Transfer the rice to a medium saucepan and add 2 cups of water. Bring to a boil over high heat, then reduce heat to low, cover with a lid and simmer for 35-45 minutes or until the rice is tender and the water is evaporated. Each batch of rice cooks a little differently, so taste at 35 minutes to see if the rice is tender. Remove the saucepan from the heat and let rest for 10 minutes, covered. If using fresh breast milk or formula for blending, I would remove the lid and let the rice cool for 15 minutes.
Place the rice into a blender or food processor and add 1/2 cup of liquid of choice. Blend for 1-2 minutes on medium-high speed until completely smooth and creamy, adding in the additional liquid in 1/4 cup increments, if needed, until you have your desired consistency.
Red Pepper Baby Puree
In a medium saucepan, bring 2″ of water to a boil.
If using a potato: place it in a steamer basket and steam for 10 minutes before adding peppers, and cooking for another 5-7 minutes.
If using pear or apple: add in the red peppers and apple or pear and steam for 5-7 minutes or until tender. Reserve steamer water. Let cool slightly.
Add in all of the ingredients into a blender or food processor and puree for 1 minute or until completely smooth, adding in a tablespoon of water at a time if needed.
Oatmeal for Babies
In a medium saucepan, bring 2 cups of water to a boil. Add in 1 cup of old-fashioned oats along with the chia seeds, hemp seeds and any spices you are using. Turn down the heat to medium-low and cook the oats for 5 minutes, stirring occasionally, or until all of the water is gone and the oats are soft. Let cool slightly.
Transfer the oats to a blender or food processor and puree for 1-2 minutes, adding water in 1/4 cup increments if needed, until completely smooth.
 I had to add 1/2 cup of water to my oatmeal. You will want the oat cereal to be on the thinner side, so it doesn't become sticky. The oats will continue to absorb liquid as they cool, so you can add more water, fresh breast milk, or formula as needed. Serve to baby or freeze for later.
 Type of Oats: This recipe is for old-fashioned oats: for steel-cut or instant oats, read the full post.
Adding Spices: you can add a big pinch of cinnamon or pumpkin pie spice mix or a smaller pinch of nutmeg or cloves to these oats before blending.
Chia and Hemp Seeds: are added for a nutritional boost, but you can add or omit them if you prefer. You can get both of these at any health food store or online here (chia/hemp).
Avocado for Baby
Age: 4-6 months and up
Yield: roughly 15-25 ounces, depending on the recipe
Freezer Tray
Bumkins Baby Bowl
Blender
Saucepan
Did you make this recipe?
Tag @babyfoode on Instagram and hashtag it #babyfoode!
Pin Recipe Email a Friend
The Best Sweet Potato Baby Puree (Stage One)
Home » Feeding Style » Baby Food Purees » Stage One » The Best Sweet Potato Baby Food Puree
This Sweet Potato Baby Puree is a smooth puree with a pinch of mild curry powder that makes for a fun and tasty first food for your baby! Great Stage 1 baby food for babies 4-6+ months.
Medically reviewed and co-written by Jamie Johnson, Registered Dietitian Nutritionist (RDN), and Lauren Braaten, Pediatric Occupational Therapist (OT).
Sweet Potato Baby Food Puree
This deliciously rich baby food puree will take your little one on a fun culinary adventure ✈️ without ever leaving their high chair!
Sweet potatoes are one of my all-time favorite vegetables to puree for my baby. Not only do I find that most babies love their naturally sweet taste and creamy texture, but sweet potatoes are also loaded with essential nutrients for a growing baby. That’s a winning combo in my book! 🏆
In this recipe, we will roast the sweet potatoes to bring out their natural caramel-like, earthy goodness before adding a pinch of mild curry powder and blending to a light and smooth consistency. The result? A sweet yet slightly herbal puree with a silky texture that leaves a fine and captivating sleek feel in your baby’s mouth.
Don’t be afraid to eat this flavorsome puree right alongside your baby 👩👧- it’s that good!
Is it your first time making homemade baby food? If you answered yes, then I suggest you start this journey by reading my in-depth Guide on How to Make Homemade Baby Food. The detailed article goes over all the essential information such as the best cooking tools to have on hand, safe storage, knowing when your baby is ready for solids, introducing purees, making the best first foods for baby, and more! You can also check out my best-selling cookbook for even more information and recipes.
Sweet Potato Video
Watch this video to see how easy this Sweet Potato Puree recipe actually is!
Reasons to Love Sweet Potato Puree
- smooth and creamy
- great for babies 4-6+ months
- stage one baby food
- packed with essential nutrients for baby
- easy to make — requires only 5 minutes of hands-on time
- babies love the sweet and earthy taste
- homemade
- freezer-friendly
Ingredients
Make sure to read the recipe card below for full ingredients and instructions!
- Sweet Potatoes: These are at the top of the list when it comes to the first foods to introduce to your baby.
 The nutritional value of sweet potatoes is outstanding, and the sweet taste makes it easy to introduce to your baby. Sweet potatoes are high in beta-carotene as well as the ultra-important electrolyte mineral, Potassium. They also contain Vitamin E, calcium, folate, and plenty of other vitamins and minerals. Thanks to their high fiber content, sweet potatoes help support a healthy digestive tract and promote regular bowel movements for your baby. This recipe calls for 2 sweet potatoes, but you can use more or less depending on how much you want to make.
 - Mild Curry Powder: We are kicking up the flavor profile with mild curry powder to bring out the sweet potatoes’ earthiness, making the puree’s flavor a bit more robust. You can skip the curry powder if you prefer or add another spice like cinnamon, nutmeg, basil, or rosemary.
- A great source of fiber that can prevent and resolve constipation.
- Contains a lot of beta-carotene, which converts into vitamin A for eye health.
- Contain vitamins C and E to help strengthen immunity.
- A high source of potassium to help maintain a healthy heart and blood pressure, fluid balance, and muscle function.
Shopping & Storing Tip: When purchasing sweet potatoes, look for small to medium sweet potatoes that are firm, smooth, even in skin tone, and without cracks or cuts. Why small to medium? Because the larger ones tend to be starchier. Sweet potatoes stay fresh longest in a cool or room-temperature location, away from moisture, heat, and light.
Step-by-Step Instructions
- Prep: Wash the sweet potatoes while ignoring the fact that you probably need a manicure.
- Roast: Dry and prick sweet potatoes before popping them onto a baking sheet and into the oven to bake for 50-60 minutes or until tender when pricked with a fork.
 Let cool to touch.
 - Discard Skin: Peel away the sweet potato skin and discard.
- Place in Blender: Place the sweet potato and curry into a blender or food processor and add liquid of your choice.
- Blend: Puree for 1-2 minutes or until completely smooth, adding more
- Eat: Serve or freeze for a later meal.
These tools will make it a lot easier for you to make this healthy Sweet Potato puree. For more of my favorite kitchen tools make sure to check out my shop.
- Baking Sheet
- Blender or Food Processor
- Freezer Tray
- Storage Containers for Fridge
- Stasher Bag
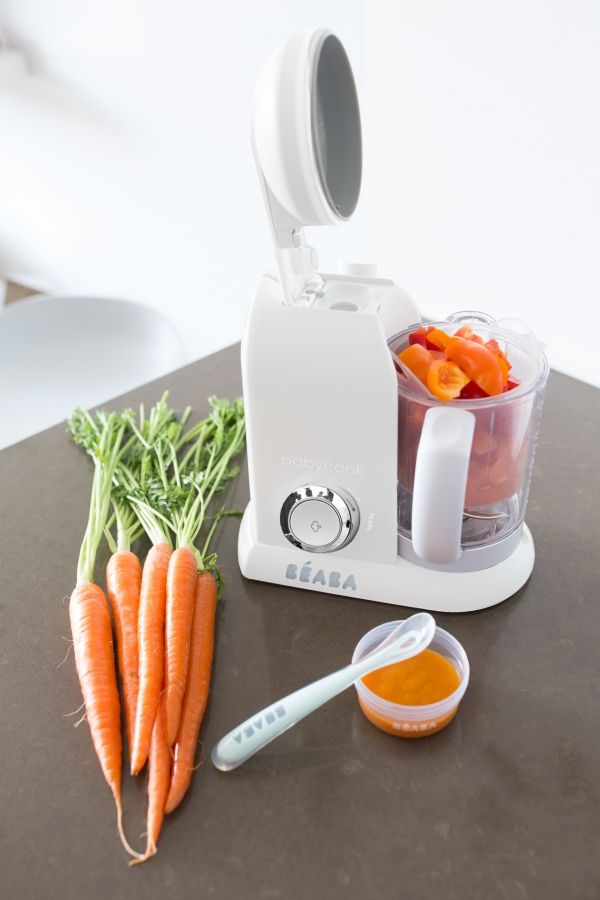
- BEABA Babycook
- bib with catch pocket
Other Cooking Methods
While I love the rich flavor of roasted sweet potatoes, there are several ways you can cook them to make into a baby food puree.
With a touch of a button, the BEABA Babycook will cook the sweet potatoes for you! Place 1 peeled and chopped sweet potato into the stainless steel steamer basket, and place the basket into the glass container, closing the lid. Fill the reservoir tank to a level 3, close and lock the lid. Hit the steam button and let the machine do its magic. Once steamed, transfer the sweet potatoes into the glass container, leaving the water, close the lid, and hit the blend button for 1 minute or until the puree is smooth. You may need to add more water to the puree if needed in 2 tablespoon increments.
Full Review: read my full, in-depth and honest review of the BEABA Babycook Neo here! Make sure to grab 15% off your Babycook with code (BabyFoode15)!
SteamingPeel and roughly chop 2 sweet potatoes. Place them into a steamer basket over 2 inches of boiling water for 10-15, or until tender when pricked with a fork.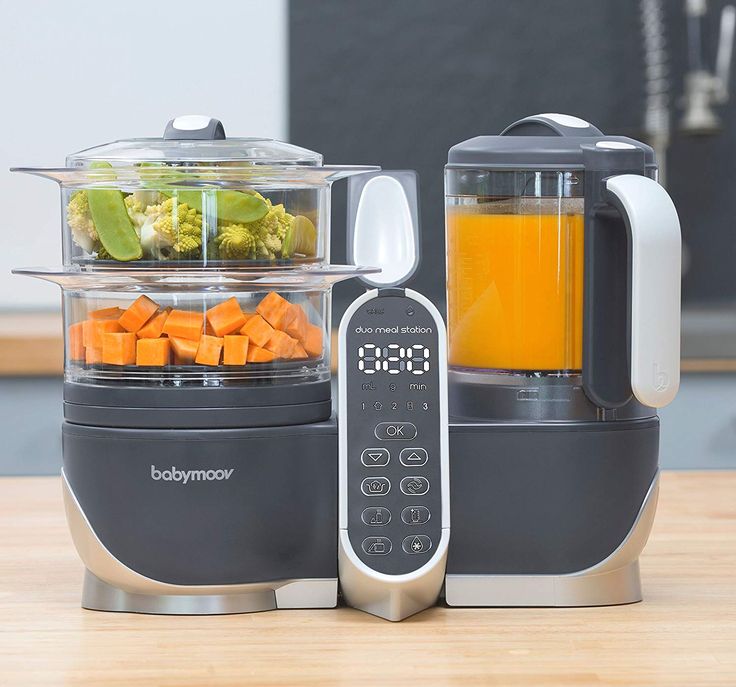 Puree in a blender as directed below.
Place 2 peeled and roughly chopped sweet potatoes into a medium saucepan, add enough water to cover the sweet potatoes, and bring to a boil. Reduce to simmer and cook for 15 minutes or until tender when pricked with a fork. Puree in a blender as directed below.
Instant PotYou can cook the sweet potato in an instant pot as well. Add one cup of water to the bottom of your instant pot, and add the trivet. Prick the sweet potatoes a few times with a fork and place them on the trivet. Close the lid and set the valve to “sealing.” Turn on the instant pot, select “high pressure,” and set the timer for 30 minutes if you’re using medium sweet potatoes and 60 minutes if you’re using large ones. When the timer goes off, allow the pressure to do a “natural release” before you manually release the rest of the pressure. Let the sweet potatoes cool, and then peel and puree in a blender as directed below.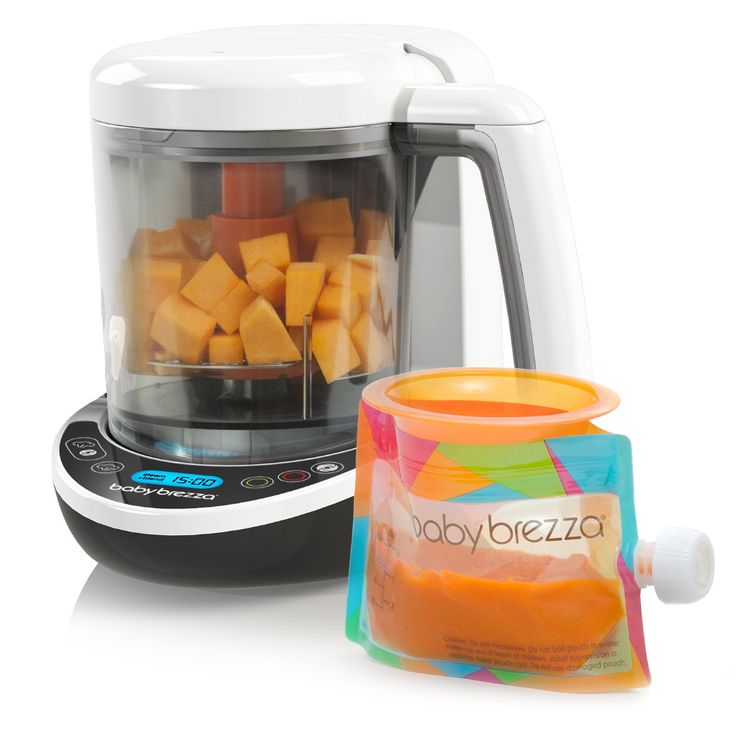
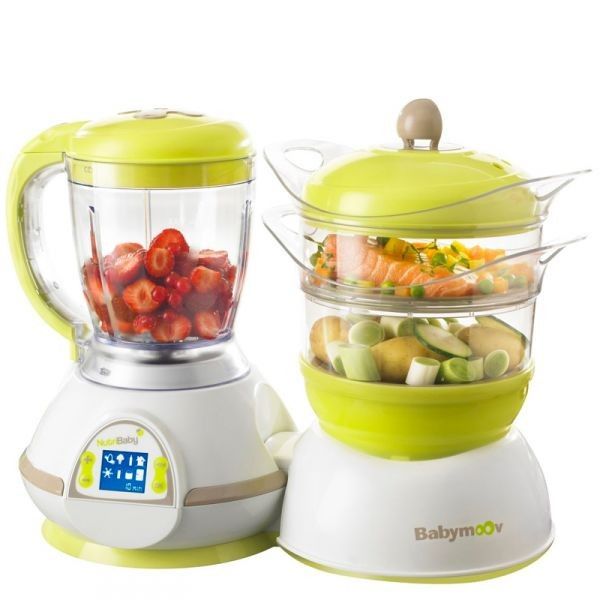
BEABA Babycook Neo
Our all-time favorite baby food maker! Comes with a large capacity glass bowl, stainless steel steam basket and has four cook settings: steam cook, blend, reheat or defrost. A must-have kitchen tool if you want a hands-free way to make homemade baby food.
View Product
Puree Feeding Tips
- Follow your baby’s lead – when feeding purees from a spoon, sometimes there’s a tendency to keep offering bites past the point of your baby being full. Always follow baby’s cues for when they are done eating. Turning away from the spoon, closing her mouth, or pushing food away are all signs that baby is finished with the meal.
- Try adding a little seasoning or spice to purees – babies like flavor! Or consider changing the temperature of purees from time to time, to slightly warmed or slightly chilled. Varying these aspects adds to the sensory experience!
- Throwing spoons is a common phase that all babies go through at one point or another.
 One of the best ways to handle spoon throwing is to ignore it and keep feeding baby as usual (with an extra spoon you already have at the table). If baby ends up also throwing back up spoons #2 AND #3, simply encourage your baby to eat with their hands until they appear to be finished with the meal. ***Give baby plenty of opportunities to practice putting items in and taking items out of containers outside of meal times.
Frequently Asked Questions
When can baby have sweet potatoes?
Baby can eat sweet potatoes as one of their first foods. When a baby can start on solids is determined by their own rate of development, which generally comes between 4-6 months of age. Some of the developmental milestones babies need to reach in order to start solids include: if your baby has solid control of their head and neck, if your baby has doubled in weight, and if your baby is reaching for or opening their mouth when you eat (see my guide here).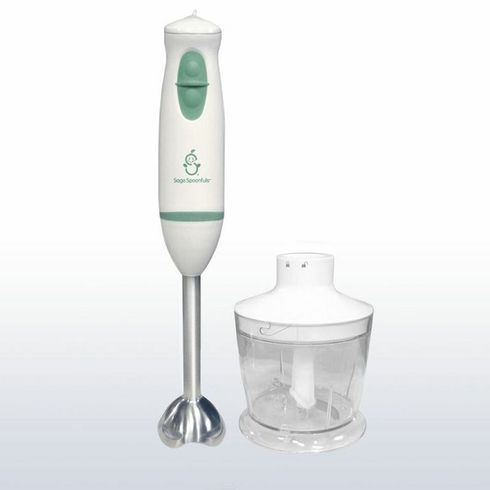 Before you start your baby on purees, you should consult with your pediatrician to make sure your child is developmentally ready for purees.
Can sweet potato be baby’s first food?
Sweet potato can 100% be baby’s first food if you want it to be. It is recommended to wait to introduce the top eight allergen foods to your baby once a few other well-tolerated foods have been introduced, but otherwise, foods can be introduced in any order so choose whatever you are most excited for your baby to have.
Is sweet potato a common allergen for baby?
No, sweet potato is not a common allergen, however, as with any food, start with a small portion and be aware of any signs that might be an allergic reaction after introducing it.
Does sweet potato cause constipation for babies?
Too much sweet potato may cause constipation in some babies but they are high in fiber so can also help alleviate constipation in others. If your baby is constipated and eating a lot of sweet potatoes, cut back and see if that helps.
Can I add spice to this sweet potato puree?
For this recipe, we are adding a pinch of mild curry powder, but feel free to use the following spices instead: cumin, nutmeg, cinnamon, cloves, garlic, thyme, mint, basil, or fresh ginger (see quantity recommendations in the recipe card).
Tip on Spices: I always add spices or herbs to my baby food purees, but you can choose to leave them out. You do you! Either way, this puree will surely turn out scrumptious.
You can store this puree in an airtight container in the fridge for up to 4 days.
FREEZERThis puree can be frozen for up to 4 months.
- Spoon the puree into a freezer storage container (this is my favorite freezer storage container).
 Do not overfill.
 - Place the lid on the storage container or cover with a piece of saran wrap — label with the date and recipe name.
- Place the tray into the freezer and let it freeze completely — preferably overnight.
- Pop-out the baby food cubes and place them in a zip-lock baggie or stasher bag. Don’t forget to relabel the baggie or stager bag for future reference.
Need more information on how to store your baby foods? Head over to my Best Baby Food Storage Containers – Plus 6 Tips on Freezing and Thawing post!
Sweet Potato Combination PureesWhile this Sweet Potato Puree tastes satisfying to the tummy by itself, it’s also easy to mix and match with other nutrient-dense baby food purees. Give these fun flavor combos a try!
- Apples
- Carrots
- Pears
- Parsnips
- Beets (golden or red)
- Quinoa Baby Cereal
- Chicken
- White Beans
- Soft Tofu
- Pumpkin
- Mango
- Cauliflower
- Yogurt
- Beef
- Canned Coconut Milk
- Salmon
Recipe Tips
- Sweet Potatoes: Look for medium sweet potatoes that are even in color with no scratches.
 Large sweet potatoes are starchier and might make the puree too thick.
 - Pureeing: Root vegetables absorb a lot of liquid while pureeing, so don’t be shy about adding extra liquid while blending. I had to add a full cup of liquid to the sweet potatoes to get them smooth. Start by adding 1/4 cup of liquid and slowly go up from there as needed.
Or watch a shortened version of this video here.
- 2 medium sweet potatoes
- 1/4 tsp mild curry powder (optional)
- 1/4-1 cup liquid or pureeing, (water, fresh breast milk, formula, or sodium-free chicken stock)
Prep: Heat oven to 400°. Line baking sheet with tin foil, parchment paper or a silicone mat.

Bake: Wash and dry the sweet potatoes. Prick with a fork in several places and then place the sweet potatoes on the baking sheet. Bake for 45 minutes – 1 hour or until a fork can easily prick the sweet potato. Let sit until cool to touch.
Peel: Cut into the skin of the potato lengthwise and peel away the skin of the potato. Scoop out the sweet potato meat and place it into a blender or food processor, adding in the mild curry powder and liquid.
Blend: Puree on high for 1-2 minutes or until smooth, adding in additional liquid in 1/4 cup increments if needed. I had to add in 1 cup of water to the puree pictured.
Eat: Serve to baby or freeze for a later meal.
Age: 4-6+ months and up
Yield: 24 ounces
Additional Spices: Feel free to use the following spices instead of the curry – 1/2 tsp of cumin, 1/4 tsp of nutmeg, 1/4 tsp of cloves, 1 fresh garlic clove, 1/2 tsp of chopped fresh thyme, 3-4 basil leaves, 1/2 tsp chopped rosemary or even a big pinch of fresh ginger or 1/2 tsp ginger powder.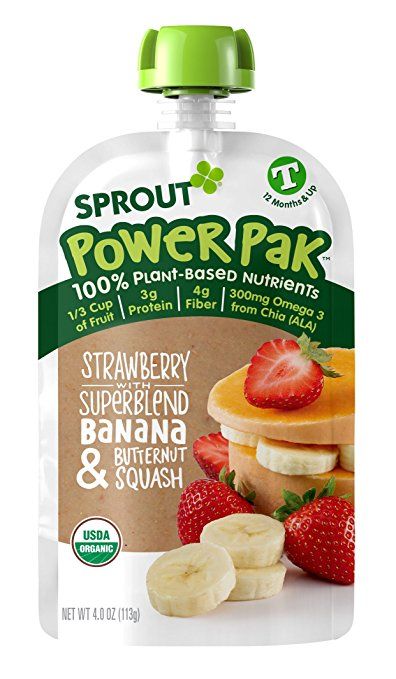 Or you can leave out the spices altogether.
Storage: Fridge – store in an airtight container in the fridge for up to 4 days. Freezer – can be frozen for up to 4 months.
Blender
Freezer Tray
Bumkins Baby Bowl
Tripp Trapp High Chair
Did you make this recipe?
Tag @babyfoode on Instagram and hashtag it #babyfoode!
Pin Recipe Email a Friend
How to properly dilute infant formula
Properly prepare milk formula - it would seem that it is easier, read the instructions on the box and do as it is written. But sometimes the simplest things, especially when they concern a newborn, can simply put parents in a stupor.
Contents
- How to properly dilute the mixture
- How to prepare infant formula
- How long is reconstituted infant formula
- What water to dilute infant formula
- Water temperature for infant formula
- Preparing Night Feeding Formula
- Infant formula on the road
You should know that no formula, even the most modern adapted formula, can completely replace mother's milk.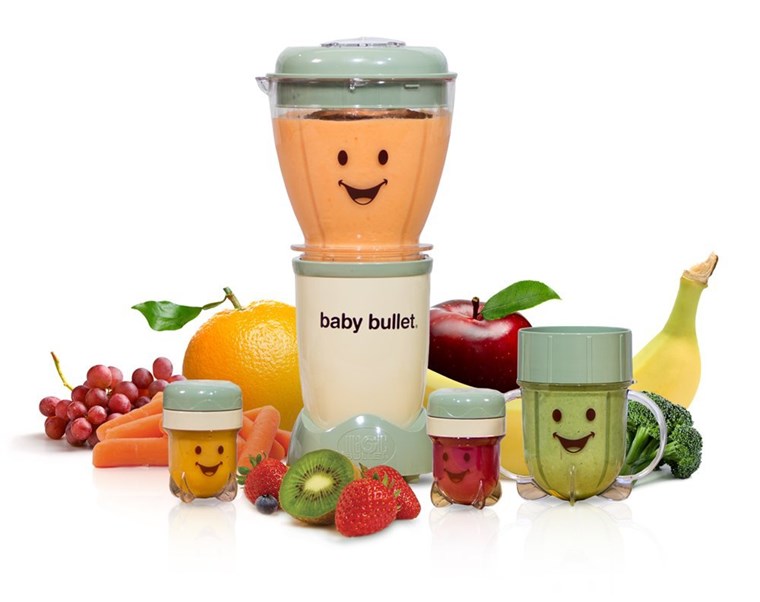 Transferring a child to artificial feeding should be a conscious and forced step, and not the advice of a friend and the desire to make life a little easier for yourself, to have freedom of movement or your own guesses and assumptions that there is not enough breast milk. The deficit that is formed in the child's body without mother's milk cannot be filled with anything.
How to properly mix
The first thing to do is read the instructions from the manufacturer. It always describes how to prepare infant formula. It is worth paying attention to the following important points:
- in what proportion to dilute the milk formula (often, one scoop per 30 ml of water)
- at what temperature is the mixture prepared
- recommended amount of ready-made formula for children of different ages
- how long and under what conditions can an opened package be stored
How to properly prepare formula for a newborn
The intestines and mouth of a healthy baby are sterile.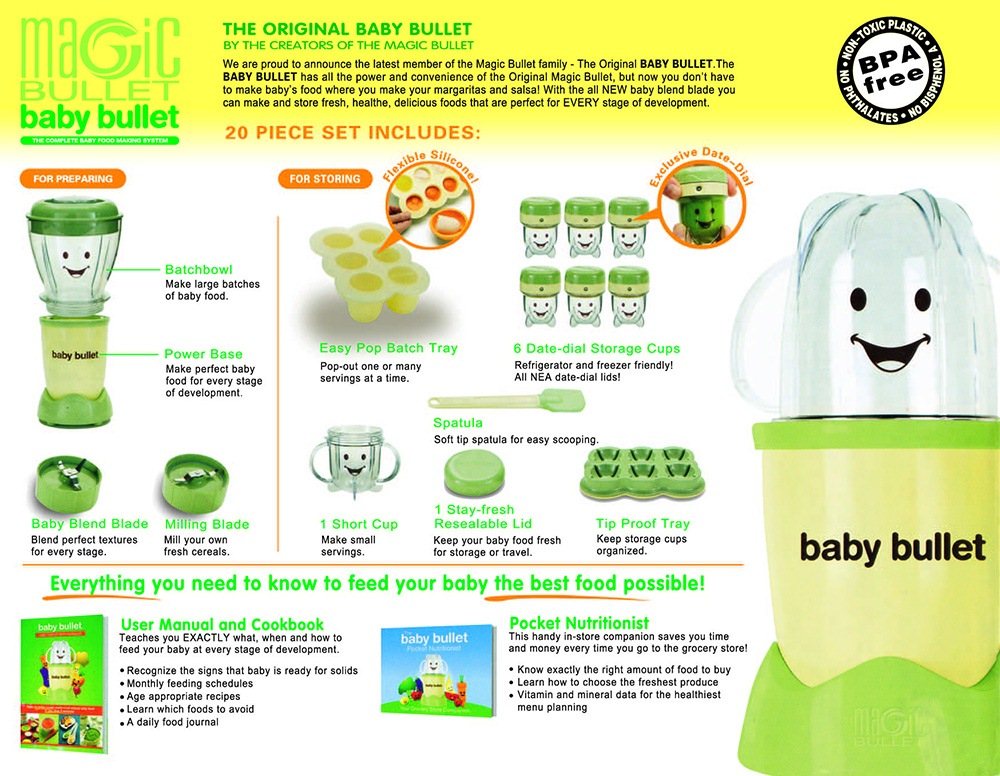 The task of the parent is to give the baby the opportunity to gradually adapt to the surrounding space, before starting to acquaint him with pathogenic microflora (in other words, microbes).
In all cases of contact with children's things, food and the child himself, be sure and always wash your hands with soap and water. Of course, in any case, the baby will have to get acquainted with the surrounding microorganisms, but when he is a few days old, it is too early.
Since you need to prepare the formula just before feeding, be prepared to do this under the heart-rending cries of a hungry baby. It is possible that under such conditions it will not be possible to prepare sterile bottles in cold blood - it is better and more convenient to have at least two of them.
It is better to prepare and cover a clean bottle with a dry towel in advance than to rush around the house and remember where to put it after feeding when the baby is crying from hunger. Of course, in theory you need to wash the bottle immediately after feeding, but in practice, babies miraculously make adjustments to your schedule.
So, when all the necessary preparations are made, according to the instructions, we determine the desired ratio of water and dry mixture according to the age of your baby. Pour water of the required temperature into a sterile bottle or bring it to the desired temperature in the bottle. We pour the required number of measuring spoons, after removing a slide from them (you can use the back of a knife).
The measuring spoon must be dry. Follow this strictly and store infant formula in a dry place. Milk powder is very hygroscopic and perfectly absorbs moisture, and if the rules are not followed, the mixture will instantly begin to clump.
Close the bottle with a cap and shake very well so that there are no lumps left in the mixture (you can check for light). Just in case, we check the temperature of the mixture by dropping it on our wrist. After feeding, pour out the rest of the mixture.
Some mothers, trying to feed the baby more satisfyingly, increase the concentration of the dry mixture in the water. Doing this is strictly prohibited. This can lead to obesity or other metabolic disorders in the child.
To some, these measures may seem superfluous, and, of course, no one can force you to do this. But do not forget that the first three months of a child’s life without this will complicate colic and aggravate the situation with hastily washed bottles, believe me, it’s not worth it.
How long can reconstituted infant formula be stored
A very common question of interest to all parents is how long can prepared infant formula be stored? Ideally, ready-made milk formula is eaten immediately and not stored. The longer the mixture is prepared, the more chances are given to multiply harmful microbes that love heat and milky environment. And not just the necessary bifidobacteria, for which you lovingly created the optimal temperature.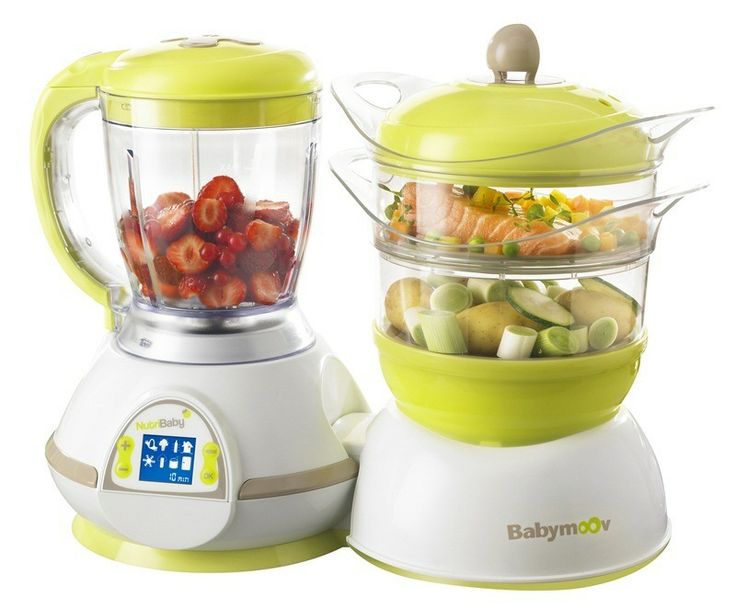 The storage time of reconstituted infant formula should be kept to a minimum. Remember that prepared milk formula should be stored is impossible even in the refrigerator.
The bottle and nipple must be washed and sterilized before each formula preparation. You can learn more about sterilizing feeding bottles here.
What kind of water to dilute infant formula
An urgent question for parents - is it possible to dilute formula with infant water? For decades, boiled water has been used to prepare the mixture. Now they began to think about the fact that boiling kills water, deprives oxygen and other trace elements. Today you will not surprise anyone with special baby water for drinking and formula preparation. It does not need to be boiled, it is enough to heat it to the optimum temperature.
What are the benefits of baby water?
- at all stages of harvesting, water undergoes strict sanitary control
- cleaning uses a multi-stage filter system
- unlike boiled, it is not devoid of oxygen and other useful trace elements
- mineralization decreases in baby water (in dry mixtures, they try to choose the optimal ratio of trace elements and water with increased mineralization can disrupt these proportions)
If you want to use water from a well, it is better to hand it over for analysis to a sanitary and epidemiological station.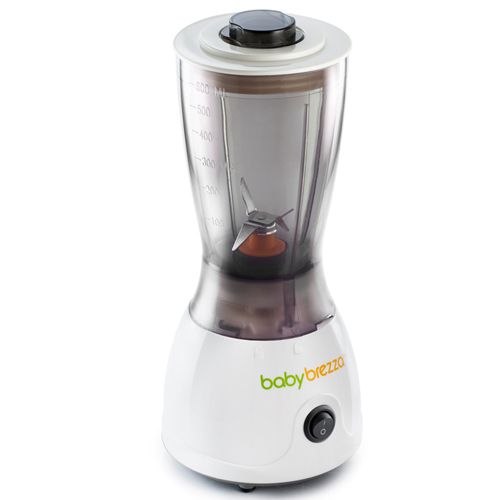
Water temperature for infant formula
The water temperature is of fundamental importance for the preparation of formula, which must be indicated on the packaging. Almost all mixtures now contain bifidobacteria that are beneficial for the child's intestines. Beneficial bacteria, unlike harmful ones, are rather gentle microorganisms. At a temperature higher than that indicated in the instructions, they will simply die.
In addition, of course, the temperature of the water simply needs to be comfortable for the child, 36 - 37 ºC. This is the temperature of mother's milk. Therefore, if possible, use a thermometer to prepare infant formula. Fortunately, the assortment of baby stores is now replete with products that make life easier for moms. Well, if there is no thermometer, it does not matter. Put a few drops of the prepared mixture from the bottle on your wrist. If the temperature of the mixture is optimal, then you will not feel it on your wrist.
It is not advisable to heat the finished mixture.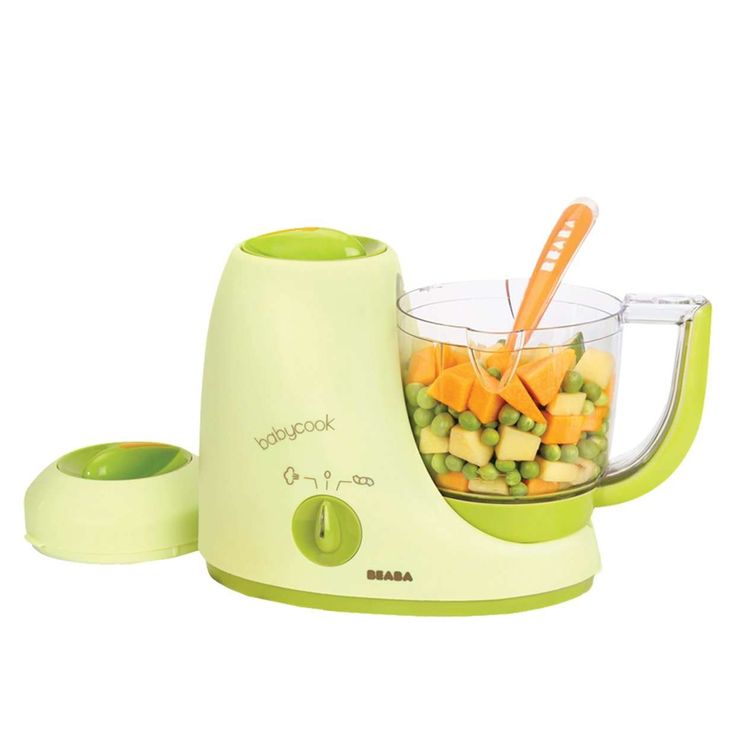 Adapted infant formula is not a product that can be heated and cooled without consequences. It's good bacteria, remember? And not only. But if it so happened that while you were preparing for feeding, the mixture has cooled down, warm it up under running hot water.
Do not use the microwave to heat up the mixture! You will not be able to control the degree of heating of the liquid bottle, which can lead to an irreversible change in the structure and composition of the formula.
Night feeding formula
The safest option for the baby and gentle for the mother is to pour water into a sterile bottle in the evening and put it in the warmer. Most warmers are capable of maintaining a constant set temperature in the bottle. Pour the dry mix into the dry mix dispenser.
Now you can prepare the mixture on autopilot at night. All that remains to be done is to get from the dispenser into the bottle and mix thoroughly. Just in case, do not forget to check the temperature of the prepared mixture. Ready. You can start feeding a hungry baby.
Infant formula on the go
All modern parents want to be mobile. We must pay tribute to the manufacturers of children's goods - it has now become much easier to provide a child with food on a trip than it was, say, in the last century. It sounds ridiculous, of course, but that was only fifteen years ago.
If you are traveling with a small child, take water and powdered milk separately with you. For cars, heaters have already been invented that work in the car from the cigarette lighter. Special bags-thermoses are convenient, where you can put a bottle with a little warmer water than you need. If there is not enough time to keep warm in a special bag, you can warm up a bottle of water for feeding by putting it in a container with another hot water, for example, made of titanium, if you are traveling on a train.
Remember, your task is to keep the water and dry formula separate for as long as possible, combining them just before feeding. Of course, ready-made diluted mixtures in tetrapacks are also on sale, but each mother decides for herself whether to use them or not.
How to prepare infant formula
How to make formula for your baby.
In order for your baby to grow up healthy and feel good, it is important not only to choose the right formula, but also to use it correctly.
In the first months of life, the child's body goes through a period of adaptation to extrauterine conditions, the entire first year the baby grows and develops intensively. Everything that surrounds the baby from birth should contribute to its development, be as useful and safe as possible. That is why when preparing infant formula, it is necessary to strictly observe the rules of hygiene, recommendations for handling the product and take into account storage conditions.
To prepare the mixture, use only boiled water - it must be boiled strongly for at least 5 minutes. Bottled water is not sterile and should also be boiled before use.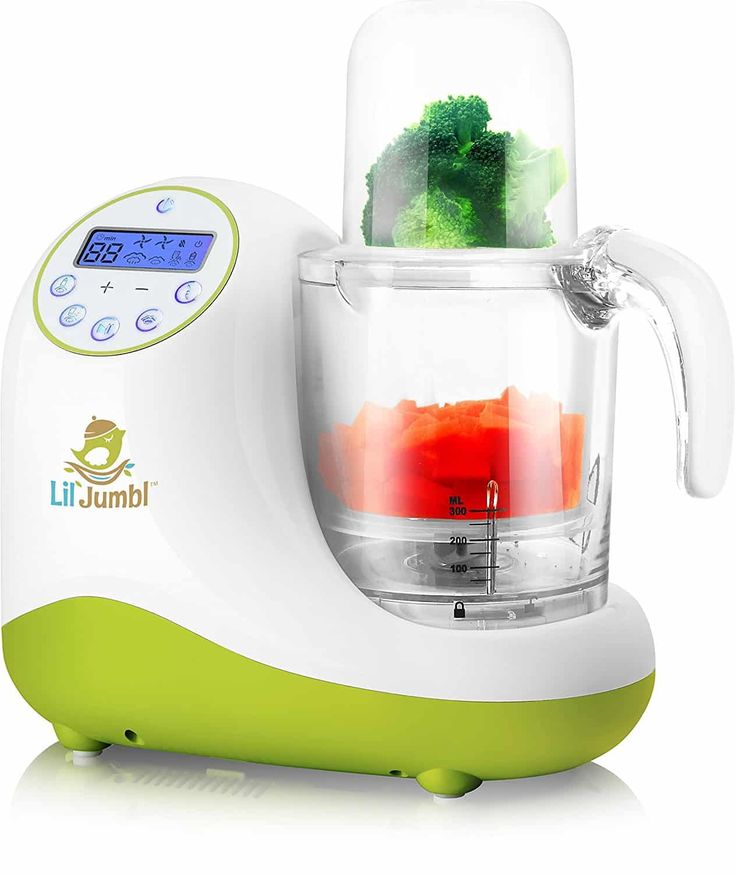 Do not heat water in the microwave.
Cool the boiled water to the temperature recommended by the manufacturer and dilute the mixture following the instructions. To measure the mixture, use only the measuring spoon supplied with the package.
If you dilute formula for more than one feeding, it should be stored in the refrigerator at 2-4°C and used within 24 hours. After the start of feeding, a portion of the mixture should be used within an hour, as reconstituted infant formula is an excellent breeding ground for microorganisms. After an hour, the rest of the mixture should be poured.
Often a newborn baby can fall asleep right during feeding - do not worry if this happened to your baby. Just lightly pat your baby on the cheek or nose, and if he wakes up, continue feeding.
Pay attention.
Dry infant formula after opening the package are not sterile. Use the product in accordance with the instructions and recommendations of the doctor.
When opening a package with dry infant formula containing healthy fats Omega-3, Omega-6, a slight fishy smell is possible - this is normal, because similar fatty acids are also found in fish oil, the benefits of which we have known since childhood. This smell disappears and is not felt in the diluted mixture.
Do not cook or heat the mixture in the microwave. In microwave ovens, food is heated unevenly, so some of the mixture may be too hot for the baby.
What utensils do you need to prepare the mixture?
Bottle, nipple, cap, measuring spoon, knife for removing excess mixture from the spoon. Two pots: in one you will boil the dishes, in the other - water for preparing the mixture. There are also convenient modern sterilizers and heaters that you can use when preparing the mixture.
Preparing one meal
1. Wash your hands with soap and dry them with a clean towel. Thoroughly wash the bottle, nipple, cap, measuring spoon and all utensils that will be used to prepare formula.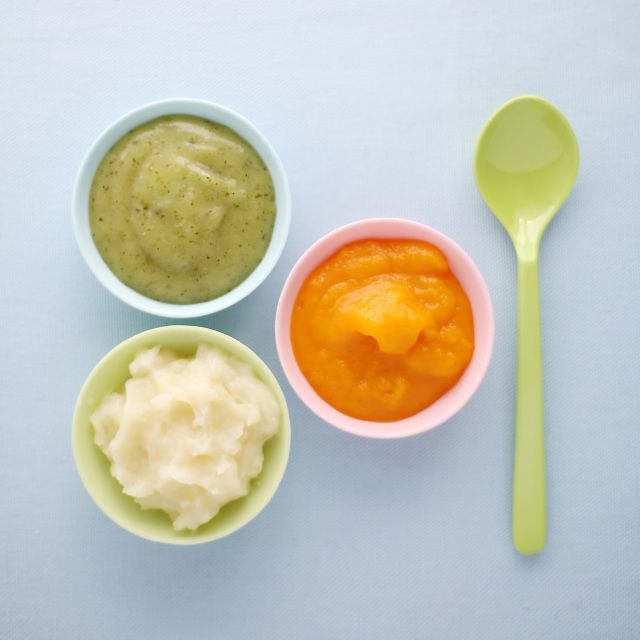 It is best to do this with a special product for children's dishes - it is more gentle. Be careful when washing baby utensils in the dishwasher: due to the narrow neck, the bottle often remains unwashed, despite the fact that bottles of most manufacturers are allowed to be washed in the dishwasher. For washing bottles, special brushes are provided, with which you can thoroughly rinse the bottle.
2. Rinse all dishes to remove detergent and boil them for 5 minutes.
3. Prepare a clean surface to mix.
4. Boil water in a separate saucepan at a high boil for 5 minutes. Unless otherwise specified in the instructions, mixtures containing probiotics, such as Similac Gold or Similac Comfort, must be diluted with boiled water cooled to a temperature of no more than 35 degrees in order to preserve the beneficial properties of beneficial bacteria.
5. Pour the required amount of warm, pre-boiled water into the sterilized bottle. Remember that you should not mix boiled and unboiled water to achieve the desired temperature.
6. Fill the included measuring spoon with the mixture, then use the blade of a clean knife to remove the excess mixture.
7. Add mixture to water bottle according to instructions. Add dry mix to the bottle, not the other way around.
8. Stir until completely dissolved. For feeding, the mixture must be at human body temperature, i.e. approximately 35 ° C - check the temperature of the mixture and feed the baby. If the mixture is too hot, you can cool it down quickly by placing the bottle in a bowl of cold water.
9. Sit back, hug your baby, and maintain physical and eye contact while feeding formula. Prepare a napkin in advance in case of excess mixture, and after feeding, scold the baby with a “column” so that he burps the air that has entered the stomach during feeding.
Pour out the remains of the mixture left in the bottle that the child has not eaten for an hour.
How do I properly heat formula bottles?
If you have prepared several servings of formula for feeding your baby in advance, and the bottle of formula is just out of the refrigerator, it is important not only to warm the formula, but also to do it right. So here's how to do it:
- Take the bottle of prepared formula out of the refrigerator just before feeding.
- Warm the formula by placing the formula bottle in a container of hot water so that the water level is below the rim of the bottle. In order for the mixture to heat up evenly, periodically shake or rotate the bottle, while the warm-up time should not exceed 15 minutes.
- Check the temperature of the mixture by dropping a little on the inside of your wrist. The mixture should not be too hot, it must be cooled to a human body temperature - 35 ° C.
How do I take pre-prepared infant formula with me on trips and outings?
The first step is to cool the prepared mixture. During a trip or a walk, it should be stored in a cold place - this will help prevent the development of pathogenic bacteria.
- Prepare the mixture as you normally would, let it cool and refrigerate (max. 5°C unless directed otherwise).
- Remove the formula from the refrigerator just before leaving the house and put it in a special cooler bag.
- Once there, you can put the formula bottles back in the fridge or warm them up and use them for feeding.
- Remember that the mixture must be used within 24 hours.
If the planned trip or walk is longer than two hours, you may not be able to keep the bottles of formula cold - in this case, freshly prepared formula must be used for feeding. Plan ahead and take the required amount of dry formula with you in a clean, sterilized container. Prepare the mixture using boiled water.
Good hygiene and formula preparation is very important for your baby's healthy growth and development!
Materials used in preparing the article:
- How to prepare bottle milk formula at home.