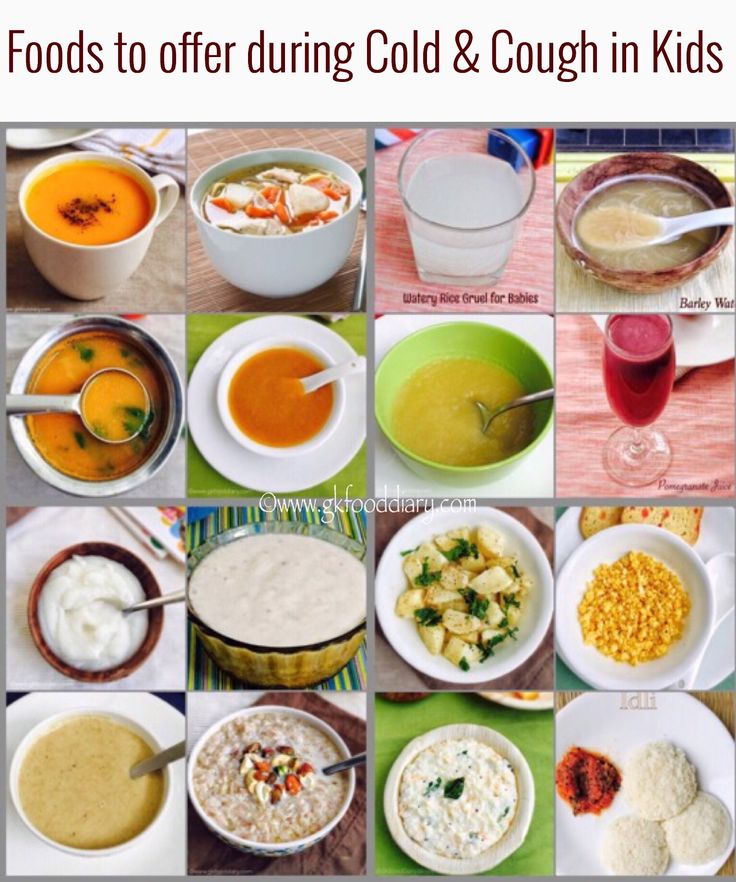
Can you freeze rice for baby food
How to Make Baby Rice Cereal (Freezer-Friendly!)
Home » Feeding Style » Baby Food Purees » Stage One » How to Make Homemade Baby Rice Cereal
Using only 1 ingredient, this Homemade Baby Rice Cereal is a simple and easy recipe to make for your baby! Plus, it is completely freezer-friendly, so it’s a great addition to your freezer stash of baby purees. It’s great for babies 4-6+ months and up as a Stage 1 baby food.
Medically reviewed by Jamie Johnson, Registered Dietitian Nutritionist (RDN), and Lauren Braaten, Pediatric Occupational Therapist (OT).
Homemade Baby Rice CerealHomemade brown rice baby cereal is packed with manganese, magnesium, and selenium. It is a good source of fiber, protein, and a ton of other essential vitamins and minerals for a growing baby. 💪
It’s a nutritious first food for your baby, and you can easily mix it with other fruit or veggie purees for a more wholesome and delicious meal! 😋
Plus, this homemade baby cereal is one of the easiest purees you can make for your baby! All you need is 1 ingredient and less than an hour of your time 🕐.
For this recipe, we will cook the brown rice, blend it up, and then pop it into the freezer for easy-to-grab cubes of baby rice cereal. I have found that this cooking method makes the creamiest and smoothest baby cereal you can ever imagine. Besides, there is nothing like having a freezer stash of healthy baby purees at your fingertips!
Is it your first time making homemade baby food? Then I suggest you start this journey by reading my in-depth Guide on How to Make Homemade Baby Food. The detailed guide goes over all the important information such as the best cooking tools to have on hand, safe storage, how to know when baby is ready for solids, how to introduce purees, the best first foods for baby, and more! You can also check out my best-selling cookbook for even more information and recipes!
Rice Cereal Video
Watch this video to see how easy making your own homemade rice cereal can be!
Reasons to Love this Rice Baby Cereal- easy to make
- 1-ingredient puree
- simple and wholesome ingredients
- freezer-friendly — great to stash in the freezer
- free from allergens like gluten, dairy, soy, corn
- full of essential nutrients for a growing baby — fiber, manganese, protein, selenium, and magnesium
- works great stirred into other combination purees
- for babies 4-6 months and up — stage 1 puree
- mild taste
- creamy and smooth
Make sure to read the recipe card below for the full ingredient list and instructions!
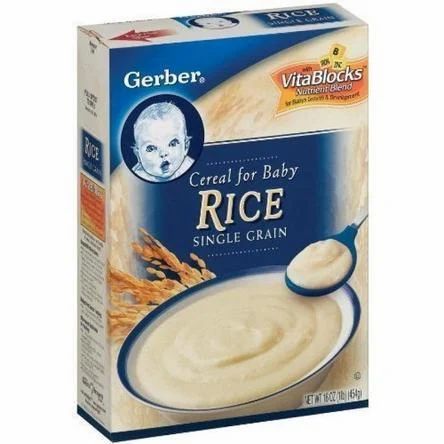
- Rice: I recommend using organic short grain brown rice in this recipe.
 Brown rice has health benefits and loads of nutrients in it, as opposed to white rice, which has all of the key nutrients stripped from it. I strongly recommend using organic brown rice as the cost difference ounce-per-ounce is very small. The organic variety has not been soaked in pesticides and has significantly less arsenic in it. You can use either short or long-grain organic brown rice for this recipe.
 - Water: This will be added to cook the rice. You can also use sodium-free bone broth or sodium-free veggie broth for more nutrients and flavor or a mixture of broth and water.
- Liquid for Blending: While blending the rice, you’ll need to add more liquid to thin out the rice into a puree. You can use water, bone broth, veggie broth, fresh breast milk, or formula.
TIME-SAVING TIP: If you are in a rush, you can use quick-cooked brown rice (I like the organic brown basmati rice from Trader-Joes) that only takes 20 minutes to cook!
Soaking the RiceSoaking brown rice (or any grain) helps remove some of the naturally occurring phytic acids, which are some of the hard-to-digest components of the grain.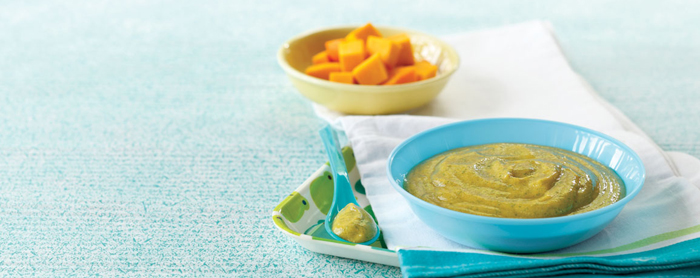 Getting rid of these acids speeds up the cooking time and makes the rice easier to digest.
If you are introducing grains as your baby’s first food, soaking the grains would be helpful as your baby would have an easier time digesting the puree.
But if thinking 2-8 hours ahead of time is holding you back from making your own cereal, then feel free to skip this step.
How to Soak Rice: Place 1 cup of rice in a medium bowl and add 2-3 cups of hot water (enough to cover the rice) and leave at room temperature for at least 2 hours. You can also leave it overnight. Drain the rice and rinse well. Follow the recipe below on cooking and pureeing instructions, but note that the rice will cook faster, so check the rice after 20 minutes.
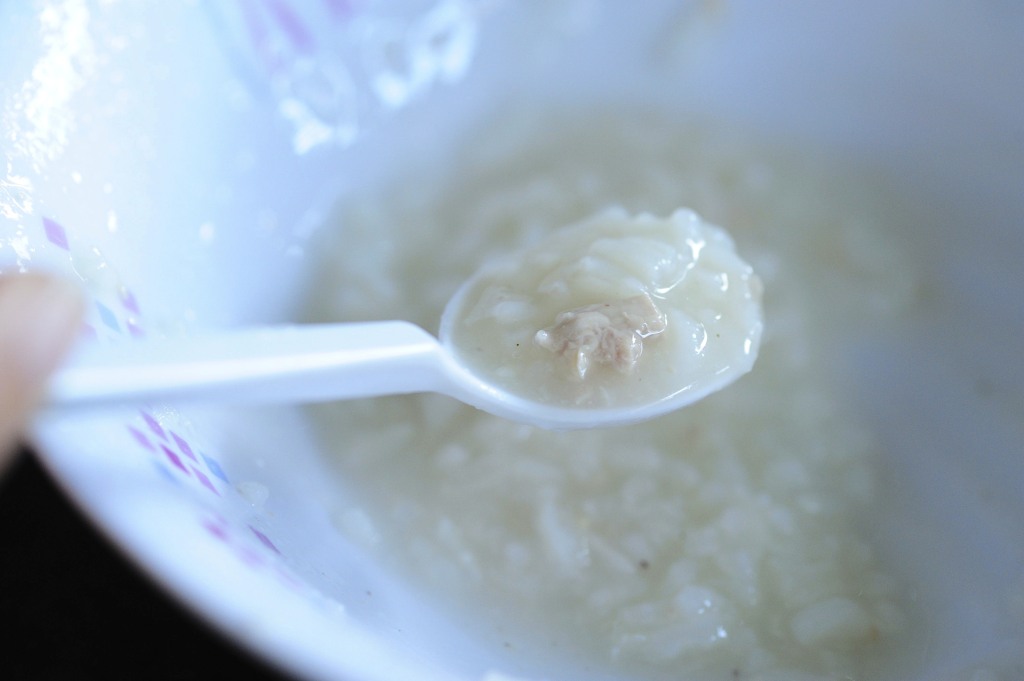
How to Make Baby Rice Cereal- Rinse Rice: Place the rice in a fine-mesh colander and rinse with cold water until the water runs clear. This will help remove any excess starch from the rice grains and make the rice fluffier and easier to blend.
 PLEASE DO NOT skip this step, or your puree will be starchy.
 - Add to Saucepan: Add the water and the rice to a medium saucepan, cover, and bring to a boil over high heat.
- Cook: Once at a boil, turn down the heat, and let simmer on low for 35-45 minutes or until the water is gone and the rice is tender. Rice cooking times vary, so taste test the rice after 35 minutes to see if it is tender.
- Sit: Remove from heat and let it sit for 10 minutes.
- Blend: Transfer the cooked rice to a blender or food processor and blend for 1-2 minutes, adding liquid to thin out the rice puree.
- Store: I recommend storing a small quantity of the rice puree in the fridge for use that week and then freezing the rest for future meals.
- Blender or Food Processor
- Storage Containers for Fridge
- Freezer Tray
- Stasher Bag
- highchair
- suction bowl or baby bowl
- baby spoon
- open lid cup
- bib with catch pocket
Other Cooking Methods
I have found that cooking the rice first and then blending, creates the smoothest rice cereal for your baby. But there are a couple of other ways to make rice cereal for your baby.
Instant Pot
You can cook small or large batches of white or brown rice in your instant pot. For white rice, you will put 1 cup of rice and 1 cup of water into the instant pot and cook for 3 minutes with a natural pressure release until the pin drops. For brown rice, you will put 1 cup of rice and 1 cup of water into the instant pot and cook for 24 minutes with a natural pressure release until the pin drops. Feel free to double the recipe if needed.
Rice Powder
- Grind Rice: Place 1 cup of uncooked rice in a coffee grinder or blender. Grind for 1-2 minutes or until you have a very fine rice powder.
- Add Hot Water: In a microwave-safe bowl, add in roughly 1 tablespoon rice powder and 1-2 tablespoons hot or boiling water. Stir until smooth adding more water if needed. Let sit until warm enough to eat.
Frequently Asked Questions
When can babies eat rice cereal?
Babies can have rice cereal as one of their first foods. When a baby can start on solids is determined by their own rate of development, which generally comes between 4-6 months of age. Some of the developmental milestones babies need to reach in order to start solids include: if your baby has solid control of their head and neck, if your baby has doubled in weight, and if your baby is reaching for or opening their mouth when you eat (see my guide here). Before you start your baby on purees, you should consult with your pediatrician to make sure your child is developmentally ready.
Can rice cereal be the baby’s first food?
Rice can 100% be your baby’s first food if you want it to be. It is recommended to wait to introduce the top eight allergen foods to your baby once a few other well-tolerated foods have been introduced, but otherwise, foods can be introduced in any order so choose whatever you are most excited for your baby to have.
Is rice a common allergen for baby?
No, rice is not a common allergen, however, as with any food, start with a small portion and be aware of any signs that might be an allergic reaction after introducing it.
Does rice cause constipation for babies?
Rice may cause constipation in babies since it absorbs water and may make it harder to pass stools. Switch to a different whole grain like oatmeal if your baby is having a hard time digesting rice.
How to Store Rice CerealThis baby rice cereal is quick and effortless to freeze and reheat, making it convenient to have on hand. The frozen cubes are easy to grab and reheat right before mealtime.
How to Freeze- After you blend the rice into a puree, you can pour the rice cereal into freezer-safe trays . Do not overfill.
- Place the tray into the freezer for 3-4 hours or until completely frozen.
- Transfer the cubes of frozen rice cereal into a Stasher Bag or ziplock baggie.
- This puree will last 4 days in the fridge and for up to 4 months in the freezer.
- Take the number of frozen cubes you want to feed your baby for that meal and place them in a microwave-safe container.
- Heat in the microwave for 30-second intervals until warm, stirring after every session.
- You can also take the frozen cubes and place them in a small saucepan on the stove, heating on low and stirring continuously.
- NOTE: The puree will be thick when you reheat it. You can thin it back out by adding other purees (see the list below for some of my favorite options), fresh or frozen breast milk, formula, or water. Add a little at a time, stirring in-between.
Label Tip: Don’t forget to label your purees before you place them in the fridge or freezer with the name of the puree and date you made it. Take it from me, you will completely forget when and what is in your freezer by the end of the week;).
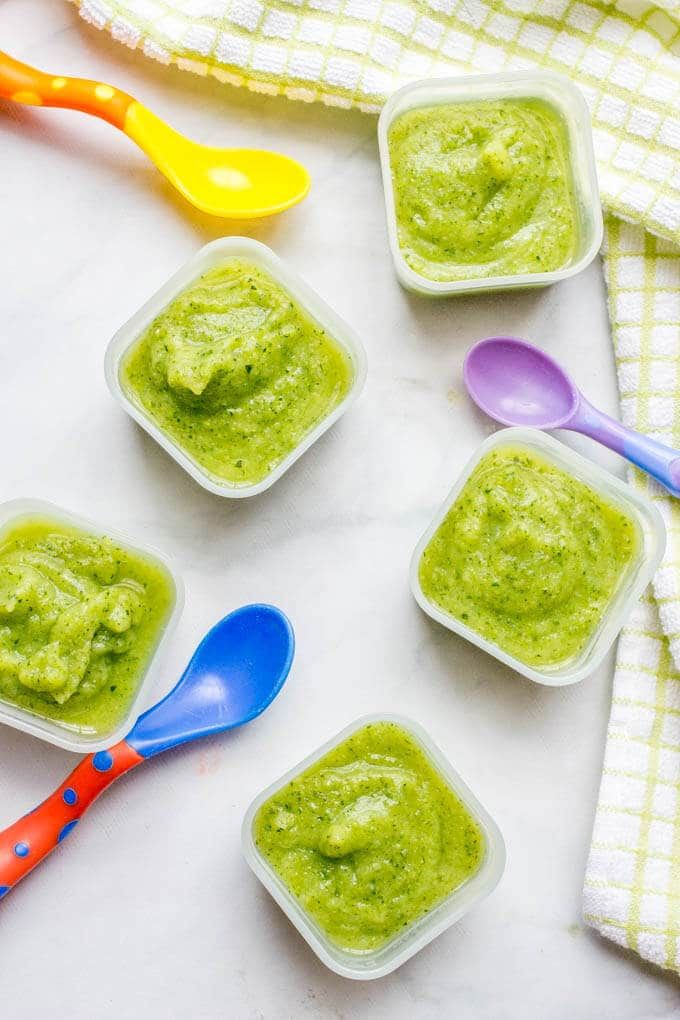
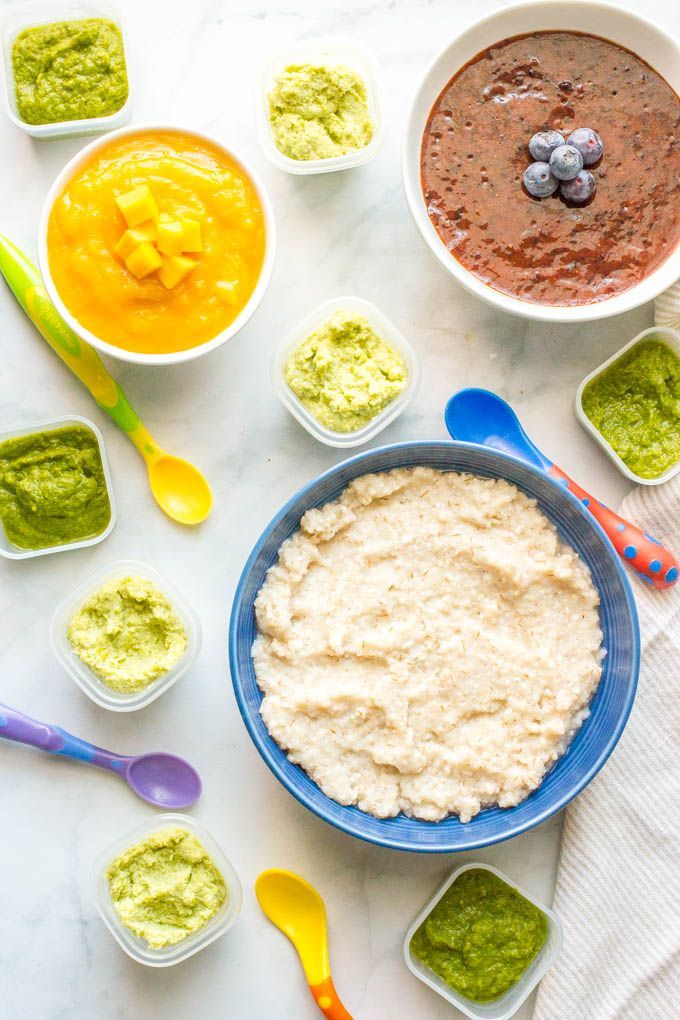
Rice Comination PureesWhile Rice is great by itself, it’s also super easy to mix and match with other nutrient-dense baby food purees. Give these fun flavor combos a try!
Stage 1 Purees- Apple Puree
- Sweet Potato Baby Food Puree
- Green Bean Baby Puree
- Carrot Puree
- Roasted Banana Baby Puree
- Superpower Green Baby Food Puree
- Apple, Spinach + Broccoli Baby Food Puree
- Sweet Potato, Carrot, Cauliflower Baby Food Puree with Chia Seeds
- Banana, Cherry + Beet Baby Food Puree
- Roasted Root Veggies + Thyme Puree
- Broccoli + Asparagus Baby Food Puree with Tarragon
- Mango + Kale Baby Food Puree with Ginger
Feeding Tips
- Place a small amount of puree on the tray during spoon feeding – so that your baby can dip their fingers or hands in the puree.
 Allowing baby to explore foods in this way helps them learn to self-feed and can help them be more willing to try new textures and foods in the future.
 - Have a spare spoon (or three!) – even very young babies often want to be involved in feeding themselves as much as possible. Giving baby an extra spoon to hold can be helpful in giving her a sense of control and also promotes hand-eye coordination.Allow baby to use spoons as a teether during the meal. There are many great options out there but a few we particularly love include the Olababy 3 Piece Set, the NumNum Pre-Spoon GOOtensils, and the ChooMee FlexiDip Baby Starter Spoons.
- Purees are great to keep in your baby’s regular rotation of foods – but if you start feeding with traditional weaning using purees, make sure to progress beyond eating ONLY purees. Once baby can safely and comfortably swallow purees (usually by 7 or 8 months) it’s time to introduce other textures, such as teething biscuits and soft cooked finger foods.
 Moving onto additional textures in a timely manner may help prevent feeding difficulties at a later age.
Or watch a shortened version of this video here.
- 1 cup brown rice (I prefer organic short grain)
- 2 cups water
- 1-2 cups liquid for blending (fresh breast milk, formula, water)
Rinse Rice – IMPORTANT STEP: Place the rice in a fine-mesh colander and rinse with water until the water runs clear.
Cook: Transfer the rice to a medium saucepan and add 2 cups of water. Bring to a boil over high heat, then reduce heat to low, cover with a lid and simmer for 35-45 minutes or until the rice is tender and the water is evaporated.
 Each batch of rice cooks a little differently, so taste at 35 minutes to see if the rice is tender.
Let Rest: Remove the saucepan from the heat and let rest for 10 minutes, covered. If using fresh breast milk or formula for blending, remove the lid and let the rice cool for 15 minutes.
Blend: Place the rice into a blender or food processor and add 1/2 cup of liquid of choice. Blend for 1-2 minutes on medium-high speed until completely smooth and creamy, adding in the additional liquid in 1/4 cup increments, if needed, until you have your desired consistency.
Eat: Serve to baby or freeze for later.
Age: 4-6 months and up
Yield: roughly 20 ounces
Notes on Rice: I recommend using organic short grain brown rice in this recipe. Brown rice has health benefits and a ton of nutrients in it, as opposed to white rice, which has had most of the key nutrients stripped from it. I would strongly recommend using organic brown rice as the cost difference ounce-per-ounce is very small and the organic variety has not been soaked in pesticides. You can use either short or long-grain brown rice for this recipe.
Notes on Water: water will be added to the rice to cook in. You can also use sodium-free bone broth or sodium-free veggie broth for more nutrients and flavor, or do a mixture of half broth and half water.
Notes on Liquid for Blending: while blending the rice, more liquid will need to be added to thin out the rice into a puree. You can use water, bone broth, veggie broth, fresh breast milk or formula.
Blender
Freezer Tray
Bumkins Baby Bowl
Grabease Utensil
Saucepan
Serving: 1ounce, Calories: 34kcal, Carbohydrates: 7. 2g, Protein: 0.7g, Fat: 0.3g, Saturated Fat: 0.1g, Sodium: 1mg, Potassium: 26mg, Fiber: 0.3g, Calcium: 4mg
Did you make this recipe?
Tag @babyfoode on Instagram and hashtag it #babyfoode!
Pin Recipe Email a Friend
How to Freeze Baby Food- Everything You Need to Know
Freezing Homemade Baby Food
There are some important freezing guidelines that you must follow.
This page outlines some common questions asked about freezing homemade baby food and even provides a chart of the foods that will and will not freeze nicely (Homemade Baby Food Cubes Freezing Chart – opens in a new page)
How long will baby food [cubes] keep in the freezer & refrigerator?
- Freezer: 3-6 months (ideally use within 1-3 months)
- Refrigerator (fruits / veggies): 48 hours
- Refrigerator (meat, poultry, fish eggs): 24 hours
For optimal quality and nutrient retention, keep frozen baby food cubes in the freezer for a maximum of 3 months.
Baby food cubes are safe to remain in the freezer from 3 to 6 months. Using baby food cubes within 1 month to 3 months is really more prudent. Due to the amount of water crystals that tend to build up with baby food purees, and due to the fact that nutrients may leach/evaporate upon thawing because of the water crystals, it is more prudent to use your frozen baby foods cubes as soon as possible – 3 months of storage tops. We always recommend using within 1 month if at all possible.
Many authoritative guidelines will say that most fruits and veggies will keep from 8 to 12 months in the freezer. This is mostly true of foods that are frozen in their natural state. This is also assuming that the freezer remains at a constant sub-zero temperature. Storing foods in a deep freezer is best should you wish to keep frozen foods for that time frame.
Remember that when certain books give freezer time guidelines, they rely on the typical guidelines for fruits/veggies that have NOT been cooked and turned into purees.
How long with baby food cubes keep in the refrigerator?
In the refrigerator, it is recommended that fresh pureed homemade baby food be stored no longer than 48 hours (many food safety authorities say that 72 hour is fine.). This limit ensures that bacteria growth in the puree is kept to a minimum and that the food does not take on the “taste of the fridge”. This “rule” applies for veggies, fruits, meats etc.
If you do not plan to freeze your homemade baby food, I suggest that you make the puree on a day to day, or every other day, basis.
For example, one sweet potato may be baked and then you may freeze one half without pureeing it and then puree the other half. This method will help cut down “waste” and also allow for food safety.
Can I safely use frozen vegetables or fruits to make baby food purees and refreeze them?
YES. You can refreeze frozen veggies & fruits. Using frozen fruits and vegetables is the second best option to using fresh foods. The process of flash-freezing (foods being frozen at a very low temperature and frozen very quickly) actually preserves and allows for optimal nutrient retention.
One of the most commonly asked question is “Can I safely use frozen vegetables or fruits to make baby food purees and refreeze them?”. There are no studies or research to show that refreezing is negative and/or may adversely affect health. The caveat is that you must cook the foods prior to refreezing them. Frozen vegetables and fruits are NOT COOKED prior to being frozen.
Picked at the peak of freshness, a vast majority of frozen veggies are flash frozen either right in the fields or in the warehouse close by. “Fresh” veggies may sit around in trucks and warehouses and criss-cross the country before it even makes it to your table.
Frozen veggies are NOT cooked when packaged and so they must be cooked prior to eating. Please be sure to read the label of your frozen veggie bags as a few brands of frozen veggies may be pre-cooked; you would not want to refreeze these.
The fact is, cooking foods deplete more nutrients than does freezing foods. Contrary to myth, freezing foods (fruits and vegetables in particular) does NOT deplete 100% of that food’s vitamins and minerals. The process of freezing, if kept at a constant 0 degree temp does not contribute to a TOTAL loss of nutrients – if it did, then the majority of the population would be malnourished as we rely on and eat a large amount of frozen foods.
If you ever forget what the “rule” is, remember this example : you can take out a roast that was frozen uncooked & raw, thaw it, cook it and then freeze the leftovers for another meal. Once you have thawed the leftovers, you should never re-freeze the leftover-leftovers.
The package says not to refreeze. Question received from one of our visitors:
Q. Just reading the section on using frozen food to make baby food and then refreezing. I was just concerned because on the package (Green Giant Peas) it says to not refreeze thawed product. Do you know why that is??
A. You should never refreeze a thawed product, that is correct. Refreezing thawed products may affect the taste and quality (and possibly very minutely, the nutritional value) of the product. You should ALWAYS cook a thawed product prior to re-freezing it. Cooking a thawed product will allow you to then re-freeze it for one cycle.
Keeping a bag of frozen veggies or fruits on makes it simple for you to serve up a meal. You don’t have to puree the whole bag, just cook and use a handful at a time.
Freezing Homemade Baby Food – The Ice Cube Tray/Freezer Bag Method:
Using this method, you spoon or pour your baby food purees into regular ice cube trays and then cover with plastic wrap.
Prior to using your ice cube trays, you want to thoroughly cleanse them with warm soapy water and/or run them through the dishwasher on the sanitize setting. Some parents have even submerged their ice cube trays in boiling water for sanitizing (note: please make sure that the manufacturer of the trays indicates it is ok to boil the trays. )
)
Learn more about baby food purees and storage here
The ice cube tray method of storing homemade baby food offers you many advantages.
- Each cube is approximately 1+ ounces, allowing you to have an idea of the amount of food your baby is consuming.
- There is minimal waste as you use only 1 cube at a time and will not have to toss away much food; such as you toss away when using commercial foods.
- Another advantage is that you probably have ice cube trays on hand and will not need to go out and buy them.
- Once the purees have been frozen in the trays, you simply pop out the cubes and use as needed. Using this method also allows you to make several trays at a time so your time spent in the kitchen making baby food is decreased.
You may transfer the baby food cubes into freezer bags, freeing up your trays for the next batch of food as well as freeing up some freezer space.
If using the freezer bag method for your food cubes, be sure to label the bags with the type of food and also date the bags. This will help you to quickly grab a cube from a bag of veggie and a bag of fruit without having to guess what you have in the bags. It also allows you to keep track of the length of time the food cubes have been in the freezer.
Learn more about Homemade Baby Food Storage Methods
My baby food cubes are frosty and have ice crystals on them – Do my homemade baby food cubes have freezer burn?
Don’t be alarmed if you see ice crystals forming on your baby food cubes. As mentioned earlier, this is NOT freezer burn rather it is the excess liquid used to make the puree that rises and freezes at the top of the cubes. These crystals or frost are not dangerous and will not make your baby food cubes inedible or harmful.
Freezer Burn – What is it and How may I spot it?
Freezer burn looks like grayish brown spots on the frozen item. It appears as a leathery type texture and is easily noticeable. Crystals on frozen foods are not freezer burn but are a result of any excess liquids being frozen and forming ice crystals.
Freezer burn does not make a frozen food harmful; it simply makes the areas affected very dry. The only thing that may suffer in foods that have a lot of freezer burn is the quality. You can cut away the burned portions and still be able to use the unaffected area of the food.
Freezer burn results when excess air in the frozen package descends on the food. Try to eliminate air pockets in the packages you will be freezing to help stop freezer burn.
Can I use glass jars for freezing homemade baby food? Can I use Gerber/Beechnut glass jars?
Glass that is not specifically manufactured for freezing has the unfortunate ability to crack, leave behind tiny, microscopic shards and fragments and also is prone to bursting. Baby food jars are not manufactured for freezing or for extreme heating. BALL, makers of home canning products, manufactures 4 ounce jars specifically for freezing as do other manufactures.
Many people do freeze in baby food jars but I do not advocate this whatsoever. After all, you’re making baby’s food because you want the best nutrition and health for your little one; why take a risk by freezing in jars? There are glass jars on the market that are specifically manufactured for freezing and those jars should pose no hazards at all.
Gerber containers do not have any specific markings or labeling to indicate that they are good for either temperature extremes. I have emailed Gerber and they have said that they do not recommend using their containers for storage at either temperature extremes such as freezing or extreme heat (microwaving). Feel free to contact Gerber as they were very quick with their reply to us. I do not advocate freezing foods in any container that is not specifically labeled for freezing.
There are certain “grades” of plastics that are specifically manufactured to withstand high temperatures and/or freezing. You may look on the bottom of the containers for the plastic symbol and then look the symbol up here at American Plastics Council. Please note that these codes do not necessarily mean that the container you are using is 100% safe for heating or freezing; the codes will give you a baseline to help with your decision.
What is the “rule” for freezing Meat Purees or Meat Combinations?
Meat Purees and Meat “Dinners” that you have mixed may be frozen just as you would fruits or veggies or combinations. It is safe to freeze meats that have been frozen when raw and uncooked, thawed, cooked and then puréed.
You should not freeze meat purees from meats that have been frozen when raw, thawed, cooked and then frozen and then, thawed again.
If you ever forget what the “rule” is, remember that you can take out a raw frozen roast, thaw it, cook it and then freeze the leftovers for another meal.
Once you have thawed the leftovers, you must use them within 48 hours; you should never re-freeze the leftover-leftovers.
Can I Use Previously Frozen Breast Milk or Formula to Make and then Freeze Baby’s Vegetable or Fruit Purees?
You should not use Previously Frozen Breast Milk to thin purées that you will then be freezing into baby food cubes.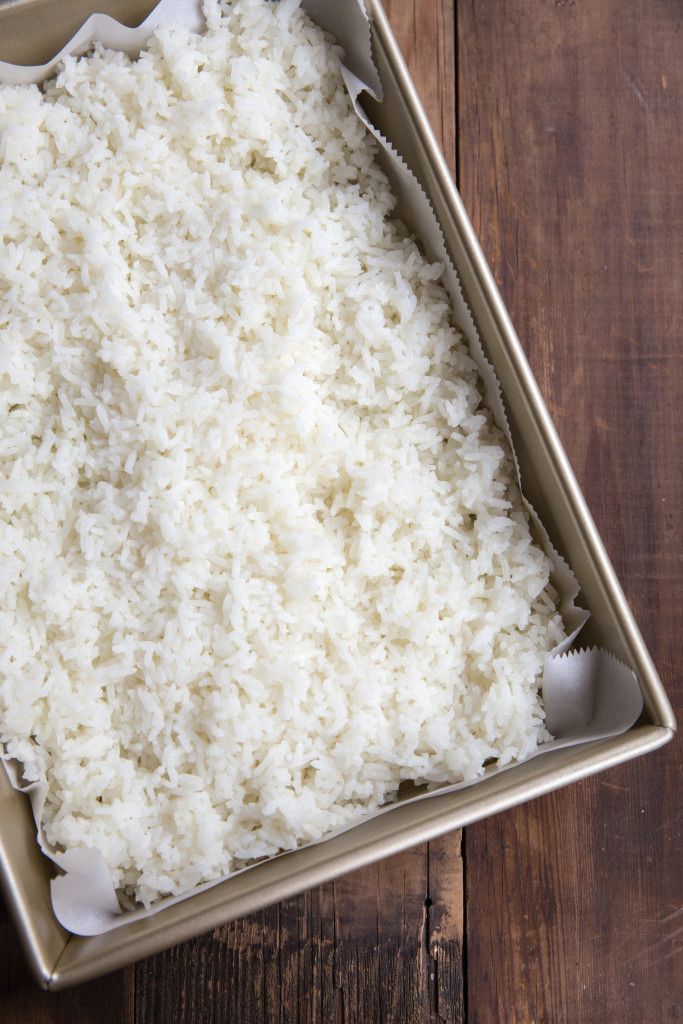
Breast Milk should never be re-frozen in any way or form. Using formula to thin and then freeze Purées is acceptable.
Formula
You may freeze purees that have been mixed with formula. Formula should not be frozen in the form of bottles or cans. For example, you should not freeze formula bottles that you have mixed nor should you stock up on pre-mixed formula and freeze that. As the formula companies note, freezing formula causes a separation of the fats from the liquid and texture suffers. There is no health risk to freezing formula, just texture and quality. Think of it as the same as freezing a gallon of milk – it’s not dangerous but it makes the quality of the milk suffer.
The Enfamil website notes:
“Freezing of any Enfamil formula is NOT recommended. Freezing infant formula can lead to physical property changes like fat separation, which may prove difficult for sensitive infants to digest. Freezing will not extend the expiration date of the formula.
” “Freezing of our products may cause loss of desirable appearance and functionality (though not nutrition), and is not recommended.” Clinical Frequently Asked Questions, Storing Enfamil
The International Formula Council Notes:
“Should Infant Formula Be Frozen? The use of infant formula after freezing is not recommended. Although freezing does not affect nutritional quality or sterility, physical separation of the product’s components may occur.” http://www.infantformula.org/faqs.html#14
It might be easier to freeze your purees without adding any extra liquids. If need be, thin your puree food cube(s) when it comes time to feed your baby. Should you decide to do this, you simply thaw the “un-thinned” food cubes and then thin the food cubes to the desired texture that your infant requires.
Want to make your own baby food? Visit our blog on making your own baby food purees and storage
More Resources About Freezing Food and Food Safety- USDA Freezing Guidelines
- Freezing Prepared Foods
- Freezing Food from NDSU
- Do’s and Don’t’s of Freezing
- Food & Nutrition – Storage & Freezing from UIUC
- American Frozen Food Institute
Remember, always consult with your pediatrician regarding introducing solid foods to your baby and specifically discuss any foods that may pose allergy risks for your baby.
This site complies with the HONcode standard for trustworthy health information: verify here.
SHARE ON FACEBOOK SHARE ON PINTEREST
Freezing rice and ready-made dishes from it Cooking articles
Share with friends:
Not everyone can afford to cook meals every day. Those who go to work and spend whole days there are practically deprived of such an opportunity. However, eating homemade food is much healthier and more economical on the wallet than dining at a cafe. Freezing ready-made meals for the future allows you to save time as much as possible. This method is suitable not only for too busy, but also for lazy people. You can freeze not only vegetables and meat, but also rice. Rice keeps well in the freezer for up to a month. The only secret is to properly defrost and cook it afterwards. Below are some quick and easy ways to freeze rice and cooked rice dishes.
1. Rice in airtight containers
- Put the freshly cooked rice in the container, leaving the lid on.
- When the product has cooled to room temperature, close the lid.
- Tape or tie a sheet of paper to the container with the date of freezing.
Reheat:
Open the lid of the container, add some water to the rice and place the container in the microwave. Reheat the rice for a couple of minutes. After that, mix it well.
Recipes of rice dishes:
- Spanish rice
- Yellow rice
- Emerald rice
- Traditional Jamaic rice with beans 9000
- Coconut rice 9001 9000 9000 9000 9000 9000 9000 9000 9000 9000 9000 9000 9000 9000 9000 9000 9000 9000
- Place the required amount of rice in the bowl.
- Cover the top of the bowl with plastic wrap so that enough cling remains on the sides.
- Place a plate or cutting board on top of the bowl.
- Quickly turn the bowl with the plate or board over so that the bowl is on top.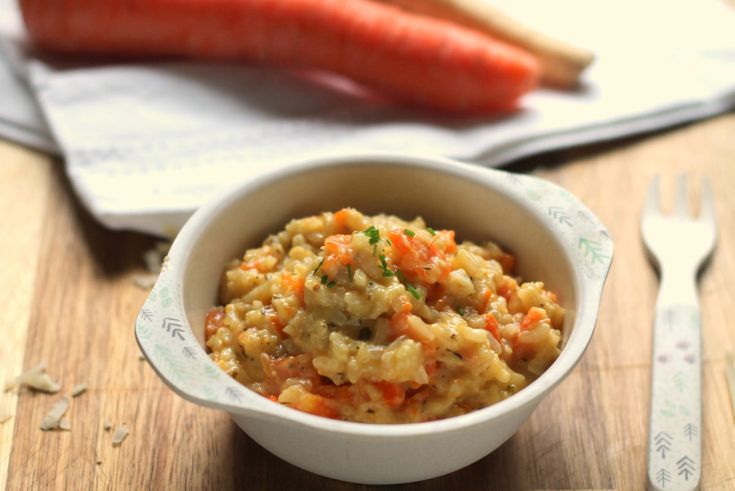
- Carefully lift the bowl and cover the top of the rice with plastic wrap around the edges.
- Remove the air from under the film, give the rice a square or rectangular shape. This is necessary in order to make it more convenient to store the product in the freezer.
- Place individual bags of rice in an airtight bag or plastic container and seal or tie tightly.
- Write the date on which the rice was packed on the bag or container.Reheat:
When you want to cook rice, just take the bag of rice out of the freezer. Remove the plastic and place the rice in a microwave-safe bowl. Add some water and heat for a couple of minutes until the rice is soft and fragrant.
3. Brown Rice
- Rinse cooked rice under the tap, drain.
- While the rice is still hot, place it on a sheet of paper and spread it evenly.
- Cut the paper with the rice into smaller portions.
- Cool the rice to room temperature, put each portion in a separate bag.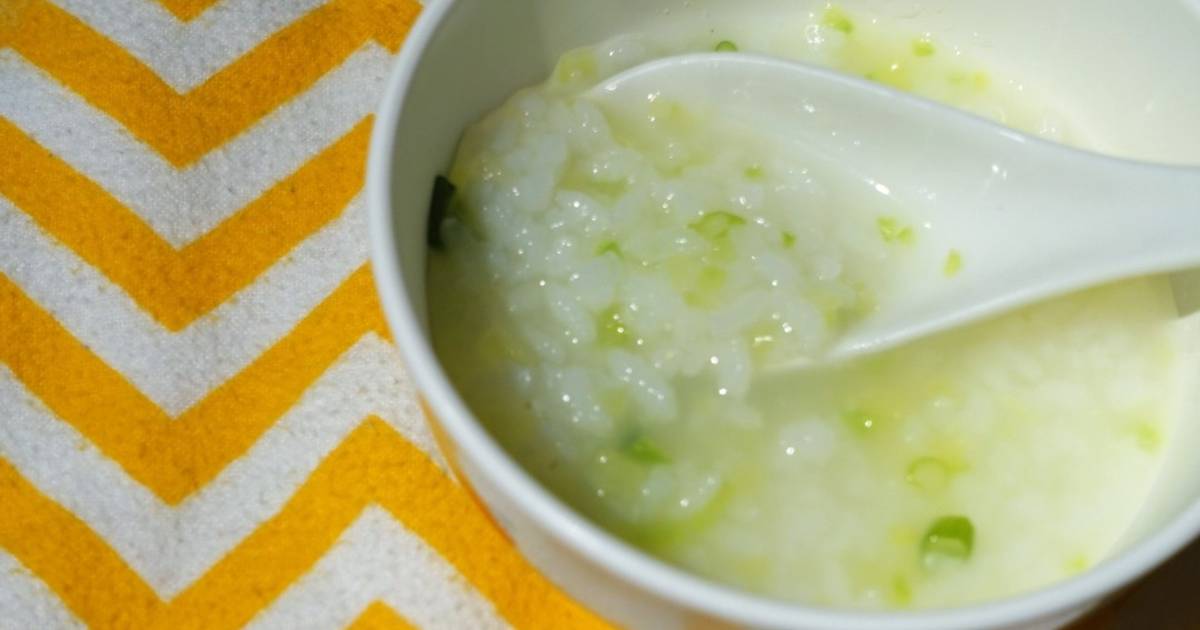 Remove excess air from the bags, close the bags.
- Write the freezing date on the bags.
- Place the bags in the freezer.Reheat:
Remove the rice from the bag, remove the paper, put it in a bowl, add some water and put it in the microwave for a couple of minutes.
Brown rice recipes:
- Stewed leaf cabbage with rice in Caribbean
- rice with beans in Kubinski
- Rice salad with pounds and ham
4. Rice Puding Pudding, Pudding Pudding Podosyt. excess water.
- Place the pudding in a freezer container and let it cool to room temperature.
- It is better to spread the pudding in several small containers than in one large one - this way it will be easier to take it out and reheat in the required quantities without exposing the rest of the heat to the heat, since this dish should not be thawed unnecessarily.
- Let the pudding cool. Close the container with a lid, mark the date of freezing.
- Rice pudding keeps in the freezer for 3 months, but it is still recommended to consume it as soon as possible.Reheating:
Remove the pudding from the container and place in a saucepan. Pour a couple of tablespoons of milk into the pan and heat slowly on the stove. Do not forget to stir the dish to prevent it from burning and sticking to the bottom of the pan.
Recipes for rice puddings:
- Quick pudding with cinnamon, cardamom and blueberry
- Rice pudding on coconut milk
- Portuguese pudding
- Place the dish in bags, squeeze out excess air from them.
- Place the bags in the freezer.Remember: Do not freeze and then reheat any baby food that contains milk and dairy products.
Reheat:
Reheat baby food in small batches.
 Before using for defrosting, the dish must first be put in the refrigerator for a couple of hours, and preferably overnight. You can heat it up in the microwave or in a saucepan on the stove. In any case, be sure to stir everything to prevent burning. Before you start feeding the baby, the contents of the plate must be sufficiently cooled.
 You may be interested in an article about the beneficial properties of rice porridge.
So, as you can see, freezing rice and rice dishes is not difficult at all. The main thing to remember is that before placing bags or containers in the freezer, you must completely remove air or water from them, otherwise the texture, aroma and taste of rice may not change for the better. Remember to add some water to the rice before reheating. This will make it more moist and juicy.
Author of the article: Semenova Natalia "Grand Culinary"
Similar articlesHow to freeze baby food - Encyclopedia Baby food
Levchuk Victoria ©Knowing how to freeze baby food, you can cook and store whole batches of homemade food for a child, because this is a real find for busy parents.
Table of Contents:
There are several ways to freeze baby food - they all work equally well - but may take up different amounts of freezer space.
By all means ……you must prepare homemade baby food and then refrigerate it as quickly as possible to prevent bacterial growth. Any food left at room temperature for more than two hours is not safe for a child to consume and should be thrown away.
To cool cooked food quickly, you can try putting it in a shallow container - you can even dip the container in a pot of cold water to help speed up the process.
How to freeze baby food - Method 1Thoroughly clean the ice mold and the spoon that will be used in filling each section. An ice tin with a resealable lid is ideal as it protects food from frostbite or picking up any odors from the freezer. If there is no mold with a lid, you can cover with food-safe plastic wrap. Some people use foil, although we don't recommend it as some of the foil will remain in the food!
Place the filled ice cube tray in the freezer, and - once completely frozen - place them in ZIP bags that take up less space in the freezer.
This method produces small portions of baby food that are ideally sized - typically around 30 grams or so. One cube per meal may be enough for a child to start with, but as they grow, you may need to increase the number of cubes at a time or increase the ice cube tray.
You can also make many different flavors of baby food by mixing and matching different fruit and vegetable cubes, for example, the combination of apple puree cube with carrot puree cube, delicious!
Which ice mold should I choose?Some ice cube trays are specifically made for baby food and do not contain potentially harmful chemicals - but you can use a regular ice cube tray, or you might be advised to try a silicone mold, or even stainless steel trays, although the regular plastic version will do. if there is confidence in the quality of the workmanship.
How to freeze baby food - Method 2Same as method 1, since the process of freezing baby food is the same, only silicone cupcake molds are used instead of an ice mold! Their flexibility makes it easy to remove food portions - plus, of course, their use is beneficial when the baby starts to eat more baby food!
How to Freeze Baby Food - Method 3If no suitable freezer containers are available for baby food, baking paper can be used (although a little more freezer space will be needed initially).
Simply spoon the cooked baby puree onto the baking sheet to form small mounds (though note that this will not work if the puree is too thin). We cover the baking paper with cling film, freeze, and then mix the servings of food into bags, as before.
How to Freeze Baby Food - Method 4Another good way to freeze homemade baby food is to divide the puree into freezer glass jars and place them in the freezer.
However, please note that you should never freeze baby food in glass jars unless the jar manufacturer has specifically stated that freezing is safe and possible.
Jars that are freezer safe must be properly labeled and distinguished from other tins (including commercial baby food tins) that are not strong enough to withstand the expansion of food that occurs during the freezing process.
This means that the jar may burst or, even worse, there may be small microcracks that cannot be seen with the eyes, but which will allow tiny pieces of glass to get into the baby's food.

How to Freeze Baby Food Method 5Probably the most popular way to freeze homemade baby food is to use freezer trays or jars for baby food, there are so many options to choose from!
Manufacturers, recognizing the growing trend of parents to freeze baby puree, offer special forms of baby food that make life easier, well, because there is a lid! What's more, these molds are free of potentially harmful chemicals, which is something some plastic trays for general consumption are guilty of.
Tracking the finished productMost types of baby food - especially mashed potatoes - freeze perfectly. Sometimes you will have to experiment with texture, since the freezing process itself consists in the fact that the water in the product expands when it freezes, destroying the cell walls. This is especially noticeable when the whole food is frozen, for example a frozen banana will be very soft when thawed.
To reduce the hassle of freezing baby food here are some helpful tips.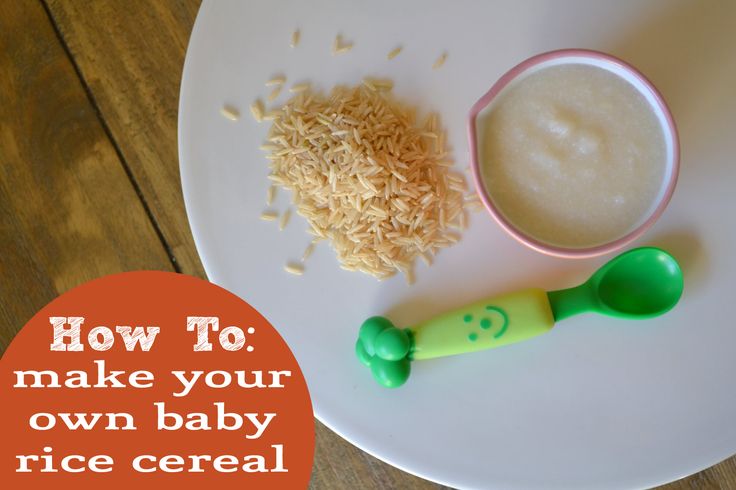 ..
.. - Do not puree too thin before freezing. Keep in mind that many foods become watery when thawed (especially fruits and vegetables), adding extra liquid before freezing will then add too much cereal to thicken!
- Herbs and spices tend to lose their flavor in the freezer. If a baby food recipe calls for them, it is best to add them after after the food is defrosted, just before heating.
- Baked foods - like homemade nuggets or fish fingers - are best frozen when almost cooked but not fully done. This is because the structure of the food when frozen and thawed can behave negatively.
— When freezing yogurt, remember that it may be too thin when defrosted. Sometimes stirring it well is enough to solve this problem - but in some cases, the resulting yogurt is too thin to eat with a spoon, so such yogurt can be used in a smoothie!
- A good result is obtained from freezing rice and oatmeal, which is good if the morning is like a nightmare and there is no time to organize a full breakfast.
 Only cereals should not be made too thin before they are frozen .
 - Many fruits - especially apples and pears - can look very brown when frozen and thawed. This discoloration is a natural and harmless result of the fruit being exposed to air, but if it's a concern, mixing lemon juice and fruit puree before freezing can solve the problem. Please note that citrus fruits can cause an allergic reaction in babies, so you can use it with a changed color!
- If you want to make your own stock of vegetable or meat broth, which is convenient, you just need to prepare a large batch at a time and freeze. It's worth trying freezing in ice cube trays or baby food trays, as discussed above - then the ideal size of small portions will be in the freezer to use as needed.
- If baby food has been frostbitten, fortunately food safety is not affected - just thaw and then cut or spoon away the affected areas.
How to defrost baby foodThe safest and easiest way to defrost baby food is to put it in the refrigerator overnight before feeding.
 Frozen baby food cubes take 8-12 hours to thaw in most refrigerators. Thawed baby food should be used within 24 hours.
 Never, ever refreeze defrosted baby food as this creates a risk of food poisoning for the baby.
We are not afraid and add me to VK and Odnoklassniki, Instagram!
Like this article? Subscribe to site updates
"Encyclopedia Baby Food"!
Don't forget to bookmark us! (CTRL+SHIFT+D) Subscribe to the site, comment, share in social networks.
Our website Encyclopedia Baby Food has useful information on the nutrition of your children, which is useful for everyone, and we update the website "Encyclopedia Baby Food" constantly and try to search and write only excellent, verified and necessary information for you and your children.
Disclaimer No. 1: It must be understood that the author of the articles on the Baby Food Encyclopedia website is not a medical staff, “I am not a doctor.
 ” The information I share is based on my own experience. My goal is not to teach you how to eat or feed your child, but to talk about how we did it, what new things I learned or read. This expands the picture of Baby Food knowledge, gives you a glimpse of the whole process so you can decide if you like it or not.
 Disclaimer No. 2 : However, the above does not cancel visiting a pediatrician. Before you start complementary foods, you need to get his professional opinion on the best way to introduce new foods for your baby. I also draw your attention to the fact that you need to look at the original date of the published articles, because some of the "best practices" may have changed. Always check with your child's pediatrician about complementary foods and their health.
Disclaimer #3: Keep in mind that every family is unique, every situation is also completely unique. There are no universal solutions. Only you can find what works best for you.
- Stewed leaf cabbage with rice in Caribbean