Carrot and pear baby food
Carrot And Pear Baby Food Recipe – Little Mashies
Why is carrot a great baby food choice for reusable food pouches?
Carrot is sweet, tasty and babies just love it! It is so versatile and is a gold mine of nutrients. It has a large amount of beta carotene which is converted into vitamin A, improving the immune system of your baby and providing a good function of the lungs, digestive tract, skin and eyesight. You can steam, mash, boil, fry or bake carrot and you get a slightly different flavour with each. You can mix it with fruits, vegetables or meat and it still tastes great.
Ingredients:
1 cup of pears, diced
1 cup of carrots, diced
Instructions:
Step 1: Cut pears and carrots into small pieces being careful to dice the carrots into smaller pieces than the pears so that they cook at the same time.
Step 2: Steam the diced carrots and pears in a stovetop steamer or a Beaba Baby Cook system for about 15 minutes or until soft.
Step 3: Puree the pears and carrots in a food processor or blender, using a little of the cooking liquid to get a desired smooth consistency (2 tablespoons). You can also use breast milk or formula to mix with the puree.
Step 4: If preparing your baby food recipe in bulk freeze the puree into ice-cube trays or spoon it straight into Little Mashies reusable food pouches and then store them in the fridge or freezer. For instructions on how to fill a refillable pouch you can read our blog. For info on how long to freeze specific baby foods for we have the information here.
Step 5: Label and date your homemade pouches so that you know when to use the puree by. There is a space on the back of the Little Mashies yoghurt and baby food pouches so that you can write all the details.
Step 6: To clean your reusable food pouches you can check out our Little Mashies video here. Little Mashies are see through when held towards light, so it is very easy to see that all of the food is washed out. Because of the specifically designed curved shape, all of the food washes straight out when held upside down under a tap. Little Mashies can also be used in the dishwasher and steam sterilisers, and are BPA free, Phthalate Free, and PVC free.
Here is a selection of recipes from our bestselling Baby Food Recipe Book (see video flick through here). Right now, you can use the coupon code RECIPE to remove 100% of the price of the digital version (save $19.95). Simply add it to cart, apply the code, and pop in your details as though you were a paying customer. We only ask that if you have time after using our book could you please leave us a review. Thanks so much in advance!
For Baby Led Weaning and Older Kids
For baby led weaning you skip the baby food puree altogether and start with large (2 finger sized) pieces of the food. We would of course do this on our Little Mashies sucky platter! So from 6-9mths of age in baby led weaning foods should be the size of about 2 fingers so that the baby can pick it up and self feed. They also need to be well cooked so they are soft, and with no loose pieces (for example tiny florets that can break off on broccoli, or a slice of apple that's so thin it can break when gnawed on).
From around 9mths with baby led weaning you chop the food very small (to avoid choking). I would suggest 2-4 grains of rice in size. It's a small piece so that if they swallow it whole they won't choke. In traditional baby food recipes this is the stage where we mash food so it has a little texture. At around 12mths of age in baby led weaning the food goes up to bite sizes (and this is the same in non baby led weaning kids), about fingernail sized pieces.
Of course some babies will be on a different timeline depending on whether they have heaps or a few teeth. Every baby is different and you just have to watch carefully and get to know how your baby is with food. Never leave them alone whilst eating, and I also recommend sitting them at a table with you for all meals if you can. It helps set the expectation for later in life and you can be a role model for how to eat well. Around 18mths you can offer your little one larger serves again (so a whole apple for example) so that they can learn to take smaller bites themselves, to chew, and to swallow.
Little Mashies reusable food pouch reviews
My Kids Love These
POSTED BY VANESSA
My kids love these! Love putting homemade yoghurt and smoothies in them. Best of all kids can't see what colour the smoothies are! For THAT mum who likes to hide greens and veg in everything! Lol!
These Are Awsome
POSTED BY UNKOWN
These are awesome to make your own food but still give the kids the joy of having the 'squeeze' option. These are better though as they look cooler than normal packaging.
The Pouches Are A Great Size
POSTED BY UNKOWN
The pouches are a great size 130 ml and the designs are cute.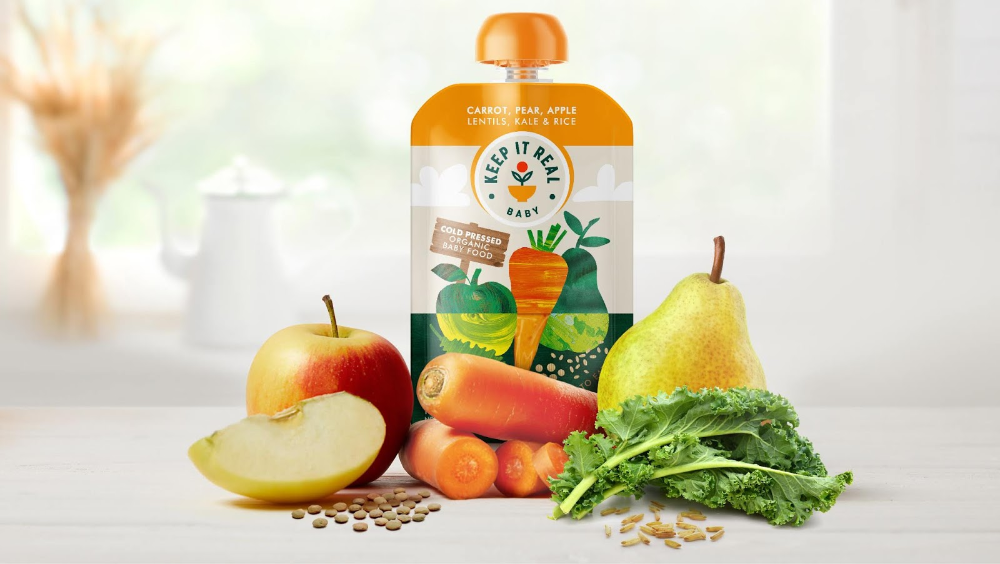 They are super easy to clean. My daughter enjoyed these more than the store bought pouches. I feel better that I know what she is eating. Everybody wins!
Reusable Baby Food Pouches 10pk
$35.95
Little Mashies Reusable Yoghurt Pouch Boho 10pk
$35.95
Sale
Leakproof Stainless Steel Lunchbox Set
Regular price $119.90 Sale price$100.00 Save $19.90
Sippy Cup (4 in 1)
$29.95
View all
60 products
Simply add it to the cart, pop in the coupon code, and it will remove 100% of the price.
At 6 mths of age you can introduce a range of puree's to your baby (see our baby food recipe book and use coupon code RECIPE to remove 100% of the price at the checkout).
For baby led weaning you skip the baby food puree altogether and start with large (2 finger sized) pieces of the food. We would of course do this on our Little Mashies sucky platter! So from 6-9mths of age in baby led weaning foods should be the size of about 2 fingers so that the baby can pick it up and self feed. They also need to be well cooked so they are soft, and with no loose pieces (for example tiny florets that can break off on broccoli, or a slice of apple that's so thin it can break when gnawed on).
From around 9mths with baby led weaning you chop the food very small (to avoid choking). I would suggest 2-4 grains of rice in size. It's a small piece so that if they swallow it whole they won't choke. In traditional baby food recipes this is the stage where we mash food so it has a little texture.
At around 12mths of age in baby led weaning the food goes up to bite sizes (and this is the same in non baby led weaning kids), about fingernail sized pieces. Of course some babies will be on a different timeline depending on whether they have heaps or a few teeth.
Every baby is different and you just have to watch carefully and get to know how your baby is with food. Never leave them alone whilst eating, and I also recommend sitting them at a table with you for all meals if you can. It helps set the expectation for later in life and you can be a role model for how to eat well. Around 18mths you can offer your little one larger serves again (so a whole apple for example) so that they can learn to take smaller bites themselves, to chew, and to swallow.
It is widely recognised that babies should start solids around 6 months of age. At this time reusable baby food pouches can be really convenient to take your homemade healthy puree with you when you are out and about. Spoon attachments are available so you can feed your baby directly from the pouch from 6 months old. Without a spoon attachment babies usually start feeding themselves pouched food around 8 months old. This is when they hit their independant phase and what to do everything themselves. A pouch is a lot cleaner than a bowl and spoon in these circumstances. We do however advise that you give your baby a variety of meals, not just ones that are in a refillable pouch.
Refilling your reusable yoghurt pouches is easy! Simply turn the reusable food pouch upside down and open the wide double ziplock at the bottom of the pouch. Once the zipper is open you can spoon yoghurt into the pouch or pour it in (out of a jug or bottle).
If you are concerned about making a mess you can use a kitchen funnel so that all of the yoghurt stays away from the yoghurt pouch zipper.
Another idea that we commonly do at home when filming videos (but it would also be useful when holding a baby in one arm), anyway.. the idea is that you put the pouch upside down in a glass (with the lid on), open the ziplock and the glass acts like a second hand, holding the pouch still whilst you spoon the yoghurt in. This is what I do when I only have one hand to use for the refill!I also tend to refill my reusable yoghurt pouches in bulk. I'll buy a good quality yoghurt from Coles or Woolworths and will fill a whole 10pk of pouches in one go so they are all ready for snacks on the go.
My kids always want to eat when they are out and refilling the reusable pouches one at a time just doesn't work for us. The only time i do that actually is when I've pureed a meal that my toddler refused, put it in a reusable pouch, and given it to her again. Oh and the other time I do singles.. there are two actually. When we go for ice-cream (it is so much cleaner when in a pouch), and when I have leftover smoothie (again, it stops me getting smoothie all through my car, pram, or playroom).
Little Mashies refillable yoghurt pouches are compatible with pouch filling machines that are on the market. Our spout is universal so even though we don't think you need a filling machine, our reusable pouches will fit. All of our yoghurt and baby food pouches come with anti-choke lids as standard.
Cleaning reusable baby food pouches is easy! We have designed Little Mashies refillable yoghurt pouches without corners so there are no places for food to get stuck (we would hate your little one to get sick from old food stuck in corners)!
When you open the ziplock you can see all the way through the pouch to ensure it is clean. If you have a dishwasher you can clean the pouch using that, otherwise you can wash your reusable baby food pouches by hand and this takes around 20 seconds. Little Mashies squeeze pouches are BPA Free and are safe to wash with warm water.
If you need some meal ideas for your refillable pouch you can find home made yoghurt here, baby food recipes here, and pouch smoothie recipes here.
Now, to clean your Little Mashies food pouches by hand simply open up the ziplock at the bottom and take off the cap. Run warm water through the open ziplock with the baby pouch facing downward so the water comes out of the spout and into the sink. The shape of Little Mashies reusable pouches acts like a funnel, pushing out food and making the pouch very easy to clean.
To start washing your reusable pouch, squirt some dishwashing liquid into the refillable pouch, then use a baby bottle brush to clean the inside walls (just like a baby bottle). To clean the spout use a straw brush (like the ones we have here), and clean it in the same manner that you would clean the teat from a baby’s bottle. Give the reusable pouch a rinse and place it over a kitchen utensil in the drying rack to dry. If you don’t have time to dry it fully place it in the freezer until you are ready to use it again. Do not put wet reusable food pouches in dark cupboards or draws. They are very easy to dry if you have removed the cap, and placed something inside the zipper to keep the pouch open (we use a whisk, tongs or a spatula).
Note that if you continuously wash your pouches in the dishwasher the high temperature will make the zipper wear out more quickly. At home we wash our pouches mostly by hand because it is so quick and easy and then just use the dishwasher when we have had loads of kids over and served reusable yoghurt pouches or smoothies to them all.
Oh and while I remember if you use the code RECIPE at the checkout it will remove 100% off the price of the baby food recipe ebook so you can get some inspiration for your refillable pouches.
Some parents start introducing a sippy cup or straw cup to their babies around 6 mths of age. This can make it easier to transition from breastmilk or bottle feeding around 12 mths of age. Most paediatricians recommend babies 18 mths or older use an open sippy cup rather than a bottle, so anytime before then is fine. This is why we have a 4 in 1 sippy cup, so that you don't have to purchase seperate products as your baby moves through the stages of learning how to swallow and drink. To shop the Little Mashies silicone sippy cup, check out our baby feeding range here.
All of our baby food recipes are contained within our ebook. You can get a free download by using the coupon code RECIPE at the checkout. Simply add it to the cart, pop in the coupon code, and it will remove 100% of the price.
Sale
Gift of love
Regular price $79.90 Sale price$49.95 Save $29.95
5 x 30cm Reusable Baking Sheets
$64.75
Sale
5 x Reusable Smoothie or Snack Bags
Regular price $74. 75 Sale price$64.75 Save $10.00
5 x Snack Bags
$64.75
View all
17 products
Ginger Infused Carrot and Pear Puree
Once your baby has been introduced to carrots and pears, then here’s a great recipe for introducing just a little spice!
The ginger in this dish doesn’t make it ‘hot’ – instead, it adds a fragrant warmth that’s both subtle and delicious.
Both carrots and pear can be introduced to your baby from 6 months, or earlier if recommended by your pediatrician. Easy to digest, they pair up to make a sweet, mild tasting puree that’s suitable from baby’s very first tastes of solids.
After checking with your doctor, you might like to try introducing this recipe from around 6 months.
Our little ones have always enjoyed foods made with a touch of ginger and sources including the Bastyr Center for Natural Health suggest that it’s a great aid to digestion, making it an intriguing ingredient for use in your baby food recipes!
1 medium carrot, peeled (if not organic) and diced
1/2 pear, peeled, cored and diced (we used Comice)
1/2 inch peeled ginger*
2 fl oz (1/4 cup) of homemade chicken stock, apple juice or water
* You can ‘turn up the heat’ in this recipe depending on the way you use the ginger.
For an extremely subtle flavour, just add the whole piece of ginger to the pot, then remove it before pureeing (it should be easy to find as it doesn’t really break down during the cooking time).
For a slightly more robust effect, crush the ginger a little before adding it, but – again – take it out of the mixture before you puree it.
For a strong ginger flavour, use around 1/4 inch instead and either chop the ginger extremely finely before adding it to the pot, or crush it in a garlic press to extract the juice.
Place the diced carrot and the ginger in a small saucepan and pour in the liquid. Use chicken stock if you prefer to give the dish a more savoury twist, or apple juice for a sweeter flavour.
Bring the carrots to a boil, then immediately lower the heat.
Simmer, covered, for around 6 to 8 mins, until the carrots are tender.
Uncover the saucepan, add the diced pear and replace the lid.
Simmer for several more minutes, until the pear is soft.
Remove the ginger if necessary.
Transfer to a food processor and puree until smooth, or blend in the saucepan using a hand blender. Add a little more of the liquid if you wish to achieve a thinner consistency.
Store in the fridge for up to 48 hours, or in the freezer for up to one month.
TIP: If you like to have a ready supply of ginger on hand to use in your recipes, here’s what to do…
1. Peel a large piece of root ginger.
2. Slice, then place in a food processor with a little water.
3. Blend until smooth.
4. Transfer to a zip top bag and place in the freezer, allowing the ginger to spread out so that it freezes in a flat strip.
5. Break off pieces as you need them!
More carrot baby food recipes
More pear baby food recipes
Can babies eat spicy food?
Homemade baby puree: recipes
Homemade fruit and vegetable puree: cooking secrets
Vegetable and fruit puree often becomes the first meal of the baby after breast milk or formula, so many mothers prefer to cook it on their own. Although modern manufacturers convince us that baby food is devoid of preservatives and harmful additives, fresh vegetables and fruits are much healthier, especially when it comes to infant nutrition. Yes, and preparing baby puree at home is not so difficult.
Vegetables or fruits?
Let's try to make baby puree for our beloved baby. Despite the fact that pediatricians of the last century recommended starting complementary foods with fruits, it is better to first introduce the child to vegetables - modern doctors and nutritionists have come to this conclusion. Boiled vegetables do not irritate the gastrointestinal tract, are better absorbed, satisfy hunger, do not cause allergies and increased gas formation. In addition, vegetables do not contain fructose, which irritates the pancreas. And one more weighty argument in favor of the fact that it is better to start with vegetables - fruits are tastier, and if the baby tries them first, he will refuse vegetables, because they will seem to him more insipid.
How to prepare baby vegetable puree
What can baby puree be made from? The ideal puree for the first feeding is from cauliflower or zucchini. A little later, you can introduce pumpkin, broccoli, carrots, potatoes and green peas. Before cooking, vegetables are washed well, peeled, cut into pieces and cooked - steamed, in the oven or in the usual way, in water. The first two methods are preferable because oven roasting and steaming preserve the vitamins, minerals, nutrients, and natural color in the vegetables. And most importantly - such vegetables are much tastier. Some nutritionists recommend boiling vegetables with their skins on before peeling them, so choose your own cooking method.
If you do have to cook vegetables in a saucepan, use an enamel pot, add less water and put the vegetables in boiling water. Boil until soft, but do not overcook vegetables and fruits, otherwise they will become tasteless and lose a lot of vitamins. Ready vegetables are chopped with a blender until smooth and slightly diluted with water, vegetable broth, breast milk or mixture to a gruel state, since the child does not yet know how to digest thick food. Small pieces of vegetables in puree sometimes cause the baby to refuse to eat, so the knives in the blender should be well sharpened, and if there is no technique, you can grind the vegetables through a sieve. Salt and spices are usually not added to baby vegetable puree, and if the baby is more than 6 months old, you can put a little butter in the puree.
A few rules for making baby puree at home
- Use only fresh vegetables and fruits.
- Water for cooking vegetables must be filtered or bottled.
- If you are using frozen foods, choose only whole fruits and vegetables as they retain the most nutrients.
- All utensils for preparing baby food should be perfectly clean, so if the knife falls on the floor, it should be washed well. Also, the presence of pets in the kitchen during the cooking process is not allowed.
- Avoid vegetables and fruits high in nitrates such as spinach, lettuce, beetroot, melon, and watermelon in infants' diets.
- Store-bought vegetables are recommended to be soaked in water to remove nitrates: 1-2 hours for this, up to 24 hours for potatoes.
- Mix sour-tasting fruits and berries with sweet fruits - for example, blackcurrant goes well with banana or pear. Sour puree is unlikely to please the baby.
- Give your child only fresh food, but yesterday's puree from the refrigerator is better to eat yourself.
DIY fruit puree for children
Children are more likely to eat fruit puree, because fruits are tastier and sweeter. Fruits contain a large amount of vitamins, minerals, trace elements, fiber and antioxidants, so they are very useful for a growing body. However, fruits are strong allergens, especially berries, bananas, pomegranates and apricots, so they should be given with caution, watching the child's reaction. The most low-allergenic fruits are apples and pears, so it is better to start complementary foods with them, and then introduce all other fruits. First, the baby is fed with a one-component puree made from only one product, and then you can mix different vegetables and fruits, and not only among themselves. Very tasty combinations of fruits and vegetables, such as apples and zucchini, pumpkins and pears.
Fruit must be of good quality, undamaged, ripe and juicy, and the rules for preparing fruit should not differ from those for cooking vegetables. Naturally, fruit puree is not sweetened with honey and sugar - the later the child learns the taste of sugar, the stronger his health will be.
Aromatic pumpkin puree
Babies love to eat pumpkin because of its pleasant sweetish taste, besides pumpkin is very healthy. It contains a whole storehouse of various vitamins, including vitamin T, which normalizes the metabolism in the body. For pumpkin puree, small pumpkins are suitable, since large fruits are not as tasty and difficult to peel.
Cut the pumpkin in half, and then into small slices, one or two of which (depending on the appetite of the crumbs) cut into cubes. Boil the pumpkin in a double boiler or in water for 20 minutes, while warm, beat with a blender to a smooth puree and dilute if necessary with water or a mixture. Add oil and salt depending on the age of the child.
Gentle Broccoli Puree
One of my favorite homemade baby puree recipes is broccoli. This cabbage is extremely useful because it contains potassium, iron, calcium and other valuable substances. It has much more vitamin C than lemon, and the reason for its nutritional value is its high protein content.
Separate the broccoli into florets, wash thoroughly and steam for 20 minutes. Cabbage cooks faster in water - fresh broccoli will take 7 minutes, and frozen - about 15 minutes. Broccoli puree does not need much water, it should lightly coat the vegetables. After the cabbage becomes soft, chop it in a blender or pass through a sieve. If you're making mashed potatoes for kids older than a year old, be sure to add butter - the little ones will gobble up broccoli on both cheeks!
How to make baby pear puree at home
Pear is a very delicate, tasty and healthy fruit that rarely causes intolerance. In addition to the high vitamin value, the pear has other beneficial properties - it facilitates digestion and removes toxins from the body.
For baby food, choose green pears to reduce the risk of allergies, which are rare among babies. Peel the fruits from the peel and core with seeds, and then stew the pear in a bowl with a thick bottom in a small amount of water for 15 minutes. Let the pear cool slightly and puree it in a blender with a little of the remaining pear broth. For large kids, fruits can not be boiled, but add half a teaspoon of natural honey to the puree.
Zucchini and apple puree
Little gourmets will love this delicious puree, besides, zucchini is considered the most hypoallergenic vegetables, which, due to their high potassium content, have a beneficial effect on the heart. Apples contain iodine, iron and phosphorus, and due to the high concentration of vitamin C, apples help in the prevention of colds and viral infections.
Wash the zucchini and apples well, de-seed them, cut into pieces and cook in a saucepan for about 20 minutes, considering that the zucchini will cook 5 minutes faster. By the way, apples are steamed for 15 minutes, zucchini - 10 minutes. Next, vegetables and fruits are chopped in a blender, mixed and brought to a boil. For allergic children, this is the best side dish!
Exotic mango
Sometimes you can pamper your baby with exotic fruits - for example, make mango puree. This is a very delicate fruit with an original taste, containing 12 amino acids and improving sleep.
Choose only ripe fruits that are soft and reddish-yellow in color. Peel the mango from a thick skin and a large bone, put the pulp in a blender, add 2 tbsp. l. water and mash it, and then heat it in a saucepan for several minutes. For a baby up to a year old, it is better to give mashed potatoes with heat treatment to facilitate digestion, and older children can be fed raw mangoes.
Carrot and Potato Puree
Make normal potato puree without oil. Peel the carrots, grate them and stew them with butter and vegetable broth - about 1 tsp is required for 200 g of carrots.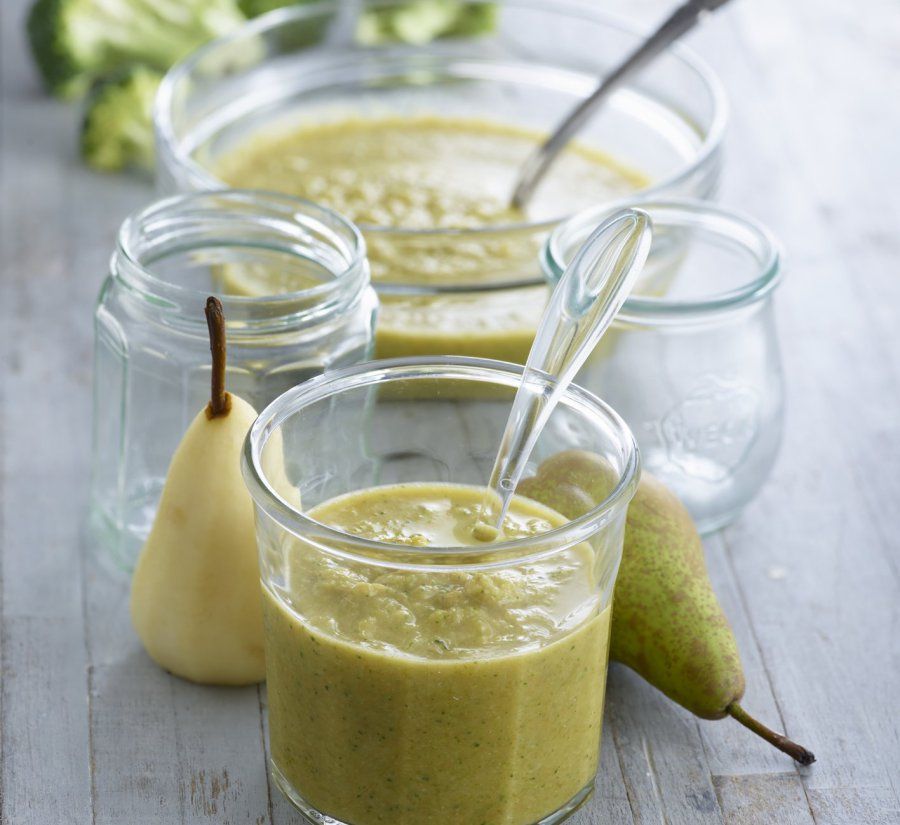 butter and 150 g of broth. When the carrot becomes very soft, wipe it through a sieve, and then put it on a plate, put mashed potatoes on the second half. Let the child choose whether to mix two types of puree for him or eat separately!
Pumpkin and apple puree
This sweet, sugar-free pumpkin-apple puree, cooked in a double boiler, is suitable for children who are already accustomed to “adult” food and are able to perceive a new unusual dish. It is better to take a pumpkin with a gray or green skin and with bright pulp - such fruits contain more vitamins and other useful substances. Apples are green because they have fewer allergens.
Cut pumpkin and apple flesh without peel or seeds into pieces, place in a steamer and cook for 20 minutes. Grind pumpkin, apples and raisins in a blender or by hand with a pusher if the child has already learned to chew. They say that this puree is very good for skin and hair, and you can check the truth of this statement yourself if you start feeding this dish to your baby.
In autumn, you can take care of preparing vegetables for baby purees. Some vegetables, such as pumpkin, carrots and apples, are stored fresh, and zucchini, broccoli, berries are frozen in small portions, because due to frequent freezing and thawing, vegetables lose vitamins and become tasteless. You can roll up fruit and vegetable puree in jars, but this snack should not be given to babies. Remember that the taste of vegetables determines whether the baby will love them in the future, so try to prepare an appetizing and tender puree - for health and good mood!
pear puree weakens or strengthens - 25 recommendations on Babyblog.ru
I found it on the girl's blog, I post it for those who are too lazy to look for a very valuable article:
How and when to introduce complementary foods to a child who is exclusively breastfed?
traditional and pedagogical complementary foods.
I strongly believe that up to 6 months (the absolute minimum age at which a child can be ready for adult food) for a breastfed-only baby who is gaining weight complementary foods are undesirable and optional . If the child gains little weight, it is worth finding the reason for this situation (maybe breastfeeding is not organized correctly), and then making a decision to introduce complementary foods earlier than the above period. Children with allergies, severely ill or premature babies need an even more balanced approach when introducing complementary foods - later or earlier. So children with allergies can delay the introduction of complementary foods for 1.5-2 months.
It is worth mentioning active nutritional interest - with the traditional feeding schedule, it is difficult to understand whether the child has a need to try and absorb other foods if the mother eats separately from the child and wants to feed him with other foods. In this case, mothers are guided by whether the baby pushes out a spoonful of complementary foods. If yes, then it is worth postponing the introduction of new products a bit. Wealth readiness is defined by the following features:
Increased feeding frequency that lasts longer than a few days and is not associated with illness or teething.
Increased interest in food for adults.
Ability to sit independently.
Extinction of the reflex ejection of solid food from the mouth by the tongue.
As well as the ability to take food with your hands and put it in your mouth
-4 months should receive this corrective additive. However, a reasonable question arises - what does this supplement correct? Does this mean that already at 3-4 months, women's milk contains less vitamins and minerals than a child needs? Does this mean that the juice contains the necessary vitamins and minerals? I will answer both of these questions - no ! Industrially produced juices (especially apple juice, which doctors like to call a source of iron) do not contain the required amount, if not at all, of vitamins. Vitamin C is added to juices as an antioxidant, and if other artificial vitamins are added, it is not known how much they will be absorbed by the child. "Juice is a very heavy product, which contains a lot of aggressive fruit acids, mineral salts and sugar. Even for adults, it is too concentrated a product that needs to be diluted. And it is better for children to drink compote at all. Moreover, the sugar contained in juices for a baby is not at all (for more details, see http://www.detki.de/index.asp?sid=2084627041&id=d160) In addition, the administration of juices suppresses the child's appetite and may reduce the mother's milk supply if the baby "likes" the juice . Fruit or vegetable puree is better because the puree contains fiber, which reduces the concentration of aggressive substances.0005
Therefore, I would recommend that you give your child juice when he already receives a large amount of "heavy" foods - cereals, vegetables, fruits, meat, fish, dairy products are introduced ... Then the juices will act in a new capacity, as stimulants of enzymatic activity .
As for fermented milk products - various kefirs, which are prescribed by doctors as a remedy for dysbacteriosis (if you suddenly forgot to prescribe "Linex" or "Hilak"), then first of all you should think about adjusting the mother's diet so that her milk contains a sufficient amount of the same the most, but "native" bifido- and lactobacilli.
I would like to note that children who breastfeed freely on demand very late begin to want to drink other liquids - especially not sweet ones, such as water or kefir.
I can offer you 2 schemes for the introduction of complementary foods, which are also quite arbitrary. For example, you can give water both after the introduction of complementary foods, and later, focusing on the needs and desires of your child. Many breastfed children do not drink water until 1 year and 3 months, or even up to one and a half to two years.
I observe mothers' impatience to feed their child with something “delicious” very often. From the age of 4 months, the baby already knows how to deftly grab objects (for example, food from your plate, spoon, fork, glass with your juice). Please do not mistake this interest for food. Please note that it is possible that the child considers himself ready for complementary foods, drags food from your plate and enjoys new taste sensations, and sometimes immediately eats the entire portion that you offer, rejoicing in such an appetite. But after a while, his stomach gets upset (in my practice, a 6-month-old girl scolded for 3 days! after a plate! Uhi. “Ukha is her favorite dish, she asks so much!”), Constipation appears or you notice that the food comes out completely undigested, in the same form in which it was eaten. It is worth limiting such an active food interest in caring for the child's digestion. Note that in the old norms of complementary foods, the amounts allowed for a given age were necessarily indicated. I suggest that you consider these norms as the maximum dose. Don't chase quantity. The consequences can be very sad due to inadequate load on the gastrointestinal tract. (Distract baby with a toy, new activity, or breastfeed after leaving the table.)
Postpone the introduction of complementary foods in the week the child was vaccinated, in extreme heat, in case of illness, several days after recovery. This also applies to the introduction of new complementary foods.
Many people start complementary foods with fruits.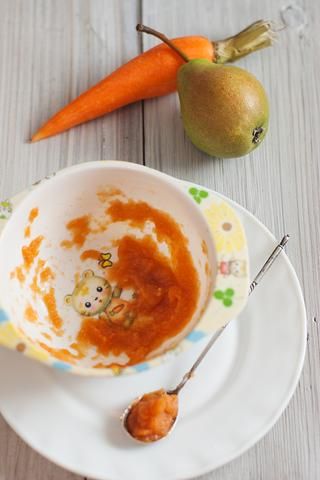 I didn't put fruit in the chart first for fear that the kids would then refuse to eat the less tasty vegetables. However, this is not the rule.
If the child is prone to constipation, start with vegetables or fruits, if diarrhea or frequent stools - with porridge, rice porridge. Seasonal
When you start weaning, give only one new food at a time and wait 3 days or a week before trying anything else.
Single ingredient fruit and vegetable purees can be added once every 1-2 weeks. Thus, it is possible to identify an allergic reaction to a certain product and exclude it from the diet.
Do not give salt and sugar . I suggest introducing salt after a year or later, when it is noticeable that the child has lost interest in such unleavened cereals. Instead of salt, you can add dried dill or other greens, but this does not always “work”. For sweetening, you can boil porridge on fruit broth or add mashed potatoes or pieces of fruit (soft ones - peach, apricot, plum or steamed dried apricots, prunes) to already cooked porridge. For even older kids, you can add jams cooked in the microwave (much less sugar is required, they gel well) or jam from berries that do not cause allergies. What concerns berries , then you can try non-red-colored (growing in your area) for about a year, squeezing the juice on the tongue and wait 2 days. Children who are not allergic can also try red-colored berries from the age of one. After a successful test with juice, you can give half a berry, a whole one every other day, then another one and bring it up to 3-5 berries per day (depending on age).
Inject one product at a time. Wait a few days to make sure the child tolerates it well (no rash, hives, shortness of breath, diarrhea). So you can track possible allergic reactions. You need to be especially careful if the family already has allergies.
· Keep a food diary for the first 4-6 months, where you record the amount of food eaten, when and the reaction to it.
· For starters, the child will need half or one teaspoon per feed of .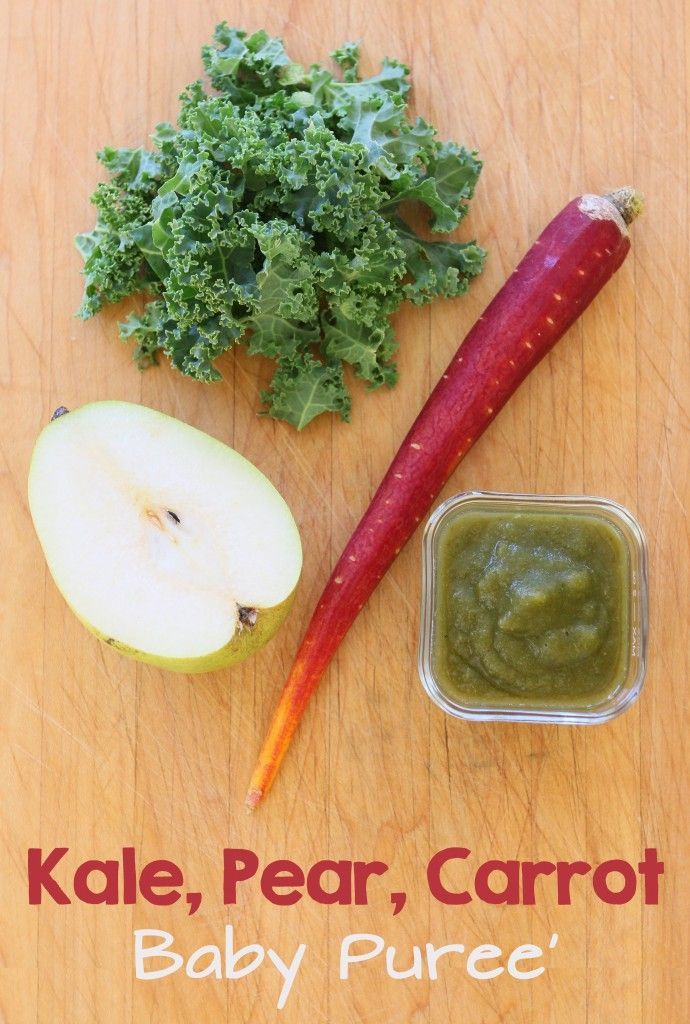 It is also convenient to use vodka shots (50 grams each), measuring half for the first doses. After 3-5 days, gradually increase the dose by one teaspoon per day for both vegetables and fruits, and porridge. One day you will see that the child does not eat more than a certain amount - (“does not eat more than half a bowl”). This amount may be less than x grams recommended in Soviet books, and may remain so for a long time - for six months or more. Dr. Sears writes that one-year-olds are able to eat a tablespoon of complementary foods at a time. It makes sense to boil a little more by a couple of teaspoons, but not force the child to eat everything.
Give a new meal in the morning - if you get diarrhea, it probably won't be at night.
No need to buy jars of baby food. You can make your own baby food with a baby grater, blender, food processor, meat grinder, or even just a fork. If you still buy baby purees, read the labels carefully and avoid products with added sweeteners, salt and fillers (starch, etc. ) (IMHO, it is almost impossible to find such a product in Russia). Ideal - to take vegetables and fruits-berries from your own summer house. However, make sure that your grandmother does not use pesticides and the like as fertilizers. harmful substances. Persuade her to switch to natural, organic fertilizers and insect repellents - infused grass, garlic, manure, spraying with tobacco, or harmless biological chemicals.
If you don’t have a “grandmother in the village”, try to find such an old grandmother among the neighbors, talk to the grannies in the market, choosing those who grow their vegetables in more environmentally friendly areas of your area, fertilize with organic matter. Ask around for a granny you'll pay for "clean vegetables." If you are satisfied, arrange a "cooperation" with her for the next year, let her plant some plants that you would like to buy from her.
If you are not sure about the purity of purchased products - peel vegetables and fruits, potatoes and meat can be soaked in water for about an hour before cooking, drain the first broth from meat or vegetables - this way you protect your child from excessive consumption of harmful substances from vegetables and other products. Use a baked apple in the child's diet - a source of peptin, which enhances the excretion of incoming harmful substances. You can bake an apple in a roaster or oven.
If this is not your option, buy canned puree from reputable brands. Be sure to pay attention to the shelf life and composition. Start with puree from one component, after a week you can add the second.
After the introduction of vegetables, you can give soup - the same vegetables with vegetable broth.
Please note that the color and consistency of the stool changes after the introduction of complementary foods. For example, a pear usually gives a very green color, mothers often get scared.
As for porridge - there are several options - just boil adult porridge to a very boiled state; grind it in a coffee grinder and then boil it; cook porridge like "Nordic" and grind it on a blender, or buy a ready-made nursery.
From ready-made porridges , prefer dairy-free porridge without sugar and salt - low-allergenic porridges from different companies. I suggest diluting porridge with water, since the share of consumption of your milk for a child is still huge, and separately expressing for porridge, when portions are not already 1-2 teaspoons, for a mother who often feeds and milk exactly as much as necessary, it can be tiring and problematic. If the baby refuses dairy-free cereals, change the type of cereal, or start pumping at the time when the child has the biggest break in breastfeeding (at night or in the morning), and gradually you will begin to produce more milk - "porridge".
Porridge in "bags" may cause allergies, as it contains additional ingredients. One mother suggested a way to cook adult porridge - sort through the cereal, rinse, dry, grind in a coffee grinder. Pour into a saucepan (such small 400g are sold) 2/3 cup of water, put on fire, dilute 2.5 tsp in the remaining water. ground cereal, stir, pour into boiling water, cook until thick (rice is cooked for about three minutes, buckwheat for twenty minutes). If you doubt the "purity" of porridge, the first broth can be drained (3-5 minutes after boiling), then dry and grind the cereal.
Start with gluten-free cereals - rice, buckwheat or corn. Contain gluten - oatmeal, semolina, millet and wheat porridge.
Decide how thick you want to feed the porridge. 1:4 is a dilution for the initial doses of complementary foods, then gradually boil / dilute a thicker porridge - 1:2.
I added vegetable oil (a source of polyunsaturated fatty acids, very good for the skin) already in vegetable puree (a week after the start) - I used cedar (local), but you can also olive and sunflower.
It can be difficult for a breast-fed baby to choose a time to feed a new product. When to give complementary foods - before or after feedings? Based on my own experience, I would recommend you - before your next feeding of . This is especially best when you are getting ahead of yourself a little in the absence of active food interest in the child, which happens quite often. My son, I suspect, and many other children on EB, could well get by with breast milk until 9. -10 months, and possibly more.
Other foods are still less valuable than breastmilk for a baby under one year old, so you're just introducing your baby to new taste experiences. I repeat - do not chase quantity.
Breastfeed after feeding.
· There is a rule not to give the same type of complementary foods several times a day, especially for beginner children (for example, buckwheat porridge 3 times a day or potatoes and cabbage 2 times a day).
· After the introduction of the first type of complementary foods (for example, a variety of vegetables), after a month and a half or two, you can switch to another type of complementary foods (for example, cereals).
3-4 months after the start of the introduction of grated products, you can start simply mashing the vegetables with a fork, or grating on a grater with large holes, switch to cereals like Nordic, they have more structured flakes. Sometimes children start to choke on larger pieces - repeat the transition after a week, or gradually add the amount of coarsely ground foods.
If it seems to you that some product has given an allergic reaction - do not give it for 5-7 days, and you will understand whether it caused a reaction or not, then you can try to give more, very carefully, with one teaspoon.
Meat is easiest to turn in a meat grinder. Even if it is the cheapest meat grinder. More expensive models of meat grinders have nozzles with smaller holes, start with these. (My son started eating meat regularly around the age of 2.) If the child has low hemoglobin, introduce the meat earlier. Lamb, turkey and lean pork are considered less allergenic, followed by beef and chicken. It is imperative to start with one type of meat, with a small amount (1/3 teaspoon), observe the child’s reaction (to allergies) for 5 days, then begin to increase the amount of puree, bringing it to 60-70g. After 5 days, you can start introducing another type of meat, etc. It is usually recommended to give meat every day, but for a child on EB this is not so important.
Start giving fish 2 months after meat, choose non-red (salmon is often allergenic), I like the opinion that you need to eat local products, and for us, river and lake white fish are just right (if the fish in your rivers is polluted , choose sea). For the first feeding, choose fish with a mild taste and smell. Drain the broth from the fish.
Yolk. Try quail - it is less allergenic, start with half. If the child does not eat it, mix it into vegetables or soup.
Some mothers make large portions of complementary foods at once and freeze small portions in the freezer (eg in ice cube trays) and then reheat in the microwave. I don’t really like this method - I prefer to eat freshly prepared foods myself. However, this is also an acceptable option.
By the way, freezing vegetables for a child in the fall is a great idea! We freeze berries (for compote), zucchini, peas, broccoli, cauliflower, cucumbers (we remove the skin from them, cut into pieces and defrost in a natural way, it goes as an additive to mashed potatoes), carrots, etc. (and Polish producers freeze even potatoes!). It turns out that if you make a large portion of frozen foods - then freeze them again - it will turn out completely tasteless. In the same way, I am not a supporter of putting leftovers in the refrigerator and then warming them up for a child, especially up to a year and a half.
· It should be noted that substitution of complementary foods for one breastfeeding often does not occur for a very long time - up to 1 year and 3 months. and even more.
In general, you can use the recommendations for complementary foods from regular books, adjusting the age, the order of introduction of products and the amount of food the child eats. EB kids can't eat that much! (there is a suspicion that children cannot eat so much at all, and the recommendations were written by doctors who survived the famine during the war). The same Dr. Sears writes that for preschoolers, the dose of vegetables is 3 teaspoons (but 3-5 times a day - but the age is different, mind you.