Cutting food for baby
How to Cut Foods for Baby-Led Weaning
You’ve probably seen photos online of babies practicing baby-led weaning, chomping down on a whole carrot or grasping raw apple slices. But, is this safe?
In the case of the raw carrot and apples, nope. But, baby-led weaning certainly can be safe, if you know how to cut and cook foods properly.
Baby-led weaning, or baby-led feeding as I prefer to call it, means that babies feed themselves finger foods as soon as they start solids. But it isn’t anything goes. Here’s how to make sure that the foods you give your baby are safe and easy-to-eat for your baby’s developmental capabilities. Because if your baby can’t pick up the food, then she can’t actually eat it!
And these guidelines work for any finger foods, even if your baby is still eating some purées (which is just fine, by the way!).
Size and Shape
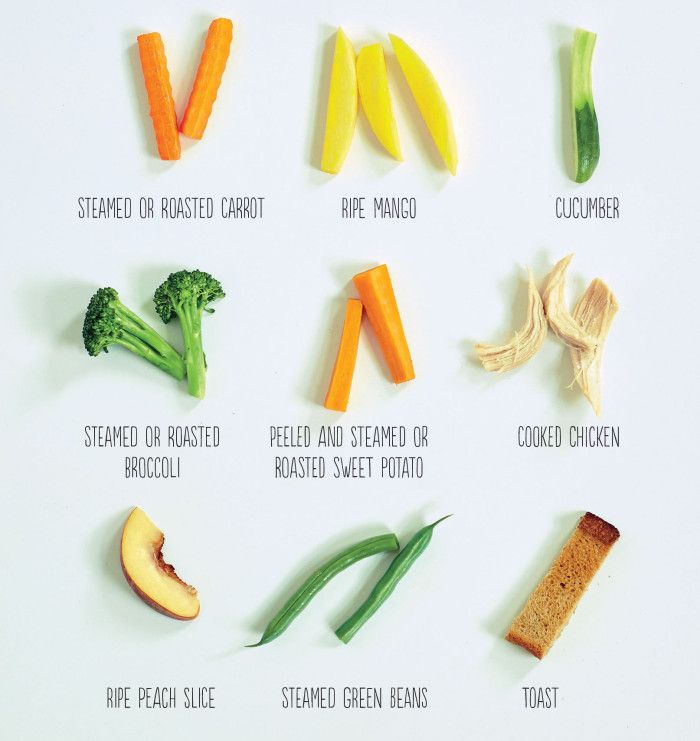
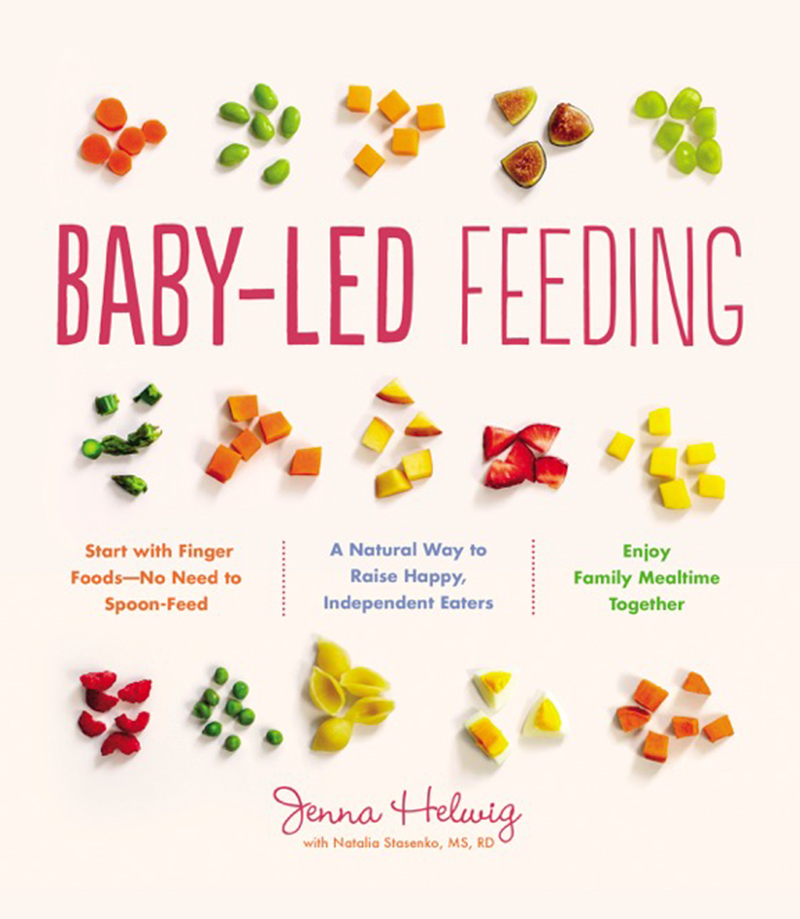
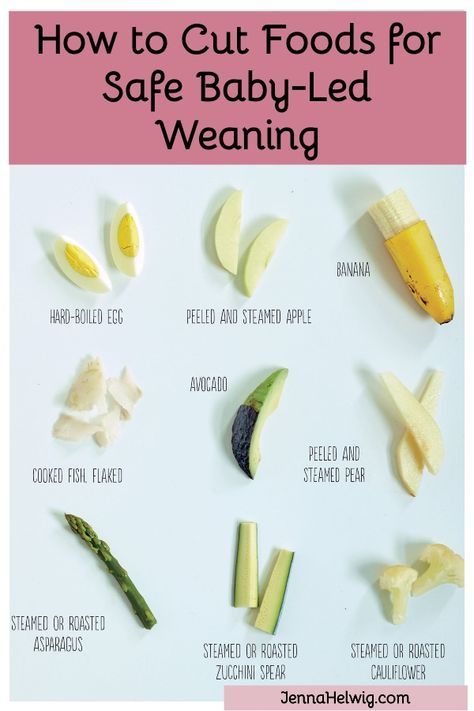
At around 6 months — Most babies just starting solids haven’t developed their pincer grasp (thumb and forefinger) yet. So to pick up foods they grasp them with their whole palm. Since you want your baby to still access the food while it’s in her palm, it’s best to cut food into long, thin sticks. Think about the length and width of your pinky finger, and check out the photo above from Baby-Led Feeding for some ideas.
Other than choking hazards and honey (which you should never give to a baby under age 1), most foods are fair game at this age, including meat, poultry, cheese (shredded), and allergens like eggs, nuts (never whole, but a little smooth nut butter stirred into a purée or spread on toast), and fish.
Toasts are another excellent vehicle for introducing new foods and flavors. Because while we don’t want foods to be too hard (see below), we also don’t want them to be too soft and gummy. Commercial bread can be difficult to pick up and can turn into a ball of mush in a baby’s mouth. But, lightly toasted bread is ideal for self-feeding. Here are 15 of my favorite toast toppings for babies.
And remember that much of eating at this early stage is about your baby exploring–touching, smelling, and yes, tasting. But don’t be alarmed if it seems like little of the food is actually making it into her tummy. Self-feeding takes a lot of eye-hand coordination, and that’s an ability your baby is still developing.
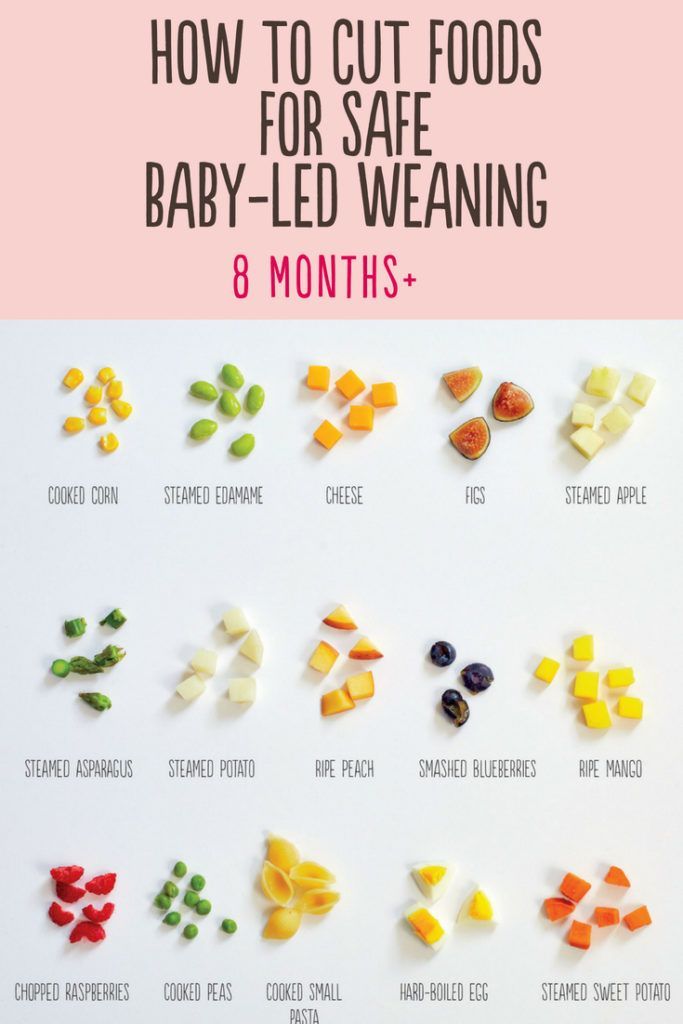
At around 8-10 months — When babies develop their pincer grasp start cutting foods into small pieces, about chickpea-sized. And for small round foods like chickpeas or blueberries, smash them lightly before serving. It’s great for babies at this age to practice their pincer grasp, but it’s also A-OK to continue serving food in sticks like you did when he was younger. The photo above is also from Baby-Led Feeding.
Some of my other favorite single-ingredient foods at this stage include chopped hard-cooked eggs and small pasta shapes.
This is also a good time to begin offering your baby a spoon along with thick soups or mashes.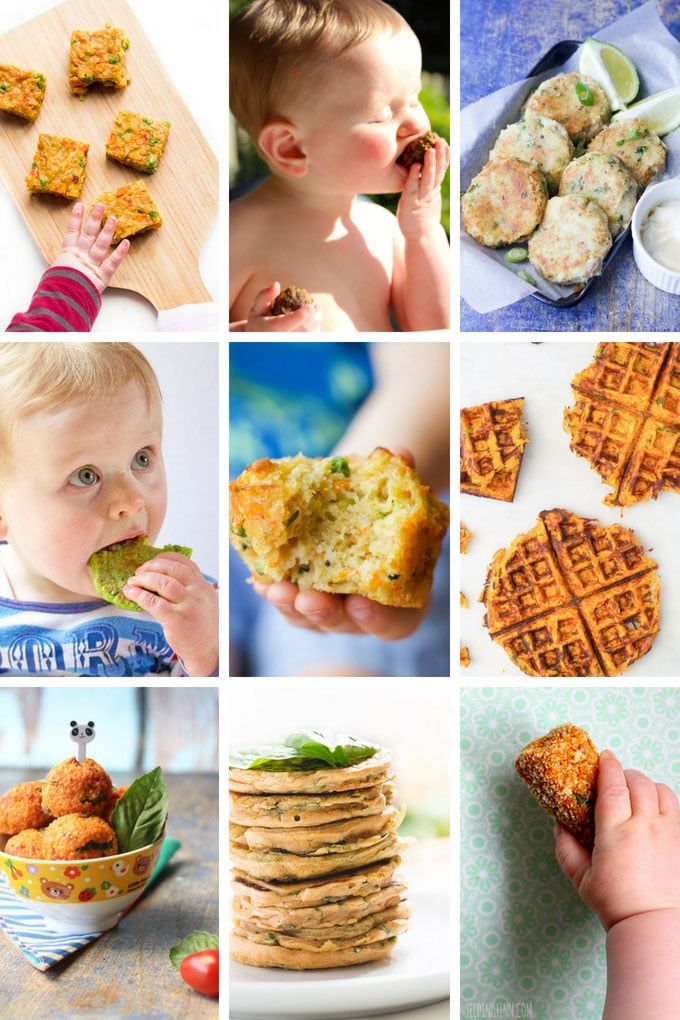 It will take practice for her to get the hang of eating with the spoon, but you can pre-load the utensil to start, and of course, practice makes perfect.
Texture
At all ages, foods should be soft enough that you can smash them with gentle pressure between your thumb and forefinger. This means no raw carrots, apples, nuts, or tough chunks of meat. For vegetables, this usually means steaming them, roasting them, or cooking them in an Instant Pot. Meat should also be very, very tender. Here’s my guide to cooking meat for babies.
Remember, to err on the side of caution with baby-led feeding and always stay with your baby while she’s eating. Then enjoy the show!
Looking for more baby-led weaning ideas and family feeding tips? Sign up for my newsletter! As a thank you, I’ll send you three of my favorite healthy smoothie recipes for the whole family. I look forward to being in touch!
Photos by Lauren Volo.
Jenna Helwig
[email protected]How to Cut Food for Babies and Toddlers
It’s possible to make it easier for kids to eat the food we offer them simply by making sure it’s cut into appropriate sizes. This can help reduce frustration, picky eating, and food waste—and the potential for choking risks. This post has all of my best tips for how to cut food for babies and toddlers!
How to Cut Food for Babies and Toddlers
Food can be slippery and hard to pick up. It can be chewy, tough, sticky, or a whole host of other textures. It can help to greatly reduce frustration at mealtimes if you consider a few basic tips when cutting food for kids. The principals of this are really straight forward, but I’m going to share a lot of visuals since I know the real life practice of this can get confusing!
How to Cut Food for Baby Led Weaning
If you’re starting solids with the Baby Led Weaning style, you’ll want to make sure that the food is soft (it should easily squish between your fingers) and be cut at least the size of your finger. This will help ensure that baby can easily pick it up, yet be unable to put the entire piece into her mouth.
TIP: Find my Ultimate Guide to Baby Led Weaning here.
Tips for Cutting Up Finger Foods for Babies
When babies are about 9 months old, they develop the “pincer grasp”, or the ability to pick up smaller pieces between two fingers. At this age, you can start to serve very soft, squishable finger foods that are about the size of a pea or two.
TIP: Find my full list of Early Finger Foods for Babies here.
Progression of how to serve raw veggies for kidsHow to Serve Raw Veggies to Toddlers
Offering raw veggies to kids can be challenging since many are hard and take a lot of work to chew. And big chunks of raw veggies like carrots can be choking hazards. To stay safe and give the kids a chance to practice with the new textures, try:
- 12/14 months: Start with shredded raw veggies like carrots, cucumbers, bell pepper, and lettuce.
 (You can soften the carrots for a few minutes in very hot water if desired.)
 - 16/18 months: Proceed to very, very thin slices (paper thin!).
- 20/24 months: Gradually offer slightly thicker pieces around, but they should still be thin and less than 1/4-inch thick.
- 2 years: Try offering small diced pieces of bell pepper and cucumber, though some kids may still do better with larger, thin pieces.
- 4+ years: Kids may be able to safely chew a big piece of raw carrot or a whole baby carrot. (This is a really tough texture, so try to avoid it for a while.)
How to Cut Sandwiches for Kids
Bread can be a challenging texture for kids, especially when there are other textures in the middle of a sandwich. Progressing through a few phases can make this easier and help avoid frustration.
- 6+ month: Serve lightly toasted finger-size or larger pieces of bread for baby to gnaw on.
- 9+ months: Dice bread into very small pieces. Moisten it with apple butter, baby food puree, or another moist spread as needed to help baby move it around in their mouths.
- 14/16 months: Stick pieces are great for this age to help kids practice taking bites.
- 20/22 months: Sandwich quarters are a great size for one year olds and are a nice size for little hands to hold.
TIP: Find my favorite Kid’s Sandwiches here.
How to Serve Apples to Babies and Toddlers
Start with applesauce and Roasted Apples for babies, then shredded apple to thin matchsticks to very thin slices through the one year old year.
How to Serve Bananas to Babies and Toddlers
Start with a BLW-style banana (leave a little of the skin on to act as a less slippery handle) and Banana Puree, then move to small pieces around 9 months, and larger pieces around 16 months. Kids may also be able to bite whole bananas after 12 months since they are so soft.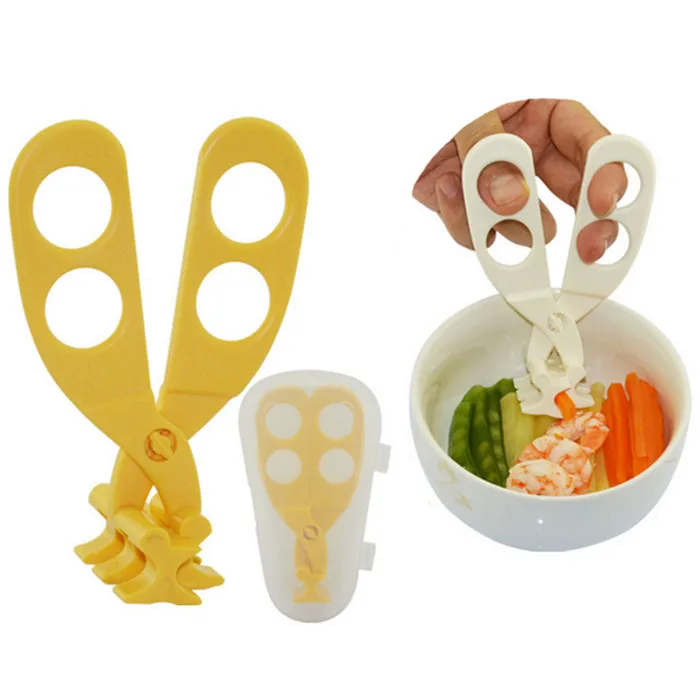
How to Serve Broccoli to Babies and Toddlers
Start with Mashed Potatoes with Broccoli or a big BLW-style piece, then move to smaller very tender pieces around 9 months, and gradually increase the size through the one year old year.
With all of these, you want the florets to be very soft so they are easy to chew.
Fork making “bite marks” in pearHow to Help Kids Learn to Take Bites
It’s common for one year olds to stuff a lot of food into their mouths at once, so we sometimes need to be very deliberate about teaching them to take bites. You can use a fork to make a “bite mark” so they can see where to try to put their teeth. You can also give them larger pieces of food that they physically wouldn’t be able to fit into their mouths so they sort of have to take a bite.
Sit with the kids during meals, if you can, and show them how you take bites. This is a normal phase and kids usually get the hang of it if we give them time to learn and practice.
Try cutting foods in new ways to keep thing interesting.
Best Tips for Cutting Food for Kids
- Start with finger-size pieces at 6+ months for baby led weaning.
- Transition to pea (or two peas) size pieces around 9 months when kids can pick up smaller pieces between their fingers.
- Offer larger pieces so they can practice taking bites around 16/18 months.
- For raw veggies and hard fruits (like apples), start with shreds, then matchsticks, and paper thin pieces.
- Save baby carrots and other very hard raw veggies until age 4+.
- Find my favorite baby First Finger Foods.
- Find my go-to toddler Finger Foods.
- Learn more about Serving Nuts to Kids.
- Brush up on the common choking hazards and how to reduce the risk.
Related Recipes
I’d love to know if you have any questions on this or feedback, so please comment below!
Finger food - Encyclopedia Baby food
Viktoria Levchuk©
Finger food is baby food prepared in the form of pieces of boiled soft food so that the child can independently take it and transfer it to the mouth, chew it or swallow it without anyone help and any problems.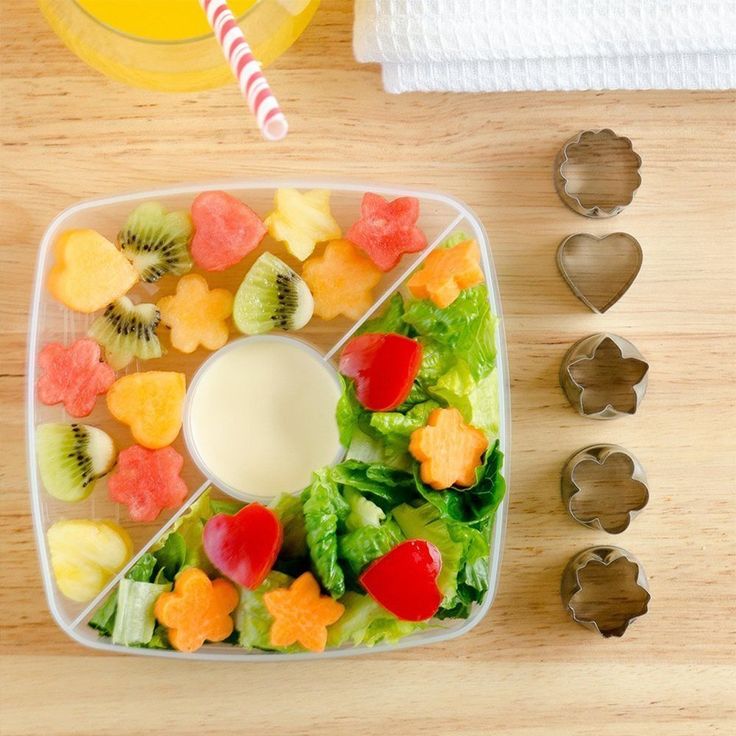
Finger food is a fun way to encourage the development of motor coordination and skills for biting, chewing and self-feeding. Food in pieces should be easy to grasp by children's fingers and long-term storage, and should not contain bones or seeds.
As soon as the child begins to take food with his fingers and put it into his mouth with reasonable hand-eye coordination, then the fun begins! Let your child experiment with soft snacks such as a banana or peach that can be “hand-mashed” to the right consistency. The more a child experiments with finger food, the faster he will masterfully feed himself.
Finger food helps keep a child's food interest. As soon as he begins to feed himself on his own, then new taste horizons open up for him. What child refuses to try to bring the product to his mouth on his own, even if he didn’t really like it before.
Contents:
Very often mothers think at what age should they give finger food to their baby.
Honestly, even for me it's a difficult question. It's just that sometime between eight and nine months, the baby began to eat small pieces of food. The change in the consistency of food by age is very well described in the WHO recommendation, so it should be guided by.
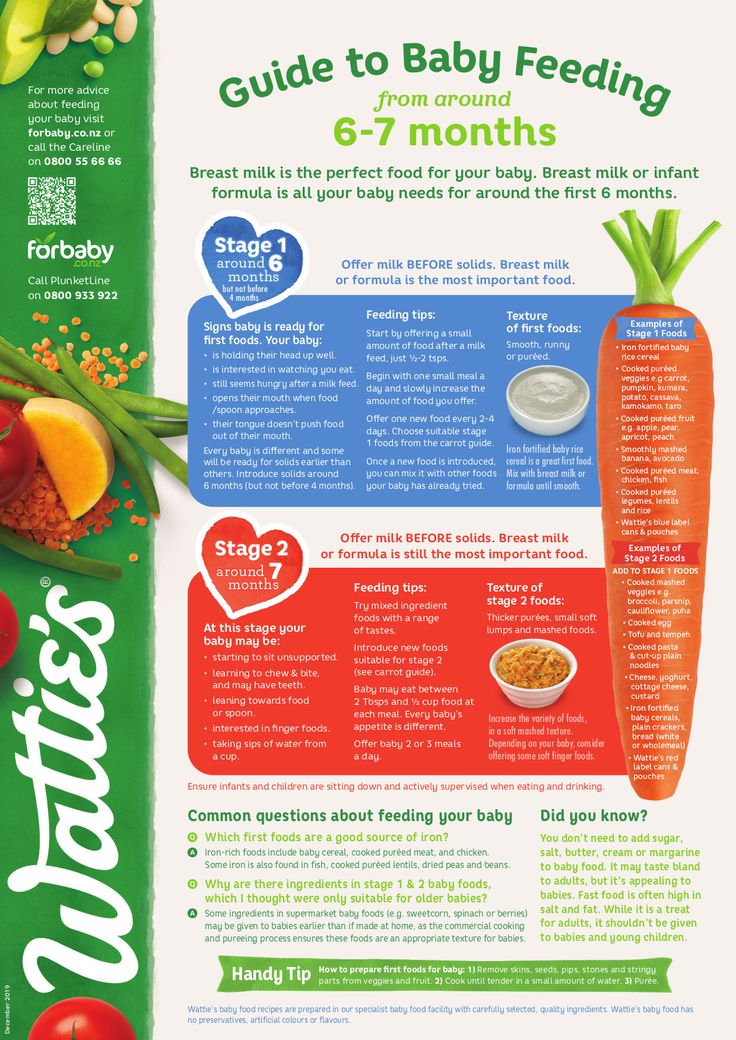
Food consistency up to a year. Click on me!!!
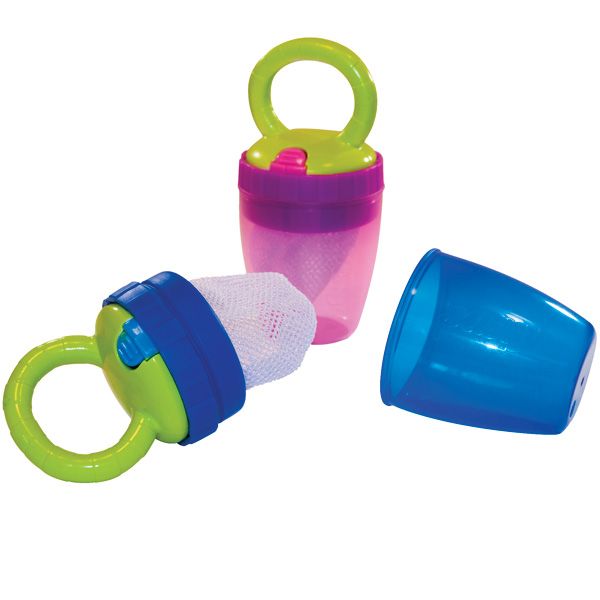
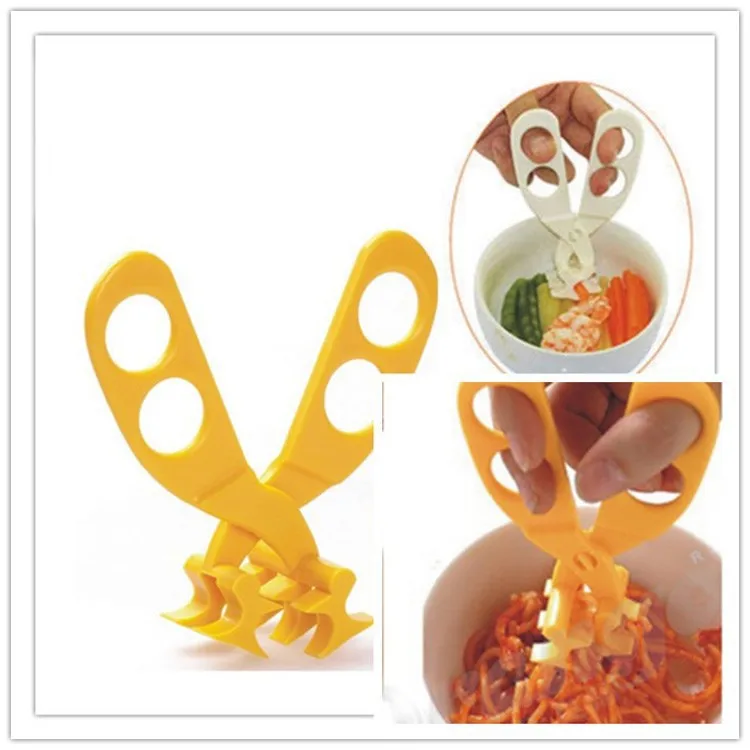
However, you should not do it blindly and try to feed the baby in pieces at a certain age, perhaps he will not be ready yet. Children are all different, some want food in pieces, almost from the beginning of complementary foods, others are not ready for lumpy food for up to a year or more. Therefore, any decision on finger food is made based on the child and his readiness. An excellent preparation for finger food is a nibbler, which will prepare the child for lumpy food.
The child has no teeth
Click on me!!! A child's gums are incredibly strong, as is the tongue, so the number of teeth is not an indicator of whether to give finger food or not. If the decision has been made to start complementary foods and the baby is doing well with mashed foods, then you can safely start giving small pieces of soft food when the baby is ready for it. At this stage, it is important to let the child try to eat food of a different consistency, more complex, in order to train the maxillofacial apparatus. Thus, the child gradually prepares for the full chewing of food with the help of the entire jaw, teeth and tongue.
Knowing if finger food is safe for a child
A good rule of thumb to help prevent choking is to avoid anything hard (e.g. raw carrots), round (e.g. whole grapes), sticky (e.g. , spoon of nut butter) or too much gummies (such as gummies). At first, the child is given pieces of food in the form of sticks, which can be easily clamped in the child's chick, later, when the child begins to control the finger grip better, you can move on to cubes. At first, finger food should be soft, boiled and melt in your mouth. As a child learns to manage with such products, it is possible to complicate the task and switch to fresh soft foods, etc.
Foods that squeeze easily between fingers are good for older children and for younger children. Around 16-18 months, many babies are ready for more complex textures. During this period, cutting food into pea-sized pieces is also a good idea - many babies tend to put large pieces of food in their mouths, so small cubes are used to avoid choking. We always adjust the sizes of products according to the age and eating experience of our own child.
Usually the first finger food is biscuits or baby biscuits, which are very soft and dissolve easily in the mouth. The baby first sucks it, procrastinates, and learns to roll pieces of food in the mouth with the help of the tongue. A little later, when the teeth appear, you can give the product a little harder, for example, a soft apple, some parents play it safe and give a baked apple without a peel. Later, as new foods, vegetables and fruits are introduced into complementary foods, they are offered in the form of finger food, such as boiled broccoli or cauliflower. In general, the child can be offered almost all products in the form of finger food, which is introduced into baby food.
Should the product be peeled or not?
We give an apple to a child without a peel. The first finger foods in the form of vegetables and fruits are given without skins. Yes, the skin of many fruits and vegetables contains valuable nutrients. It is often recommended to leave the skin on in order to take full advantage of the nutrients contained in the product. But removing the top layer from fruits and vegetables helps reduce the amount of pesticides that may be in the product. Peeling fruits and vegetables helps avoid choking hazards due to the rough texture of the skins. The peel also usually sticks to the palate in the child's mouth, thereby hindering him, and can be there for a long time, and when the child swallows, the probability of choking in the absence of an adult nearby is higher. Getting rid of the skin at the beginning of complementary foods also helps prevent disorders
digestion. And we also take into account that there are some vegetables and fruits, such as pumpkin and avocado, which need to be peeled, because their peel is really inedible. It is not worth getting rid of the product from the peel for a long time, only at first. Usually the first couple of months of complementary foods and exposure to finger food. Then the product with the peel is given to the child in the presence of an adult, after which it is advisable to check the baby's mouth to see if he swallowed everything. Forcibly open your mouth should not be, play the game "Show your tongue or where are your teeth." By the age of 1.5, the child copes well with the peel of fruits and vegetables, if it is too rough, then it easily spits it out.
Choking
The presence or absence of teeth does not mean that a child can chew.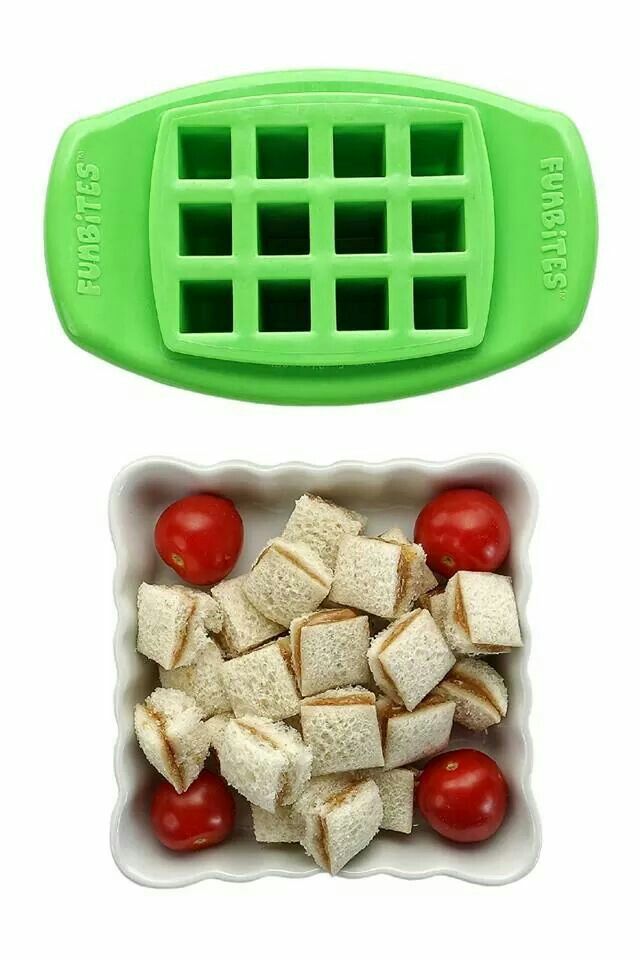 Sometimes children can bite off a piece of food, try to swallow it whole and choke, so never leave a child alone while eating. Some children can store food in their mouths like hamsters, so we always check to make sure the child has swallowed everything before leaving the kitchen. You can read the article on suffocation here.
Our finger foods
At first I gave biscuits to my first child, later I switched to a fresh apple, mostly fresh fruits, he sucked and procrastinated them more than he ate. Later, food appeared in the form of a toy, i.e. we crumbled it, crushed it, and sometimes something got into our mouths. However, since breast milk is always given at the end of complementary foods, I was not too worried about whether the baby was full or not.
With the second child, finger food was a gradual transition from the nibbler. We used it for about a month, then I ventured to give the first pieces of food. But to be honest, the child himself tried the first pieces of food, namely, he stole an apple and took a bite. The first experience of finger food is always scary, because at first the child often coughs and spits out food, he is learning, so it is important to be with the child, if something goes wrong, then the parent will be able to provide first aid. I remind you that the child is suffocating quietly, not a single sound. If he coughs, clears his throat, then everything is within the normal range, you need to help get rid of the food that interferes. Rules for helping with choking know before introducing finger food into complementary foods. It is imperative to look and study, and then give a new consistency of complementary foods.
Of course, at first, only one type of finger food is placed in front of the baby, later a plate is bought, divided into three to five sections, which is filled with finger food. The baby is already given a choice of what to eat, so you can easily determine the taste preferences in nutrition.
Finger food quick hacks
- The first finger food should be well kneaded between the gums.
- Food in pieces should be age appropriate - do not offer whole eggs to an 8 month old baby .
- If the child cannot raise his head and sit up without help, do not offer him finger food.
- The child should always sit in an upright position, not walk, especially at the first meeting, when he is offered baby food in the form of pieces, to avoid suffocation.
- NEVER leave your child unattended when serving finger food.
Examples of finger food
The first finger food is a biscuit or a baked apple. Those. food that does not need to be chewed, it melts easily in the mouth without additional help from the child. You can start with foods that have been well received by the child in a pureed form on a spoon, serving them in convenient cubes or pieces - the size of a pea for harder items, the size of a stick or wedge for softer foods.
Examples of finger food are:
Click me!!!- pieces of soft bread or crackers
- Soft cheese, Chedder or Mozarella
- Banana
- Ripe pear without peel
- Ripe soft green apple without a peel, the first time you can give boiled
- Boiled cabbage
- .
 carrots
 - Boiled potatoes
- Boiled green peas
- Boiled pumpkin
- Boiled fish
- Boiled meat in the form of meatballs
- Pasta
- Quail eggs, etc.
*All products must be familiar to the child or introduced into complementary foods.
Finger Foods to Avoid
When it comes to feeding your baby with morsels, the biggest problem is preventing choking. So we do not allow him to eat anything without the presence of parents or any adult nearby. And we exclude any food that can get stuck in the child's airways:
Click me!!!- Popcorn,
- Nuts, peanuts,
- raisins and other dried fruits,
- raw vegetables (e.g. carrots),
- grapes,
- Circles without bones, hard fruit and vegetables with a peel of
- Zhevaliy Confinctions
- popcorn, pretzels, corn chips and other snack foods
- marshmallows, etc.
Most doctors do not recommend these foods until the child can eat them safely - around 4 years (although it depends on the child, closer to 3 or 5 years).
How to transition a child to solid foods - what is BLW
The BLW theory was introduced in 2010 in the book Baby-Led Weaning by Jill Rupley and Tracey Marquette. This approach to first foods is popular in the US, while there is not much information about it on the Russian-language Internet. In this article, we will talk about what are the features of BLW, what foods can be given to a child and what should not be, what precautions should be taken into account.
Baby-Led Weaning can be translated as “baby food of choice”. You can apply this method no earlier than six months of age, it is better - from eight months. According to BLW, from this age, the child can be given regular food (which one - we will discuss below), while continuing to breastfeed or feed formula milk.
Benefits of BLW
Compared to baby purees, BLW has a number of advantages, in particular:
- You don't have to spend time preparing baby purees.
- The child can be at the family table from the very beginning and eat the same food as the parents.
- This feeding method promotes the development of visual and fine motor skills.
- The child learns to chew, swallow and decides what and how much to eat - this is how the foundations of healthy eating behavior are laid.
Read also: From 1 year and older - what and how to feed a small child
How to understand that a child can be given solid food
- There are several signs - how to understand that a child can already be given regular food:
- Child can sit up alone with little or no support.
- The child wants to chew something, even if he does not yet have teeth.
- He takes food with his thumb and forefinger instead of his palm.
- The child shows interest in food, grabs food from the table.
- It is advisable to consult a pediatrician before giving a normal meal to a child.
What foods can be given as first complementary foods
Of course, not all foods can be given as first complementary foods.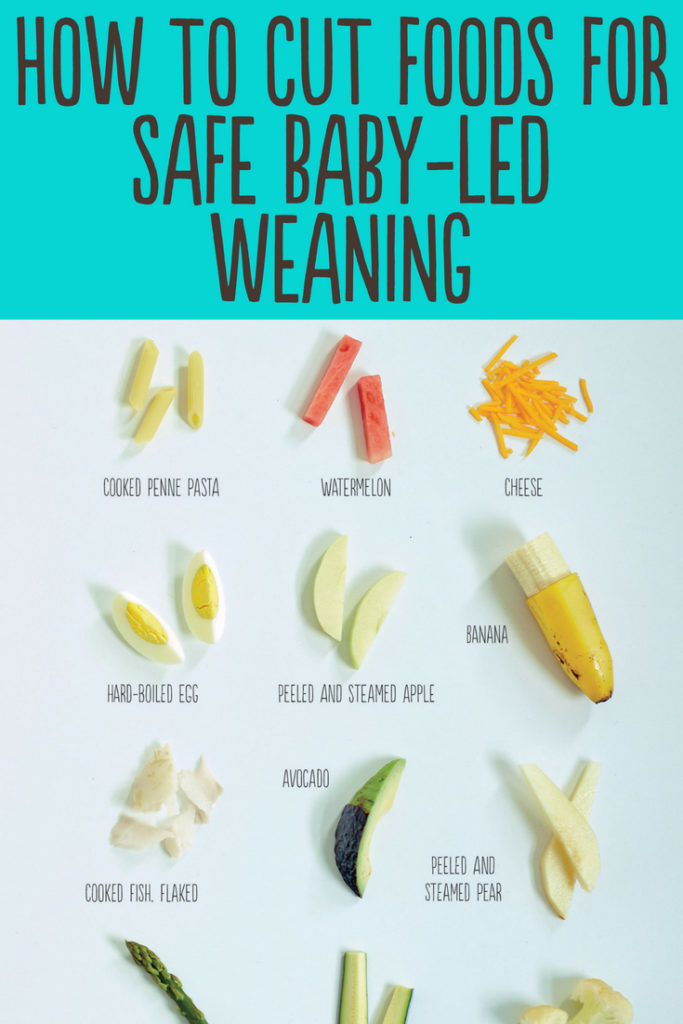 Foods that are suitable for first foods according to BLW are:
- Steamed or baked vegetables (broccoli, carrots, pumpkin pulp, zucchini).
- Ripe fruits (apple, banana, avocado, mango, watermelon, peach, pear, plum).
- Protein food (natural cheese, egg yolk, meat, liver).
- Carbohydrates (gluten-free pasta, brown rice, millet, buckwheat, gluten-free bread).
Also read: 6 Months and Older - Which Dairy Products to Feed Young Babies
BLW First Feeding Rules - Do's and Don'ts
- Make sure your child is ready for regular meals.
- Continue breastfeeding or formula feeding until at least 10–12 months of age.
- Sit the child in a comfortable position - he should sit upright without leaning back.
- Cut the food into large pieces so that it is easy for the child to take them.
- Start with soft foods: ripe fruits, steamed vegetables.
- Take your child to the family table.
- Get ready for a mess.
- Take your time and don't rush your baby - the meal will take at least 10-15 minutes.
- Pay attention to the signals - for example, if the child is throwing food, he may have already eaten.
- Do not offer complementary foods if the child is tired or in a bad mood.
- Do not coax your child to eat another bite and do not offer too much food at a time.
- If your child doesn't want to eat regular food and likes baby purees more, don't be upset. Fortunately, there are many foods available for children today that can be spoon-fed, such as baby yogurt, cottage cheese spreads, and others.
See also: Baby food - 7 dairy products for young children
Precautions - things to consider
- Avoid foods that a child can choke on, such as nuts, grapes, cherries, grape tomatoes.
- If you want to give your child foods such as cherries and grapes, cut them in half and remove the pits.
- Hard foods that a child cannot chew should be boiled (eg carrots).
- Find out in advance how to give first aid if a child chokes.
- Be careful with foods that can cause allergies: foods containing gluten, peanuts and other nuts, egg whites, seafood and some types of fish, citrus fruits.
- Do not give your baby junk food and fast food: chips, popcorn, sugary foods, candy.
- Banned honey, sugar and chocolate. Salt - in very small quantities with the permission of a doctor.
- Never leave a child with food unattended.
Based on materials from parents.com, mamanatural.com, malyshi.livejournal.com
The information and recipes contained in this Blog may not meet the user's expectations, are presented for use without regard to the individual characteristics of the user's health and are used by the user at their own discretion and under personal responsibility.
Information, documents and related graphics and recipes taken from other sources and published on this website https://milkalliance.