Feeding baby goldfish fry
Raising Goldfish Fry: Complete Care Guide
If your goldfish are happy and healthy and you have a male and a female, then eventually, you’ll end up with your goldfish spawning. After spawning, you may end up with baby goldfish, also called fry. Getting the eggs to safely make it to “fry” level does take some doing on your part, but once you have your little fry, you’ll need to know exactly how to care for them to maximize their health and growth. Let’s talk about raising goldfish fry!
Considerations Before You Have Fry
Image Credit: zoosnow, PixabayWhat are you going to do with a bunch of baby goldfish? Many people allow their goldfish to spawn and create fry without considering what they’ll do with extra goldfish. Raising goldfish is not typically a profitable venture, so money should not be a driving factor in allowing your goldfish to reproduce. Keep in mind that goldfish can get quite large and produce a heavy bioload, so even a few extra goldfish can make tank care more difficult.
Goldfish can lay thousands of eggs in a single spawning session! Most of these eggs will not be fertilized, but you can still end up with dozens or hundreds of goldfish fry from a single breeding. If you don’t have the space for additional goldfish, it may be in the best interest of the fish you already have to leave the eggs be and let nature take its course. You can also remove the eggs and dispose of them.
Caring for Eggs
View this post on Instagram
A post shared by Taichi Kawasumi (@nogoldfish.nolife)
So, your female laid eggs. Now what?
The first thing you should do is remove the eggs. Spawning mops, which can be plants or items like thread or yarn, can be added to the tank to catch the eggs. This will make it easier for you to remove the eggs from the tank and it will keep the eggs safe if you aren’t present when the spawning occurs.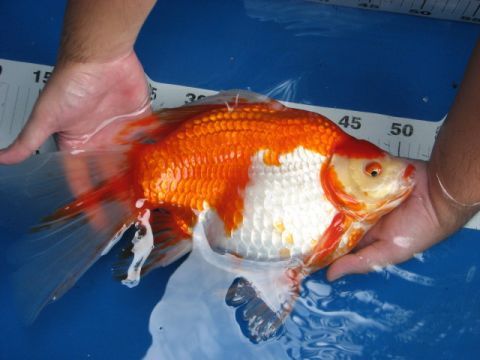
Whether you’ve set up a specific breeding tank or your goldfish are spawning in your main tank, the eggs should be separated from all other fish as soon as possible. Most fish will eat eggs, and this includes the parents. They will also eat fry, which are very tiny when they hatch. Allowing the eggs to stay in the tank with adult fish is risking losing some or all of the fry, unless you have excellent plant cover.
Housing Fry
View this post on Instagram
A post shared by Manny (@mannyggoldfish)
Within 2-7 days, you will have baby goldfish beginning to hatch from their eggs. They typically spend the first two days hanging onto surfaces, so you’re likely to see them hanging out on the tank walls. They usually won’t eat during this period because they are still absorbing the nutrients from what is left of their egg. For the best chance at survival, provide your fry their own tank. A fully cycled tank is ideal because they are sensitive to poor water quality, so if you intend to raise fry, having a fry tank set up before spawning occurs is your best bet.
Your fry tank should be kept at a temperature of 70-75˚F for the best survival of eggs and fry. It should be well aerated, but the current should be gentle. Fry are not strong enough to fight a strong current. They also should not be kept with a regular filtration system as this is likely to suck them up. Provide your fry with a sponge filter or air stone. A sponge filter is ideal because it encourages colonization of beneficial bacteria to help maintain the water quality. Fry do not need a full tank setup like adult goldfish and things like décor and plants will just make tank care more difficult.
Feeding Fry
View this post on Instagram
A post shared by @mayu4724
Goldfish fry are tiny and have tiny mouths to match. They should be fed fry food for at least the first few weeks of life. You can offer them commercial fry food, baby brine shrimp, infusoria, and some algae are all good food options for goldfish fry. After the first couple of weeks, you can begin offering slightly larger food options like daphnia and mosquito larvae. After the first two days of not feeding, you should begin offering food every 4 hours. This will support rapid growth and ensure all fry are getting enough to eat.
Many goldfish die as a result of improper feeding, diet, and/or portion sizes – which can be easily prevented by proper education.
That's why we recommend the best-selling book, The Truth About Goldfish, which covers everything about goldfish nutrition, tank maintenance, illnesses & more! Check it out on Amazon today.
Remove uneaten food after a few hours to prevent fouling the tank water. Your goldfish should be fed these nutrient-dense foods for the first six months of life to ensure rapid, proper growth. As they age, you can begin offering small pellets and other adult fish foods, but they should still have the option of live foods and other foods that stimulate growth and development.
Caring for the Fry Tank
View this post on Instagram
A post shared by Fambridge Fish 🐟 (@fambridge_fish)
You should perform 2-3 water changes of 25% every week to maintain water quality. Pre-treat new water before adding it to the tank since the fry will be extra sensitive to chlorine and contaminants. To perform water changes, you’ll need to avoid typical gravel vacuums and anything that can suck up or otherwise harm your fry. Airline tubing can be used as a siphon to remove water and is a very safe option for water changes. You can also spot clean the tank with a turkey baster or syringe, sucking up only what is needed.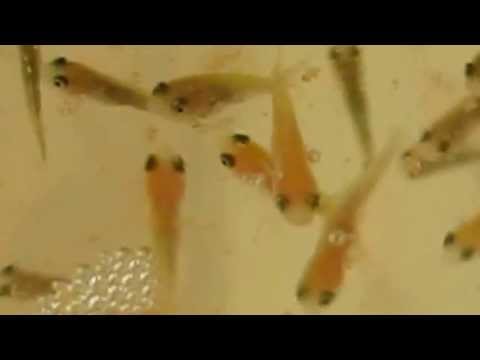
Remember, your fry are very tiny, so even with the utmost care, there’s the potential to suck one up in your tubing, turkey baster, or syringe. When it comes to caring for a fry tank, never drain your water directly into a sink, bathtub, or anything that will immediately drain. Draining water into a bowl or bucket will allow you to inspect the water for stray fry before you dump the water. Ensure you remove dead fry, unfertilized eggs, and uneaten food when you perform tank cleanings.
Moving Fry
View this post on Instagram
A post shared by 💕🦄 (@kittylovestofu)
The main thing to consider before moving your fry from their baby tank to an adult tank is their size. If your fry are still small enough for the adults to eat them, then leave them in their fry tank until they are larger. They are usually ready to be moved around 6 months of age. When they are ready to be moved, you need to acclimate them to the new tank just like you would a new fish from the pet store. Moving them directly from tank to tank can lead to shock and death.
You can float them in a bag of their own tank water until the temperature adjusts, then poke small holes in the bag to allow for water exchange before you release them into the tank. Another option is to use drip acclimation before adding them to the main tank.
Culling
Culling is a conversation that many people don’t want to have, but it is a necessary conversation when it comes to breeding your goldfish. Some fry may be deformed, injured, or otherwise unhealthy. If you have a fry that is suffering, it is cruel to let its suffering continue. Some people also find they need to cull their least desirable fry to help maintain the fish population they can manage. Remember that keeping too many fish and not being able to keep up the needs of the tank is cruel and may result in unnecessary illness and death.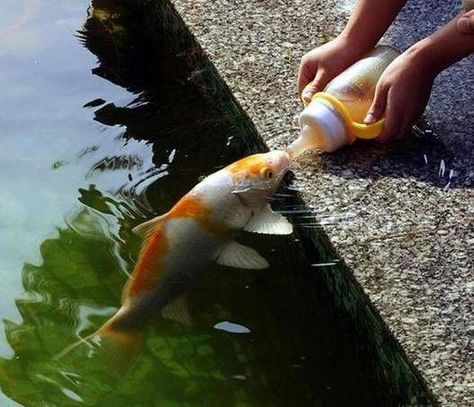
To euthanize fry, you can put them in a small container or bag of tank water and a few drops of clove oil. Clove oil is a sedative and is often used by fish veterinarians as sedation. It will help your fry gently fall asleep without feeling any suffering. Sometimes, clove oil is enough to help them pass. If you are unsure if they have passed, you can put the container into the freezer. The clove oil will ensure they stay asleep through the whole process.
In Conclusion
Raising goldfish fry isn’t for the faint of heart. It is hard work and can be full of heartbreak and difficult decisions. However, choosing to raise fry is a commitment to the health and wellness of your fish, and you are responsible for providing them with high-quality care. Carefully consider the pros and cons of raising fry before you attempt it to ensure you are ready to commit to the entire process.
Featured Image Credit: kjnk, Shutterstock
What Are The Best Foods For Goldfish Fry (babies)?
- Home
- Raising Goldfish Fry (babies)
- Feeding Goldfish Fry
Feeding goldfish fry as much food as they need as soon as they need it, but also maintaining excellent water conditions in their aquarium or pond are the most important secrets to raising fry successfully.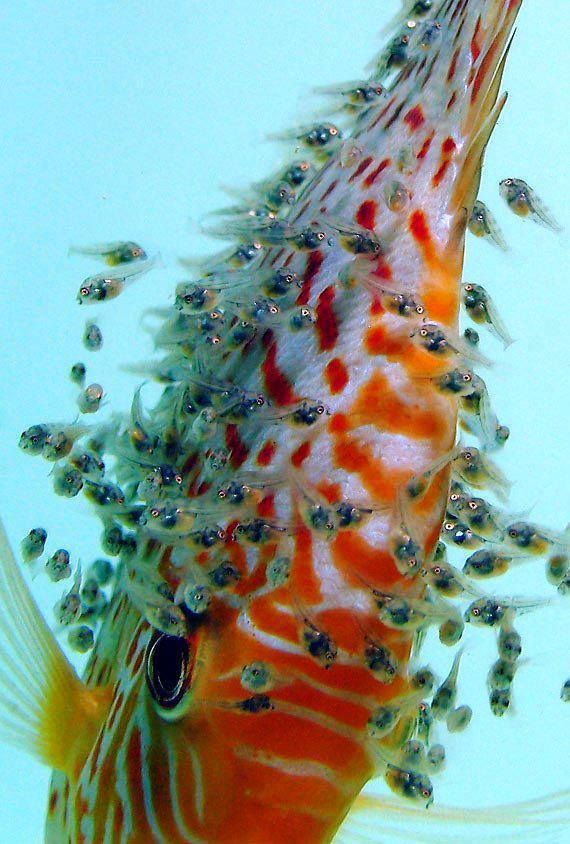
Keeping these two important issues in mind let’s look at the most common options for feeding fry during the most important first month stage.
Fry food options depend on the age of the fry.
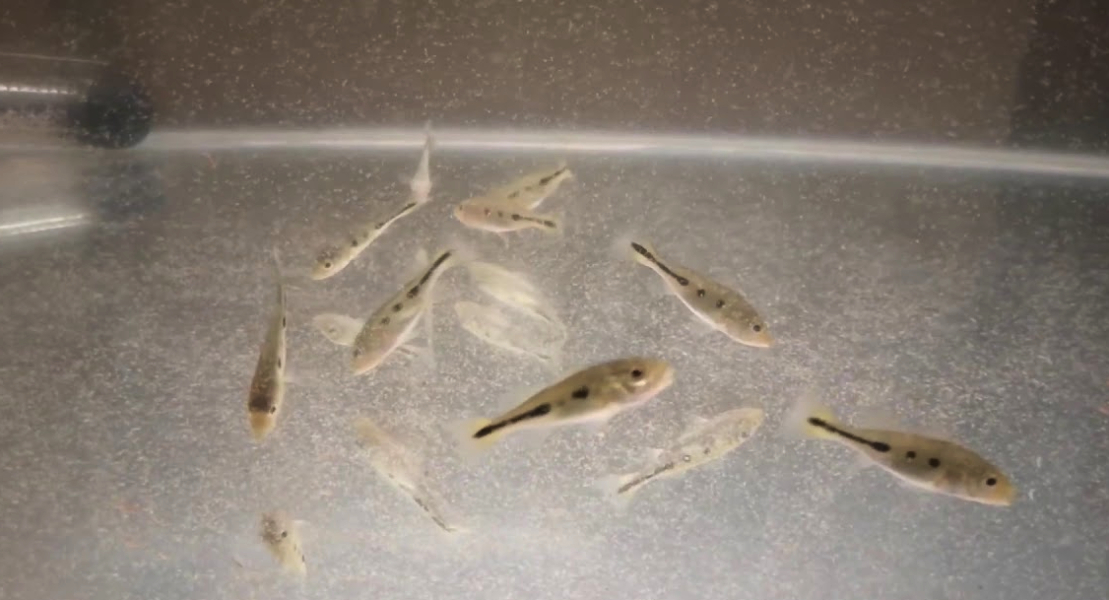
Goldfish fry with orange bellies from eating Brine Shrimp
Brine Shrimp - First Food
The advantages and disadvantages of brine shrimp have been discussed elsewhere. The biggest advantages are:
- The fry can eat them as soon as they are free swimming
- You can hatch as much or as little as you need
- They are disease free
- They are always available when you need them.
Infusoria – First Food
These are microscopic forms of animal life that live in water. They are usually cultured in 1 quart mason jars or similar.
As soon as the eggs are laid you need to start a culture. You will need many jars of the culture to satisfy an average hatching of 500 to 1000 fry.
The infusoria will satisfy the fry for about two weeks before they need something more substantial.
To learn how to grow infusoria click here.
Mosquito Wrigglers – First Week Onwards
Mosquito wrigglers
Mosquito wrigglers are the best food for feeding goldfish fry. Growth speed can be doubled if you can get enough of them, which is a problem in early spring.
The way they are fed to the fry is by placing egg rafts in the fry aquarium. As the wrigglers hatch, they are eaten by the fry.
Fry just free swimming struggle with the wrigglers even though they are tiny. I tend to feed the wrigglers to fry about a week after they become free swimming. The fry have no trouble eating them then. You also avoid the problem of uneaten wrigglers becoming too big for the fry to eat, which occurs within a few hours, and having to remove them from the fry aquarium before they become adults.
To learn how to collect mosquito rafts click here.
Daphnia – Second Week Onwards
Daphnia are a small fresh water crustacean found in still water, sometimes in such quantities that the water appears red.
Some species of daphnia can be used as a first food. The adults are put in a fine sieve and the larvae that pass through are fed to the fry.
Daphnia supply can be uncertain, one day the water is teeming with daphnia, the next day they are gone.
Daphnia can introduce enemies of fry such as hydra that kill fry under two weeks old.
Most of us don’t have access to a good supply of daphnia these days but it is well worth considering seeding your own pond in readiness for introducing your two week old fry.
If you can get the timing right, you won’t have to feed your fry for the next two weeks.
To learn how to prepare a daphnia pond click here.
To learn how to feed and maintain a daphnia culture so you have a live food source year round, click here...
Microworms - Second Week Onwards
Microworms are very small white nematodes that look like tiny worms. Sizes range from 1.5 to 3mm. They are not to be confused with white worms that are much larger.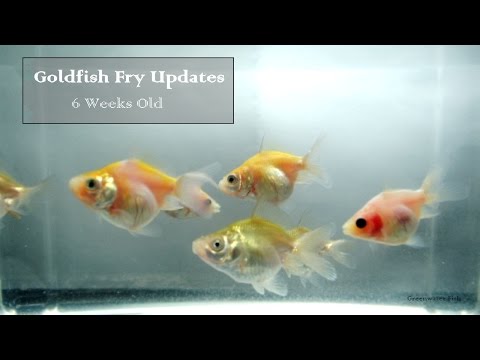
Microworms can be raised in any small container, a plastic takeaway food container with a lid is ideal. The taller ones are best as the worms will crawl out of the shallow trays.
You need to obtain a starter culture from an aquarium shop or other source. Place a thin layer of oatmeal that has been soaked in water in the bottom of a container, and on top of this sprinkle some dried yeast which the nematodes feed on.
Keep the culture covered but punch some small air holes in the lid.
Add the starter culture to the mix and within a week or two depending on temperature, a white film of micro worms will form up the sides of the container. Scrape them off the sides with a knife or small paint brush and stir them into the water so they separate.
Keep them between 68-85 degrees F.
When reproduction of the worms appears to be slowing, make up a fresh culture. The culture usually starts to smell at this stage.
As microworm cultures can smell unpleasant at times, keep them away from living areas.
Artificial Foods – First Food
I’ve put artificial foods last because that is where they belong…last.
Using artificial foods exclusively for feeding goldfish fry is seldom satisfactory because:
- The food doesn’t provide all the nutrients necessary
- They quickly pollute the water
- Fancy Goldfish varieties don't develop properly.
If you have had a failure with your brine shrimp or infusoria culture, hard boil an egg, and squeeze the yolk through muslin so it enters the water as a mist.
Most shop bought liquid fry foods are primarily egg yolk anyway so I would avoid them.
Feeding Goldfish Fry Live Food The First Month is Critical
Feeding goldfish fry isn’t hard, but for the first critical month you must be well organized and supply as much food as the fry need on a daily basis, 2-3 times daily for the first few weeks.
Tip:
If a brood is receiving the correct amount of food, the size difference between the smallest and largest fry won't be big enough for the larger fry to start chomping on their smaller siblings.
In other words you shouldn't have to separate out the larger specimens.
After the first month, you can start introducing some high quality dry food into their diet, but, dry food is never as good as live food, and the fry growth rate will drop if dry food is fed exclusively.
To raise high quality fish, live food should make up the majority of their diet for the first six months.
Top of Feeding Goldfish Fry page
Goldfish: breeding, fry, live food, feeding
Looking at goldfish, it is hard to believe that the fry of these fish are born very tiny and do not differ from the fry of medium-sized species of spawning fish. If you are breeding goldfish for the first time, do not think that the fry of these fish for the first time in their lives will be the same as their omnivorous and gluttonous parents. Goldfish fry are real fussy and trying to feed them with various dry and artificial foods, as a rule, turns out to be a failure.
When buying fish food, you don't always have to believe the "fry food" advertisements. For fish and fry, the food that they eat with pleasure is always good, even if this food is poor in proteins and vitamins, because the most important thing is that the food is well eaten, and the body will always receive the necessary amount of nutrients from the amount eaten.
Therefore, starting from the moment when the fry swim, they should receive only live food, namely “live dust” containing ciliates, rotifers, small crustaceans of daphnia and cyclops. You can get such food in natural reservoirs, and even then only in spring and summer, and it is usually not possible to buy live food for goldfish fry.
Feeding goldfish fry does not require all of the listed composition of living organisms, just two easy-to-breed at home will be enough. A good option would be ciliates shoe and daphnia. Since nematode worms are not eaten by goldfish fry, they are not considered here.
How to properly breed ciliates you can read in my publication "Ciliates breeding", and how to breed daphnia in the publication "Food for Daphnia fish". You can also buy live food for goldfish fry, or rather, order river sand containing daphnia eggs (ephippia) for daphnia cultivation at home.
There are actually several ways to feed goldfish fry. For example, where infusoria as a starter food can be replaced with boiled yolk or brine shrimp. You can read how to feed fry with boiled yolk in my publication “How to feed fry with yolk”, but in any case, growing fry must be transferred to larger live food, and daphnia will fit well here.
Unlike brine shrimp, the advantage of daphnia is that they remain constantly alive in the aquarium and even multiply, and the water, thanks to daphnia, which actively eat bacteria, is always clean and transparent, which cannot be said about brine shrimp that live in fresh water just a few hours.
It is especially important that the hatched Daphnia fry are well eaten by stunted fry, and already grown crustaceans are eaten by larger fry, and thus the distribution of food among all fry becomes uniform, and the percentage of mortality is reduced to a minimum.
Breeding of goldfish, how to feed goldfish fry, larvae, feeding rearing of goldfish fry, keeping conditions, aeration, growth, coloration of young, telescopes, formation of bulging eyes, aquarium fish
A newly hatched goldfish fry is very weak and helpless. It looks like a thread, equipped with two eyes at one end and a yolk vesicle in the middle. The yolk sac contains a supply of food for the fry in the first days of its life. At first, the fry can move only in small jerks and has the ability to attach itself to the place it touches.
Lionhead
The next day after hatching, the larvae can be seen hanging on plants and on aquarium glass or vessel walls. After two or three days, they begin to swim freely, the supply of yolk ends and they need other food. The first natural food of fry is the so-called "live dust" (culture of ciliates). It must be given in small portions. It is useful to give the fry the smallest algae in the form of a small amount of blooming water.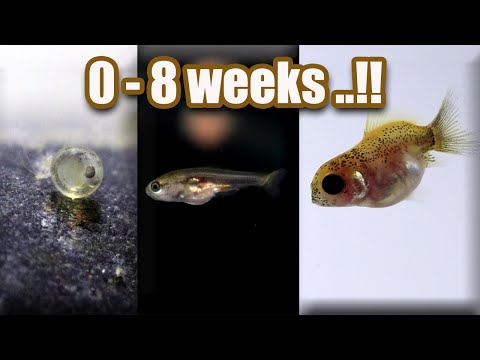
Related article Interesting facts about goldfish
After one and a half to two weeks, the fry can be fed with small daphnia and cyclops (instead of ciliates or rotifers), sorted through a gas sieve. Then - adult cyclops and daphnia. At the age of one month, juvenile goldfish are already able to take small bloodworms.
If live crustaceans are difficult to obtain, they can be replaced with boiled egg yolk, mashed with water, passed through a fine sieve, finely chopped bloodworm, then fine bloodworm or specialized food for fry, which are sold in pet stores.
Ranchu fry
Feeding oatmeal (for young up to 2.5 months old) passed through a fine sieve gives the fish a short, round body, which is desirable for veiltails and telescopes.
Feeding should be plentiful, fry eat more than their weight per day. It is better to feed little by little, but several times a day, and do not leave food for the night.
Sufficient oxygenation of the water or a sufficiently spacious room is very important to ensure good conditions for the development of young animals.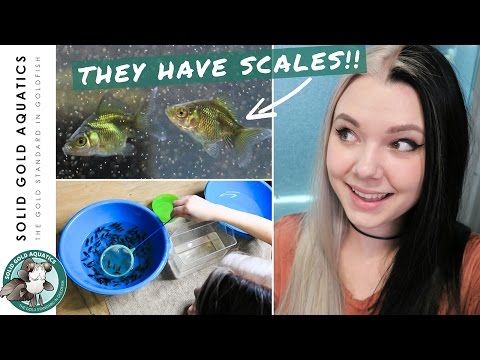
The fry should be kept in the same aquarium where they hatched for up to two weeks. After that, they should be seeded, placing no more than 250 fry in a 40-80 liter aquarium (do not forget about aeration and daily water changes). In such an aquarium, fry can be kept up to two months of age, sorted by size. With the growth of young animals, the number of them in the aquarium should also decrease. At an early age, fry are not recommended to be caught with a net, it is better to pour them over with a saucer. In the saucer, the fry are clearly visible and can be counted.
Lionhead
The fry need daylight for their bright colors, but they need to be protected from direct sunlight by creating shaded areas in the aquarium with plants or corymbs. If the sun illuminates the aquarium for no more than two hours a day, no shading is needed. If there is no daylight, bright electric is needed.
Juveniles of scaly varieties initially have the silvery-gray color of their progenitor, crucian carp. This color changes to gold, white and pure black at the age of 3-5 months. Some part always remains unpainted until old age. Scaly ones necessarily change their color, the last ones are white. The color change occurs in the period from a month - in young fish, up to six months - in old ones. Staining, with rare exceptions, goes from darker to lighter colors: from black to red, from red to white. Picturesque variegated red and black colors are fickle and turn into red.
Related article Enemies and diseases of goldfish
Scaleless fry do not go through a period of silvery coloration and already at the age of one and a half months they begin to turn into their final color. At 2.5 months you can already get an idea of the final color, although the best chintz colors are fully developed within 2-3 years.
The eyes of telescopes in the first weeks of life seem normal, not bulging. At the age of two to six months (sometimes even up to two years), it is impossible to say whether the fish will be telescopes.