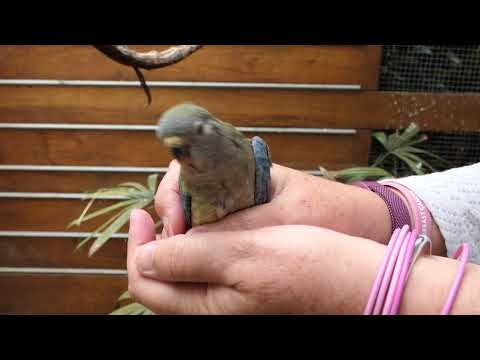
Hand feeding baby zebra finches
Handfeeding
Introductory notes
Hand feeding baby finches, especially birds which just recently hatched, is a very challenging, time consuming, and tedious process. Unfortunately it does not always end in success even when the best efforts are made to save the bird's life. Fostering abandoned babies to another pair of finches is often the more successful route, but unfortunately not all people who encounter an abandoned baby finch will have a foster pair on hand that is able to take care of the baby. Therefore, if one is determined to attempt saving the life of a baby finch and has no other option for raising it, hand raising may be attempted. Some people also chose to hand raise young finches in order to yield a more hand tame pet. Although this can be done, I highly recommend allowing the biological parents to raise the young until their juvenile feathers begin to appear. At this point hand raising the birds is often met with greater success, because they are older and more developed.
Please note that hand raised finches may have special needs once they are weaned. For example, some hand raised finches may have behavioral problems as adults (e.g. they may act overly aggressive towards other finches) since they were not properly socialized as chicks. In this case, the hand raised finch must be housed separately from other finches and given the opportunity to interact with people instead of other birds.
Supply List
Items you will need in order to hand raise finches:
- Kaytee EXACT Hand Feeding Formula (available at most pet stores).
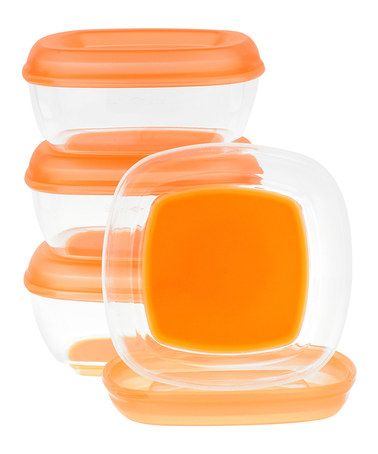
- Infant apple sauce (available in the baby food isle of most grocery stores).
- Unflavored pedialyte (available in the baby pharmacy area of most grocery stores).
- 1cc needleless syringes (look for syringes that do NOT have a luer lock or catheter tip; TB syringes sold "without a needle" should work. This may be obtained from your veterinarian or found at some online retailers).
- A "crop feeding extension" for the 1cc needleless syringe (made from a "BD vacutainer butterfly blood collection set WITHOUT safety-lok" which may be available at your vet's or at an online retailer--just cut the tubing to a length of 2.2cm).
- Flat toothpicks.
- Paper towels & wash cloths.
- A thermometer to check the temperature of the formula you prepare.
- A small, outdoor thermometer (a thermometer designed for use in reptile enclosures will work--available at most pet stores) to check ambient temperature in the incubator/brooder.
- An incubator/brooder (which can be crafted at home--see below) or purchased. If you purchase an incubator, get one that has slow air flow and solid state thermostat controls.
Proper Hygiene
Important: Because very young finches do not have the more robust immune system that adult finches do, they are more susceptible to certain diseases.16 Proper hygiene, therefore, is a must to prevent hand raised chicks from becoming sick.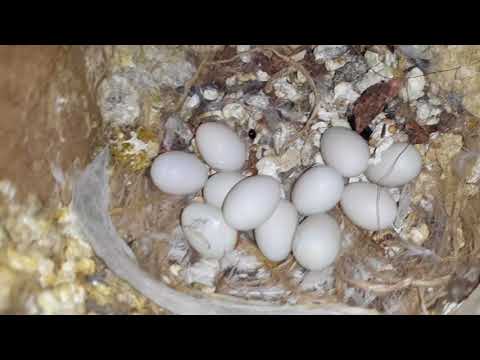
- Wash hands before & after feedings (if feeding more than one bird, wash hands between birds).
- Sterilize all utensils in weak bleach solution (1 part bleach: 20 parts water; let the utensils soak for 15 minutes in this solution) and rinse well under cool water before EACH and every use. DO NOT boil the utensils as this will cause them to melt and distort.
- Only use one feeding utensil per bird (in other words, each bird should have its own labeled syringe).
- If feeding more than one bird, do not double dip the feeding utensil in the formula.
- Store the Kaytee hand feeding formula (in its dry powder form) in the freezer.
- Mix fresh feeding formula before each feeding; do not store & reheat old formula.
- Do not let adult birds come into contact with the neonates.
Preparing the Brooder
First, you must acquire an incubator if you are trying to save a fertile egg that has not yet hatched.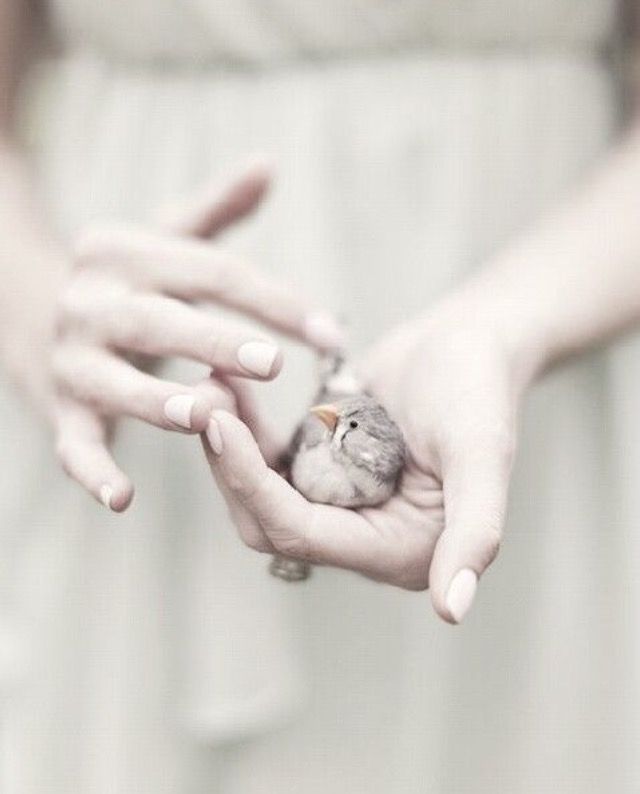 If the egg has already hatched, either a commercial incubator or a "home-made brooder" may be used to keep the chick warm. To construct your own brooder, you will need a plastic container with a wide, ventilated top (e.g. a critter keeper), a heating pad, heat-proof tape, washcloths and paper towels, and a small outdoor (or reptile) thermometer.
Tape the heating pad around the bottom of the plastic container and up around an inch or so of the sides of the container with the heat-resistant tape. Plug the heating pad in and place the it on medium. Place a washcloth on the inside bottom of the plastic container, and place a few paper towels over that; this is where the chicks will eventually be placed. Put the thermometer inside of the container on top of the paper towels. After about a half hour, check the temperature inside of the container. Adjust the temperature of the brooder as needed (by adding or removing wash cloths underneath the paper towels, or by changing the setting of the heating pad) according to the following table:
| Stage of chick's development | Temperature of brooder |
| Newly hatched | 92-94°F (33.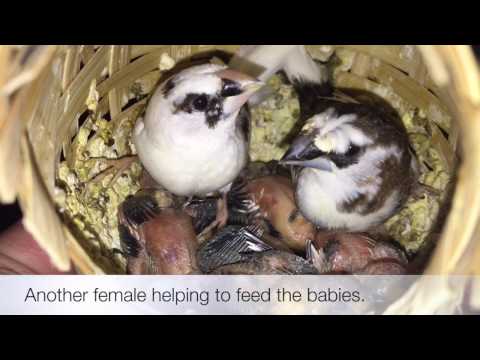 3-34.4 °C) 3-34.4 °C) |
| Older, but still unfeathered | 90-92°F (32.2-33.3 °C) |
| Pin feathers present | 85-90°F (29.4-32.2 °C) |
| Fully feathered | 75-80°F (23.9-26.7 °C) |
| Weaned | Room temperature |
Always allow a half hour to pass before checking the adjusted temperature. Once the temperature is correct, the chicks may be added to the brooder and replace the ventilated lid. Keep a close eye on the birds to see if they are too warm or too cold. Chicks which pant or hold their wings away from their bodies are too warm, whereas chicks which shiver or huddle are too cold. Keep the brooder in a dimly lit area.
The humidity in the brooder needs to be maintained above 50%. This may be accomplished by acquiring an unused spray bottle (found at a local grocery store), sterilizing it, filling it with distilled, lukewarm water, and spraying a little water in the incubator/brooder as needed. Only spray fresh water into the brooder, and never spray the chicks directly. Change all of the bedding in the incubator several times daily to keep the inside clean.
Don't forget that as the chicks age, the temperature inside of the brooder should be lowered slowly as described above. When the chicks are fully feathered, the temperature can be lowered (gradually, of course) to room temperature.
Preparing the Formula
First, heat water to 120°F using a stove, hot plate, or coffee maker (if your water has bacteria in it, boil the water for 15 minutes first). Mix the correct proportions of formula and hot water in a sterilized container. Follow the label on the KAYTEE Exact feeding formula (reproduced below) to mix the formula to the correct consistency (which varies as the chick ages). Do NOT heat or reheat mixed formula in the microwave, as doing so may lead to "hot spots" that could burn the chick's crop. Once the formula and the hot water have been mixed thoroughly, allow the mixture to cool to 101-104°F (38.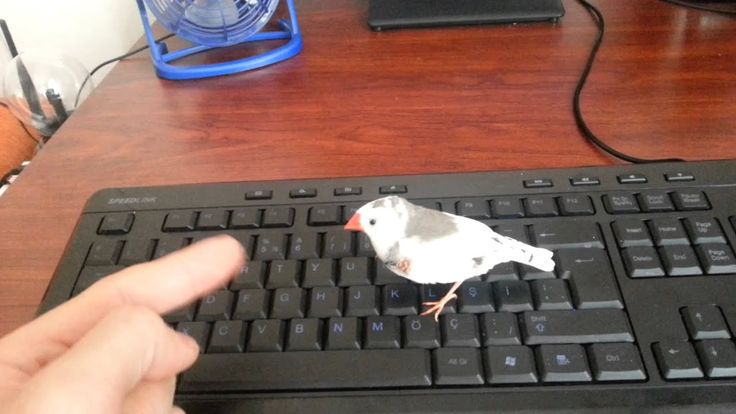 3-40°C) before feeding the chicks. Feeding formula at this temperature allows the chicks to digest it properly.
| Age in Days | Amount Water | Amount Formula | Consistency |
| 1 | 6 parts Pedialyte | 1 part | Broth (very watery) |
| 2 | 6 parts (water) | 1 part | Broth |
| 3-5 | 3 parts | 1 part | Creamy soup |
| 5-weaning | 2 parts | 1 part | Pudding |
Only make small quantities of formula before each feeding. Discard left over formula; DO NOT reuse mixed formula! Instead, mix fresh formula at each feeding.
Feeding the Chick(s)
Before you being feeding, several general rules should be followed:
- ALWAYS make fresh formula for each feeding; never refrigerate mixed formula.
- Only use sterile feeding utensils. Clean utensils after each feeding.

- Encourage the bird to beg for its food; never try to force feed it by forcing its beak open. Only feed during begging behavior (as the glottis and choana slit are closed at this time which allows food to be delivered safely). If you try to feed the chick while it is not begging, it may asphyxiate (choke) on the food. Dispense the food in rhythm with the chick's head-bobbing motion.
- Pause every couple of seconds after providing the bird with food to allow it to breathe.
- Do not get any formula in/on the bird's nostrils. Clean up any spilled food, especially food that may have gotten on the chick.
- Do not over or under feed the baby. When it is full, the chick may stop begging or its crop (the sack which holds the food located near the base of its neck) will appear full, which ever comes first. Feed it again each time the crop becomes nearly empty. This should occur at regular intervals. Keep track of how long it takes for the crop to empty between each feeding, as any sign of slowing is bad and needs to be addressed immediately (see below).

- Allow the crop to completely empty at least once each day (usually before first morning feeding).
- Be sure to replace the paper towel which the bird is sitting on as needed (usually after each feeding).
- Be gentle and use good judgment.
Age: 1 Day
When the chick first hatches, place a little pedialyte around its beak. Within forty-five minutes after it has hatched, the first real feeding may be given. This is done by mixing a very small amount of formula (which will be mostly pedialyte) and given to the bird by means of a flat toothpick. Scoop the formula up little by little with the toothpick and place it within the birds beak and not down its throat (do not force this, if the chick refuses to take it, try gently tapping its beak or stroking its back to encourage begging). Continue feeding it regularly whenever the crop is emptied (usually every hour). Also, four night feedings should be given to strengthen the baby.
Age: 2 Days
The same procedure for a 1 day old finch should be used here, however, pedialyte should be exchanged for water. Also, reduce night feedings to 3 times per night.
Age: 3-5 Days
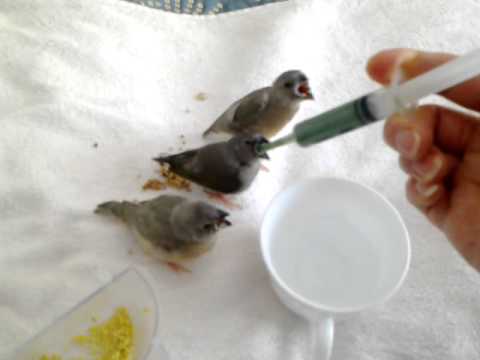
More formula and less water should be provided now (see chart above), and the 1 cc syringe with handy crop tube extension should be used for feedings. Crop feeding is a method whereby the small, flexible tubing attached to the syringe is inserted directly into the chick's crop by way of the mouth as the chick begs. Do NOT try to insert the tube if the chick is not engaged in begging behavior. Angle the tube towards the RIGHT side of the chick's throat and gently guide the tube down the chick's esophagus and into its crop. You will be able to see the tube in the crop; do not push it too far down. Dispense formula quickly but carefully until the crop is nearly full, then remove the tube gently. Do NOT continue dispensing food as you retract the tube.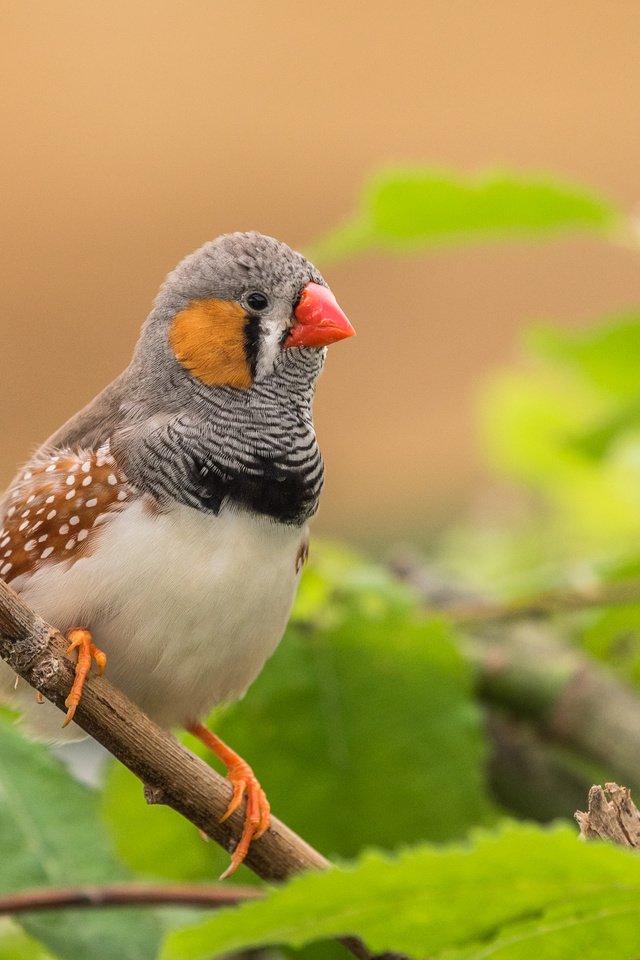 This method allows the chick to receive its entire meal more quickly than the previously used method (placing a small amount of formula in the mouth, waiting for the chick to swallow it, and then repeating until the chick is full). If the extension could not be found or if you do not feel comfortable crop feeding a baby finch, a pipette may replace the syringe for this age but do NOT attempt to crop feed using a pipette. Instead, just continue delivering small volumes of food into the chicks mouth and give it time to swallow and breathe between servings. Make sure the formula's not clogging the utensil and that no air bubbles get trapped within the formula once it is sucked into the syringe/pipette. Feedings should still be administered as the crop empties (about every hour and a half), and night feedings for day 5 should be reduced to 2 for that night.
Age: 5 Days to Weaning
The consistency of the formula now is comparable to pudding, but should not be so thick that it clogs the utensil. Feed when the crop becomes empty (every 2-3 hours), and reduce night feedings for days 6 & 7 to once per night. On day 8, cease night feedings. Soon the feathers will be emerging; when the bird is fully feathered, the temperature in the brooder may be gradually reduced to room temperature, as explained earlier. By 18-21 days, the birds will normally be at fledging age. During this time, they should be offered spray millet, soaked seed, and an egg-mix to nibble on. Wean them onto these foods as they begin to refuse taking any more formula, and place them into a cage of their own with low perches, fresh water, fresh foods, and a nest with nesting material until they fledge. If they are late fledging, place a mature bird in the cage with them to act as a mentor. Shortly after they get the hang of things, the cage may be rearranged to look like a normal finch cage, and the normal diet (the one you provide to your mature finches) may be given to the young ones.
Problems to Prevent & Watch For
First, when feeding the baby, do not overfeed it.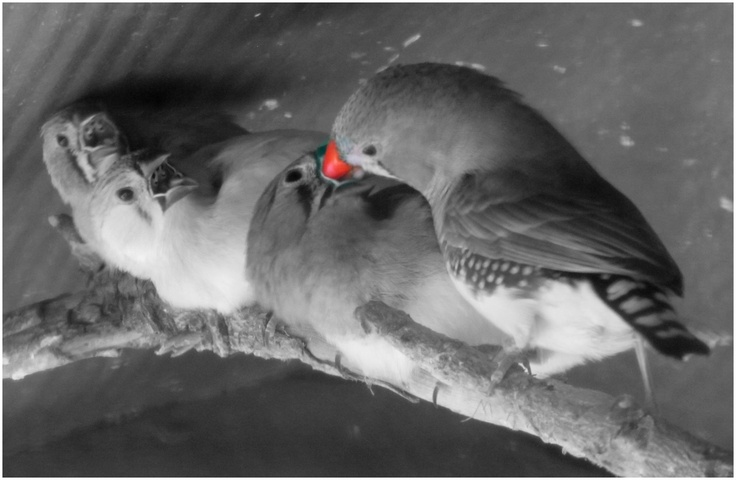 Stretching its crop too far can lead to atony of the crop and inhibit the bird's ability to digest food properly.
Second, pay attention to the chick's skin. Normal skin looks pink to yellow in color and appears supple (minimal flaking is normal). If you notice excessive flaking and/or dry, deep-red colored skin, this is a sign that the chick is dehydrated. If the chick becomes dehydrated, give it a small volume of pedialyte immediately and mix future meals with a greater proportion of water to dilute the meals slightly. Also check the humidity in the brooder and make sure it is above 50%.
Third, pay attention to the color of the chick's feces. They should be yellow-brown in color. If the chick begins producing green feces, this is a sign that the crop has stopped emptying properly. Crop stasis (crop "slow down," or decreased crop emptying) may be a sign of infection. Other common causes of crop stasis are over feeding, feeding cold formula, and improper brooder temperatures.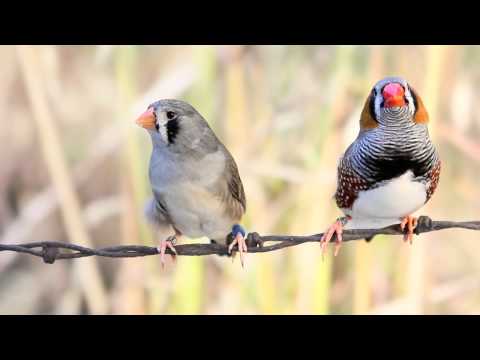 To help the crop empty, add a little warm water to the crop and gently massage its contents. Never massage a crop that is more than half full. Check the temperature of the brooder and the formula you have been feeding. Make any necessary adjustments and pay close attention to the time intervals between feedings. If the crop is still emptying too slowly, suspect infection and act immediately: mix equal parts of hand feeding formula and infant applesauce. Provide this mixture for all feedings during the next 24 hours and then slowly return to the normal concentration of formula over another 24 hour period. The infant applesauce lowers the pH of the crop and aims to rid it of any infection. If the chicks' condition does not improve, or if it deteriorates, call your avian vet. You may need to administer an antibiotic or antifungal medication to treat the chick.
One other problem you may encounter while hand feeding a baby finch is air in the crop. Sometimes feeding a finch too slowly may cause the bird to gulp air. You can relieve the air by "burping" the bird: while the chick is begging, gently apply pressure to the crop to push the air out. If this does not work or if you are not comfortable "burping" the chick, bring it to your avian vet. Air in the crop can also indicate infection (fermentation in the crop can cause air to build up inside of it) and may require treatment with an antibiotic or antifungal drug from an avian vet, if the applesauce-Kaytee treatment described above does not suffice.
Lessons in Handfeeding Finches | AFA Watchbird
Vol. 26 No. 5 (1999), Articles
Vol. 26 No. 5 (1999)
Articles
- Myra Markley
Myra Markley
For years I had been told that it was not possible to tame a finch. As wild birds, finches will always be flighty and afraid around humans. Finally, a few years ago I started hearing stories of people with tame, friendly finches, and I decided to try and tame one of my young Zebra Finches
I've never tried taming an adult bird.
I figured it would be best to start with a young finch. I preferred one that had not weaned yet so I could take over the role as "mother" and acclimate the bird to humans. I contacted a few people on the internet who had hand raised finches and learned how they accomplished raising these tiny birds.
I attempted to hand feed a couple of three-day-old Zebra chicks because they had been tossed from the nest. This failed miserably. Both babies died after a few days and I felt just terrible. I really am not sure why they died. It could have been a number of things; aspiration, bacterial infection, or the formula was not the right temperature.
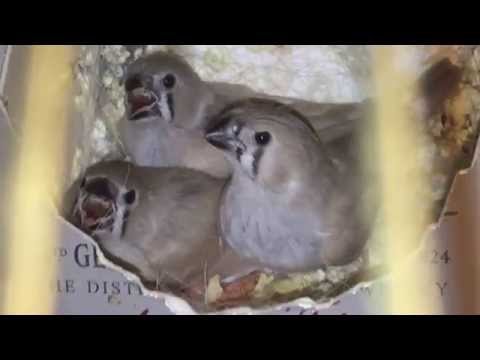
My next attempt, which was nearly six months later, was with a 10-day-old Zebra chick. Her eyes had just opened when I started feeding her, and she ate very well for me right from the start.
Brooder
I built my own brooder from stuff around the house. It would be nice to have a real brooder but they are very expensive, and I am only an enthusiastic hobbyist.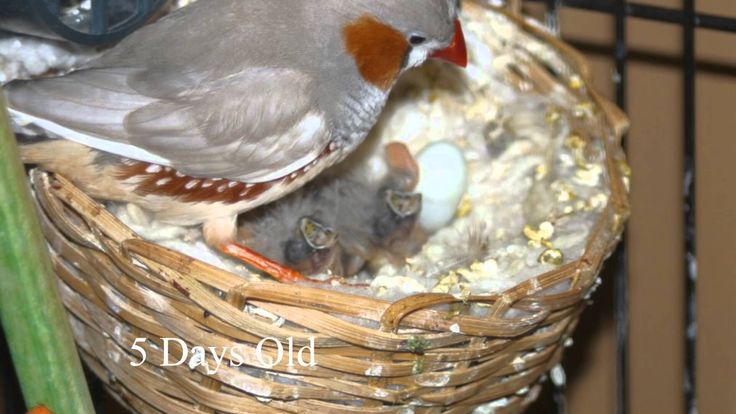
Material list:
• A bowl, small aquarium, or plastic carrying case. I have used a shoebox in the past with no problems.
• A heating pad (set on low).
• A small plastic bowl or Canary
nest.
• A washcloth.
• A small glass of water.
• Something to measure the temperature (keep the temp. around 98 degrees).
• Many Kleenex tissues and paper towels
Place the heating pad in the box, or around the shoe box so it covers the bottom and at least some of the sides. Add in the small bowl or Canary nest with a Kleenex tissues to help soak up the droppings. The small glass of water
is also kept inside in the makeshift incubator to add the much needed humidity. As the water evaporates add more. Place a thermometer in the incubator and place the lid gently on top but not closed tightly-it works best if there is a half inch opening on each side of the lid so air can circulate. Give it time to warm up and check the temperature. Keeping the temperature 96 to 99 degrees is best for young finches but should be slowly lowered as the chick grows feathers.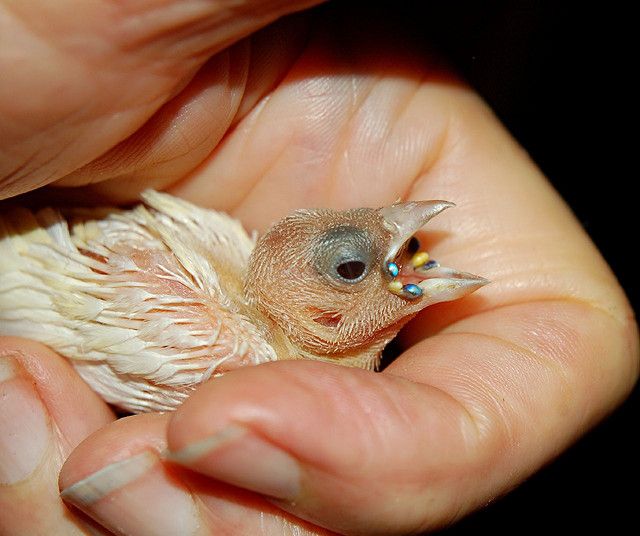
I used the wash cloth to adjust the height of the bowl/nest inside the brooder, this allowed me to more finely tune the temperature for the chick as it grew.
Hand Feeding Formula
Lafeber's Instant NutriStart hand feeding formula mixed with Gerber's Rice Cereal with Applesauce and water or Pedialyte worked the best for raising my finches. I used a small Oral Tipped Syringe for the feedings. Narrow or long tip made feeding the Zebra chick easier.
If you have a chick that is one to eight days of age, you may need to use the flat end of a flat tooth pick. The syringe will not work for a baby that small. It is best to just let the chick have one small drop at a time and swallow the food on its own.
Mix the ingredients into a thin yogurt like texture for younger chicks, thickening it slightly as the chick grows. Make fresh food for every feeding and clean the syringe thoroughly after every use. Also never force feed a chick, the risk of aspirating is too great.
90,000 Canaries, finches and finches.
 Care, maintenance and feeding of songbirds. – Veterinary clinics UshiKhvost, a full range of services for animals.
 Passerines, which include the songbirds kept by humans, are divided into 4900 species. Favorite representatives for home keeping: canaries (Serinus canaria variant domestica), song canaries, colored canaries with more than 140 color options, finches that live in nature both on the African and Australian continents, and in South Asia and Micronesia. Australian finches include the zebra finches (Taeniopygia guttata) and the Gouldian finches (Chloebia gouldiae), the butterfly finches (Granatina bengala) and the red-breasted finches (Amadina fasciata) are well-known representatives of African finches. Tiger Astrild (Amadava spp.) and Rice Finches are considered Asian finches.
Anatomical and physiological features of songbirds
Depending on the shape of the beak, songbirds are divided into granivorous (thick-beaked) and fruit-or insectivorous (thin-beaked).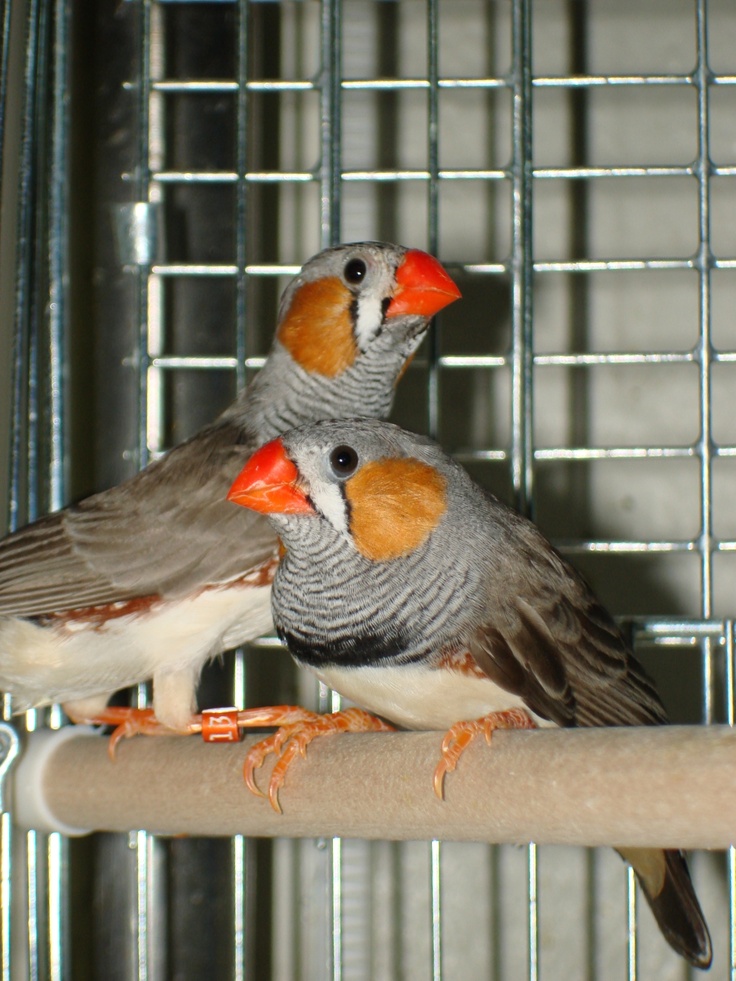
The lungs of birds are inelastic, moreover, birds do not have a diaphragm. Breathing is carried out through filling with air, the so-called. air sacs. When the chest moves, the air sacs fill with air passing through the lungs. Therefore, when holding a bird in your hands, you should pay attention to the fact that respiratory movements are not limited.
Songbirds need a lot of energy. Particular attention to the usefulness and energy intensity of the feed should be paid during the molting period. Birds are very sensitive to starvation: 24 hours without food can lead to death.
- Body temperature: 40-43°C.
- Respiration: 50-100 breaths per minute (at room temperature), up to 300 in hot weather.
- Pulse: 200-800 beats per minute.
Maintenance, care, feeding of songbirds
Songbirds are a sociable bird population. Pairs are needed for proper species maintenance, and even better large groups. A suitable birdcage should be twice as wide as it is tall.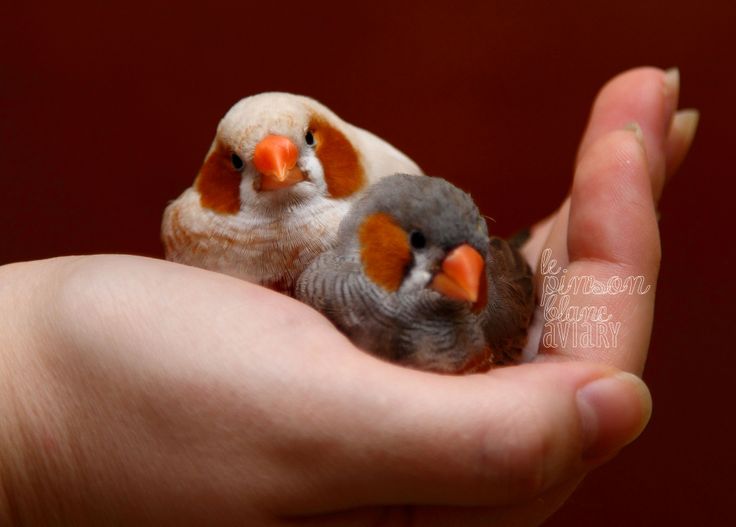 Too high, narrow, round or angular cages are not suitable. Ideal: a tray made of artificial materials (easy to clean and disinfect, no cracks or cracks that serve as a refuge for parasites) and a stainless grate.
The cage should be installed in a bright, well-ventilated place near a window (careful with hinged windows!). One side of the cage should be against the wall so the birds can retreat to it. In large cages or enclosures, non-poisonous plants can be placed to serve as a shelter. Smaller cages should be installed in such a way that half of the cage is, for example, behind a green plant or under a shelf.
Songbirds are extremely sensitive to the change of day and night. If the cage is in a room with artificial lighting (for example, in a living room), then in the evening it is necessary to cover it with a blanket.
The sticks in the cage must be of different thicknesses and at different heights. Sticks made from natural, non-poisonous wood (eg fruitwood, maple, birch, elderberry) will be happy to use for roosting and beak sharpening. The glass surface has nothing to do with both sticks and the birdcage floor.
Coarse sand with grains of sand of various sizes is suitable as bedding; pebbles will be readily eaten by granivores to aid digestion. Bathing trays hung, for example, on the door of the cage, should always be available and should be cleaned daily, as well as feeders and drinkers.
Never place food and water under sticks (they become contaminated with droppings and become infectious). Drinking water should always be available, even if desert birds like the zebra finches can go without it for several days.
Breeding aviaries should have brooding houses of smooth, easy-to-clean material without cracks or crevices (habitat for mites and other parasites).
For all songbirds, the diet should include 3-4 parts of grain feed. 1 part protein rich soft food plus green food. Especially often neglect of the protein components of the feed, which leads to the manifestation of protein deficiency. Sprouted grain feed is a variety and rich in vitamins and nutrients. To do this, soak the grains for 24 hours, then leave for 24 hours under a wet cloth until green seedlings appear. Caution: germinated grain spoils easily! Not every grain mixture is suitable for germination (for example, due to irradiation to improve safety).
In addition to the commercially available ready-made grain mixture, soft food or food with eggs (with a minimum of 20% protein) should be offered. Self-made soft food may include 1 egg, 40-50 g of ground crackers and any vitamin and mineral mixture. For example, chickweed, parsley, young dandelion, fruits (apple, plum, grapes, etc.) and some vegetables (corn, carrots) are suitable as green fodder. You can not give gas-forming products such as cabbage, as well as pumped up with stimulants and fertilizers (greenhouse salad). Grass food should be collected in ecologically clean places (not along the streets or railways!), washed well and dried. Omnivores can additionally offer mealworms, aphids and cat food.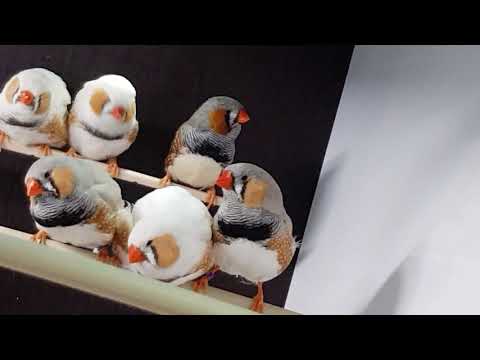
Escaped bird
Escaped bird does not fly too far from where it lives. A familiar voice should call the bird from the window or open door from which it flew. The search should be focused on high places (trees, window sills) in order to shout or whistle louder if necessary. If a bird is found, do not catch it with your hands, you should lure it into a cage. Often the birds easily return to a familiar safe haven.
If the bird has disappeared and the search action in the surrounding areas has not been successful, you should leave the cage in a conspicuous place (near the window) with an open door and a rich selection of food, as well as regularly call the bird and whistle. Occasionally, birds are found in a cage even after a few days.
Mental disorders
Feather plucking.
Causes of illness: along with metabolic disorders (elevated urea levels, liver and kidney diseases), skin and feather diseases, as well as neglect, being left alone, loss of a partner, boredom, unsatisfactory maintenance (sudden fluctuations in temperature, too dry air , lack of movement, a cage too small for several inhabitants and also plucking of feathers by other birds), obesity.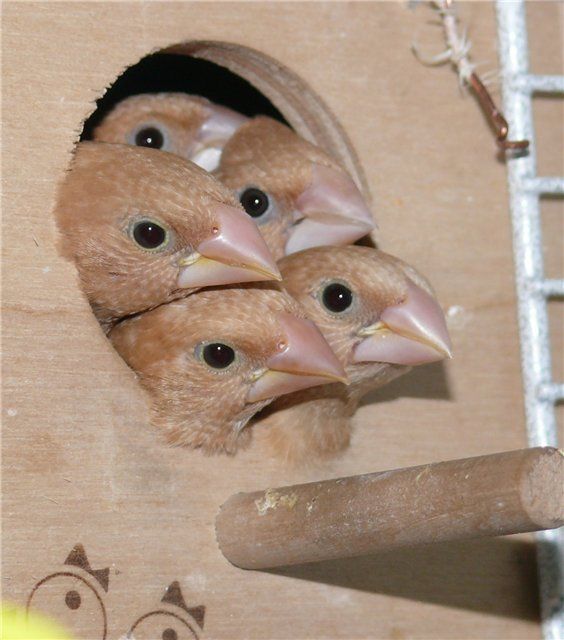
Treatment strategy: establish the cause, optimize feeding and housing conditions.
General measures: put on a collar made of paper or old x-ray film (attention: the bird must be able to take food and drink), remove broken feathers, occupy the bird: offer green branches of non-poisonous plants for pecking, toys, allow free flight, single birds have partner, when pecking with other birds, smear bare spots with bitter paste, you can remove the affected young birds from the cage, do not keep a large number of birds in a cramped room.
Sadness
Causes of the disease: the death of one of the partners or the change of the person who cares for the bird can lead to real manifestations of the disease.
Symptoms, diagnosis: apathy, loss of appetite, melancholy for no apparent reason (carry out a good diagnosis, diseases caused by various pathogens are often detected!).
General measures: if possible, place the bird in a large flock, often the birds just bloom and find a new partner, in another case, plant a new bird, similar in character to the dead one, besides, the birds need a lot of attention, optimal full nutrition during illness and recovery, supplements of vitamins and glucose in drinking water are necessary.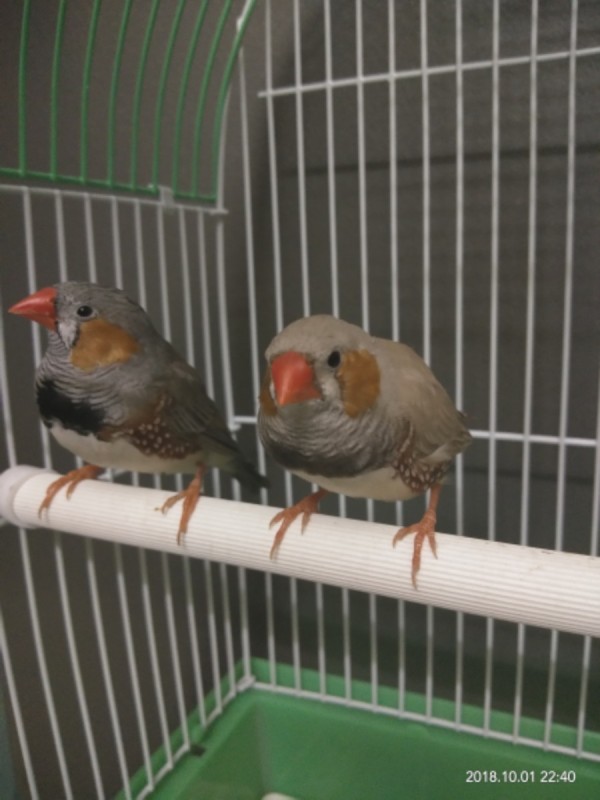
Tags: maintenance, feeding, care, problems, diseases, birds
AdW: Taeniopygia Guttata: Information - Birds
- Physical description
- Reproduction
- Life span/longevity
- Behavior
- Communication and perception
- Food habits
- predation
- Role of ecosystem
- Economic importance for people: Positive
- Economic importance for people: negative
- Servation status
- East
- introduced
- Australian
- Natives
-
- Range length
- 10 to 11 cm
- 3.94 to 4.33 inches
- monogamous
-
- Age range of sexual or reproductive maturity (male)
- 2.
 5 to 3 months
-
- The average life expectancy
status: wild - 4.5 years
- The average life expectancy
-
- 12 years 12 years 12 years 12 years 12 years
- Typical Life
Status: Wild - 2-3 Years
status: -
- Typical Life
Status: Captive - 5-7 Years
- Typical Life
- Visual
- Acoustic
- Prigrs
- Visual
- Acoustic
- Chemical
- Red ticks (Dermanysus Avium)
- Fate ticks (Achari)
- Power lice
DIARISED DIASON from Australia and inhabit most regions of the continent. They have become naturalized in parts of Indonesia and are kept as pets worldwide (Taeniopygia guttata, 2006; Fischer, 1997; Taeniopygia guttata, 2006; Slater, et al., 1993)
Natural Wednesday
Oblasts, exclusively in the vengens and subtropical castles of racks and subtroperic zones in areas with scattered shrubs and small trees. However, they have adapted to many anthropogenic pressures, including water bodies and lands cleared of vegetation for commercial purposes. Zebra finches are also widely domesticated and often kept in captivity by humans. ('Zebra Finch', 2006; 'Taeniopygia guttata', 2006; Slater, et al., 1
Breeding
Breeding season varies. They can mate at any time of the year after significant rainfall. Zebra finches are monogamous and bond for life. ('Zebra Finch', 2006; Vriends, 1997)
The singing of finches plays an important role in the mating process. Women do not sing, but men have a truly original song that incorporates the sounds of their relatives and their surroundings into their melodies. They also make a hissing sound when defending their territory and comrades. Along with the song, the males perform a courtship dance as part of the mating ritual. ('Zebra Finch', 2006; Vriends, 1997)
Increasing collection of materials and resources for building nests may indicate mating time. Nests are usually built of grass and lined with feathers or even wool. They can be found in a variety of places, from trees, bushes and animal burrows to cavities and ledges of commercial buildings. ('Zebra Finch', 2006; Vriends, 1997)
Although zebra finches are monogamous and maintain pair bonding for life, DNA fingerprints show that infidelity is common within this species. DNA fingerprinting is a technique used to identify the biological mother and father of offspring. Both male and female finches participate in mating additional pairs. (Simansky, 2000)
Breeding flocks contain approximately 50 finches, while non-breeding flocks contain approximately twice as many. Because finches breed after heavy rains, the breeding season is not specific, but once they start breeding, nest building will begin about a week before laying begins. During the nest building period, the pair spend the night in the nest together. ('Zebra Finch', 2006; Austad, 1997; Vriends, 1997).
The average number of eggs in one clutch can be from four to six over several days. Both males and females incubate the eggs until hatching, which occurs after about two weeks, depending on the laying time of each egg. During this time, males are extremely protective of females and keep intruders out of the nest. After hatching, both parents take turns sitting on the nest and gathering food for the chicks. After about three weeks, the chicks may leave the nest and often roost with their parents, but often return to the nest at night. About two weeks after fledging, the chicks will become independent from their parents. At this time, many parent finches may be ready to raise another clutch of eggs. ('Zebra Finch', 2006; Austad, 1
Both men and women devote a lot of time to parental care. During the nest-building period, both sexes participate in the collection of materials, but focus their individual building efforts on separate sites. While males focus on collecting most of the materials and general nest building, females focus on the internal architecture of the nest. After the eggs are hatched, the females do most of the incubation while the males defend the nest. However, both sexes remain in the nest overnight. After the eggs hatch, the females mainly incubate and incubate the young, but the males gather most of the food. (Friends, 1997; 'Animals with CNC', 2006)
Behavior
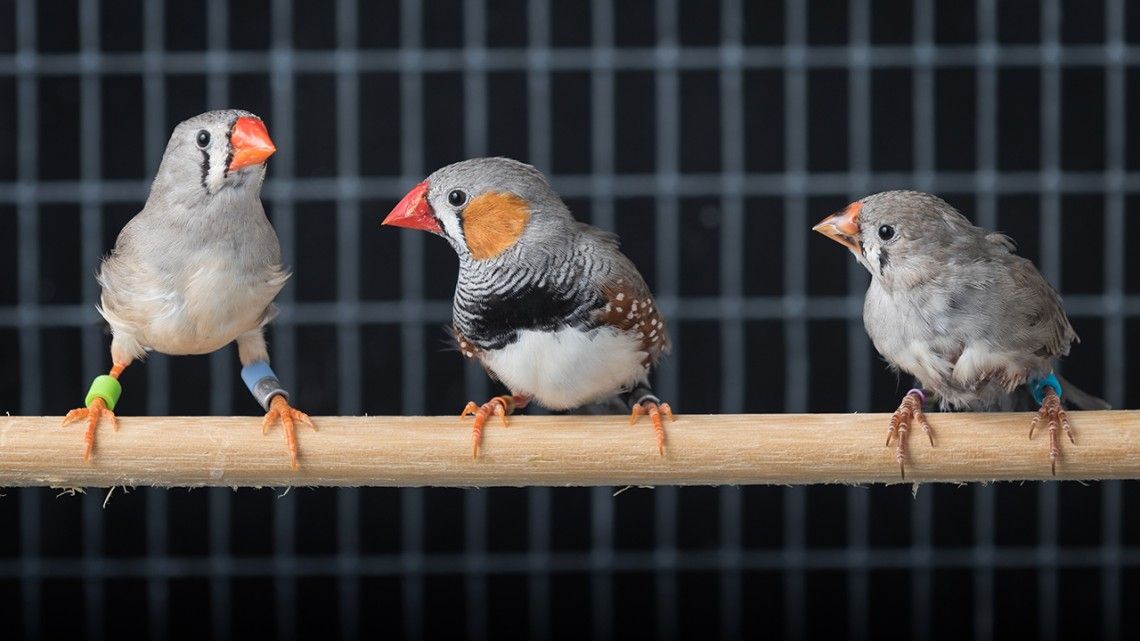
Zebra finches are sedentary and diurnal. Zebra finches are very sociable, living in packs of 100 individuals. However, during breeding, large groups break up into smaller groups of about 50 individuals. These small groups remain in contact with each other. Zebra finches recognize their group members by their songs, allowing friendly members to visit their nesting sites and chasing away members of foreign groups. Although zebra finches often travel long distances in search of food and resources, their protected area is relatively small, limited to the area immediately surrounding the nesting site. Social dominance hierarchies are often established after the inclusion of women in a group. Appearance does not seem to be a factor determining the basis of dominance in social groups. (Fischer, 1993; Vriends, 1997).
Food habits of
VEYS-zABRA. Their beaks are well adapted for removing the husk from seeds.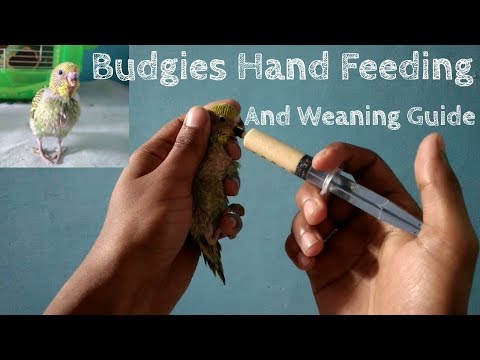 Although they prefer a seed diet, they also eat a variety of fruits, vegetables, and live foods such as insects. A diet that varies in nutritional value is important to a finch's overall health and well-being. Eating insects during breeding is especially important to ensure healthy young. ('Zebra Finch', 2006; Fisher, 1
Commenal / parasitic species