Kitchenaid baby food attachment
How To Make Baby Food With a Food Processor
Using a food processor for baby food is a quick, easy solution to creating flavorful and nutritious blends for your baby right at home. A food processor allows you to do minimal prep work—just cut to size, slightly cook tougher ingredients, then toss them into the food processor. Puree to your desired consistency and serve or store for later.
Making your own baby food with a food processor means that you can be sure every ingredient is fresh and wholesome in addition to creating unique tastes your baby will love. Busy parents will appreciate the ease and speed a food processor brings to preparing homemade baby foods.
DO YOU NEED A BABY FOOD MAKER?
You don’t need a separate baby food maker or baby food processor if you have some basic kitchen equipment like a pot or steamer, a kitchen range or microwave, and of course—a food processor. You can finely puree a wide range of ingredients with results perfect for baby food using a food processor. You can also opt for a food processor with more capacity than many baby food makers offer. This will allow you to create in bulk and store for later, so you always have homemade baby food on hand.
Full-sized food processors can do more than chop, mix or puree. They’ll also allow you to slowly incorporate shredded, sliced or even diced foods into your baby’s diet. Select food processors, like options from KitchenAid brand include a dough blade to help prepare baked baby snacks as they grow.
Select KitchenAid® food processors and choppers can help further streamline baby food prep with features that make them easy to use, clean and store including a one-click, twist-free bowl assembly with a latched lid, dishwasher-safe parts and in-bowl accessory storage. In addition, various accessories can help you to achieve a range of results and help introduce your baby to new tastes and textures over time.
HOW TO MAKE BABY FOOD
While your recipes may vary, you can follow these basic steps to learn how to puree baby food in a food processor. You can also create your own inventive flavor combinations suited to your baby’s developing palate using these steps.
Note: Always make sure to consult with your pediatrician or healthcare professional on your baby’s diet, food safety and storage recommendations.
STEP 1. COOK, STEAM OR ROAST INGREDIENTS (IF NEEDED)
If your baby food recipe calls for firm ingredients like carrots, apples or sweet potatoes, you’ll need to soften them up first. Your options here are nearly endless. Experiment with techniques like roasting, boiling, steaming or even microwaving to bring out the right, soft texture needed for food processor baby food.
STEP 2. ADD INGREDIENTS TO YOUR FOOD PROCESSOR
If you cooked your ingredients in liquid, set it aside—you’ll use it later. Add your softened fruits, vegetables or other ingredients to the work bowl of your food processor with the multipurpose s-blade in place. Make sure not to fill more than ⅔ full. Securely close the lid.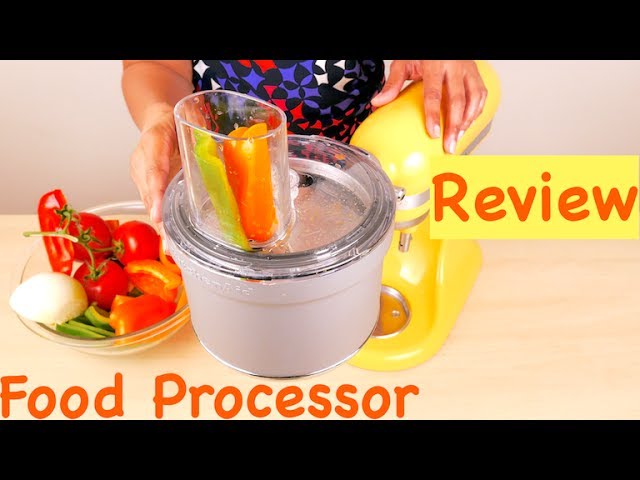
STEP 3. PUREE YOUR BABY FOOD INGREDIENTS
If you want perfectly smooth baby food, run your food processor continuously on high for 30 seconds to 1 minute. If you want a chunkier result, pulse 5-6 times or until your desired consistency is reached.
STEP 4. ADD LIQUID TO THIN BABY FOOD
For young babies, you’ll likely want a slightly thinner consistency. While your food processor is running or between pulsing, add the reserved cooking liquid a little at a time until your desired consistency is reached. You can use plain water, formula or breast milk for your liquid if you prefer, or if your cooking technique did not leave any liquid behind.
TIP: If you plan to refrigerate or freeze your baby food for later, you can wait to add the liquid. Storing before adding liquid means your mixture will take up less space and you can vary the consistency with every serving.
STORING HOMEMADE BABY FOOD PUREE
When you’re a busy new parent, planning ahead is key. Make enough food processor baby food to store, then streamline meals by simply thawing or reheating. Here are a couple of ways you can make your bulk homemade baby food puree last:
REFRIGERATING BABY FOOD:
According to the U.S. FDA, homemade baby foods can be refrigerated for 24-48 hours, though this may depend on the ingredients. Either keep the recipe in a large container that you dish servings out of, or portion your recipe into single-serve containers. Whichever you choose, make sure your storage containers are airtight.
FREEZING BABY FOOD:
To make it last even longer, you can typically freeze baby food for up to 1-3 months and possibly as long as 6 months, depending on the ingredients and other factors. Try freezing baby food in covered ice trays for convenient 1 ounce servings. Once frozen, transfer cubes into an airtight container or freezer bag. When it’s time to serve, simply pull out the number of cubes you need and reheat them.
This method also means you can have several types of baby food on hand to keep meals interesting, or for when your baby is feeling picky.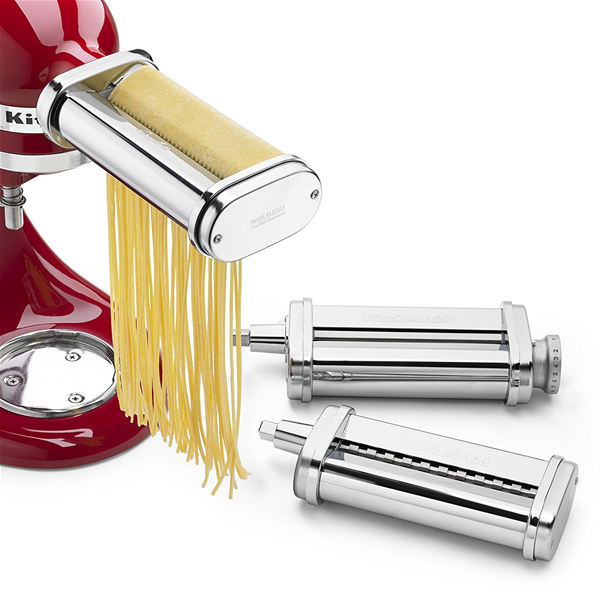 For more information about baby food safety and storage, read this article from the U.S. Food and Drug Administration.
WHAT IS THE BEST FOOD PROCESSOR FOR BABY FOOD?
That depends on your recipe and quantity along with a few other factors. Most can puree baby food easily with a standard food processor blade. For more shapes and sizes, reach for one that can slice and shred. Choose a food processor size based on whether you'll serve food right away or want to make homemade baby food in bulk.
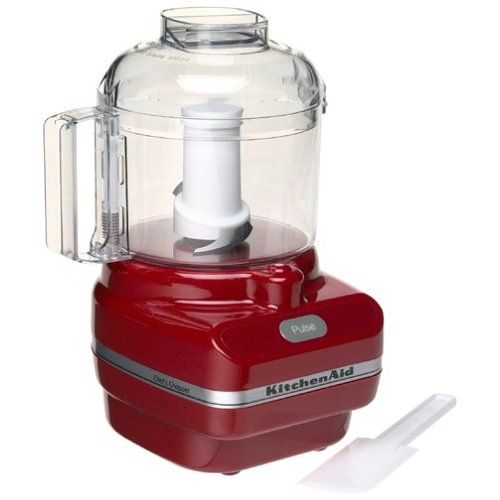
KitchenAid® 3.5 Cup Food Chopper
This mini food chopper is just the right size for a few servings—or just one at a time for ultra fresh pureed baby food meals. With a single stainless steel blade, and simple in-lid operation with two speeds and pulse, you can simplify your approach to food processor baby food.
KitchenAid® Cordless 5 Cup Food Chopper
Make a little bit more with a 5 Cup Food Chopper that features the same easy in-lid operation.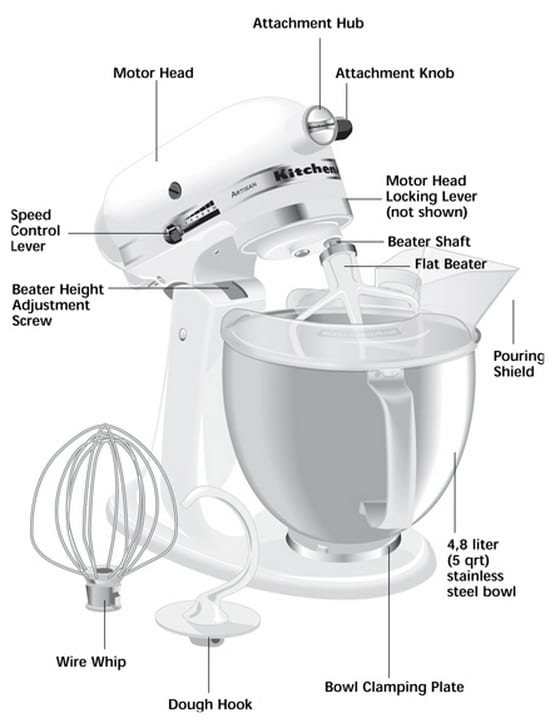 Free yourself up to move around the kitchen with the cordless model, or opt for a corded version. Both the 5 Cup Food Chopper and the Cordless 5 Cup Food Chopper from KitchenAid also come with a whisk accessory that's perfect for creating fun textures and treats for babies to explore.
KitchenAid® 7 Cup & 9 Cup Food Processors
The 7 and 9 Cup Food Processors from KitchenAid will allow you to prepare several baby food servings at once. Continuous-run speed options let you operate with the press of a button. A feed tube and disc accessories make slicing and shredding possible for when your baby is ready to try new foods.The 7 Cup Plus and 9 Cup Plus Food Processors come with additional accessories for even more versatility.
KitchenAid® 13 Cup Food Processor
To make sure you always have homemade baby food on hand, opt for a large food processor like the 13 cup models from KitchenAid. Reduce prep time with the 3-in-1 feed tube to process a variety of ingredient shapes and sizes—including popular baby food ingredients like sweet potatoes and more.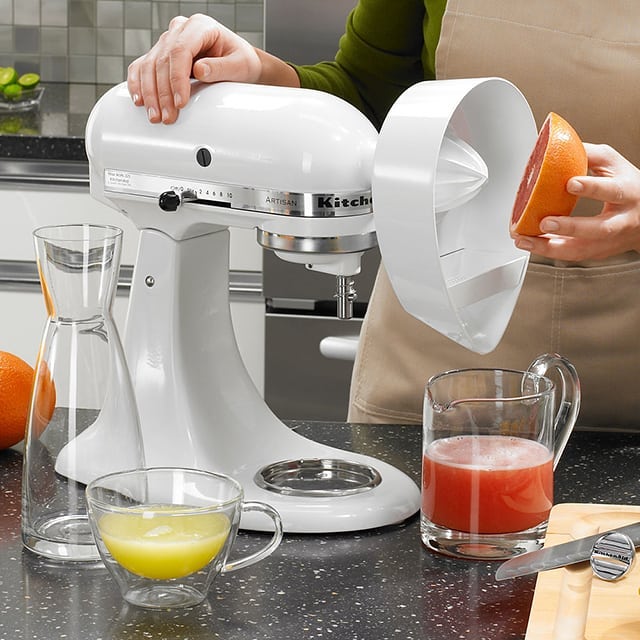 The KitchenAid® 13 Cup Food Processor with Dicing Kit will grow with your baby to help them enjoy fruits and veggies cut perfectly for healthy finger-food snacks.
FOOD PROCESSOR VS BLENDER FOR BABY FOOD
If you have a blended or pureed baby food recipe, you can likely use either a blender or a food processor. A blender may achieve smoother consistency for fibrous ingredients like kale or celery. But for most baby food recipes, both a blender and a food processor will yield the right consistency for baby food.
If you opt for a blender, the Small Batch Jar Expansion Pack for the KitchenAid® K150 Blender and the KitchenAid® K400 Blender are perfect for making just a few servings of homemade baby food. A sealed lid lets you store any leftovers or prepare batches in advance to keep them fresh for meal times.
You can also use an immersion blender to puree or blend baby food right in a bowl, cup or other container. This is useful if you are preparing ingredients in another dish like a pot on the stove since there is no need to transfer ingredients.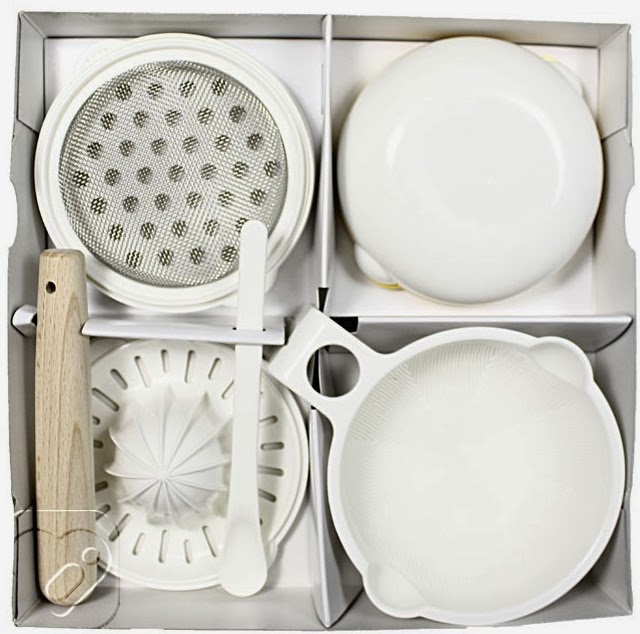 An immersion blender is also useful when you want to quickly blend just one serving of baby food. Learn more about how to use an immersion blender, or compare different types of blenders.
Keep in mind that if you’re looking to achieve a chunkier result as your baby ages, a food processor’s pulse function can be helpful. Pulse allows for more incremental processing so you can stop before your mixture is completely smooth. Because food processor blades usually spin more slowly than a blender’s, you’ll be able to have more control over the results.
TRY THESE BABY FOOD RECIPES IN YOUR FOOD PROCESSOR
You can adapt most blender baby food recipes for use in your food processor. Follow the general steps in this article to adapt pureeing baby food in a food processor vs blending. To get started, try this simple Sweet Potato Pureed Baby Food with just a few ingredients. When you’re ready to add some more techniques and flavors, adapt this versatile Roasted Vegetable Baby Food recipe for your baby’s unique tastes.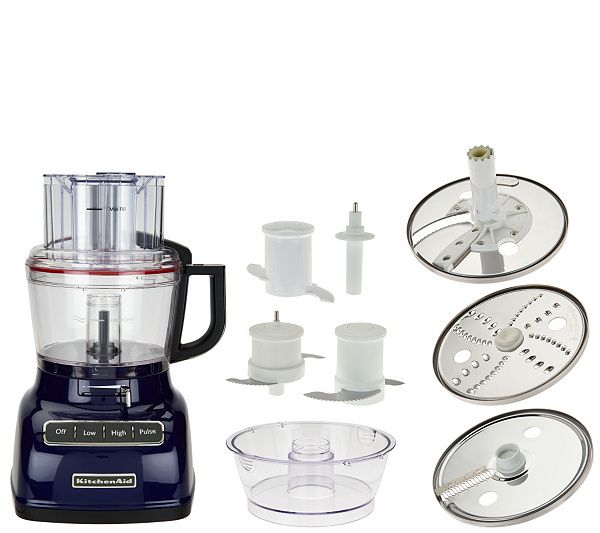 Make sure your baby gets their greens with a nutritious Green Bean and Pea Puree elevated by a bit of fresh mint.
Shop KitchenAid® Food Processors and Blenders for Baby Food Prep
Explore food prep for your growing family with KitchenAid® food processors and blenders. From food processors that can chop, puree, shred and slice, to blenders with a 3-part blending system, KitchenAid brand has the tools you need to create delicious meals for kids.
KFP1319WH
KFP1319ER
KFP0718BM
KSB1325BM
KSB4027VB
MORE KITCHEN HELP FOR NEW PARENTS
-
Small Appliance Gift Ideas for Busy New Parents Find the perfect gift for a new parent—or a busy one—with this guide that’s full of useful kitchen gift ideas.

-
Food Processor Pie Crust: How to Make Pie Dough Use our easy food processor pie crust recipe to learn how to make homemade pie dough from scratch in minutes for buttery, flaky crust.
-
Food Processor Sizes: Find the Right Fit With so many sizes of food processors, which is the right fit for you? Explore your options and find the best size food processor for your kitchen.

KitchenAid Fruit & Vegetable Strainer Set With Food Grinder Attachment
Last updated date: October 23, 2020
DWYM Score
Why Trust DWYM?
DWYM is your trusted product review source. Along with our in-house experts, our team analyzes thousands of product reviews from the most trusted websites. We then create one easy-to-understand review. Learn more.
Show Contents
Contents
- Our Take
- Features
- Specifications
- From The Manufacturer
- Expert Reviews
- Overall Ranking
- Our KitchenAid Attachment Buying Guide
- Our KitchenAid Attachment Tip and Advice
We looked at the top KitchenAid Attachments and dug through the reviews from some of the most popular review sites. Through this analysis, we've determined the best KitchenAid Attachment you should buy.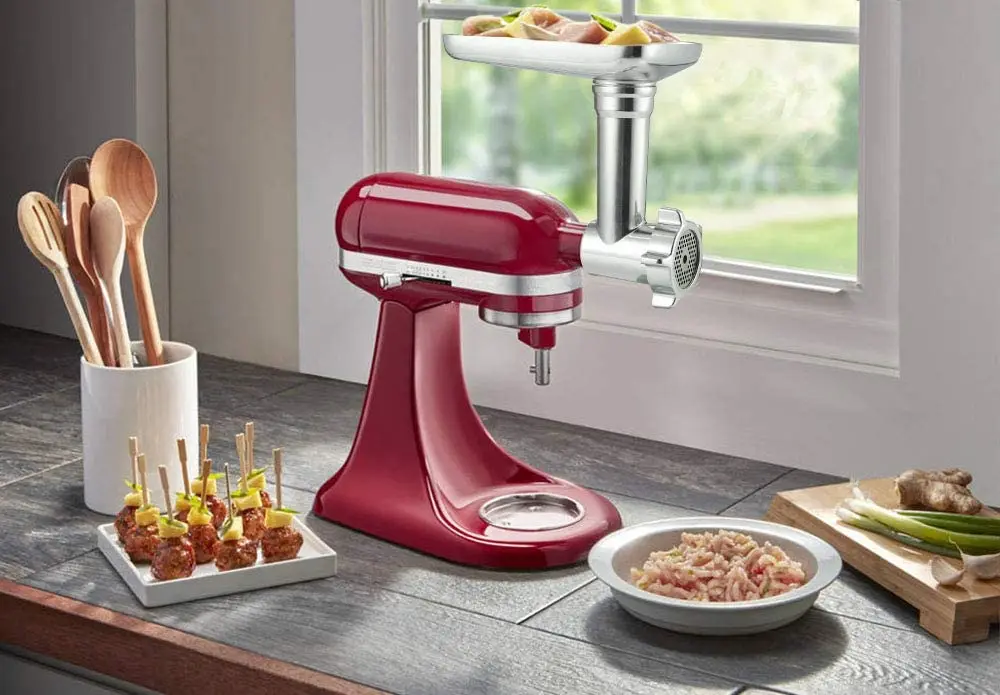
Update as October 23, 2020:
Checkout The Best KitchenAid Attachments for a detailed review of all the top kitchenaid attachments.
Overall Take
The multiuse attachment has a food grinder with fine and course plates and a strainer to strain and purée fruits and vegetables. The product, compatible with all household KitchenAid stand mixers, is great for those who want to make their own sausages and burgers and produce fruit- and vegetable-based sauces.
In our analysis of 12 expert reviews, the KitchenAid Fruit & Vegetable Strainer Set & Food Grinder placed 4th when we looked at the top 15 products in the category. For the full ranking, see below.
From The Manufacturer
Food Grinder with fine plate for meats & coarse plate for firm vegetables & cheeses. Includes a strainer and a grinder
Expert Reviews
User Summarized Score
1,531 user reviews
What experts liked
You can use this attachment to make homemade baby food, applesauce, jams and jellies (check out our recipe for peach jam!) and I can’t help but think how great it would be for making sorbet bases for the ice cream maker attachment.
- Foodal
| Full review
What experts didn't like
cooked produce works better in the machine than raw.
- Foodal
| Full review
1. KitchenAid KSMPRA Pasta Roller & Cutter Attachment Set
Overall Score: 9.8
2. KitchenAid 1-Inch Spiralizer Attachment
Overall Score: 9.7
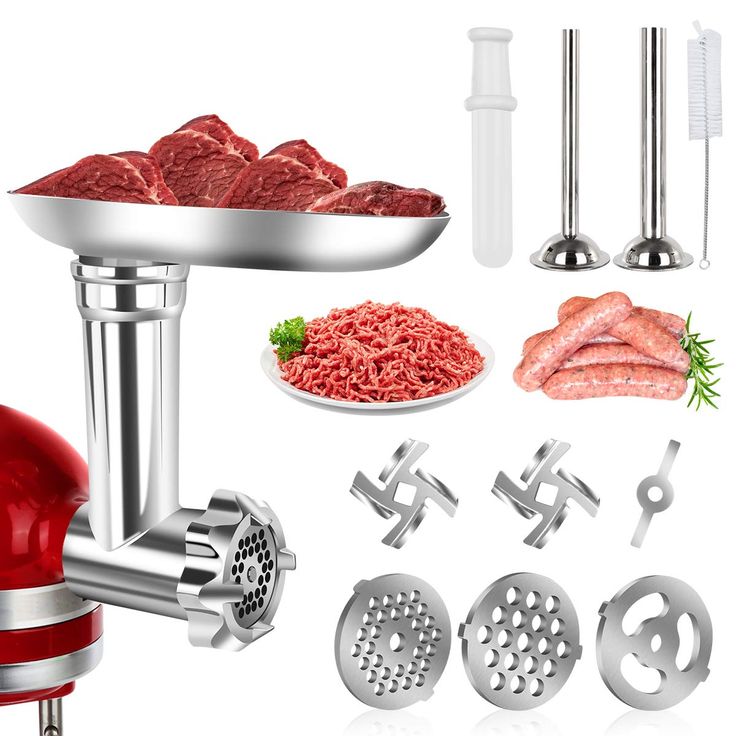
3. KitchenAid KSMMGA Metal Food Grinder Attachment
Overall Score: 9.6
4. KitchenAid Fruit & Vegetable Strainer Set With Food Grinder Attachment
Overall Score: 9.3
5. New Metro Design KitchenAid Universal Pouring Chute Attachment
Overall Score: 9.2
6. TIZZE KitchenAid 6-Wire Whip Attachment
Overall Score: 9.2
7. KitchenAid Fresh Prep Slicer & Shredder Attachment
Overall Score: 9.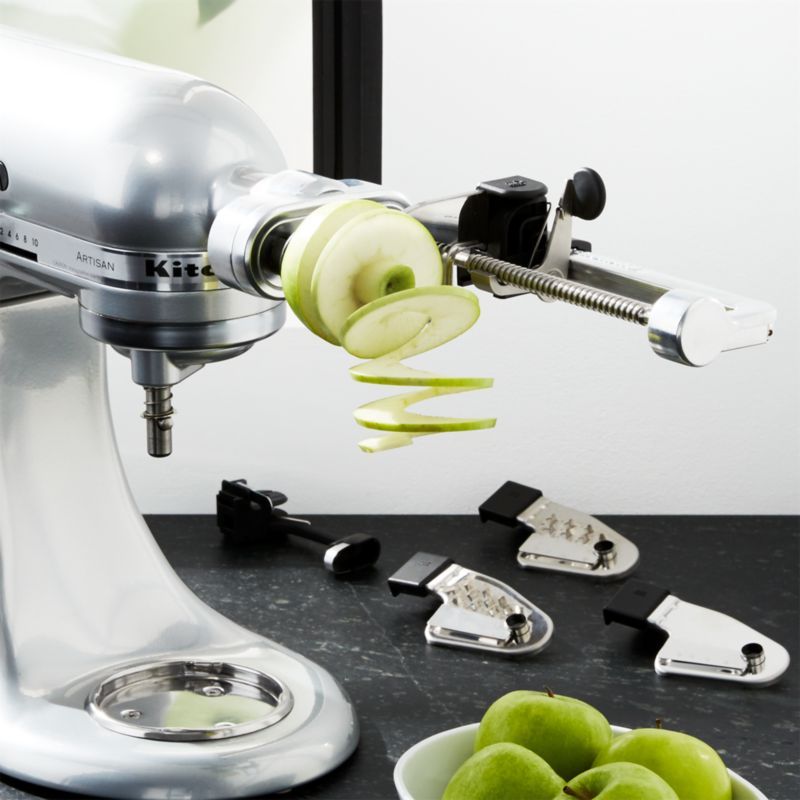 0
0
8. InnoMoon KitchenAid Slicer Shredder Attachment
Overall Score: 9.0
9. KitchTree KitchenAid Food Grinder Attachment Set
Overall Score: 8.8
10. KitchenAid Coated Flat Beater Attachment
Overall Score: 8.6
11. KitchenAid KSM2FPA Food Processor Attachment & Dicing Kit
Overall Score: 8.3
12. KitchenAid Vegetable Sheet Cutter Attachment
Overall Score: 8.3
13. ANTREE KitchenAid 3-In-1 Pasta Maker Attachment
Overall Score: 8.2
14. KitchenAid KSMDRTVICE3 2-Quart Ice Cream Maker Attachment
Overall Score: 8.1
15. KitchenAid Spiralizer Plus Attachment With Peel, Core & Slice
Overall Score: 7.1
KitchenAid stand mixers can do much more than mix, knead and whip. Do you want to roll pasta for ravioli, produce zoodles for a salad or mill wheat berries to make bread flour? No problem — the company sells a bevy of attachments to satisfy your needs.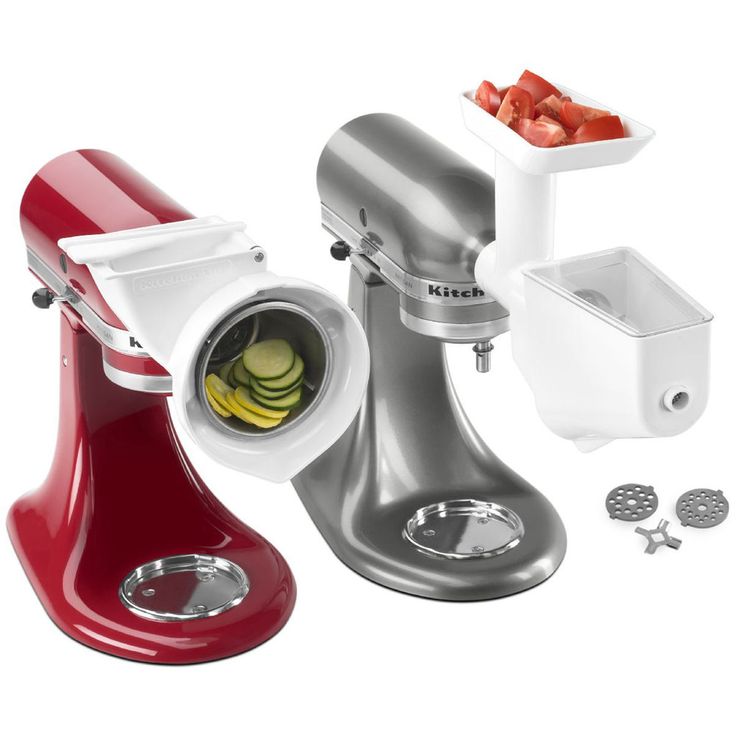 The mixer-powered extensions, which easily connect to the machine’s front attachment knob to perform particular functions, are usually sold separately or together in budget-friendly bundles.
Some of the most popular KitchenAid attachments include the pasta maker, a set that rolls and cuts sheets of pasta; a spiralizer that peels, cores and slices fruits and vegetables; a grinder that minces meats and cheeses and a food processor that chops and dices. The attachment lineup also features a strainer, slicer/shredder, vegetable sheet cutter, grain mill, pasta press, juicer, ice cream maker, sausage stuffer and sifter.
Which KitchenAid attachment is right for you? It really depends on what you want to cook. If you’re planning to make sauces, the strainer purées fruits and vegetables into a fine consistency and is also great for prepping your own baby food or jams. Or if Italian fare is your jam, the pasta maker is a stellar tool for rolling dough for stuffed varieties as well as cutting classic fettuccine and spaghetti. You can even purchase the deluxe pasta maker, which makes comes with extra lasagnette and capellini cutters or the gourmet pasta press that creates short pastas like rigatoni, fusilli and macaroni.
Many attachments also conveniently serve duel purposes. For example, the meat grinder can also process hard cheeses and breadcrumbs and the vegetable sheet cutter also serves as a zoodle maker. And the grinder/strainer combination minces proteins and purées produce.
- Read all of manufacturer’s instructions before using your attachments.
- The manufacturer indicates that the attachments fit all household KitchenAid stand mixers.
- Signs that the attachment doesn’t fit properly include spinning in the mixer hub while not in use, falling out of the front mixer hub when the attachment knob has been fastened and loosening or falling off the mixer during usage.
- Unplug your mixer from the outlet when not in use, before putting on or taking off parts and attachments and before cleaning.
- Avoid contact with moving parts when your mixer is in use; keep your fingers out of openings and be sure to tie back your hair.
- The use of attachments on KitchenAid stand mixer that were not sold by the company may cause injury or damage to your machine.
- Check the instructions to for specific cleaning directions for your attachments. In general, do not put any of them in the dishwasher unless the instructions indicate that it is safe to do so. For example, submerging your pasta maker in water or putting it in the dishwasher may damage the components or cause them to rust.
Checkout Our Other Buying Guides
KitchenAid mixer attachments and accessories (Kitchen Aid)
Sort by DefaultPrice (low > high)Price (high > low)Rating (highest first)Rating (lowest first)PopularNewest
12255075100
Additional attachments and various accessories turn the mixer into a multifunctional device for the most complex culinary tasks.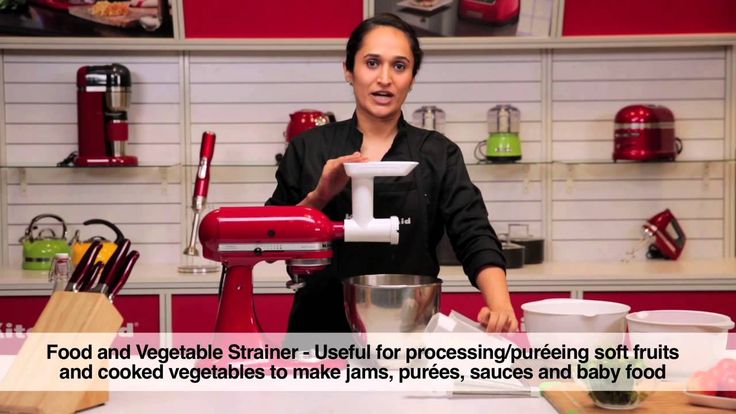 With their help, you can cook real masterpieces from meat, dough, vegetables and fruits! That is why professional chefs around the world choose Kitchen Aid mixers and attachments!
Whisks
One of the most important mixer attachments as it beats different types of ingredients best of all. With a whisk, you can easily prepare meringues, butter-based creams, milkshakes, whipped cream and other “airy” mixtures in seconds.
Spatulas and hooks
Mix ingredients evenly and help prepare dough for biscuits, cakes, muffins, biscuits, breads and other baked goods. Their special shape ensures efficient use of the entire volume of the mixing bowl.
Hooks are used for kneading hard doughs such as yeast. Spatulas - for mixing creams and batter (for bread, pizza, pasta). The paddle with a flexible edge is especially convenient - during operation, it collects the dough from the walls of the bowl to ensure it is evenly mixed.
Nozzles - mills
This accessory will quickly and efficiently prepare natural, healthy, homemade flour. Used for grinding non-oily grains or legumes with a low moisture content. As a result, you can get oatmeal, rice, corn, barley, buckwheat, wheat flour of your own grinding or prepare your own baking mixes based on them.
Meat grinder attachments
They help to achieve the perfect consistency of minced meat depending on the dish, as well as quickly chop and grind food. They make the best pub burgers, burgers, falafels and meat sauces. In addition to meat, fish and poultry, you can grind hard cheese, vegetables, nuts.
Sausage attachments
Designed for making homemade sausages from any kind of minced meat. Thanks to the different diameters, you can cook anything from small breakfast chicken sausages to large Italian sausages with herbs and seasonings.
Strainer attachments
Used for straining vegetables, fruits and for smoothing mashed potatoes. With them you can make savory soups, desserts, jams, sauces, mousses, natural baby food.
Cutters
Cut, shred, dice or shred soft and hard foods. The thickness of the cut is regulated by an external lever, and it can be changed without stopping the operation of the mixer.
There are slicing attachments that can make long, flat slices of courgettes, cucumbers, carrots, potatoes, apples and other vegetables or fruits. With them you can cook vegetarian lasagna, vegetable rolls, unusual snacks and sandwiches. The thickness of the plastics is adjustable.
There are also spiralizers with the function of cleaning and spiral cutting. They are able to cut vegetables and fruits into thin curly ribbons. With them, you can make a gluten-free and carbohydrate-free version of noodles or pasta.
Pasta attachments
Unique accessories for working with dough. They can roll out, press and cut dough for any kind of pasta and ravioli.
With the pasta press you can make your own spaghetti, bucatini, rigatoni, fusilli, large or small pasta by simply changing the pasta plates.
Ravioli nozzle - forms a ribbon with the filling sealed between two layers of dough.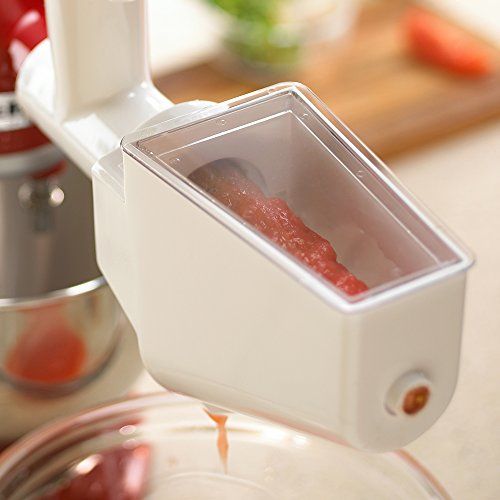 It will make excellent meat, vegetable, fruit, cheese ravioli. They are shaped by means of two rollers, gripping and pressing the sheets of dough.
Juicer attachments
They make not only juices, but also unusual herbal sauces, fruit purees and jams. Three squeeze filters allow you to get different textures at the output: pure juices without pulp, light and thick sauces, purees and jams.
Ice Cream Bowl
Bowl and special whisk set to help you make the perfect homemade dessert. Volume 1.9 liters. The bowl consists of two layers, the space between which is filled with a special liquid that accumulates cold. Before cooking, the bowl must stand in the freezer for 15 hours.
Additional nozzles and accessories for Kitchen Aid mixers are made of steel and durable plastic. Most of them are dishwasher safe. They are simply installed on the mixer and can be easily removed after the job is done.
One-Touch Power Button
Activate the hand blender by pressing and holding the power button while blending. To stop mixing, simply release the power button.
Motor housing
Designed for a comfortable non-slip grip.
Powerful DC motor (not shown) Provides powerful mixing and is designed for quiet, long-lasting operation.
Power cord 1.5 m
The power cord is rounded enough to bring the hand blender close to the hob or work area for easy cleaning. The kit includes a silicone strap for easy storage of the cord.
Stainless Steel Twist-Lock
Mixing Arm
Attaches to motor housing with a simple twist and rotates to lock in place. The sharp stainless steel blade is covered to prevent splashing when mixing.
Whisk attachment
Optimized for whipping egg whites and cream.
Chopper *
Ideal for chopping herbs, nuts and vegetables. Chopper includes bowl, knife and chopper adapter. The chopper bowl has a non-slip base to prevent movement during chopper.
Mixing jar
1 liter BPA-free jar with comfortable handle and anti-splash lid.
Bell blades
With three interchangeable Bell blades*, you'll always have the right tool for a variety of tasks. The KitchenAid Hand Blender helps you from crushing ice to chopping roasted meats and frothing milk.
Pan Guard
Attach the protective cover to the chime blades to protect the utensils during use.
Bell Guard
Clip the bell onto the replacement bell to protect it from damage when not in use.
Storage case *
Keeps accessories organized and protected.
* Included only on model 5KHB2571
APP GUIDE
IMPORTANT SAFETY PRECAUTIONS
Basic safety precautions should always be followed when using electrical equipment, including the following:
- Read all instructions. Incorrect use of the instrument may result in injury.

- To reduce the risk of electric shock, do not immerse the motor housing, cord, or power plug of the hand blender in water or any other liquid.
- This device is not intended for use by persons (including children) with reduced physical, sensory or mental capabilities, or lack of experience and knowledge, unless they are supervised or instructed in the use of the device by a person responsible for their safety.
- In the European Union only: The devices may be used by persons with reduced physical, sensory or mental capabilities, or lack of experience and knowledge, if they are supervised or instructed in the safe use of the device and understand the dangers involved. Do not allow children to play with the appliance.
- European Union only: This appliance must not be used by children. Keep the appliance and power cord out of the reach of children.
- Supervise children not to play with the appliance.
- Turn off the appliance, then unplug it when not in use, before assembling or disassembling parts, and before cleaning.
 To disconnect the plug, grasp the plug and pull it out of the socket. Never pull on the power cord.
 - Avoid contact with moving parts. Keep hands, hair and clothing, as well as spatulas and other utensils, away from accessories during operation to reduce the risk of personal injury and/or damage to the appliance.
- Do not use any appliance with a damaged cord or plug, or after the appliance has malfunctioned, been dropped, or has been damaged in any way. Return the device to the nearest authorized service center for inspection, repair or adjustment.
- If the power cord is damaged, it must be replaced by the manufacturer, its service agent, or similarly qualified persons in order to avoid a hazard.
- Use of attachments not recommended or sold by the manufacturer may result in fire, electric shock, or injury.
- Before switching on the device, make sure that the chopper adapter * is securely locked in place.
- Do not use outdoors.
- Do not allow the cord to hang over the edge of a table or counter.
- Keep cord away from hot surfaces, including the stove.
- Do not allow children to use the blender without supervision.
- When mixing liquids, especially hot ones, use a tall container or add small amounts at a time to reduce spillage.
- Keep hands and utensils out of the bowl while mixing to prevent serious injury to persons or damage to the device. A scraper can be used, but should only be used when the machine is not running.
- Blades are sharp. Be careful when handling sharp cutting blades, when emptying the bowl, and when cleaning.
- Be careful if hot liquid gets into the jug as it may spill out due to the sudden release of steam.
- Refer to the Hand Blender Operation section for instructions on run times and speed settings for accessories.
- See the Care and Cleaning section for cleaning instructions for food contact surfaces.
- This appliance is intended to be used in domestic and similar applications, for example:
- Staff kitchens in shops, offices or other work environments;
- farm houses;
- by clients in hotels, motels and other residential premises;
- bed and breakfast accommodations.
- WARNING: To prevent electrical shock, unplug the instrument before servicing.
- Always unplug the blender from the power source when it is left unattended and before assembling, disassembling or cleaning.
ELECTRICAL REQUIREMENTS
- Connect to a grounded outlet.
- Do not remove the ground prong.
- Do not use adapter.
- Do not use an extension cord.
- Failure to follow these instructions could result in death, fire, or electrical shock.
Voltage: 220-240 ac
Frequency: 50-60 Hz
Wattage: 180 W
Do not modify the plug in any way.
DISPOSAL OF WASTE ELECTRICAL EQUIPMENT
Disposal of packaging material
The packaging material is 100% recyclable and marked with the recycling symbol.
. Therefore, the various parts of the packaging must be disposed of responsibly and in full compliance with local authorities' regulations governing waste disposal.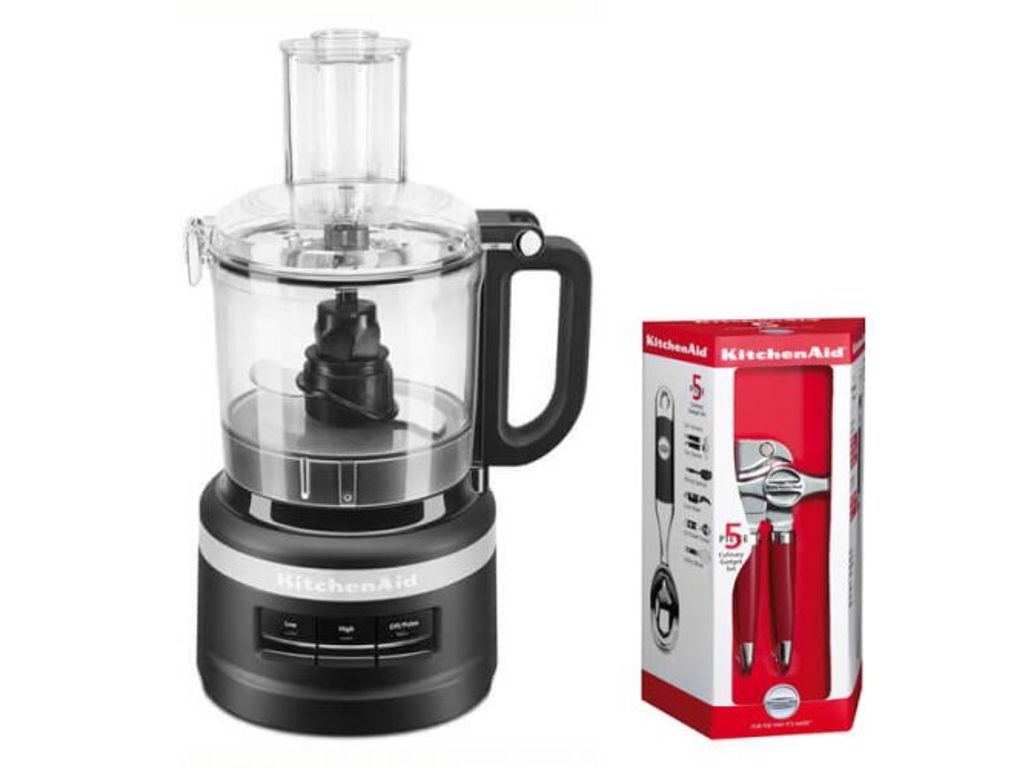
Product disposal
- This appliance is marked in accordance with the European Directive 2012/19 / EU on Waste Electrical and Electronic Equipment (WEEE).
- By ensuring this product is disposed of correctly, you will help prevent potential negative consequences for the environment and human health, which could otherwise be caused by inappropriate waste handling of this product.
- The symbol on the product or accompanying documentation indicates that it should not be disposed of as household waste, but should be taken to an appropriate collection center for the recycling of electrical and electronic equipment.
For more information about the handling, recovery and recycling of this product, please contact your local city office, your household waste disposal service, or the store where you purchased the product.
WORKING WITH THE HAND BLENDER
ASSEMBLING THE HAND BLENDER
Before using your KitchenAid immersion blender for the first time, wipe the motor housing and attachments with a clean, damp cloth to remove dirt and dust.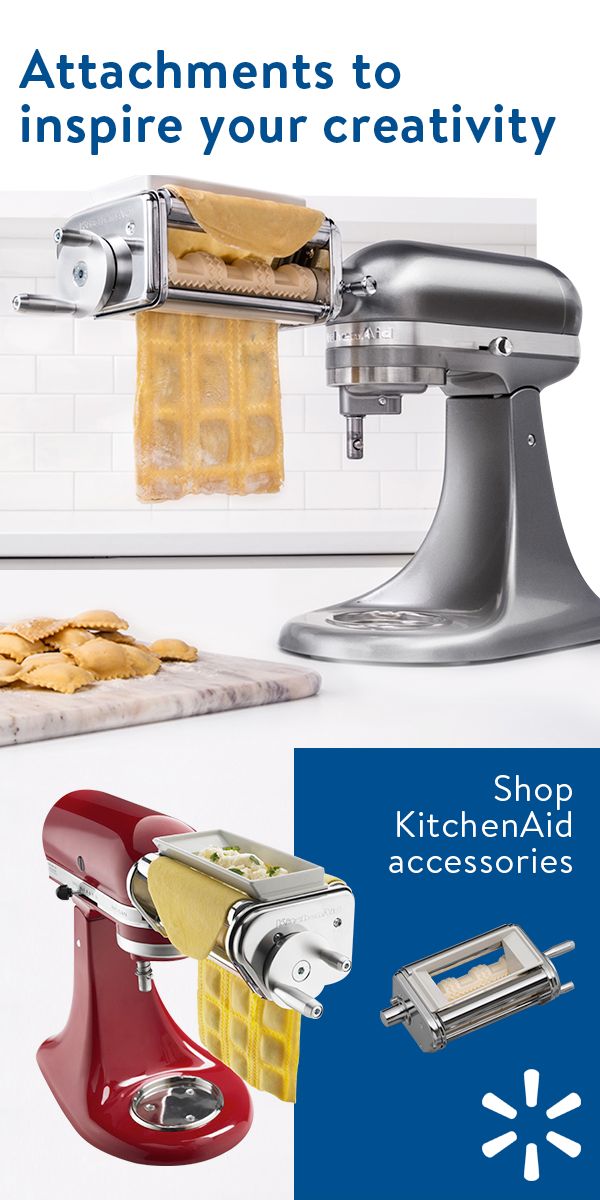 Mild dish soap can be used, but non-abrasive cleaners.
NOTE: Do not immerse motor housing or adapters in water.
Dry with a soft cloth. Wash all other attachments and accessories by hand or on the top rack of the dishwasher. Dry thoroughly.
NOTE: Be sure to unplug the power cord before installing or removing accessories.
See Using the Chopper Attachment section for information on attaching or removing the chopper adapter.
Bell Guard
Easily attaches to the Bell Blade and provides blade protection when the hand blender is not in use.
NOTE: Make sure the Bell Guard is installed with the mounting clips located between the ports on the Bell Guard.
Pan Guard
Pan Guard snaps onto any of the included Bell blades and provides protection for your hand blender and your utensils.
NOTE: Make sure the Pan Guard is installed with the mounting clips located between the ports on the flare blades.
USING THE MIX
Use the mixing attachment to blend smoothies, milkshakes, soups, boiled vegetables, icing or baby food.
- Insert the mixing lever into the bell-shaped blade (see "Installation Guide") and turn until it clicks into place.
- Insert the mixing lever into the motor housing and turn until it clicks into place.
- Plug the power cord into an electrical outlet.
- Hand Blender Speed Setting 1. Adjust the speed by turning the speed control on top of the hand blender.
- Insert a hand blender into the mixture.
NOTE: The immersion blender should only be immersed in liquid up to the length of the attachment. Do not submerge mortar beyond the seam of the mixing nozzle. Do not immerse the motor housing in liquids or other mixtures. - Press the power button to activate the hand blender.
- When mixing is complete, release the power button before removing the hand blender from the mixture.
- Unplug the appliance immediately after use and before removing or replacing attachments.
Insert the hand blender with the attached mixing arm into the mixing jar containing the ingredients at an angle. Use your free hand to cover the top of the mixing jug for more stability and to prevent splashing. Be sure to stop the hand blender before removing it from the jug to avoid splashing.
Place the hand blender momentarily on the bottom of the mixing jar, then, holding it at an angle, slowly pull it up against the side of the jar. When the hand blender is lifted, you will notice that the ingredients from the bottom of the jar rise up. When the ingredients stop rising from the bottom, return the hand blender to the bottom of the jug and repeat the process until the ingredients are at your desired consistency.
Gently lift the hand blender slightly with a circular motion of the wrist and let it fall back onto the ingredients. Let the movement of your wrist and the weight of the immersion blender do the work.
USING THE WREATH TIP
Use the whisk to whip cream, egg whites, instant puddings, vinaigrettes, mousse, or to make mayonnaise.
- Insert the whisk into the whisk adapter.
- Insert the whisk adapter into the motor housing and turn until it clicks into place. The adapter automatically adjusts the whisk according to the speed range suitable for beating.
- Plug the power cord into an electrical outlet.
- Starting the hand blender at speed 1. Adjust the speed by turning the speed control on the top of the hand blender.
- Insert a hand blender into the mixture.
Stainless steel whisk may scratch or mark non-stick coating; Do not use a whisk for non-stick cookware.
NOTE: The immersion blender should only be immersed in liquid up to the length of the attachment. Do not submerge product beyond the whisk adapter seam. Do not immerse the motor housing in liquids or other mixtures.
To prevent splatter and splatter, use the whisk attachment in deep containers or pans.
- Press the power button to activate the hand blender.
- When the blending process is complete, release the power button before removing the hand blender from the mixture.
- Unplug the appliance immediately after use and before removing or replacing attachments.
USING THE GRINDER *
Use the grinder attachment to grind small amounts of food such as cooked meats, cheese, vegetables, herbs, crackers, bread and nuts.
- Insert the chopper blade into the chopper bowl.
- Add small pieces of food to the bowl.
- Attach the chopper adapter to the chopper bowl.
NOTE: To attach the chopper adapter to the chopper bowl, place it straight down. Do not attempt to rotate the chopper adapter into place. - Align the chopper bowl with the motor housing and press it together.
- While processing, hold the motor housing with one hand and the chopper bowl with the other.
- Press the POWER button to activate the Hand Blender.
 For best results, "pulse" the power by pressing and releasing the power button until the ingredients reach your desired consistency.
 - When grinding is complete, release the power button.
- Remove motor housing from chopper adapter.
NOTE: To remove the chopper adapter from the chopper bowl, lift it straight up.
Do not attempt to unscrew the chopper adapter to remove it.** Processing time and speed are approximate.
Actual use may vary depending on food quality and desired cut size.OPERATING TIPS
- Cut hard food into small pieces to make it easier to mix or cut.
- The immersion blender is equipped with thermal protection against high operating temperatures. If the Hand Blender stops suddenly during use, unplug it and allow 10 minutes for it to reset automatically.
- To avoid splashing, insert the hand blender into the mixture before pressing the power button and release the power button before removing the hand blender from the mixture.

- When blending in a saucepan on the hob, remove the saucepan from the heating element to protect the hand blender from overheating.
- For better blending, hold the hand blender at an angle and gently move it up and down inside the container. Do not grind the mixture with an immersion blender.
- To avoid overfilling, leave room in the container to lift the mixture when using a hand blender.
- Make sure the Hand Blender extension cord does not extend beyond the hot heating element.
- Do not leave the hand blender in a hot skillet on the hob when not in use.
- Remove hard objects such as fruit pits or bones from the mixture before mixing or grinding to prevent damage to the blades.
- Do not use the hand blender to process coffee beans or hard spices such as nutmeg. Processing these products may damage the blades of the Hand Blender.
- Do not use the jug or bowl * in a microwave oven.
- Stainless steel whisk may scratch or mark non-stick coating; Do not use the whisk on non-stick cookware.
- To prevent splashing, use the whisk attachment in deep containers or pans.
CARE AND CLEANING
CLEANING THE HAND BLENDER AND ACCESSORIES
- Unplug the hand blender from the mains before cleaning.
- Remove the adapters and attachments by turning them (see Hand Blender Operation section).
- Wipe motor housing and chopper* and whisk* adapters with ad.amp cloth. Mild dish soap can be used, but non-abrasive cleaners.
NOTE: Do not immerse motor housing or adapters in water. - Wipe the power cord with a warm, damp cloth, then wipe the d.amp cloth with the cloth. Dry with a soft cloth.
Hand Blender Accessories and Inserts
Wash the mixing attachments, jar and lid, whisk, chopper bowl*, blades and guard in hot soapy water or on the top rack of the dishwasher. Dry thoroughly with a soft cloth.NOTE: Do not place the whisk or chopper attachments* in the dishwasher.