Puree baby food with water
Ultimate Guide on Baby Food Purees (4-6+ months)
Home » Feeding Style » Baby Food Purees » Stage One » Ultimate Guide on Baby Food Purees
Here it is, the Ultimate Guide on How to Make Your Own Baby Food! Everything you need to know to get started on making homemade baby purees is right in this guide. Tips, tools, storage methods, recipe combinations, starter purees, introducing new foods — name it, and you’ll find it here! This in-depth guide is perfect for babies ages 4-6+ months!
Medically reviewed and co-written by Jamie Johnson, Registered Dietitian Nutritionist (RDN), and Lauren Braaten, Pediatric Occupational Therapist (OT).
Purees for BabyAre you wanting to make your baby homemade baby food purees but don’t know where to start?
In this guide I’ll share everything you need to know to begin, starting from the best cooking tools to have on hand and safe storage. I will also share how to know when baby is ready for solids, how to introduce purees, the best first foods for baby, starter purees, and more! They’re all ideal for babies at least 4 months old (stage 1 baby food). You can also check out my best-selling cookbook for even more information and recipes!
In short, this comprehensive guide will teach you how to make and serve homemade baby food without stressing out about it.
That’s the key here — don’t stress out. It’s supposed to be fun, and it’s going to be! Hopefully, after going through this guide, you’ll realize that making homemade baby food is as easy as pie. Plus, seeing your baby wanting to devour your appetizing homemade purees is a priceless moment that is worth the work.
Here’s a tip: Grab a cup of coffee (or glass of wine), and break this post down into smaller sections so you can digest it (pun intended) over time.
As you start making your own baby food purees, you’ll realize that this once daunting task can actually become second nature to you. Don’t panic, you’ve got this!
Guide on Baby Food Purees Video
Watch this video to find out more about how to freeze, store and thaw your own purees!
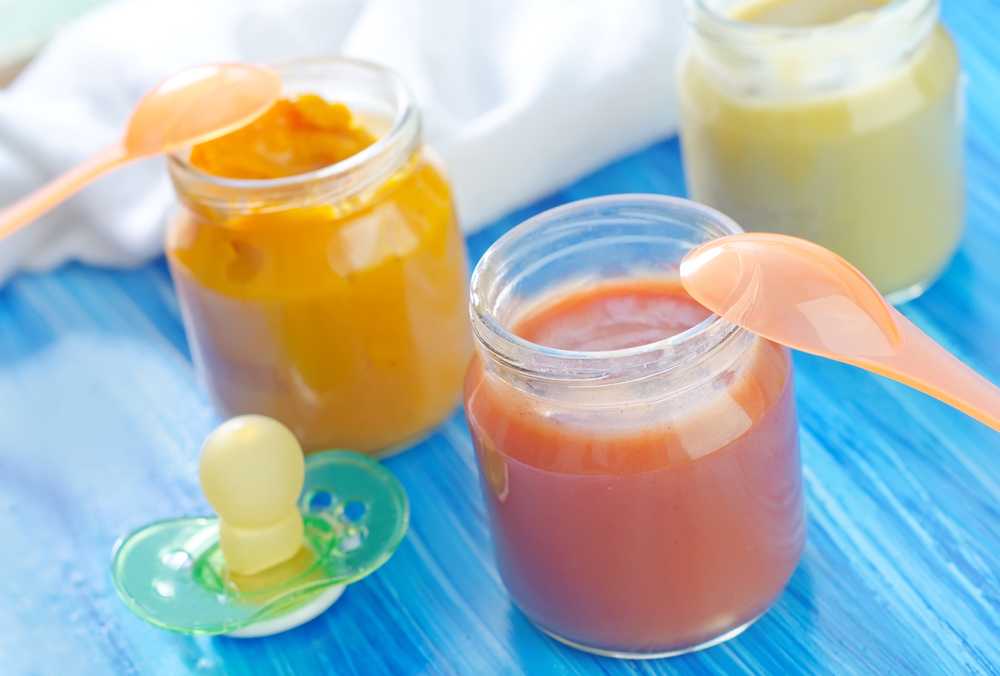
5 Reasons to Make Your Own Baby FoodNowadays, it’s easy to buy food for your baby. Many brands now tout that their baby food purees, pouches, and snack bars are organic. Given that you do have a choice, why should you cook at home?
TASTENothing tastes better than a healthy, homemade meal, and that goes for baby purees as well.
- Tastes Better – Food always tastes better using fresh, wholesome ingredients.
- Tastes Real – If you want your baby to experience what a real apple tastes like, then make a baby food puree using real apples. The industrial process of making store-bought baby food kills off most of the flavors, nutrients, and aromas of the produce, making purees taste bland and unnatural.

- Tastes Fresh – Most commercial baby food purees are heated to extremely high temperatures to have upwards of three-year shelf life. That means the food from the store is most likely older than your baby.
Don’t get me wrong — store-bought baby food is convenient if you are in a pinch. But you can’t beat the taste of any homemade baby food.
TEXTUREThe ability to control the thickness of your baby’s puree is an advantage that will not only help you get through the picky-eating days but also help transition your baby from purees to solid food.
- Some babies prefer thinner purees, while other babies like thicker ones. When you make your own, you are in control of how thin or thick your baby’s puree will be.
- Different textures are as new to your baby as the flavors themselves. So, varying a puree’s texture will not only give your baby a new eating experience but will also excite their taste buds.

Homemade baby food is undoubtedly healthier for your baby than any brand of store-bought food, whether jarred or in pouches. But the biggest nutrition win I feel you get is that you can tailor them to your child’s needs anytime.
- Is your baby feeling a little under the weather? Make a puree high in vitamin C.
- Low on iron? Add some beef, spinach, or beans.
- Maybe your baby is a little constipated. Making a puree with anything that starts with a “P” — pears, prunes, peas, peaches — will soon get your little one back on their adorable feet.
Since you’re the one who buys the ingredients and handles, preps, and cooks the purees, you can rest assured that you know exactly what’s going into all of your baby’s food.
What you make is what your babies get! There are no fillers, thickeners, suspicious ingredients with names you can’t pronounce, shelf stabilizers, or unnecessary water. Just healthy, flavorful homemade baby food that you can also enjoy!
Lastly, this might come as a surprise, but making your own baby food with all organic ingredients is more than 50 percent cheaper than buying their store-bought counterpart!
Depending on how much your baby eats, homemade baby purees can save you some serious money.
What is Traditional WeaningTraditional weaning (also sometimes called “spoon-feeding”) involves introducing food to your baby via puree form first and then gradually progressing the texture and types of foods over time. Since food is pureed with traditional weaning, the parent typically needs to spoon-feed their baby. Initial foods offered with this approach typically include thin, smooth purees, such as fruits, vegetables, oatmeal or rice cereal. Textures gradually progress to thicker purees, then mashed or chopped foods, and eventually soft finger foods, such as cooked vegetable pieces, toast, pasta, and meats.
- Baby learns how to swallow safely first, then works on chewing skills later. Purees can be very helpful for teaching swallowing, as they help intrinsic tongue muscles develop, preparing your baby to chew and swallow more efficiently. It’s also less common to gag or choke on purees, which may help some babies feel more comfortable when starting the feeding process.
- You know how much your baby has eaten. Whether using store-bought or homemade purees, you’ll be able to get a good estimate on how much your baby consumed.
- Baby can get a lot of flavor from the start. Who says purees have to be boring and bland? Especially if you make homemade purees, there are some pretty tasty flavor combinations that you can offer baby as some of their first foods.
- Less Mess (well, maybe). Although letting baby touch and explore foods is an important part of the process, if you’re feeling hesitant on just how messy things are going to get initially, starting with spoon-feeding purees might help you ease into the process.
- Preparing lots of different purees can be time consuming. In addition to making other meals for yourself and the rest of the family, it might feel challenging to make separate meals just for your baby. Although with homemade purees, you will often make a big enough batch so that you’ll have several weeks’ worth of food.
- Spoon feeding baby can make it tough to feed yourself during a family style meal. Sitting and eating when baby eats is possible, but you will likely have many interruptions as you pause to spoon-feed baby throughout the meal.
- Baby won’t get as much opportunity to engage in sensory exploration. Unless you progress to giving baby their own bowl or spreading purees on the tray and encouraging baby to taste the food off their fingers, they won’t get as much opportunity to feel the puree on their hands, fingers, and face.
- Feeding baby past signs of fullness. Reading baby’s cues is important no matter what approach you’re using, but there can be a tendency to continue to feed baby past signs of fullness when spoon-feeding and sneak in “just one more bite” from that almost empty container.
- Getting “stuck” in a comfortable zone. Once baby seems to have mastered taking purees from a spoon, it can get tempting to stick with what you know. But baby can get too comfortable with the smooth texture of purees if not encouraged to progress to other textures. This may lead to difficulties managing these textures later on in life.
Whether you decide to go with traditional weaning (purees), baby-led weaning or a combination of both, look for these readiness signs in your baby:
- Around 6 months of age
- Sitting with minimal assistance
- Good control of their head and trunk
- Bringing hands and toys to their mouth
- Appears interested in food, possibly by reaching for or leaning forward towards food
Before you start weaning your baby, you should consult with your pediatrician to make sure your child is developmentally ready.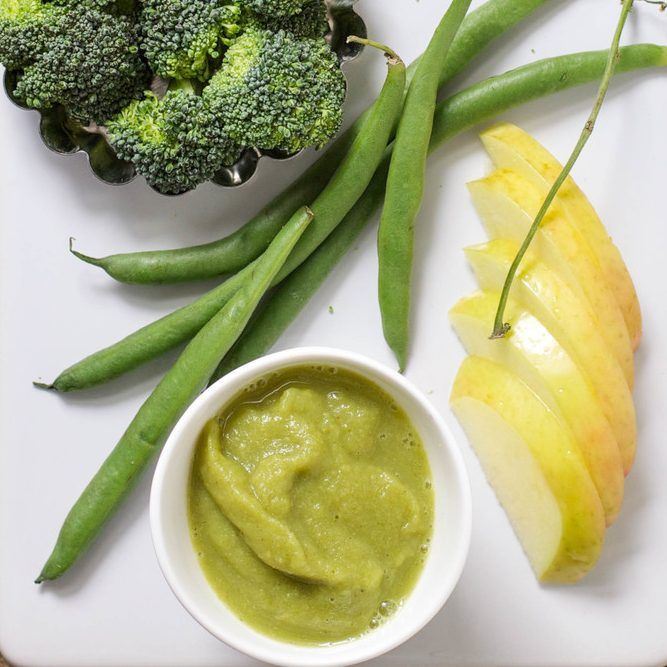
Fortunately, most of the tools you need to make homemade baby food can already be found in your kitchen. Score!
Tools Needed- blender or food processor
- baking sheet
- saucepans
- steamer insert with lid
- knives
- veggie peeler
- spatula
- freezer tray
- storage containers for fridge
- stasher bag
- reusable pouches
- baby food maker
- highchair
- suction bowl or baby bowl
- baby spoon
- open lid cup
- bib with catch pocket
- sleeved bib
- splat mat to cover the floor
Learning Resources: looking for the best high chair, cups or spoons for your baby? Then we’ve got you covered! Here you will find How to Find the Best High Chair for Baby, an easy guide on Best First Open Cups for Baby (plus 4 tips when introducing a cup) as well as 3 Tips on How To Spoon Feed Baby (plus – our favorite spoons for purees or BLW).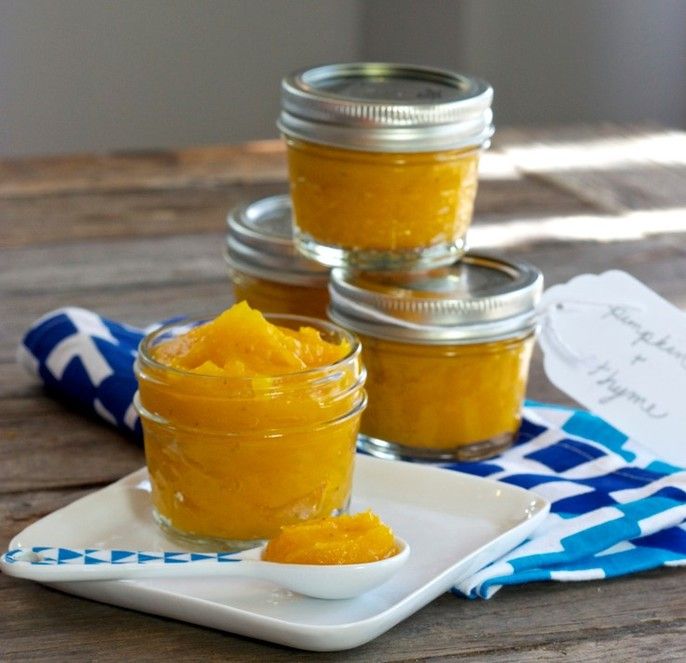
All of the baby food recipes on this site and in my cookbooks are designed to enhance the natural taste of the fruits and veggies while keeping as many nutrients intact as possible. In other words, the goal is to make a puree that’s both healthy and delectable.
There are several ways you can cook baby food purees, but the main techniques I use are:
- Steaming
- Roasting
- Simmering
- Raw
Keep in mind, that as long as the produce is cooked until soft, that there isn’t a right or wrong way to cook it for baby food.
If a recipe for broccoli calls for steaming but you want to roast it because you will already be roasting some broccoli for yourself for dinner, then go ahead and roast the broccoli for your baby’s puree. Play around and have some fun with it!
Adding Spices to Baby PureesIt’s encouraged that you can serve your baby a homemade puree with a pinch of spices or herbs from the very first bite.
Benefits of Spices
- boost and compliment any fruit or vegetable puree
- broaden baby’s emerging palate
- add more flavor and depth into their foods
- decrease picky eating in the years to come
- have medicinal properties in them — they can help with digestive issues, boost brain functions, repair muscle tissues, and so on.
While each puree recipe on this site has a selection of spices or herbs that complement the flavors of the fruit or vegetable in the puree, it’s up to you if you want to add them. You do you! Either way, the puree recipes on this site will be delicious.
Top Spices to Add to Baby’s Puree
- Cinnamon
- Cloves
- Nutmeg
- Basil
- Mint
- Parsley
- Mild Curry Powder
- Fresh Lemon Juice
- Garlic
- Rosemary
Pureeing homemade baby food is a very straightforward event. However, it can take some practice to get the smoothest, creamiest puree for your baby.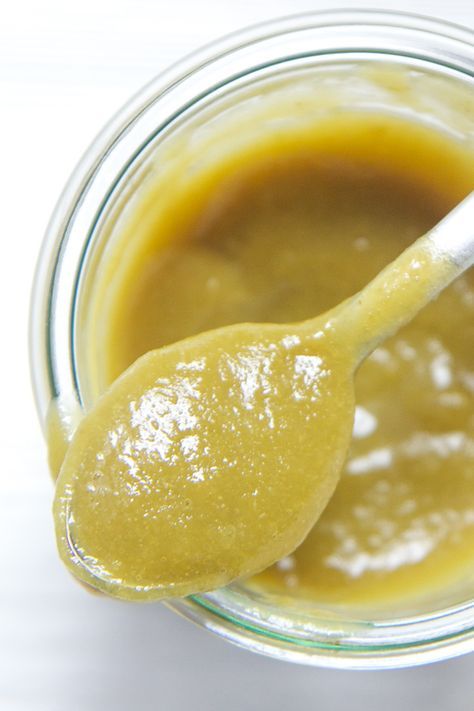
Step-by-Step Instructions
- Place Produce In Blender: place cooked produce into a blender or food processor.
- Start Machine: turn the machine starting on low and increasing until you reach the highest setting.
- Add Liquids: add liquids (water, fresh breast milk or formula) in small increments if needed to help smooth out the puree. Root veggies may been up to a cup of liquid while fruits may not need any. Add in 1/4 cup of liquids at a time to make sure not to add too much liquids.
- Blend: it usually takes 1-2 mintues to fully blend a puree for baby. If you are getting a chunky puree, add in a little bit more water and keep blending.
Note on Blending: you will always get a smoother puree when you use a blender over a food processor. Most babies will not notice a difference between the texture of baby food made in a blender versus a food processor but if your baby is having trouble with the texture of a puree made in a food processor, you may want to try using a blender.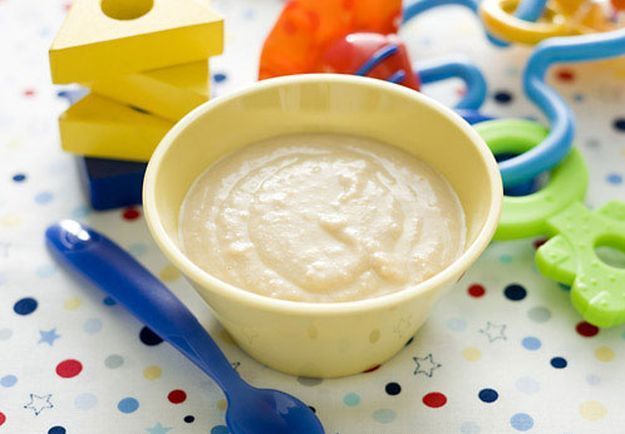
- Give It Time: Give your blender or food processor some time to work its magic. It takes 1-2 minutes of blending for each puree to get the smoothest puree. But it may take longer if you have an older blender model or you are using a food processor.
- Add Liquids: You may have to add extra liquids like water, fresh breast milk, or formula into the blender or food processor in order to get the blender really going. Hard root vegetables like carrots, sweet potatoes, beets, etc., often take at least 1-2 cups of liquids because they do not have high water content. I recommend adding liquid into the blender in 1/4 cup increments or smaller so you don’t get a runny puree.
- Cyclone Effect: You will know you have the right amount of liquid and are at the right speed when you get the cyclone effect. This is when all the ingredients are completely circling the blending without any interference.
- Scrape Down Sides: While blending, make sure to scrape the sides with a spatula to get all the produce and spices incorporated into the puree.
- Blender vs. Food Processor: A high-speed blender will give you the smoothest puree. A food processor will also work but the result is a slightly thicker puree. The upside of the food processor is that you don’t have to add as much liquid to the puree.
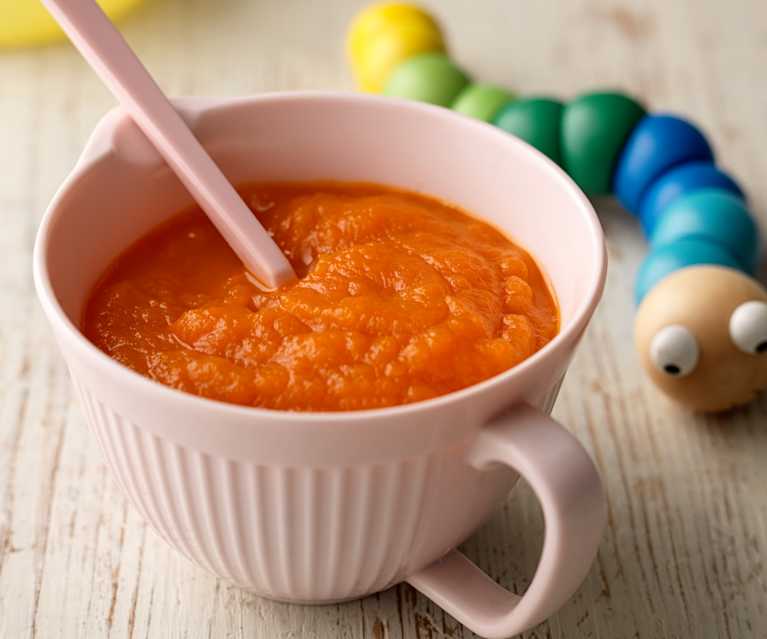
Just Starting: Roasted sweet potato and 1/2 cup of water.
30 Seconds: Scraped down the sides and added 1/4 cup more of water.
60 Seconds: Scraped down the sides and added 1/4 cup more of water.
90 Seconds: Added 2 tablespoons of water, and it was perfect. The puree was clearly running through the blender and the puree was getting super smooth.
Finished: A smooth puree for the win!
See the video in this post to get a step-by-step look at how to blend baby food.
Your freezer is about to become your new best friend, allowing you to keep several weeks’ worth of baby purees at the ready.
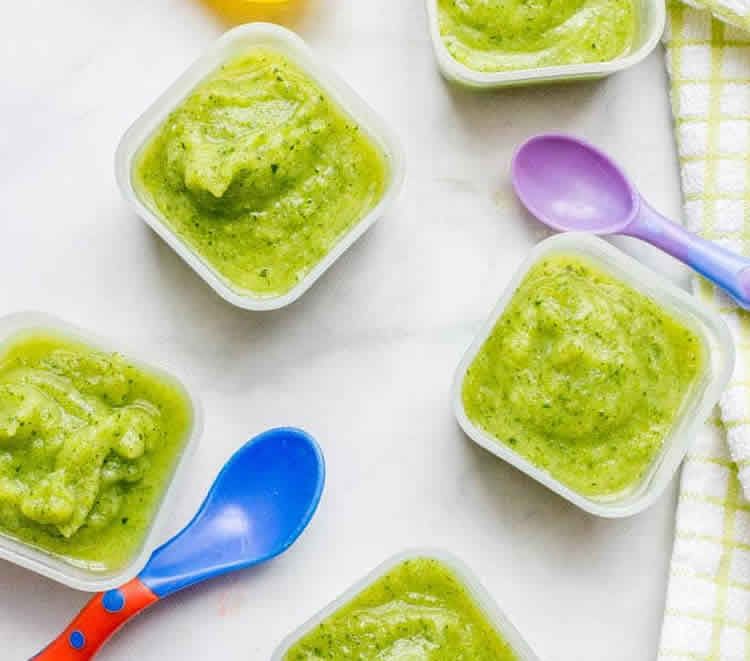
How to Freeze Baby FoodWhenever you make a puree, put several ounces in the fridge for your little one to enjoy that week, then freeze the rest of the batch for your baby to eat at a later date. Please make sure you get it in the puree into the fridge or freezer within 1 hour of cooking to prevent bacteria growth.
- Make a puree.
- Let it cool slightly.
- Transfer the puree to freezer trays or freezer jars.
- Cover the freezer trays with a lid or plastic wrap.
- Label with date and name of puree.
- Place the tray in the freezer.
- Let it freeze for at least 5 hours.
- Take the tray out of the freezer.
- Crack the purees out of the trays.
- Place the frozen purees into zip-lock baggies or stasher bags.
How to Store
Baby FoodPurees can be stored for up to four days in an airtight container in the fridge or 4 months in the freezer.
How to Thaw Baby FoodThawing may seem like a no-brainer, but it never hurts to know your options. There are three different ways to thaw purees.
Microwave- Take the frozen puree cubes that you want to serve out of your freezer.
- Place them in a glass microwave-safe container.
- Microwave in 20-second increments, stirring every time.
- The puree is ready when it is just warm to your touch.
- Grab two clean spoons, one for you and one for your baby, and test your puree before serving.
Heating Tip: To prevent the microwave from unevenly heating the puree, which can leave it with cold and really hot spots and can burn your baby’s mouth, make sure you stir between each interval and taste test it before serving to your baby.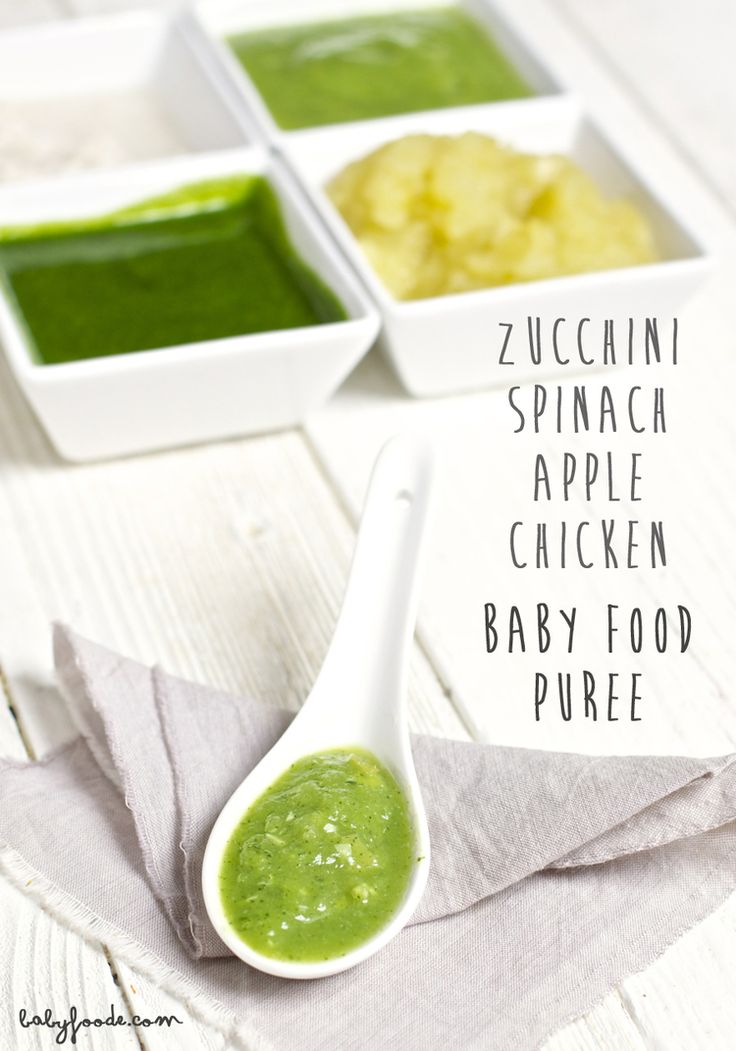
This one takes the longest time, but it is an excellent alternative to using a microwave.
- Take the frozen puree cubes you want to serve out of your freezer.
- Place the cubes in an air-tight glass container.
- Place the container in the fridge and let the cubes thaw for 8 to 12 hours, usually overnight.
- Do not leave the puree in the container to thaw on the counter or anywhere out of the fridge, as bacteria will start to grow at a rapid rate — which is definitely not recommended.
- Note that the puree will be cold but thawed. So if your baby likes their puree warmed, you’ll have to finish the job using the microwave or stovetop method.
- In a small saucepan, add the frozen puree cubes you want to serve to your baby.
- Over medium-low heat, gently cook the puree until warm, stirring occasionally.
Thawing Tip: Some infants like their puree cold, warm, or really warm, and some will eat it no matter the temperature.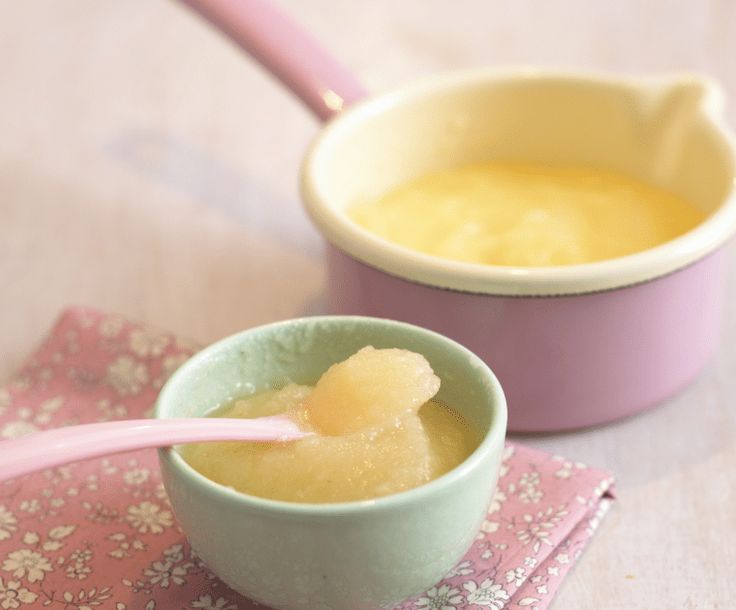 You will get to know your baby’s personal preferences as the two of you bond over food.
WeeSprout Glass Baby Food Storage Jars
These 4oz containers with lids allow you to prepare the perfect amount of food for your little ones. No more food waste! Made with food-grade glass and a plastic lid. Microwave, freezer, and dishwasher-friendly!
View Product
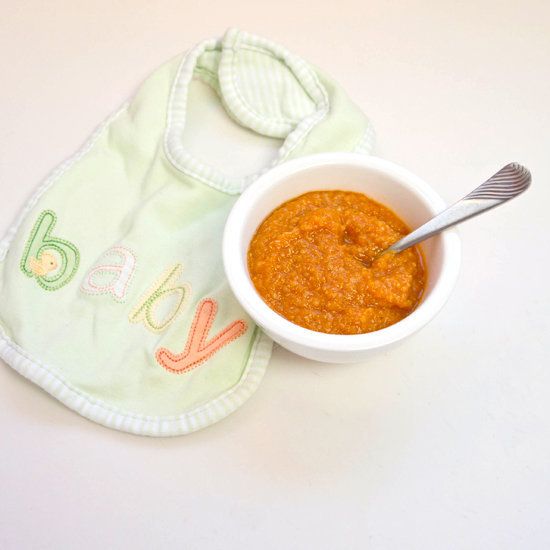
How to Introduce PureesHigh chair? Check. Bib? Check. Fully charged cell phone? Check.
With this holy trinity of baby-feeding accouterment, you’re ready for that first feed.
The faces, oh, the faces your baby is about to make! Out of all the firsts, feeding is the most fun — and the messiest. So grab a few wipes, double-check that your phone has enough storage for dozens of photos and videos, and let’s get started!
Before you begin, make sure your baby has a little bit of breast milk or formula in their belly, about half of what you’d normally give in a regular feeding.
Not too full.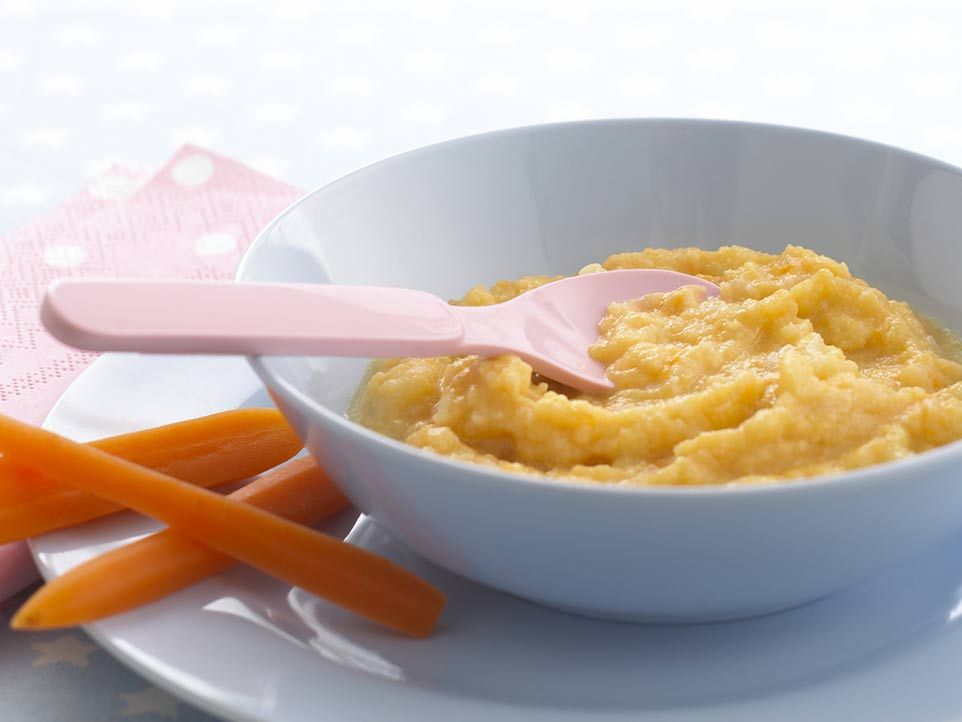 Not too hungry. Just right.
This is not going to be a clean and simple process. Your baby may eat food one day, refuse it the next, and paint their face with it the next. It’s all okay. Playing with food is a good thing; it is simply a way for babies to explore, learn, smell, and taste the world around them. So have those wipes close by, and remember:
- Start Slowly – Two teaspoons once a day is enough food for babies for the first couple of meals. Their bodies need time to adjust and digest new food. If they are still acting hungry, give them some more breast milk or formula.
- Let the Baby Decide – Your little one should determine how fast or slow they want to eat.
- All Spoons on Deck – Have more than one spoon ready. Your baby will surely snatch one out of your hands to play with, which is a-okay.
- Have Fun – Smile at your baby throughout the experience, and try to relax.
 The more fun you have, the greater the likelihood your baby will enjoy it, too (even if they barely eat or don’t eat at all).
 - Build Up – After a couple of days, build up the quantity of food you offer one tablespoon at a time.
Are you ready to start the feeding? Select a puree you’ve already made. Place just one or two teaspoons of it into its own bowl and slightly warm this small amount. You can choose whether to gently spoon it into your baby’s mouth or hand the spoon over to them to attempt self-feeding. If your baby tries to grab the spoon from you and gets it into their mouth by themselves, whoa — you’ve got success on your hands. If the experience is a bit milder, and they let you spoon some puree into their mouth, enjoy it. This is a winning experience, too.
The LikelySome babies will simply not open their mouths. Some babies will take one bite, clamp their mouths, and turn away.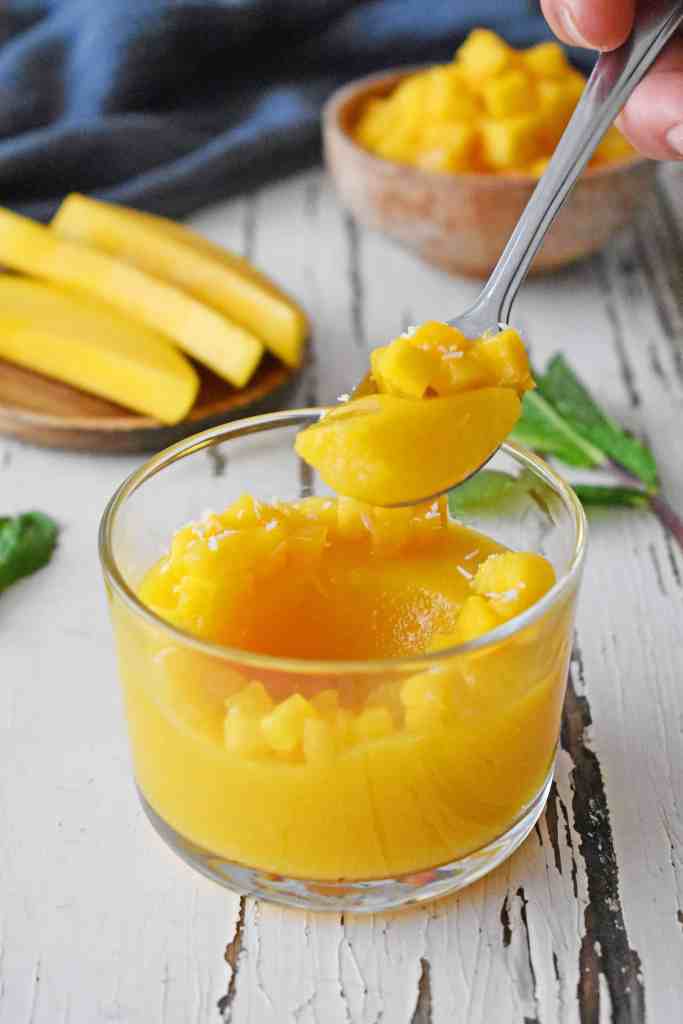 If (and when) any of this happens, don’t force the spoon into their mouth, and don’t stress out. Here are a couple of things to try:
- Put a bit of the puree at the end of your finger and see if your baby will suck it off. This is an unintimidating way to begin, especially as spoons can be scary for little ones.
- Pour a tablespoon of puree onto the high chair tray, and allow your baby to play with it if they want. This is a less micromanaging approach to letting the baby explore new food. As babies love to put everything in their mouths, odds are at least some will get in (or near) it.
- If your baby has no interest in these options, end the feeding. Dispose of the one or two teaspoons you warmed. Put the remaining, unheated puree in the refrigerator to try again tomorrow.
Remember that before their first birthday, babies receive their main source of calories, vitamins, fat, and protein from your breast milk or formula. At this point, any puree or solid food you give your baby is mainly used to teach them how to eat and explore real food.
Not sure which foods to offer first? These 10 foods are nutrient-dense, easy to make, and tasty purees are a choice for your baby.
- Avocado
- Banana
- Sweet Potatoes
- Apple
- Broccoli
- Pear
- Carrot
- Yogurt
- Oats
- Green Bean
You will want to avoid these foods until your baby is developmentally ready for them:
- Whole nuts, seeds
- Clumps of nut butter
- Dried fruit
- Hard candy
- Hard, raw fruits and veggies
- Popcorn
- Hot dogs
- Whole grapes
- Added salt and sugar
- Honey until 1 year of age
- Cow’s milk until 1 year of age
Aim to feed baby a variety of flavors to help expand her palette, which can help reduce picky eating. Try to make sure you serve at least one iron-rich food per meal to help prevent iron deficiency anemia.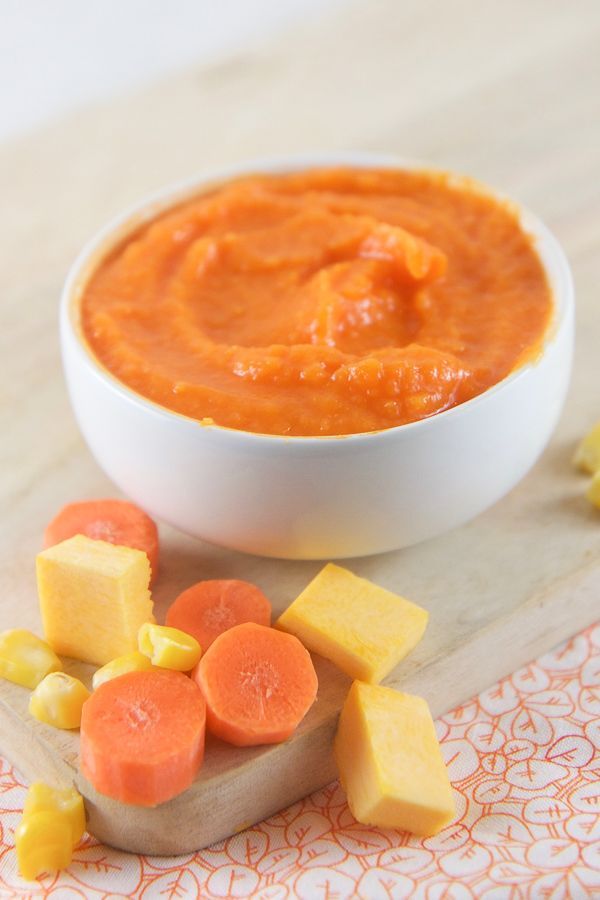 To begin, serve thin pureed foods that
Most babies are ready to start purees around six months of age. Start with 1-2 meals a day and keep the same amount of formula or breast milk feedings, usually five. Note that there is no one right schedule for your baby.
7am- 7:30-wake-up, bottle/breastfeed
7:30am- 8:30am- play
8:30am- 9am- avocado puree
9am- 10:30am- morning nap
10:30am- 11am- bottle/breastfeed
11am- 12pm-play
12pm-2pm- afternoon nap
2pm- 2:30pm-bottle/breastfeed
2:30- 3pm- banana puree
3- 3pm -play
4pm- 5pm- cat nap
5pm- 5:30pm- bottle/breastfeed
5:30pm- 6:30 pm- play
6:30pm- bath
7pm-7:30pm- bottle/breastfeed
7:30pm- bedtime
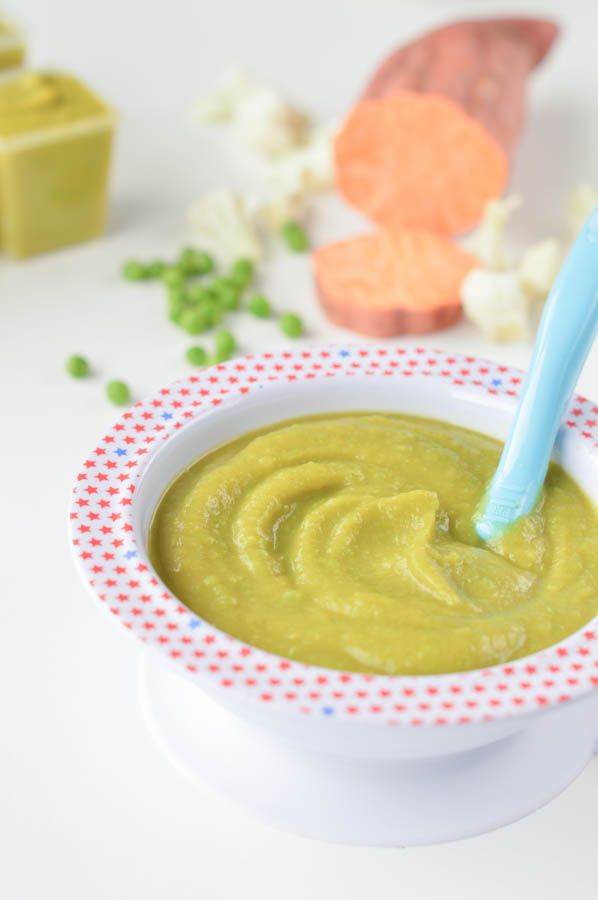
If your baby is not eating 2 solid meals a day yet, go ahead and increase purees to twice a day. Once you have introduced a variety of single-ingredient purees, you can start offering combination purees.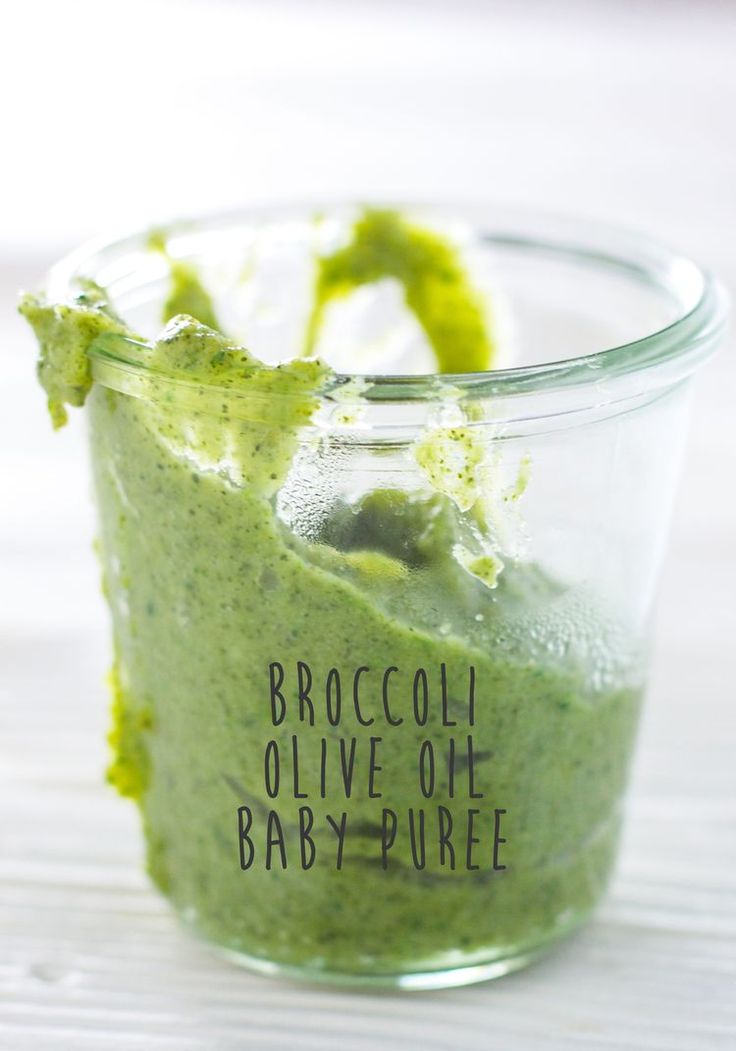
7am- 7:30am- wake-up, bottle/breastfeed
7:30-8:30am- play
8:30am– 9am- apple and carrot puree
9am-10:30am- morning nap
10:30am- 11am- bottle/breastfeed
11am-12pm-play
12pm- 2pm- afternoon nap
2pm- 2:30pm- bottle/breastfeed
2:30- 4pm- play
4pm- 5pm- cat nap
5:00pm- 5:30pm- bottle/breastfeed
5:30pm- 6:00 pm- play
6:00pm- 6:30pm- sweet potato and chicken puree, yogurt on the side
6:30pm- bath
7pm- 7:30pm- bottle/breastfeed
7:30 pm-bedtime
By now, your baby should be getting 3 meals a day, in addition to formula or breast milk, which is usually reduced to 4 feedings per day. Around 9-10, your baby should be introduced to chunky purees and then quickly to finger foods.
7am-7:30am- wake up, bottle/breastfeed
7:30am-8:30am- play
8:30am- 9am- breakfast of a quartered hard-boiled egg, halved raspberries, whole grain pancakes
9am-10am- play
10am-12pm- morning nap
12pm- 12:30pm-bottle/breastfeed
12:30pm-1pm- play
1pm- 1:30pm- lunch of cut up baked chicken, steamed broccoli and rice
1:30pm-2:45 pm- play
2:45pm- 3pm- snack of whole grain O’s, cut up cheese stick and sliced strawberries
3pm- 4:30pm- afternoon nap
4:30pm- 5pm- bottle/breastfeed
5pm-6pm- play
6pm- 6:30pm- dinner of ground hamburger meat, baked sweet potato sticks, steamed peas and carrots
6:30pm- bath
7pm-7:30pm- bottle/breastfeed
7:30 pm-bedtime
Babies are less likely to gag or choke on purees compared to solid foods.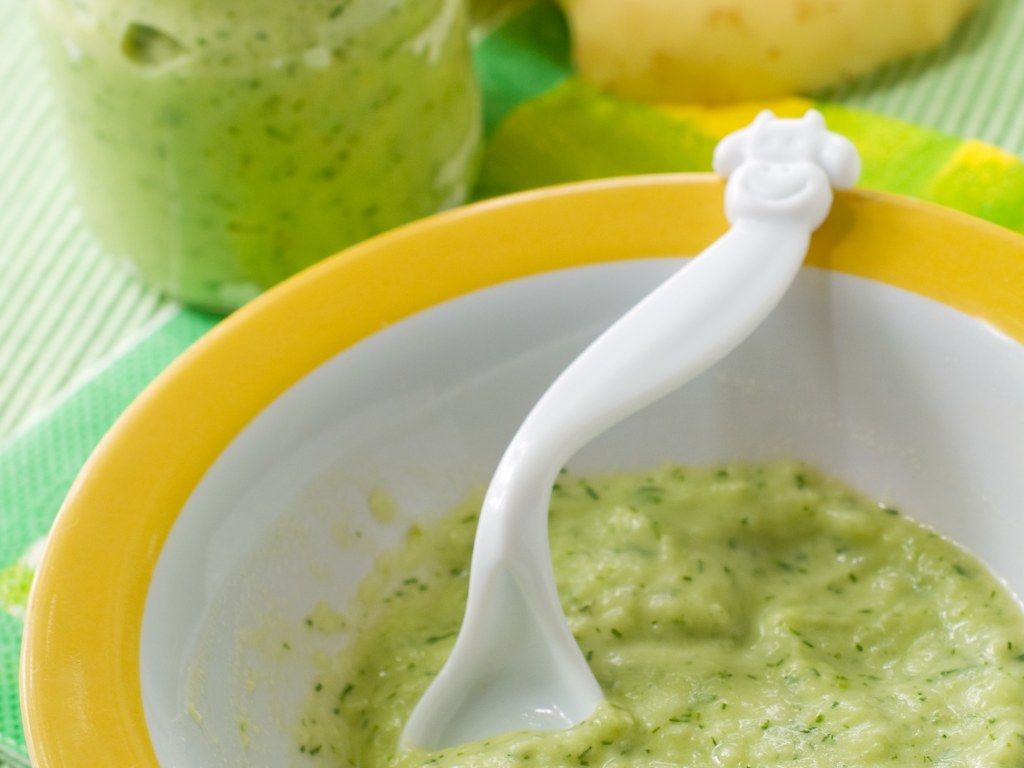 When babies first suck on the breast or bottle, they are learning how to swallow liquids. Transitioning to purees can help teach your baby an effective swallowing technique, by propelling foods backward with the tongue and swallowing.
Although it may still look and feel intense or scary the first time a parent witnesses it, gagging is different than choking.
GaggingWhen a baby gags, it is most likely because food that has not been chewed well has gotten too far back in the mouth. The gag reflex is a built-in protective mechanism to protect the airway from food. With practice, your baby learns that they need to chew first, then swallow the food. Fortunately, with continued practice with eating, the gag reflex should lessen over time.
Signs of gagging include:- sounds, such as coughing or hacking
- baby’s skin may turn red or a darker shade
- baby’s eyes might water
Babies usually recover fairly quickly, and you may see the food come forward in their mouth.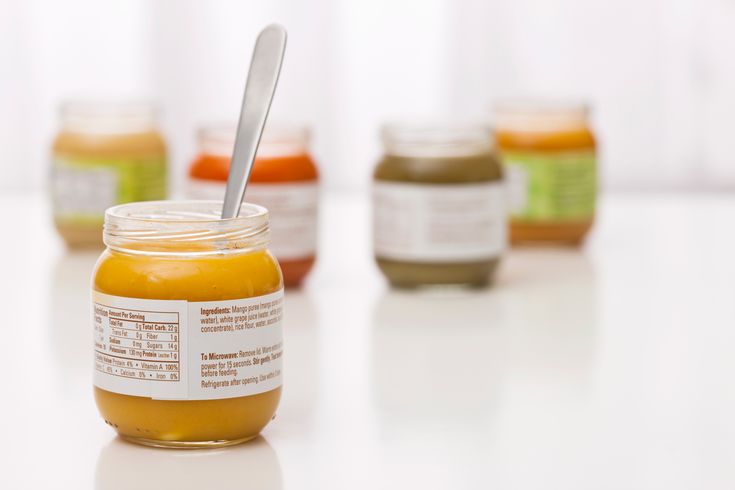 Although not as common, vomiting after gagging may happen. During this time, watch closely and do your best to stay calm.
On the other hand, choking happens when there is a blockage of the upper airway, from food or an object. Complete blockage of the airway prevents a person from breathing effectively. Therefore, choking is a true medical emergency and requires quick intervention on your part.
Signs of choking include:- baby is quiet
- baby’s skin may turn blueish in color
- baby won’t be able to cry or make much sound
Your baby may become unresponsive or lose consciousness if the food is not cleared. This is why it’s recommended to know CPR before starting solids of any kind.
How to Keep Baby SafeAs a parent of two, I know how scary it can be to introduce solid foods to your baby. With the proper precautions and knowledge, the fears will loosen and feeding your baby can become a wonderful adventure for both of you.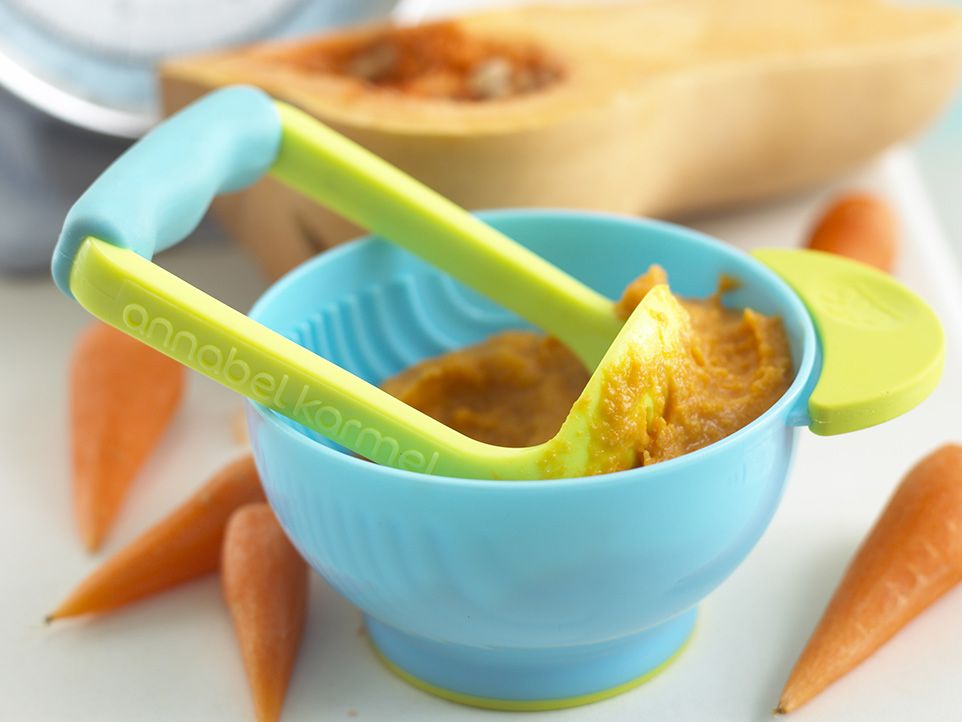 To be prepared, we recommend you attend a live class in your area or take this online Baby CPR Course.
- Always supervise with food – sit with your baby and try not to multi-task while your baby is eating.
- Baby should be sitting in an upright position for all meals and snacks, not reclined. If your baby starts to get sleepy during eating, remove food.
- No eating in the car seat unless an adult is in the backseat supervising your baby.
- Do not let baby eat on the go. Once your baby is crawling or walking, avoid letting them move around with food in their mouth or holding food in their hands.
- Check the temperature of foods before offering them.
- Check baby’s mouth after they are done eating. Some babies may pocket food in the sides of their cheeks or get food stuck to the roof of their mouth as they are learning to eat. If you see any food remaining, encourage your baby to keep chewing, spit it out if they need to, or take sips of water or milk.
 Avoid sticking your finger in your baby’s mouth to get the food out – we want baby to learn how to manage taking care of the food.
Safety 101: CPR and Choking (0-12 years)
On online course for today’s modern parent! This course goes over all the information you need to help your child if they are choking.
- Expert-taught course from a Certified CPR Instructor
- 30+ minutes of on-demand content
- 10+ downloadable guides and checklists
- 2-years of access to course material – refer back when you need it most
Enroll Today
How to Teach Babies to ChewWhen babies first start chewing, the movement you see is a basic up and down jaw movement, sometimes called munching, that will eventually progress into a mature chewing pattern, called rotary chewing. Throughout this process, babies are also developing side-to-side tongue movements, called tongue lateralization. Tongue lateralization helps your baby push food over to their gums, where the molars will eventually come in, and where the heavy work of chewing happens.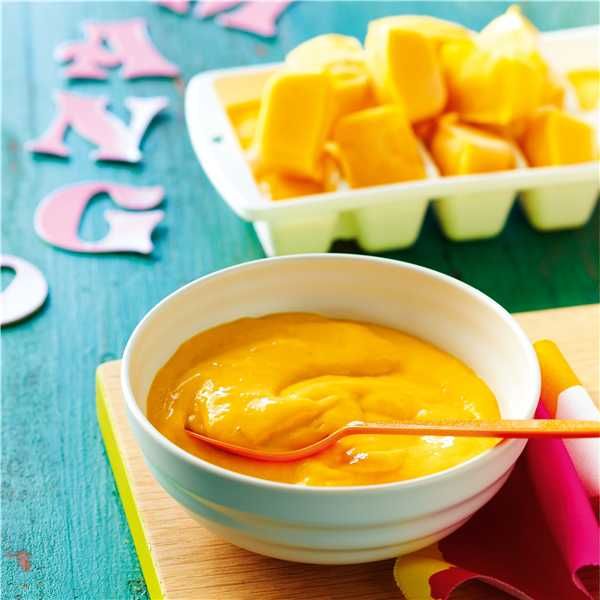 As your baby chews the food multiple times, it forms into a little ball or “bolus” of food, which is then transferred to the back of the mouth for swallowing.
Purees can also be used to develop the skills needed for chewing. You can place a spoonful of puree to the sides of the mouth as you would with a teether or soft piece of food. The purpose of this is not to expect your baby to start “chewing” the puree in the way that we think of chewing as adults, but rather to encourage your baby to start working tongue lateralization.
Frequently Asked Questions
How many ounces will baby actually eat?
This varies with each baby so it just depends! Some babies will only have a taste and be done, and others will want more and more. Some babies have a larger appetite than others so it’s hard to know but start with one teaspoon and work your way up to a tablespoon, and then more if your baby is still interested. Baby will eat more as they get older but always pay attention to your baby’s hunger and fullness cues to know when to stop feeding.
How many ounces of purees should baby eat?
By the time baby is ready for finger foods, she should be eating around 4 ounces of food at each meal. If it is more or less than this, do not worry. Babies get most of their nutrition from formula or breast milk until they turn 1 year old.
Does baby need teeth to eat?
The question of how babies can chew foods without teeth makes any parent scratch their heads! But in reality, we all chew food with our back molars, not our front teeth, which baby doesn’t get until 18-22 months of age. Good thing babies have super tough and strong gums, which they use to mash, gnaw and chew foods.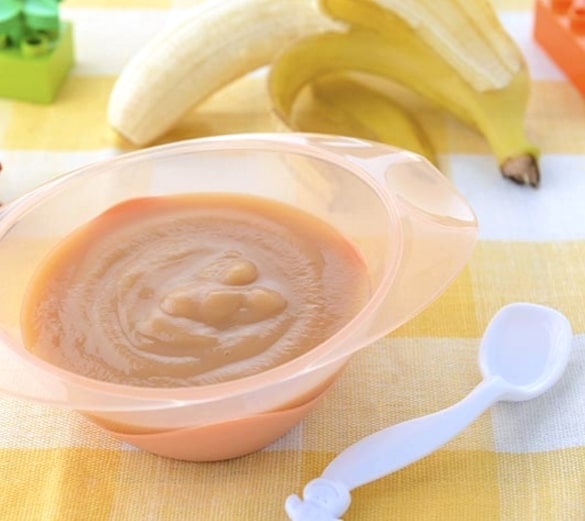 Baby’s gums are better at chewing food than you would think, and your baby will be able to chew more foods the older they get, even without their molars.
Can you mix baby-bed weaning and purees?
Absolutely! Both purees and solid foods are great ways to introduce your baby to new flavors and textures. Babies actually learn to swallow liquids first, whether in the form of breastmilk or bottles. Purees are similar to offering liquid that’s been thickened a bit, so this can help with introducing your baby to a texture change and getting practice with swallowing solid food. Just consider limiting the amount of times you switch back and forth between soft solids and purees during each meal, at least when your baby is first learning to eat. Instead, you could offer a veggie puree as the “appetizer” before soft solids at one meal, or yogurt as the “dessert” at another meal.
Puree Feeding
Tips- Relax: try to relax and don’t worry too much about how much baby eats. It should be fun for you and baby.
- Timing: babies tend to tolerate purees best 1 hour breastfeeding or bottle, when they aren’t too hungry or too full.
- Limit distractions: turn off screens, put away toys, and sit down face to face with baby during the meal.
- Follow baby’s lead: it can be easy to overfeed when using traditional weaning vs baby led weaning, so always follow baby’s cues for when they are done eating. Turning away from the spoon, closing his mouth, or pushing food away are all signs that baby is finished with the meal.
- Start with a small amount: and small servings. 1-2 oz of food per meal is adequate. Remember, these servings will be smaller than you think and at this stage, breast milk or formula will still be your baby’s primary source of calories and nutrition.
- Offer the spoon and allow waiting time: after you bring the spoon toward baby’s mouth, wait for her to open and accept it. Allow baby to close her top lip and suck puree off the spoon, while you guide the spoon straight out of the mouth. Avoid scraping the spoon on the roof of the mouth as you bring it back.
- Use shallow spoons or flat spoons: these help baby with clearing puree off with the top lip. A couple options we love include Olababy and ezpz mini spoon.
- Give time to practice: at first you might notice baby pushing the food back out and then swallowing. With time and practice, this forward/backward reflexive motion with the tongue will fade and baby will start swallowing more food than he pushes back out.
- Have a back spoon (or two!): even very young babies may want to be involved in the process as much as possible. Giving baby an extra spoon to hold can be helpful in giving baby sense of control and promoting hand-eye coordination.
- Let baby get messy! Encourage touching and playing with purees for a full sensory experience.
Or watch a shortened version of this video here.
Make Baby Food
Make baby food puree per the recipe. This could be by steaming, roasting or sauteing.
Freeze Purees
Pour puree into freezer tray or small baby food jars.
Lable the freezer tray or baby food jars with the recipe name and date.
Place the tray or jars in the freezer and freeze for at least 5 hours.
Pop the frozen baby food cubes out and place them into a zip-lock baggie or stasher bag.
Thaw Baby Food
Microwave –
Take the frozen puree cubes that you want to serve out of your freezer.
 Place them in a glass microwave-safe container. Microwave in 20-second increments, stirring every time The puree is ready when it is just warm to your touch. Grab two clean spoons, one for you and one for your baby, and test your puree before serving.
Fridge –
Take the frozen puree cubes you want to serve out of your freezer. Place the cubes in an air-tight glass container. Place the container in the fridge and let thaw for 12 to 16 hours. Do not leave the puree in the container to thaw on the counter or anywhere out of the fridge, as bacteria will start to grow at a rapid rate – which is definitely not good. The puree will be cold but thawed, so if your baby likes her puree warmed, you’ll have to finish the job using the microwave or stovetop method.
Stovetop –
In a small saucepan, add the frozen puree cubes you want to serve to baby.
 Over medium-low heat, gently cook the puree until warm, stirring occasionally.
Serve and enjoy!
Blender
Bumkins Baby Bowl
Freezer Tray
Tripp Trapp High Chair
Did you make this recipe?
Tag @babyfoode on Instagram and hashtag it #babyfoode!
Pin Recipe Email a Friend
10 Baby Food Purees (Stage 1)
Everything you need to know about making stage 1 baby food, including 10 recipes for tasty purees that are perfect for introducing solids.
Introducing solids to your baby is such an exciting milestone but it can also be an overwhelming time with lots of questions. When is your baby ready for solids? Which foods should you start with? And how do you make homemade baby food?
I’m here to make sure you have all the information you need! Plus sharing 10 baby food purees to give you some ideas of where to start if you’ve decided to make your own baby food.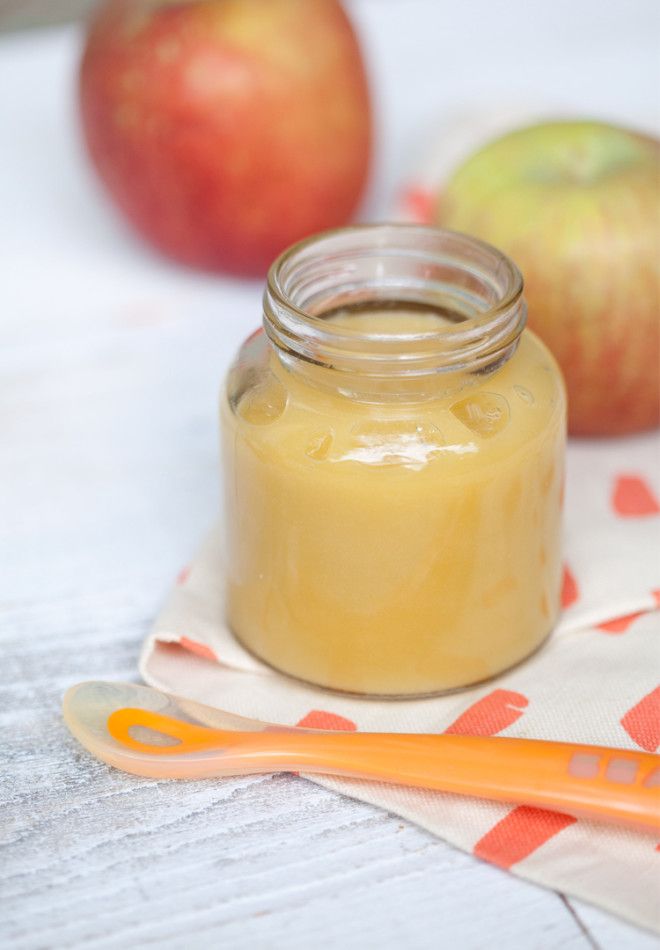
When To Start Solids
Most pediatricians recommend babies start solids between 4-6 months, but you know your baby best so trust your gut and do what feels right to you (with guidance from your pediatrician)!
I have a great guide for introducing solids to babies where I outline the basics and share my approach, but just to recap, here are some signs that your baby is ready to start enjoying solid food:
- Baby can hold their head up in an upright position without too much bobbing
- Baby can sit up with (or without) support
- Baby has lost the tongue thrust reflex
- Baby puts their hands or toys in their mouth
- Baby has shown interest in food such as leaning forward and opening their mouth or trying to grab food you’re eating
How to Introduce Solid Food to Baby
Once you’ve decided that your baby is ready to start solids, it’s go-time. There are different approaches to this including baby led weaning, where you skip purees all-together and let your baby feed themselves with finger foods from the start and traditional weaning, which starts with pureed (or blended) foods.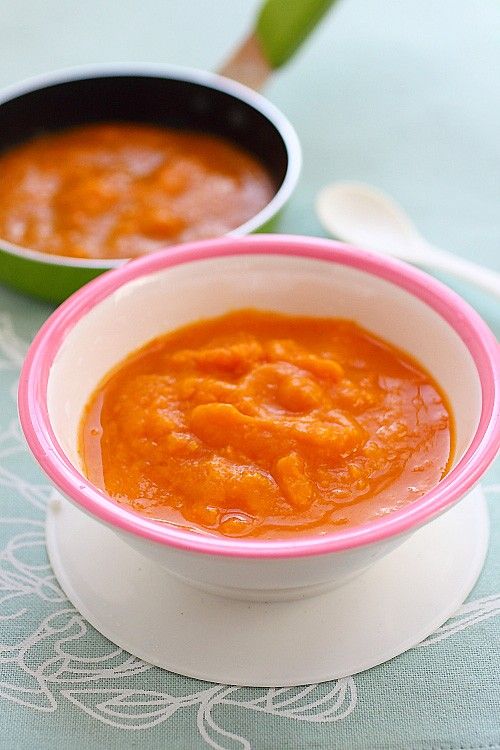
With Olivia I did a hybrid approach where the first few foods we introduced where purees and then we started with a few finger foods when she seemed ready. I go into more detail on this in my introducing solids post.
To be honest, if you’re planning to do baby led weaning this post probably won’t be that helpful because it’s focused on how to make a variety of single ingredient purees.
What is Stage 1 Baby Food?
If you decide to use purees, you’ll quickly notice that baby food is labeled by three stages. Here is a breakdown of what these different stages mean:
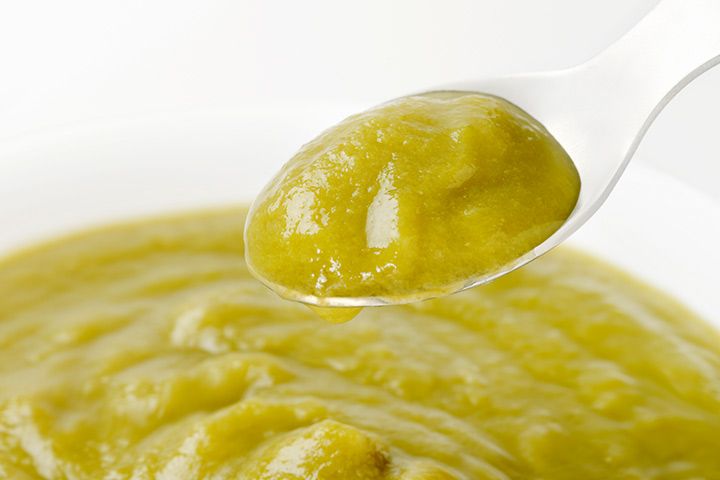
- Stage 1 (4-6 months) – single ingredient foods that are pureed into a very thin consistency with no chunkiness whatsoever that can be served with a spoon.
- Stage 2 (around 6-8 months) – slightly thicker consistency and typically includes food combinations and the addition of spices like cinnamon, nutmeg, turmeric, mint, basil, etc. See my stage 2 baby food combos.

- Stage 3 (around 9-12 months) – thick blended foods with chewable chunks or small cut up pieces of easily chewed food.
Best First Foods for Baby
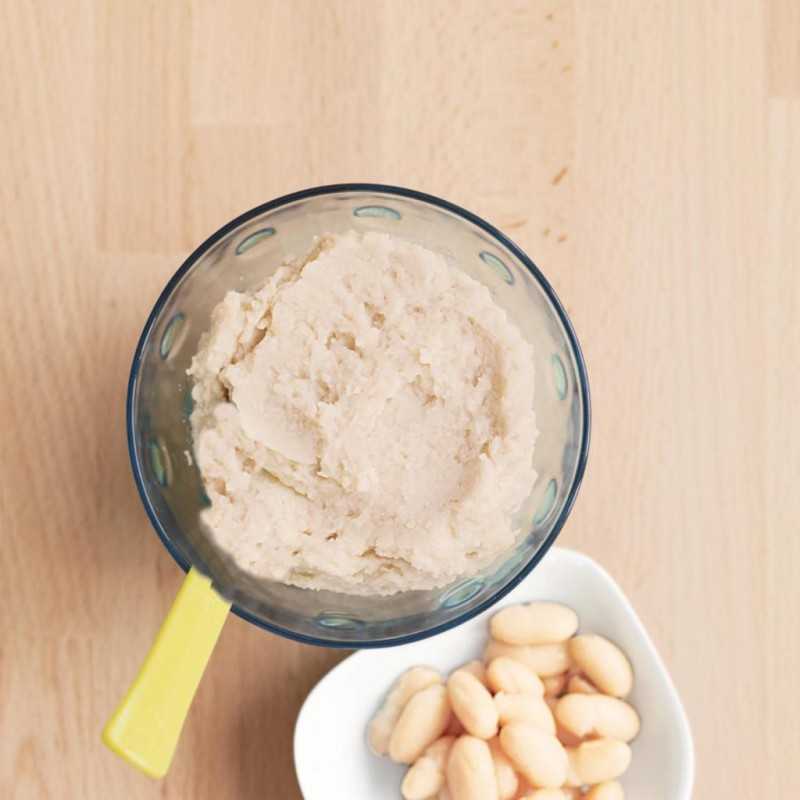
Solid foods can be introduced in any order, but most pediatricians recommend starting with a single-ingredient food that is easy to digest like pureed sweet potato, carrot, banana and/or avocado. Other options include pureed meats, poultry, beans and iron-fortified baby cereals like rice cereal or oatmeal.
You just want to be sure the first few foods are pureed super smooth and almost a liquid consistency. You can easily thin purees with breastmilk or formula.
As baby gets more practice with eating you can reduce the amount of liquid and offer purees with a thicker texture.
Food Allergies and Known Allergens
When introducing foods it can be helpful to introduce only one food every three to five days so you can watch for any signs of allergic reactions. A reaction could show up almost immediately or a few days after so it’s recommend to introduce one food at a time when starting out so you can track what may be causing a reaction in your baby.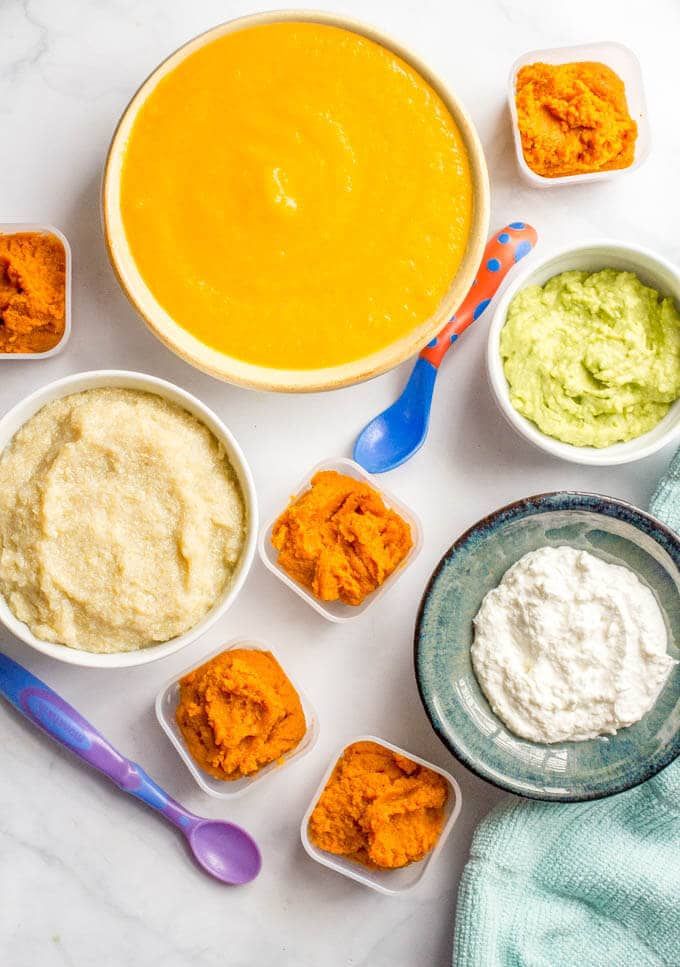 Reactions include: hives or rashes, itching, shortness or breath or more serious reactions like vomiting or swelling of the lips and tongue.
It’s also helpful to be mindful about common allergens. Foods like diary, eggs, peanuts, tree nuts, wheat, soy and shellfish should be introduced gradually after less allergenic foods have been tolerated. The previous recommendation was to wait on these foods, but that as since changed and in fact, delaying the introduction of these foods may increase the risk of a child developing allergies.
One food that is off limits until a baby is at least 1 year old is honey because of the risk of infantile botulism.
How to Make Homemade Baby Food
We covered when and what foods to start with. Now lets talk how to make a basic baby food puree! Don’t fret, it’s super easy. Here’s the basic process:
- Prep: you’ll want to start by ensuring your fruit or vegetable of choice is thoroughly cleaned. Even if you’re using organic fruits and vegetables, you’ll want to washed and dry your produce! Once the produce is clean, you’re ready to peel and chop into chunks.
 You can skip this step for some fruits or veggies.
 - Cook: some foods like banana and avocado don’t need to be cooked, but many do. For cooking, you can steam, boil or roast. I recommend using a fork to test that they’re tender and soft.
- Blend: place cooked food into a blender or food processor and blend until smooth (or the consistency you desire), adding liquid (breast milk, formula or water) as needed.
That’s it! You’ve just made a homemade baby food puree!
Best Tools For Making Homemade Baby Food
You really don’t need any fancy kitchen appliances, but there are a few tools that will come in handy when making homemade baby food.
- Steamer basket – Steaming is one the easiest ways to cook foods for making purees and having a steamer basket is key. I have a really basic steamer basket that fits in most pots, but I also use the steamer basket that comes with my Always Pan.
- Blender – I’ve been using my Vitamix blender and love how smooth it makes the purees.
 You can also use a food processor or an immersion blender.
 - Silicone ice cube trays – In the beginning I really liked to make large batches of pureed food and pour it into a silicone ice cube tray with a lid to freeze for later. It was perfect when babies aren’t eating big portions because each cube is about 1-2 ounces.
- Freezer bags – Once you have frozen cubes of puree you can transfer them to a freezer-safe bag. I love reusable Stasher bags for this.
- Storage containers – As soon as you start making homemade baby food you realize that you need lots of little containers. A friend loaned me a bunch of plastic storage containers for keeping homemade baby food and I also invested in these glass containers that are freezer safe.
- Permanent markers – When storing and freezing baby food you’ll want to label everything with the name of the food and the date.
- Baby food maker – if you’re looking for an all-in-one solution that steams food and blends it there are some cool gadgets (like the BEABA Babycook) that make homemade baby food a breeze!
10 Stage One Baby Food Purees
Ready to get started making some stage 1 baby food purees? Here are 10 easy recipes to get you started. These are the purees I used in the early days with Olivia. She loved all of these, but there are a ton of other purees you can try including pear puree, apple puree (aka applesauce), bean purees (like chickpea or lentil puree) and even chicken puree.
Sweet Potato
Sweet potatoes are a powerhouse vegetable! They’re packed with fiber, vitamins, minerals and antioxidants and babies love their sweet flavor.
Sweet Potato Puree
3.88 from 8 votes
Sweet potato puree is so easy to make. Just bake your sweet potatoes, peel and blend until smooth! It's a great first food for babies, but can also be used in baking recipes, mixed into oatmeal, added to smoothies or served as a side dish.
Get Recipe
Carrot
Carrots are low on the allergy scale and easily digested by a tiny tummy. They are high in beta-carotene, an antioxidant that converts to vitamin A in the body, which is crucial for eye health and overall immune function.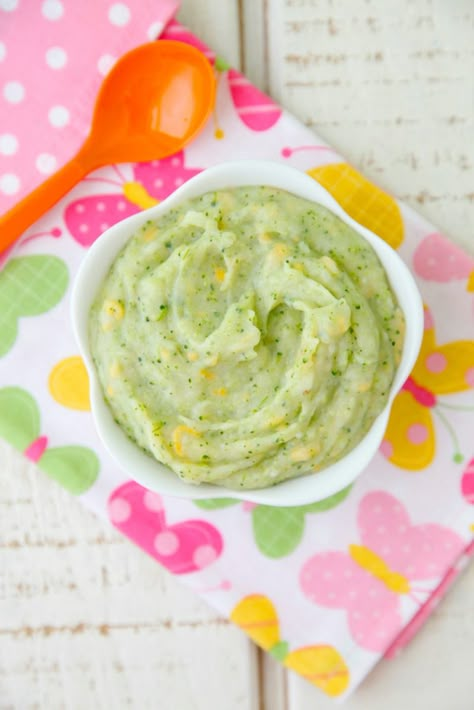
Carrot Puree
4 from 39 votes
How to make carrot baby food by cooking and blending carrots into a smooth and creamy puree. Carrot puree make a great stage 1 starter food for babies.
Get Recipe
Avocado
Avocados are high in heart-healthy fats as well as fiber, vitamins, minerals and antioxidants! They’re incredibly nutritious and super easy to prepare.
Avocado Puree
5 from 3 votes
Avocado is great first food for babies. It contains healthy fats, it’s easy to blend and it’s delicious. Make it in your food processor or blender or simply mash!
Get Recipe
Banana
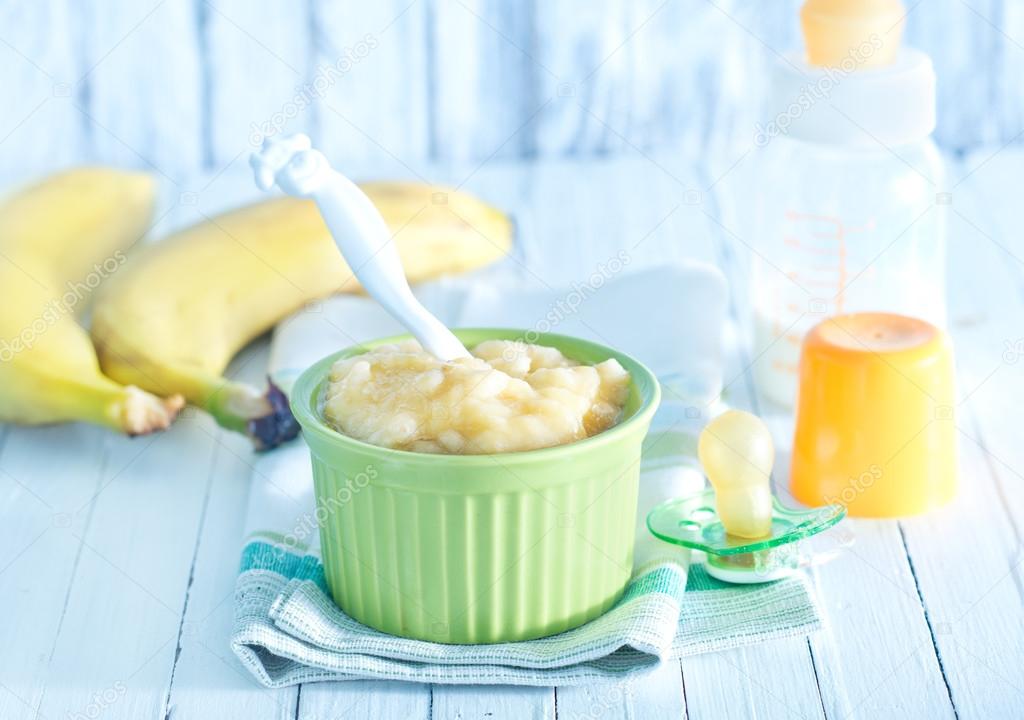
A great first food to introduce to babies, bananas are naturally soft and mushy, easy to digest and loaded with vitamins and minerals. The best part? You don’t need to cook them!
Banana Puree
5 from 2 votes
Fresh banana puree is a great first food and baby will love it because it tastes sweet! Easily make it by mashing or blending ripe bananas.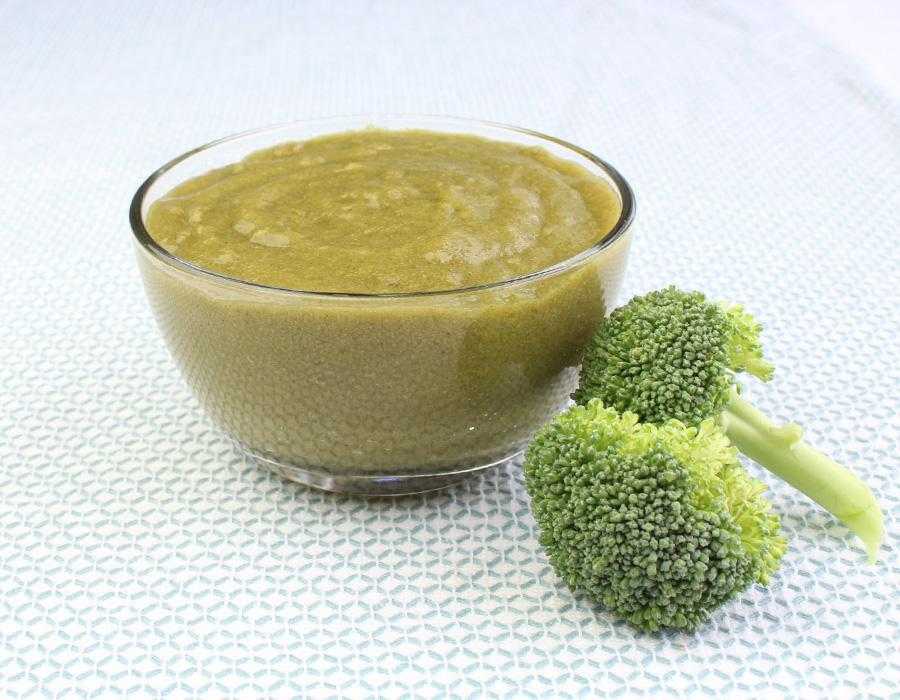
Get Recipe
Peas
Peas are naturally sweet and pack a punch with nutrition, containing a variety of vitamins, minerals and antioxidants. They are also high in protein, with 4 grams per half-cup serving. Fun fact, peas are actually a legume!
Pea Puree
5 from 5 votes
Pea puree is a great first food when introducing solids to babies and all you need is a bag of frozen peas and a blender or food processor!
Get Recipe
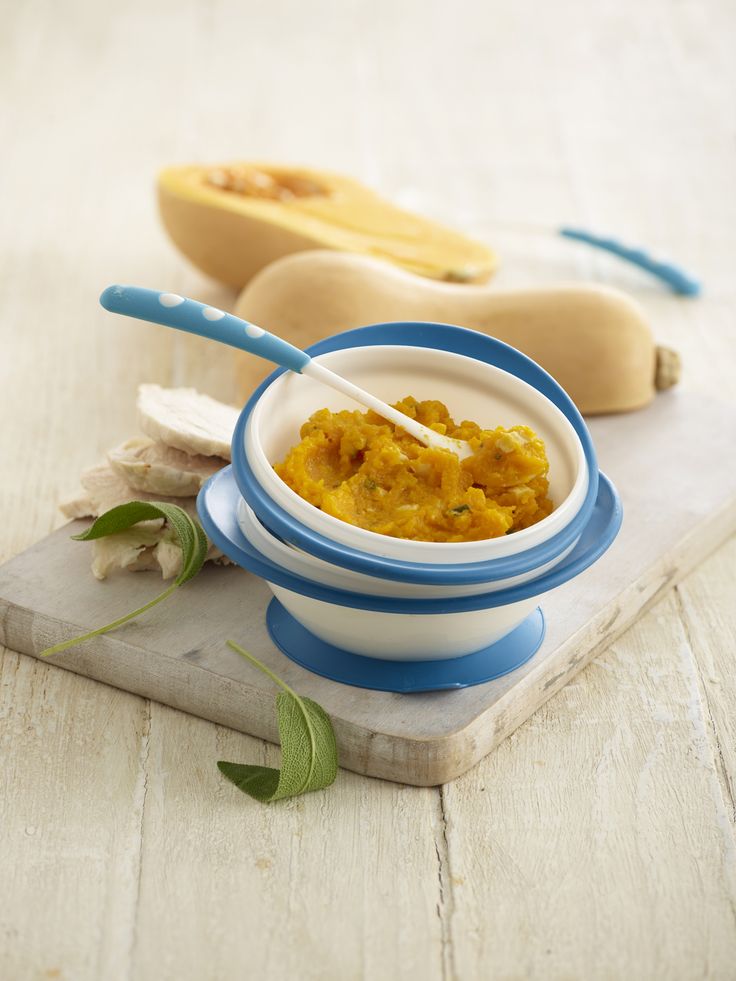
Butternut Squash
Technically a fruit, butternut squash is packed with fiber, vitamins and minerals.
Butternut Squash Puree
Make butternut squash puree at home with this simple recipe! Just scoop the seeds, roast, blend and use in recipes that call for butternut squash puree. It's also a great first food for babies!
Get Recipe
Peach
Peaches are naturally sweet and perfect for introducing baby to solid foods.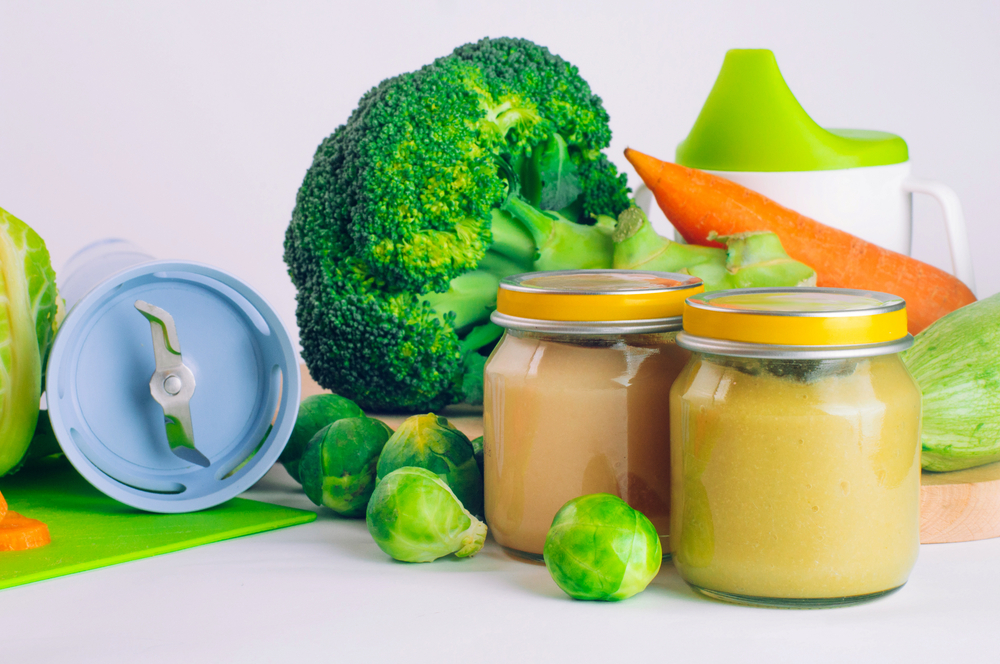 They are rich in many vitamins, minerals and antioxidants.
Peach Puree
5 from 4 votes
Peach puree is so easy to make using fresh peaches! It's a great first food for babies, but can also be used as a topping or mix-in for breakfast, dessert and drink recipes.
Get Recipe
Mango
Rich in vitamins, minerals and antioxidants, mango is especially high in vitamins A and C. They also contain a group of digestive enzymes called amylases which help little tummies just starting with solid foods.
Mango Puree
5 from 3 votes
How to make a delicious mango puree out of fresh (or frozen) mango. It's perfect for serving to baby or to use in recipes.
Get Recipe
Blueberry
Small but mighty! Blueberries are known as a superfood. Superfoods are usually plant-based and rich in nutrients that are beneficial to your health such as vitamins, minerals, healthy fats and fiber.
Blueberry Puree
5 from 1 vote
Blueberry puree is full of antioxidants and vitamins and makes for a quick and easy first food for baby! It can also be used as a topping or mix-in for breakfast, dessert and drink recipes.
Get Recipe
Strawberry
Strawberries pack quite a health punch! They are low calorie, taste delicious and are a great source of vitamins, minerals and plant compounds.
Strawberry Puree
5 from 1 vote
Strawberry puree is easy to make and naturally sweet with no added sugar! Use it in baked goods, drinks or as baby food.
Get Recipe
How to Store Purees
Freshly pureed baby food should be stored in the fridge and used within 3-4 days. For longer storage, I recommend freezing purees in an airtight container. I like using silicone ice cube tray or freezer safe jars because they make it easier to thaw smaller amounts for serving to babies.
How to Thaw Frozen Puree
I recommend thawing frozen purees in the fridge the night before you want to use them. In a pinch, you can also thaw it quickly with a warm water bath. It thaws quickly if you’re defrosting a small amount to serve to a baby.
FAQ
Can I store homemade baby food purees?
Yes! Making large batches of purees and storing them in the refrigerator or freezer makes feeding baby homemade purees a breeze.
Can you freeze homemade purees?
Freezing baby food that has been made with frozen fruit or vegetables is fine, as long as you have cooked the frozen foods first. Do not refreeze foods that have thawed without cooking. I recommend labeling baby food with the ingredient and date before you place them in the freezer.
Can you freeze baby food made with breast milk or formula?
If you are freezing baby food that has been mixed with fresh breast milk you’re fine! However, you should not freeze baby food that has been mixed with previously frozen breast milk.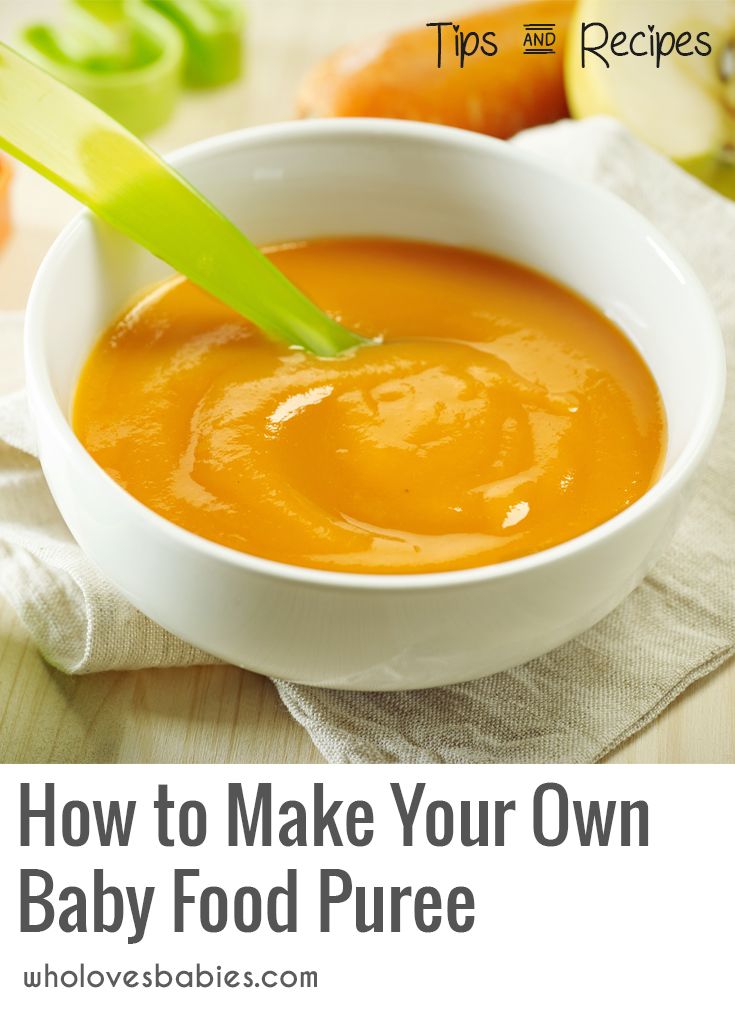 Once frozen breast milk has been thawed, it should never be re-frozen.
If you are using formula, it should be okay to freeze baby food that has been mixed with it. Most formula companies don’t recommend freezing formula, but you’re using such a small amount.
You can also freeze the baby food purees without adding any liquid. You can then thaw the baby food puree in the fridge overnight and then thin the food to the desired consistency with breast milk or formula right before serving.
This post about freezing baby food has a ton of great insight and tips.
Should I use organic fruits and vegetables?
I recommend using organic produce when possible, though I realize this isn’t always in the budget. Either way thoroughly rinsing your fruits and vegetables is an important step whether they’re organic or not.
This list of the dirty dozen fruits and vegetables from the EWG is a good guide if you can only budget for some but not all organic produce.
Is it safe to thin baby food with cow’s milk?
From a nutritional point of view, most doctors recommend waiting to introduce babies to cow’s milk until one year of age. If you need to thin your puree you can use breast milk, formula or plain water.
What is the difference between stage 1 and stage 2 baby food?
Stage 1 purees are very thin with no chunkiness and are single ingredients. Stage 2 baby foods can be more elaborate with food combinations as well as chunkier textures.
More Recipes for Resources
- Baby Pancakes
- How to Make Oatmeal For Babies
- Baby (+ Toddler) French Toast
- Applesauce
- Baby Yogurt Melts
- 6 Baby Food Combinations (Stage 2)
Be sure to check out all of the baby food recipes here on EBF.
10 Stage One Baby Food Purees
5 from 5 votes
Everything you need to know about making stage 1 baby food, including 10 recipes for tasty purees that are perfect for introducing solids.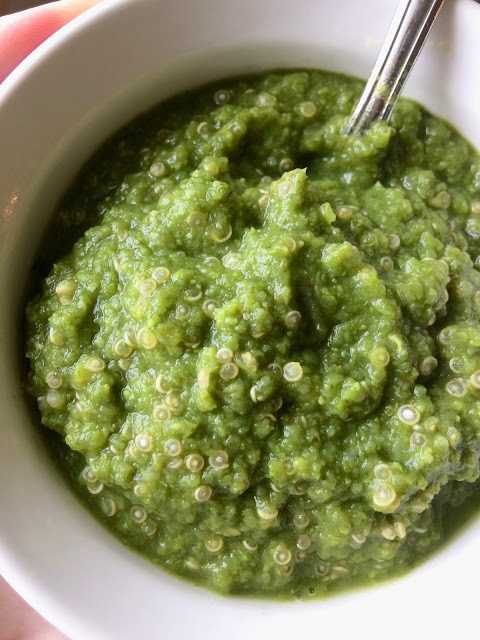
Print Recipe Pin Recipe
Prep Time 10 minutes
Cook Time 20 minutes
Total Time 30 minutes
Servings 6
Sweet Potato
- 2 cups steamed and peeled sweet potatoes
- water, breast milk or formula to thin
Carrot
- 1 lb steamed and peeled carrots
- water, breast milk or formula to thin
Avocado
- 1 avocado
- water, breast milk or formula to thin
Banana
- 1 banana
- water, breast milk or formula to thin
Pea
- 2 cups cooked peas
- water, breast milk or formula to thin
Butternut Squash
- 2 cups steamed and peeled butternut squash
- water, breast milk or formula to thin
Peach
- 3 ripe peaches
- water, breast milk or formula to thin
Mango
- 2 ripe mangoes
- water, breast milk or formula to thin
Blueberry
- 2 cups blueberries
- ½ cup water
Strawberry
- 2 cups strawberries
- water, breast milk or formula to thin
Add veggies or fruit into a high powered blender or a food processor.
 Blend and add liquid until you reach the consistency you desire. You can make the purees smooth and thin for young babies or thicker and chunkier for older babies.
blender
food processor
Serving: 1sweet potato Calories: 75kcal Carbohydrates: 17g Protein: 1g Sodium: 48mg Potassium: 292mg Fiber: 3g Sugar: 4g
DID YOU MAKE THIS RECIPE?
Please leave a comment and star rating on this post and share on social media using the hashtag #eatingbirdfood. I love seeing your recipe shares!Baby puree at home: recipes
Baby puree from vegetables and fruits at home: cooking secrets
Vegetable and fruit puree often becomes the first meal of the baby after breast milk or formula, so many mothers prefer to cook it on their own. Although modern manufacturers convince us that baby food is devoid of preservatives and harmful additives, fresh vegetables and fruits are much healthier, especially when it comes to infant nutrition.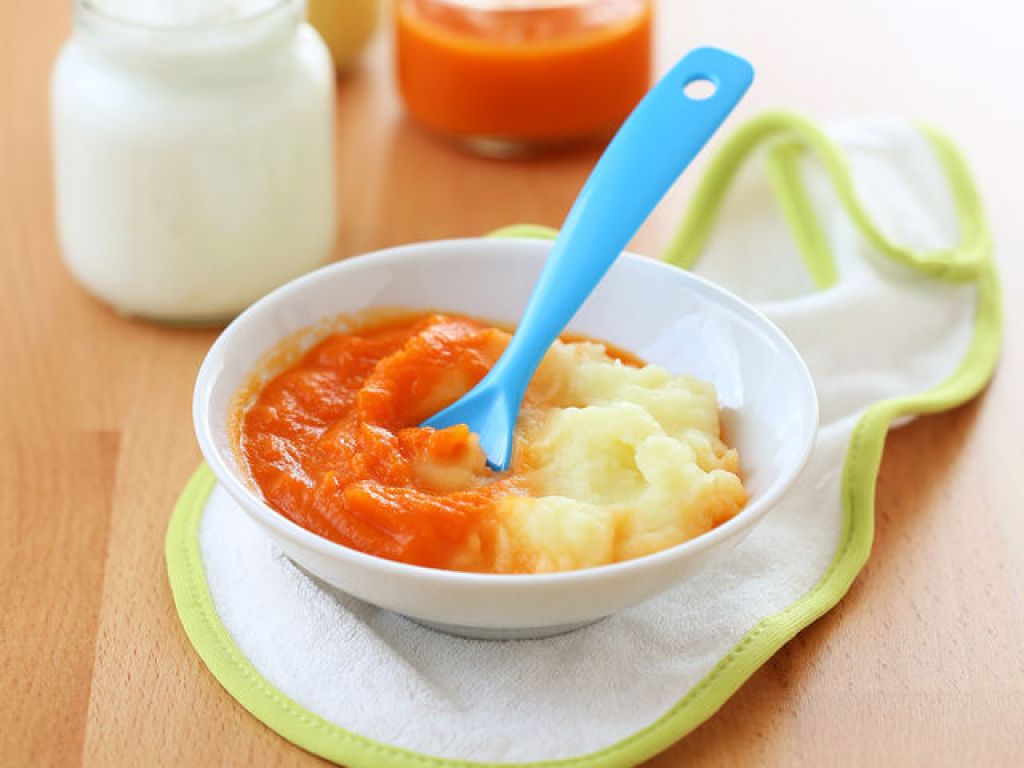 Yes, and cooking baby puree at home is not so difficult.
Vegetables or fruits?
Let's try to make baby puree for our beloved baby. Despite the fact that pediatricians of the last century recommended starting complementary foods with fruits, it is better to first introduce the child to vegetables - modern doctors and nutritionists have come to this conclusion. Boiled vegetables do not irritate the gastrointestinal tract, are better absorbed, satisfy hunger, do not cause allergies and increased gas formation. In addition, vegetables do not contain fructose, which irritates the pancreas. And one more weighty argument in favor of the fact that it is better to start with vegetables - fruits are tastier, and if the baby tries them first, he will refuse vegetables, because they will seem to him more insipid.
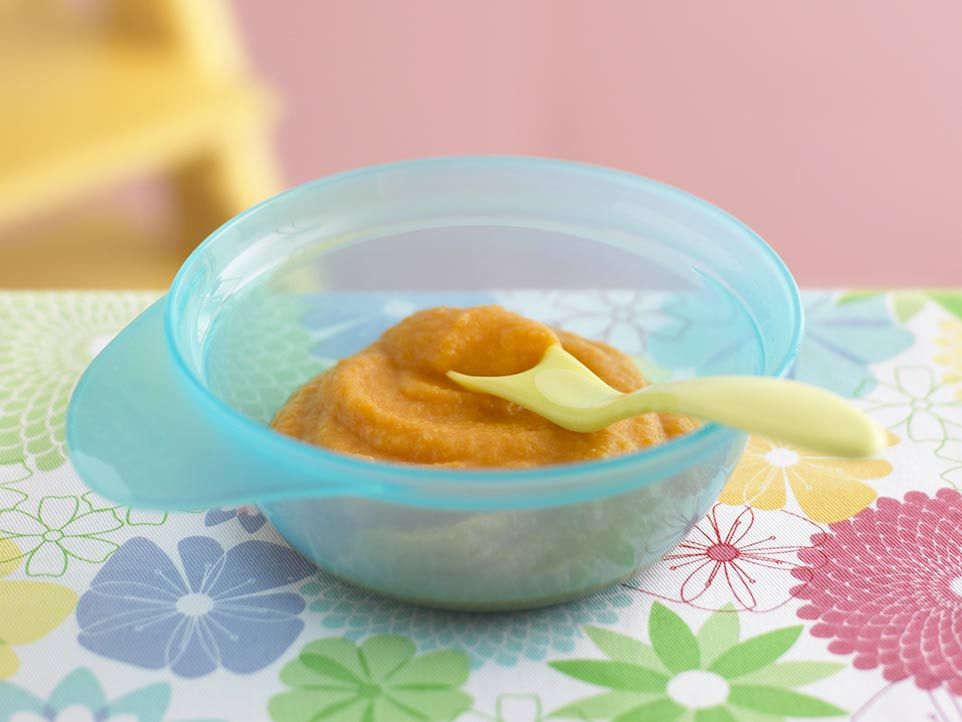
How to prepare baby vegetable puree
What can baby puree be made of? The ideal puree for the first feeding is from cauliflower or zucchini.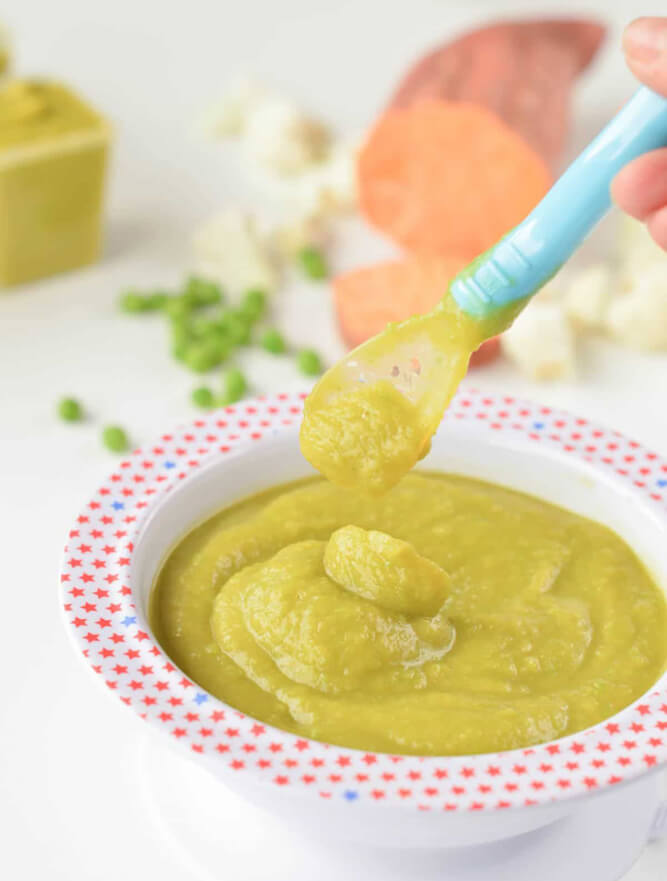 A little later, you can introduce pumpkin, broccoli, carrots, potatoes and green peas. Before cooking, vegetables are washed well, peeled, cut into pieces and cooked - steamed, in the oven or in the usual way, in water. The first two methods are preferable because oven roasting and steaming preserve the vitamins, minerals, nutrients, and natural color in the vegetables. And most importantly - such vegetables are much tastier. Some nutritionists recommend boiling vegetables with their skins on before peeling them, so choose your own cooking method.
If you do have to cook vegetables in a saucepan, use an enamel pot, add less water and put the vegetables in boiling water. Boil until soft, but do not overcook vegetables and fruits, otherwise they will become tasteless and lose a lot of vitamins. Ready vegetables are chopped with a blender until smooth and slightly diluted with water, vegetable broth, breast milk or mixture to a gruel state, since the child does not yet know how to digest thick food.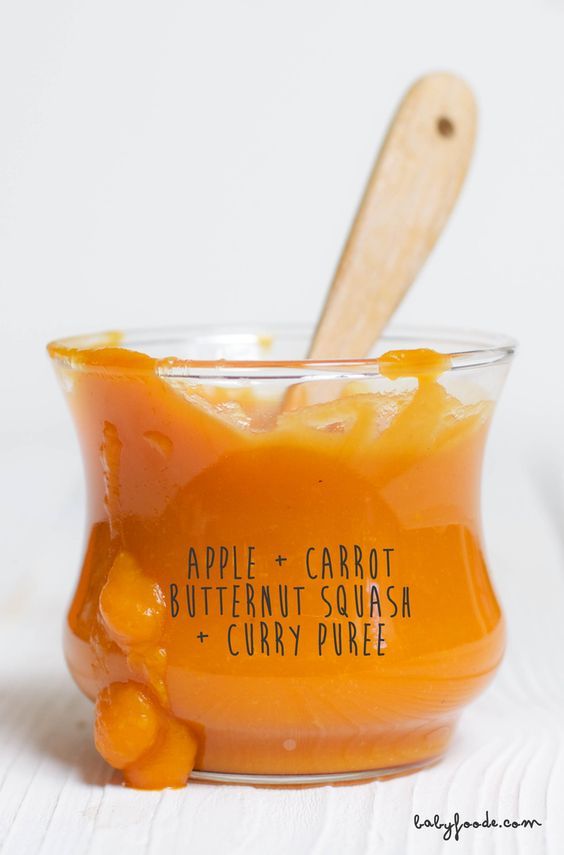 Small pieces of vegetables in puree sometimes cause the baby to refuse to eat, so the knives in the blender should be well sharpened, and if there is no technique, you can grind the vegetables through a sieve. Salt and spices are usually not added to baby vegetable puree, and if the baby is more than 6 months old, you can put a little butter in the puree.
A few rules for making baby puree at home
- Use only fresh vegetables and fruits.
- Water for cooking vegetables must be filtered or bottled.
- If you are using frozen foods, choose only whole fruits and vegetables as they retain the most nutrients.
- All utensils for preparing baby food should be perfectly clean, so if the knife falls on the floor, it should be washed well. Also, the presence of pets in the kitchen during the cooking process is not allowed.
- Avoid vegetables and fruits high in nitrates, such as spinach, lettuce, beets, melons, and watermelons, in infants' diets.
- Store-bought vegetables are recommended to be soaked in water to remove nitrates: 1-2 hours for this, up to 24 hours for potatoes.
- Mix sour-tasting fruits and berries with sweet fruits - for example, blackcurrant goes well with a banana or pear. Sour puree is unlikely to please the baby.
- Give your child only fresh food, but yesterday's puree from the refrigerator is better to eat yourself.
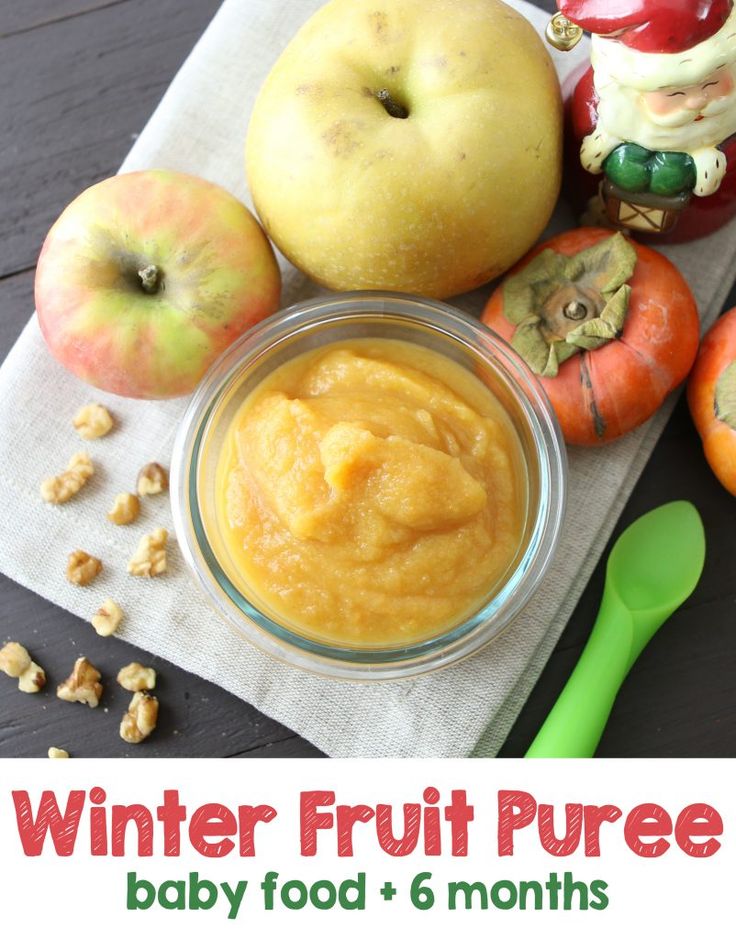
DIY fruit puree for children
Children are more likely to eat fruit puree, because fruits are tastier and sweeter. Fruits contain a large amount of vitamins, minerals, trace elements, fiber and antioxidants, so they are very useful for a growing body. However, fruits are strong allergens, especially berries, bananas, pomegranates and apricots, so they should be given with caution, watching the child's reaction. The most low-allergenic fruits are apples and pears, so it is better to start complementary foods with them, and then introduce all other fruits.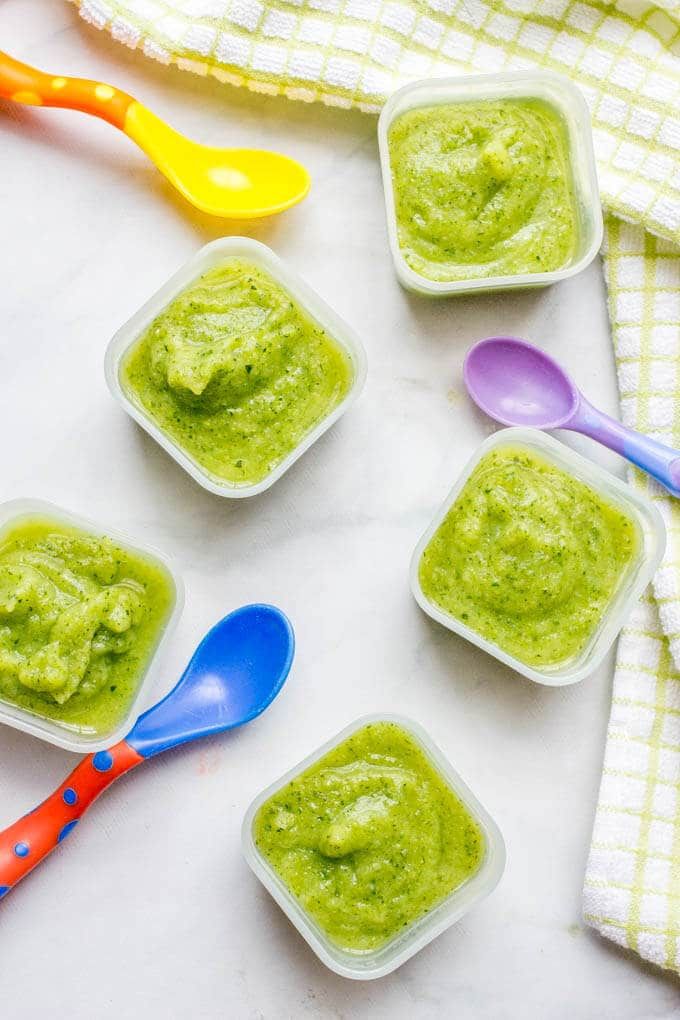 First, the baby is fed with a one-component puree made from only one product, and then you can mix different vegetables and fruits, and not only among themselves. Very tasty combinations of fruits and vegetables, such as apples and zucchini, pumpkins and pears.
Fruits must be of good quality, without damage, ripe and juicy, and the rules for preparing fruits do not differ from the rules for cooking vegetables. Naturally, fruit puree is not sweetened with honey and sugar - the later the child learns the taste of sugar, the stronger his health will be.
Aromatic pumpkin puree
Babies love to eat pumpkin because of its pleasant sweet taste, besides pumpkin is very healthy. It contains a whole storehouse of various vitamins, including vitamin T, which normalizes the metabolism in the body. For pumpkin puree, small pumpkins are suitable, since large fruits are not as tasty and difficult to peel.
Cut the pumpkin in half, and then into small slices, one or two of which (depending on the appetite of the crumbs) cut into cubes.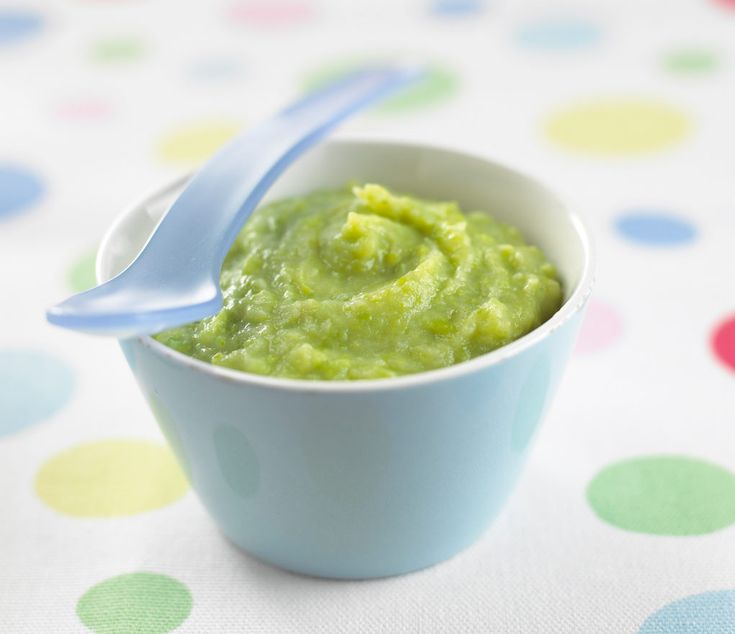 Boil the pumpkin in a double boiler or in water for 20 minutes, while warm, beat with a blender to a smooth puree and dilute if necessary with water or a mixture. Add oil and salt depending on the age of the child.
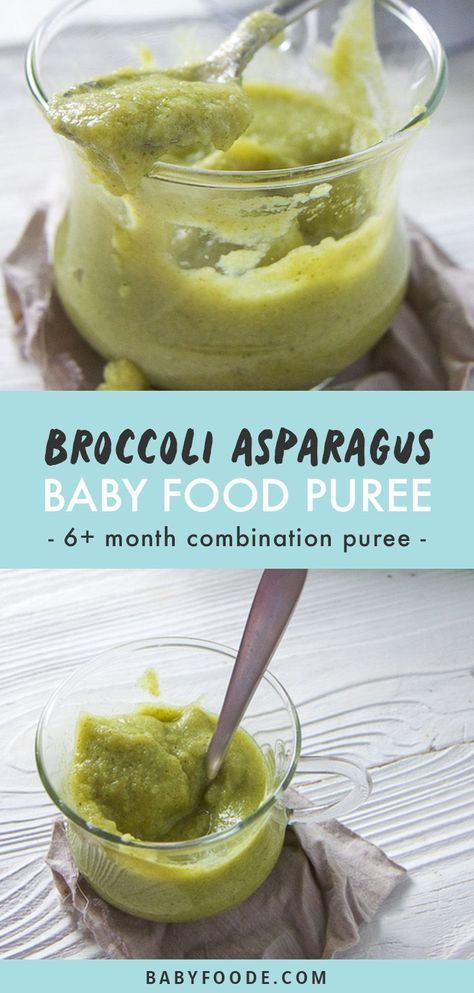
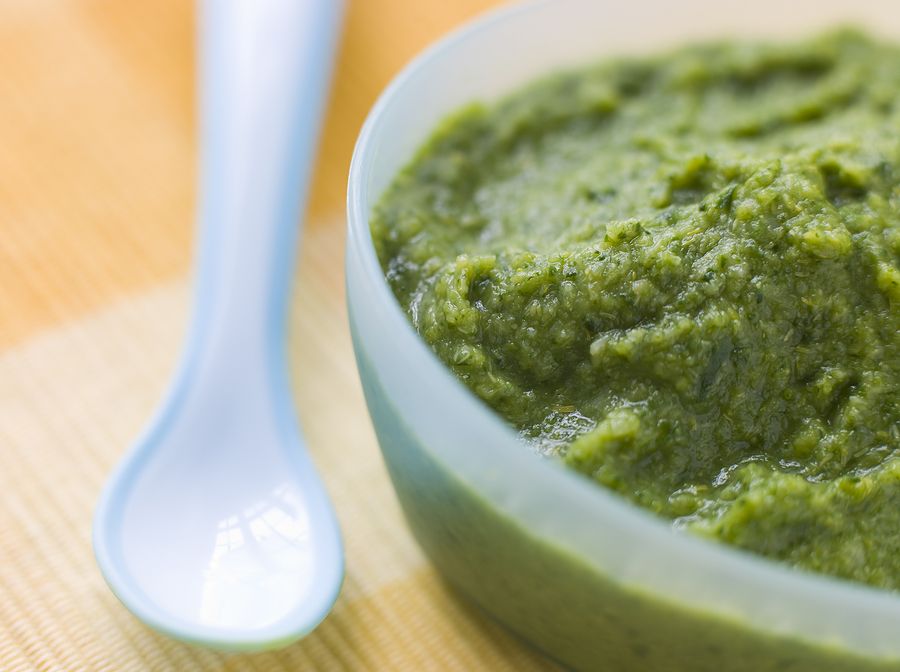
Gentle Broccoli Puree
One of my favorite homemade baby puree recipes is broccoli. This cabbage is extremely useful because it contains potassium, iron, calcium and other valuable substances. It has much more vitamin C than lemon, and the reason for its nutritional value is its high protein content.
Separate the broccoli into florets, wash thoroughly and steam for 20 minutes. Cabbage cooks faster in water - fresh broccoli will take 7 minutes, and frozen - about 15 minutes. Broccoli puree does not need much water, it should lightly coat the vegetables. After the cabbage becomes soft, chop it in a blender or pass through a sieve. If you're mashing for kids older than a year old, be sure to add butter - the little ones will gobble up broccoli on both cheeks!
How to make baby pear puree at home
Pear is a very delicate, tasty and healthy fruit that rarely causes intolerance.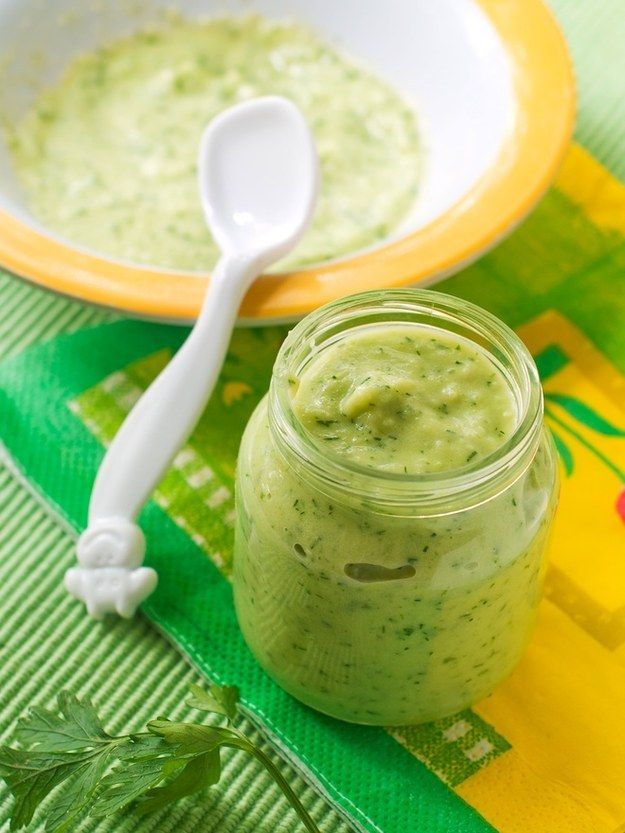 In addition to the high vitamin value, the pear has other beneficial properties - it facilitates digestion and removes toxins from the body.
For baby food, choose green pears to reduce the risk of allergies, which are rare among babies. Peel the fruits from the peel and core with seeds, and then stew the pear in a bowl with a thick bottom in a small amount of water for 15 minutes. Let the pear cool slightly and puree it in a blender with a little of the remaining pear broth. For large kids, fruits can not be boiled, but add half a teaspoon of natural honey to the puree.
Zucchini and apple puree
Little gourmets will love this delicious puree, besides, zucchini is considered the most hypoallergenic vegetables, which, due to their high potassium content, have a beneficial effect on the heart. Apples contain iodine, iron and phosphorus, and due to the high concentration of vitamin C, apples help in the prevention of colds and viral infections.
Wash the zucchini and apples well, de-seed them, cut into pieces and cook in a saucepan for about 20 minutes, considering that the zucchini will cook 5 minutes faster.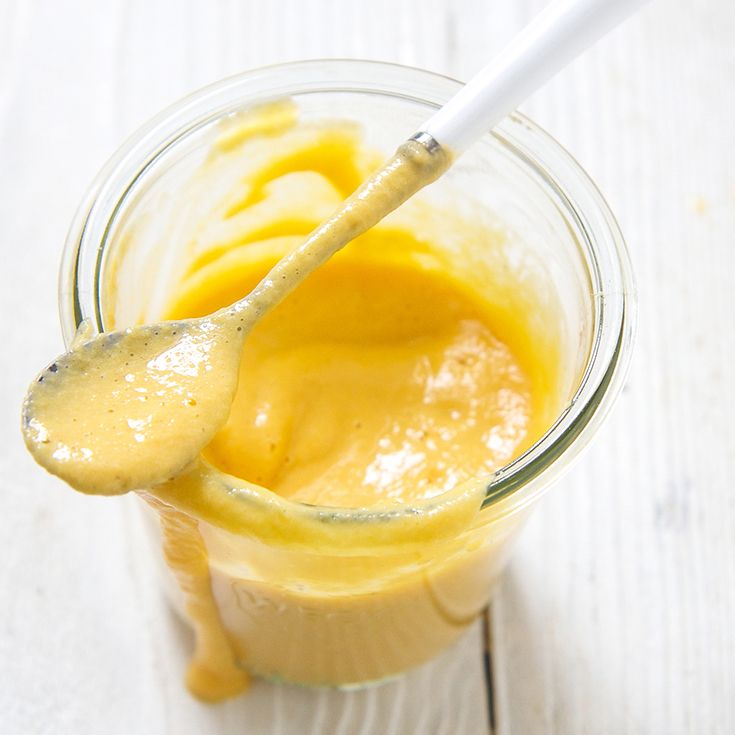 By the way, apples are steamed for 15 minutes, zucchini - 10 minutes. Next, vegetables and fruits are chopped in a blender, mixed and brought to a boil. For allergic children, this is the best side dish!
Exotic mango
Sometimes you can pamper your baby with exotic fruits - for example, make mango puree. This is a very delicate fruit with an original taste, containing 12 amino acids and improving sleep.
Choose only ripe fruits that are soft and reddish-yellow in color. Peel the mango from a thick skin and a large bone, put the pulp in a blender, add 2 tbsp. l. water and mash it, and then heat it in a saucepan for several minutes. For a baby up to a year old, it is better to give mashed potatoes with heat treatment to facilitate digestion, and older children can be fed raw mangoes.
Carrot and Potato Puree
Make normal potato puree without oil. Peel the carrots, grate them and stew them with butter and vegetable broth - about 1 tsp is required for 200 g of carrots.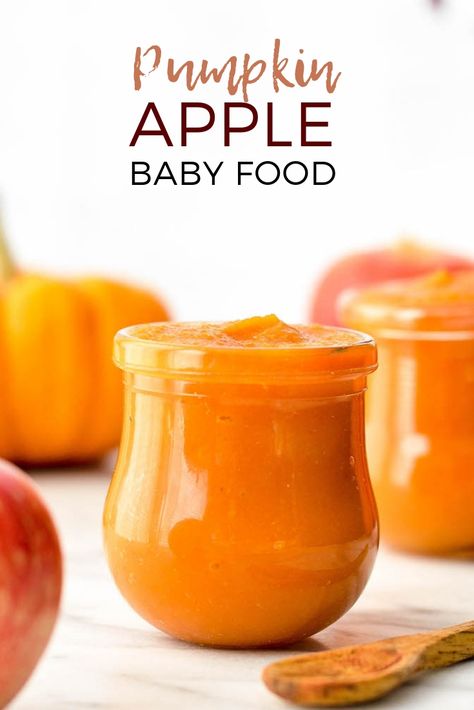 butter and 150 g of broth. When the carrot becomes very soft, wipe it through a sieve, and then put it on a plate, put mashed potatoes on the second half. Let the child choose whether to mix two types of puree for him or eat separately!
Pumpkin and apple puree
This sweet, sugar-free pumpkin-apple puree, cooked in a double boiler, is suitable for children who are already accustomed to “adult” food and are able to perceive a new unusual dish. It is better to take a pumpkin with a gray or green skin and with bright pulp - such fruits contain more vitamins and other useful substances. Apples are green because they have fewer allergens.
Cut pumpkin and apple flesh without peel or seeds into pieces, place in a steamer and cook for 20 minutes. Grind pumpkin, apples and raisins in a blender or by hand with a pusher if the child has already learned to chew. They say that this puree is very good for skin and hair, and you can check the truth of this statement yourself if you start feeding this dish to your baby.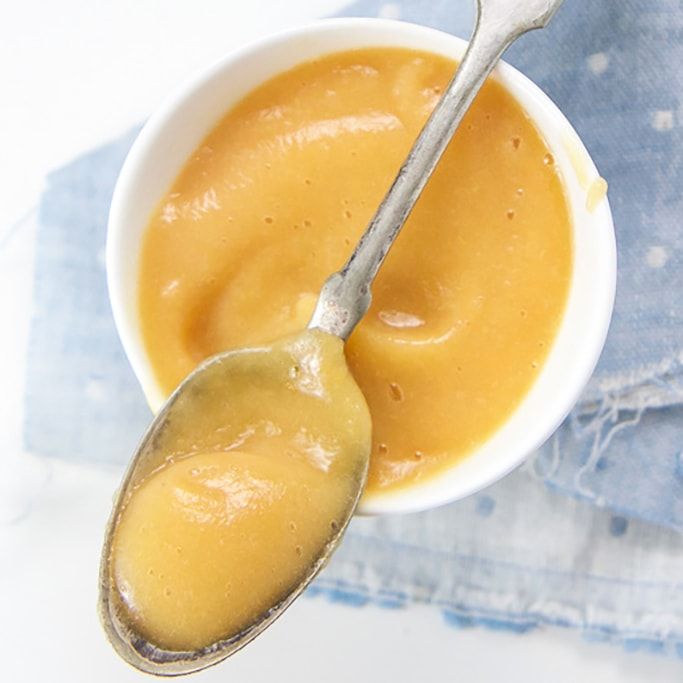
In autumn, you can take care of preparing vegetables for baby purees. Some vegetables, such as pumpkin, carrots and apples, are stored fresh, and zucchini, broccoli, berries are frozen in small portions, because due to frequent freezing and thawing, vegetables lose vitamins and become tasteless. You can roll up fruit and vegetable puree in jars, but this snack should not be given to babies. Remember that the taste of vegetables determines whether the baby will love them in the future, so try to prepare an appetizing and tender puree - for health and good mood!
How to properly dilute infant formula
Properly prepare formula milk - it would seem that it is easier, read the instructions on the box and do as it is written. But sometimes the simplest things, especially when they concern a newborn, can simply put parents in a stupor.
Content
- How to properly dilute the mixture
- How to prepare infant formula
- How long is reconstituted infant formula
- What water to dilute infant formula
- Water temperature for infant formula
- Preparing Night Feeding Formula
- Infant milk formula on the road
You should know that no formula, even the most modern adapted formula, can completely replace mother's milk.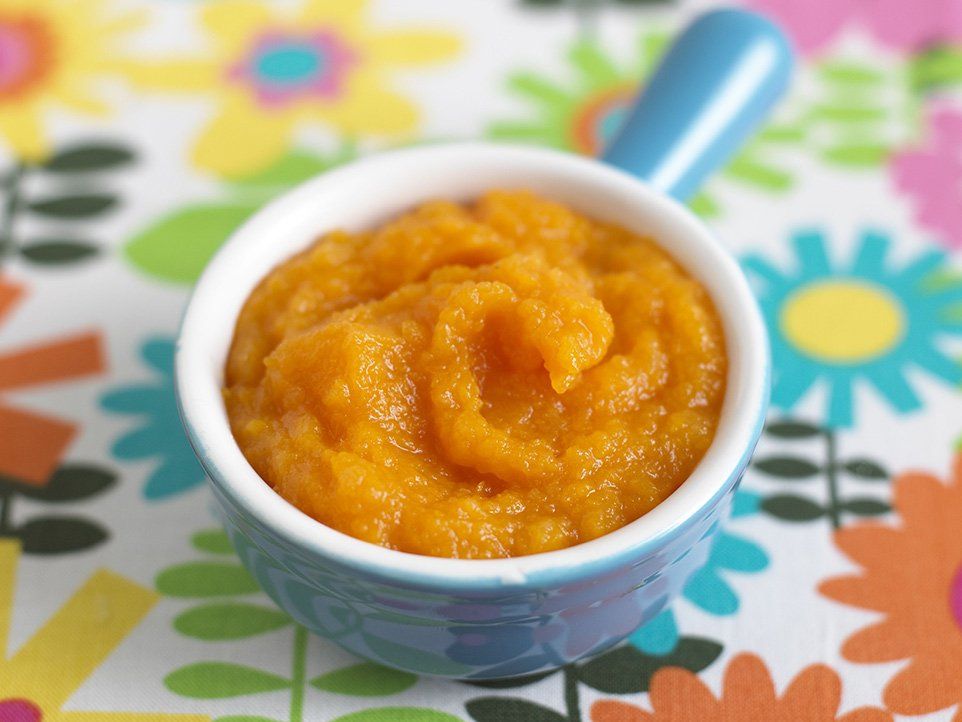 Transferring a child to artificial feeding should be a conscious and forced step, and not the advice of a friend and the desire to make life a little easier for yourself, to have freedom of movement or your own guesses and assumptions that there is not enough breast milk. The deficit that is formed in the child's body without mother's milk cannot be filled with anything.
How to properly mix
The first thing to do is read the instructions from the manufacturer. It always describes how to prepare infant formula. It is worth paying attention to the following important points:
- in what proportion to dilute the milk formula (often, one scoop per 30 ml of water)
- at what temperature is the mixture prepared
- recommended amount of ready-made formula for children of different ages
- how long and under what conditions can open packaging be stored
How to properly prepare formula for a newborn
The intestines and mouth of a healthy baby are sterile.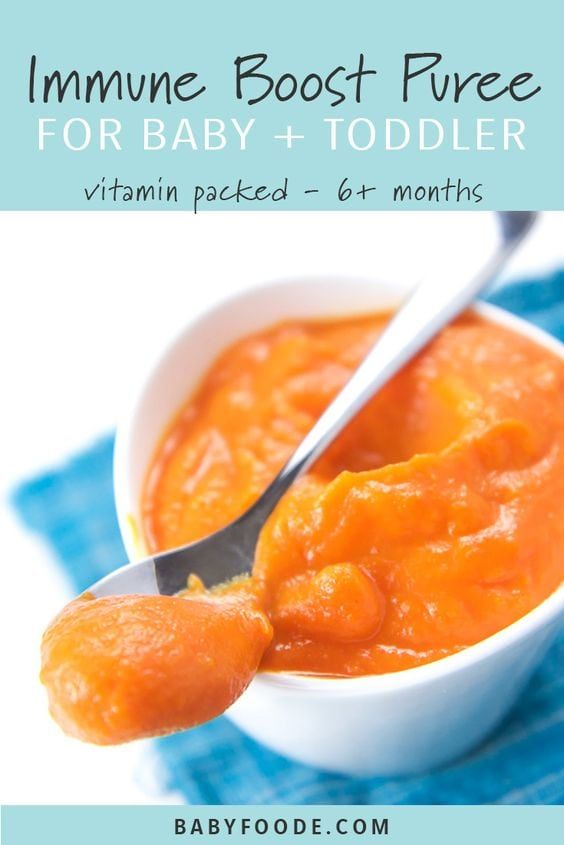 The task of the parent is to give the baby the opportunity to gradually adapt to the surrounding space, before starting to acquaint him with pathogenic microflora (in other words, microbes).
In all cases of contact with children's things, food and the child, be sure and always wash your hands with soap and water. Of course, in any case, the baby will have to get acquainted with the surrounding microorganisms, but when he is a few days old, it is too early.
Since you need to prepare the formula just before feeding, be prepared to do this under the heart-rending cries of a hungry baby. It is possible that under such conditions it will not be possible to prepare sterile bottles in cold blood - it is better and more convenient to have at least two of them.
It is better to prepare and cover a clean bottle with a dry towel than to rush around the house and remember where to put it after feeding when the baby is crying from hunger. Of course, in theory you need to wash the bottle immediately after feeding, but in practice, babies miraculously make adjustments to your schedule.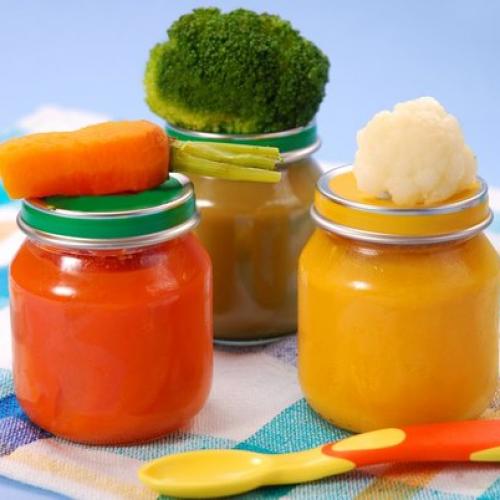
So, when all the necessary preparations are made, according to the instructions, we determine the desired ratio of water and dry mixture according to the age of your baby. Pour water of the required temperature into a sterile bottle or bring it to the desired temperature in the bottle. We pour the required number of measuring spoons, after removing a slide from them (you can use the back of a knife).
The measuring spoon must be dry. Follow this strictly and store infant formula in a dry place. Milk powder is very hygroscopic and perfectly absorbs moisture, and if the rules are not followed, the mixture will instantly begin to clump.
Close the bottle with a cap and shake very well so that there are no lumps left in the mixture (you can check for light). Just in case, we check the temperature of the mixture by dropping it on our wrist. After feeding, pour out the rest of the mixture.
Some mothers, trying to feed their baby more satisfyingly, increase the concentration of the dry mixture in the water.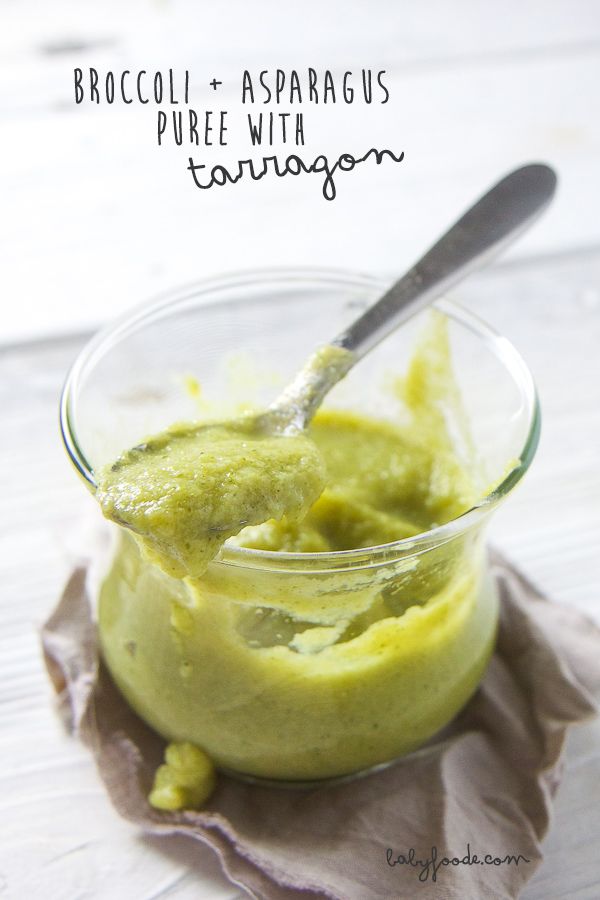 Doing this is strictly prohibited. This can lead to obesity or other metabolic disorders in the child.
To some, these measures may seem superfluous, and, of course, no one can force you to do this. But do not forget that the first three months of a child’s life without this will complicate colic and aggravate the situation with hastily washed bottles, believe me, it’s not worth it.
How long can reconstituted infant formula be stored
A very common question of interest to all parents is how long can prepared infant formula be stored? Ideally, ready-made milk formula is eaten immediately and not stored. The longer the mixture is prepared, the more chances are given to multiply harmful microbes that love heat and milky environment. And not just the necessary bifidobacteria, for which you lovingly created the optimal temperature. The storage time of reconstituted infant formula should be kept to a minimum. Remember that prepared milk formula should be stored is not allowed even in the refrigerator.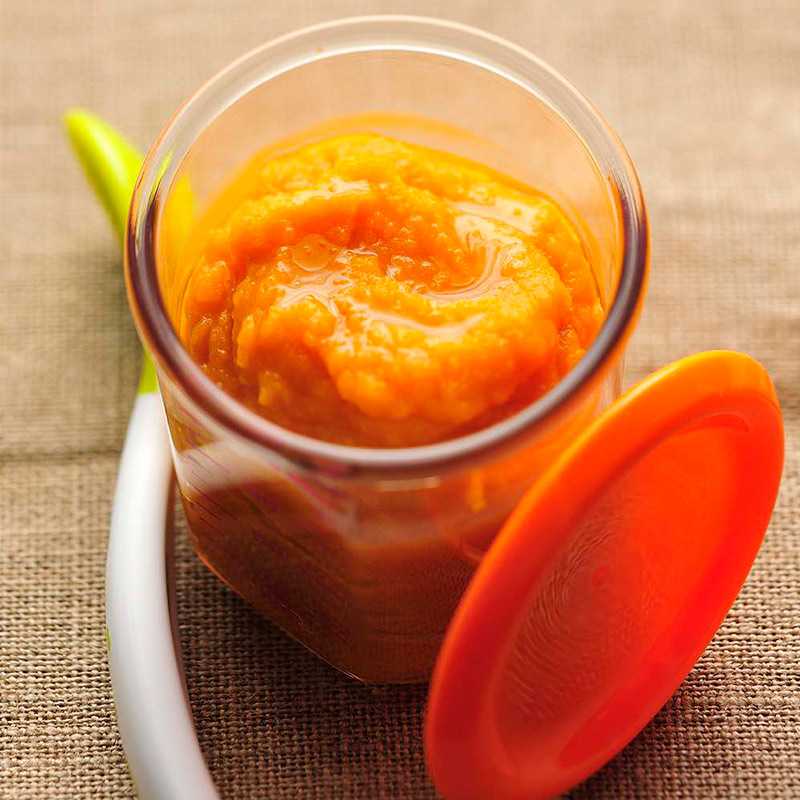
The bottle and nipple must be washed and sterilized before each formula preparation. You can learn more about sterilizing feeding bottles here.
What water to dilute infant formula
An urgent question for parents - is it possible to dilute formula with infant water? For decades, boiled water has been used to prepare the mixture. Now they began to think about the fact that boiling kills water, deprives oxygen and other trace elements. Today you will not surprise anyone with special baby water for drinking and formula preparation. It does not need to be boiled, it is enough to heat it to the optimum temperature.
What are the benefits of baby water?
- at all stages of harvesting, water undergoes strict sanitary control
- cleaning uses a multi-stage filter system
- unlike boiled, it is not devoid of oxygen and other useful trace elements
- mineralization decreases in baby water (in dry mixtures, they try to choose the optimal ratio of trace elements and water with increased mineralization can disrupt these proportions)
If you want to use water from a well, it is better to hand it over for analysis to a sanitary and epidemiological station.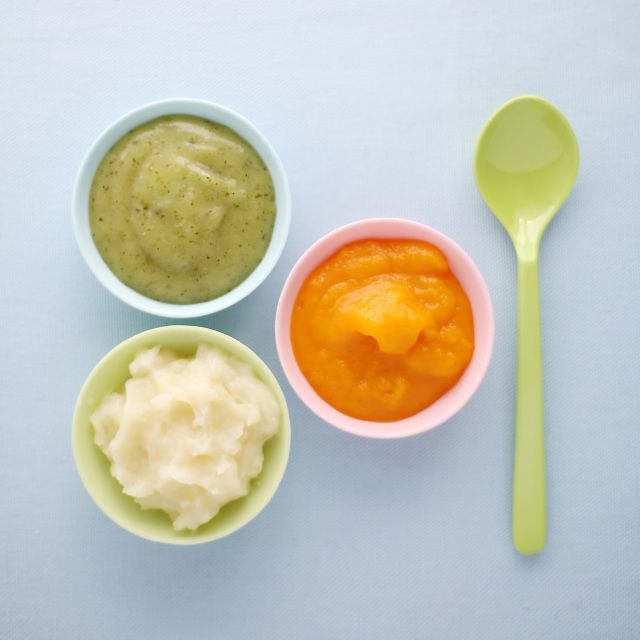
Water temperature for infant formula
The water temperature is of fundamental importance for the preparation of formula, which must be indicated on the packaging. Almost all mixtures now contain bifidobacteria that are beneficial for the child's intestines. Beneficial bacteria, unlike harmful ones, are rather gentle microorganisms. At a temperature higher than that indicated in the instructions, they will simply die.
In addition, of course, the temperature of the water simply needs to be comfortable for the child, 36 - 37 ºC. This is the temperature of mother's milk. Therefore, if possible, use a thermometer to prepare infant formula. Fortunately, the assortment of baby stores is now replete with products that make life easier for moms. Well, if there is no thermometer, it does not matter. Put a few drops of the prepared mixture from the bottle on your wrist. If the temperature of the mixture is optimal, then you will not feel it on your wrist.
It is not advisable to heat the finished mixture.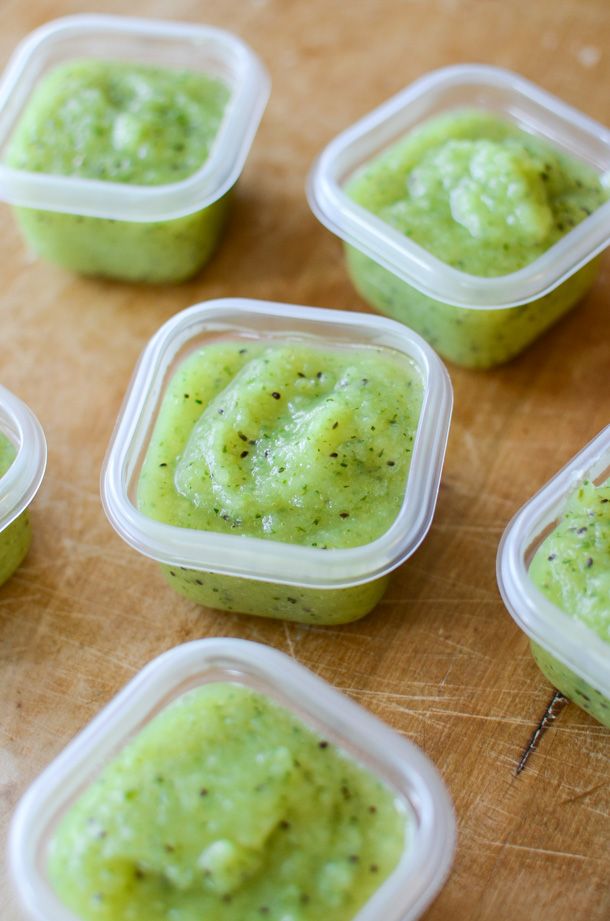 Adapted infant formula is not a product that can be heated and cooled without consequences. It's good bacteria, remember? And not only. But if it so happened that while you were preparing for feeding, the mixture has cooled down, warm it up under running hot water.
Do not use the microwave to heat up the mixture! You will not be able to control the degree of heating of the liquid bottle, which can lead to an irreversible change in the structure and composition of the formula.
Night feeding formula
The safest option for the baby and gentle for the mother is to pour water into a sterile bottle in the evening and put it in the warmer. Most warmers are capable of maintaining a constant set temperature in the bottle. Pour the dry mix into the dry mix dispenser.
Now you can prepare the mix on autopilot at night. All that remains to be done is to get from the dispenser into the bottle and mix thoroughly. Just in case, do not forget to check the temperature of the prepared mixture.