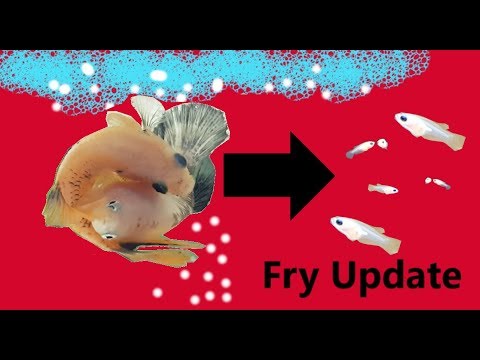
What do i feed baby fish
How to Raise Baby Fish Fry in Aquariums (and Increase Survival Rate) – Aquarium Co-Op
One of the most thrilling parts of the aquarium hobby is getting your fish to breed. If you are taking good care of your fish and feeding them well, one day you may spot a tiny baby darting around the tank. While accidental fry are always exciting, there are several ways you can increase their survival rate or boost your numbers if you plan on selling them for profit.
1. Protect the Eggs from the Parents
Many fish do not show any parental care towards their offspring and will happily eat their own eggs that they just laid a few seconds ago. Therefore, the first step is to save the eggs from being gobbled up. Use one of the following methods based on the species and their egg-laying behavior:
- If the eggs are sticky, you can provide sites for the eggs to be laid, such as yarn spawning mops, dense plants (like java moss or frogbit), ceramic tiles, or spawning cones. Once the eggs are laid, you can move the spawning site to a safer location.
- If the sticky eggs are laid on the aquarium glass or other immovable objects, you can remove the parents from the tank. Another method is to manually collect the eggs by rolling them off with your fingers or using a plastic credit card.
- If the eggs are freely scattered around and don’t stick to things, you can use layers of marbles as substrate to allow eggs to fall in between the cracks where the parents can’t reach them. Another similar technique is to place a mesh screen or plastic mesh from the craft store just above the bottom of the aquarium floor to let the eggs fall through. Some breeders like to put mosses or other bushy plants underneath the mesh as additional protection.
Some fish like discus prefer to use spawning cones or tiles to lay their eggs on vertical surfaces.
- Most cave-spawning fish (like plecos and dwarf cichlids) are good at guarding their eggs, but new parents are often prone to eating them. If you wish to hatch the eggs yourself, use an appropriate-sized pleco cave, coconut hut, Apistogramma cave, or PVC pipe for the fish to spawn, and then take away the cave as soon as the eggs are laid.
- Certain African cichlid species are mouth brooders that protectively hold their eggs and fry inside their mouths. However, some breeders choose to strip the female of the eggs (or fry) to prevent the babies from being accidentally swallowed, stop the fry from being released into the main tank, and give the mother more time to recover from her duties. This is an in-depth topic that extends beyond the scope of this article, so do your research to learn more about stripping eggs and which method works best for you.
Once the eggs have been isolated, now it is time to hatch them. Eggs, especially unfertilized ones, are prone to growing fungus, which can quickly spread and ruin an entire clutch. Larger eggs that belong to African cichlids, plecos, peacock gudgeons, and the like can be placed in an egg tumbler that constantly blows fresh, oxygenated water onto the eggs and discourages fungal infections. Another method is to place the eggs in a small, plastic container of water with an air stone for circulation, and keep the eggs warm by floating the container in an aquarium or clipping it to the side of the tank wall.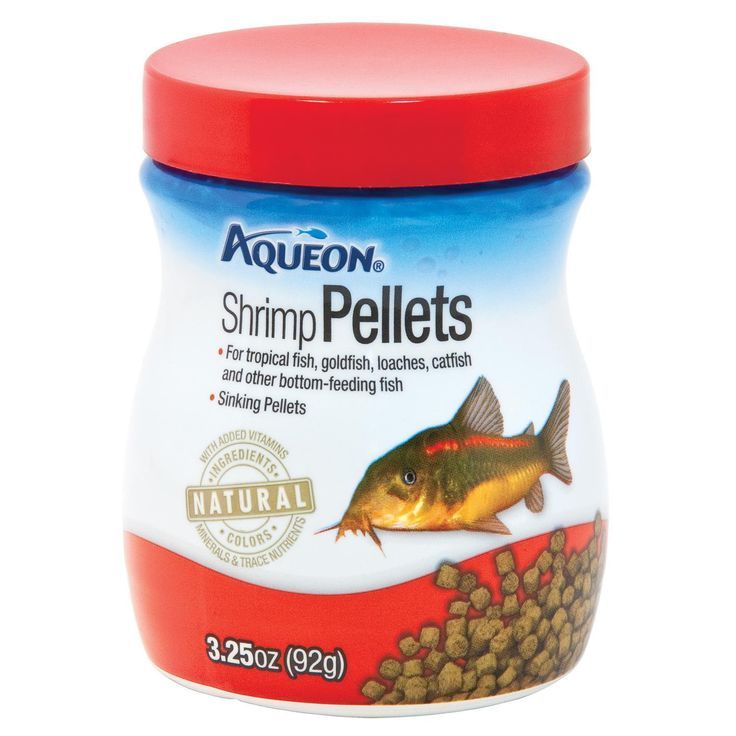 You can add a few drops of methylene blue (until the water turns slightly blue) or some alder cones as a gentle fungicide, and then do a couple of 50% water changes in the container once the eggs hatch. With both techniques, use a turkey baster to remove any eggs that have fungal growth.
2. Remove the Fry
After the eggs have hatched, the baby fish still aren’t out of the danger zone. Separating the fry from the adults not only prevents them from being eaten, but it also allows them to grow bigger and faster because there is less competition for food. Additionally, it is best to keep the newborns in a smaller container so that they don’t have to expend as much energy swimming to reach their meals. A net breeder or breeder box with a clump of moss for shelter is ideal because it allows the fry to live in the same tank and water conditions as the parents. For livebearers that bear live young instead of laying eggs, you can place the pregnant female in the breeder box when she’s about to give birth and then remove the mother after all the fry have arrived.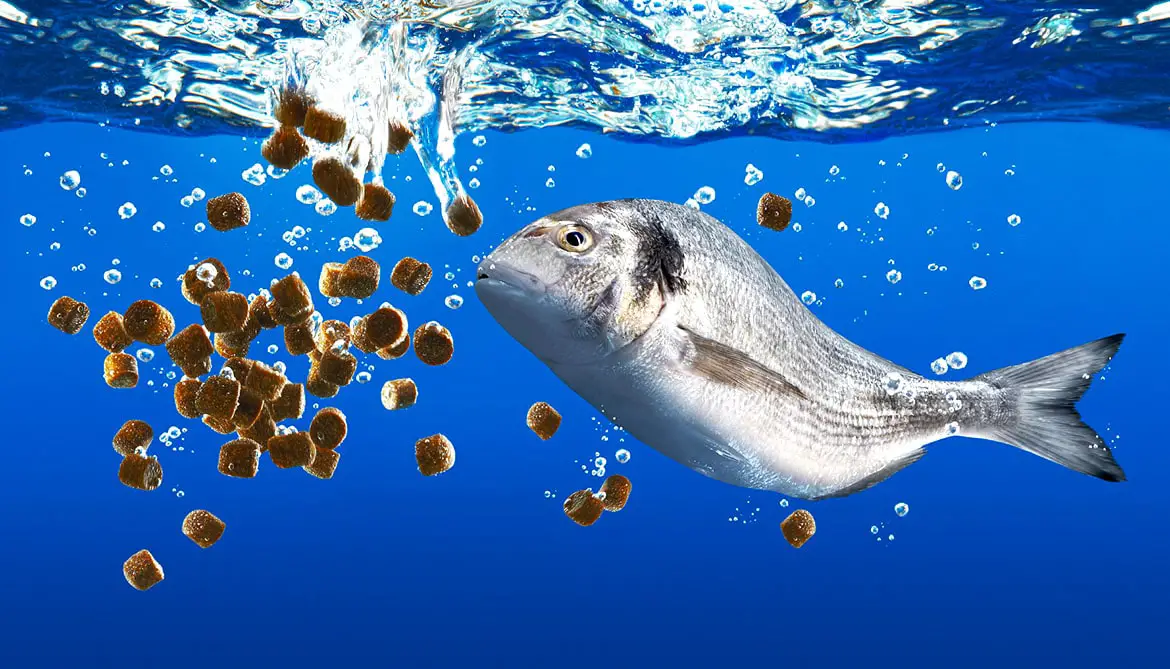
A breeder box allows you to raise fry in the same aquarium as the adults while protecting them from predation.
When the baby fry are bigger and stronger, move them to a larger grow-out tank to give them more room to swim around. If some fry are growing faster than others, you may need to separate them out by size into multiple aquariums to prevent cannibalism and lessen competition for food. This sorting process is also an opportunity to cull any sickly fry if needed to prevent defective genes from spreading and to avoid giving customers unhealthy fish.
3. Provide Lots of Cover
For people who do not have the room for an extra grow-out aquarium, you can try colony breeding instead, in which the parents and young are raised in the same fish tank. While this approach may not yield the highest number of offspring, it is certainly easier in terms of time, cost, and space. To increase the fry survival rate, the key is to provide tons of little nooks and crannies where the babies can escape into but the adults cannot fit inside. For example, breeders often make DIY fish fry traps using floating pond plant baskets or craft mesh rolled into a tall cylinder using zip ties. This allows you to either place a pregnant livebearer inside the trap so that the fry can escape out the holes, or vice versa where the parents are outside the trap and the fry can swim inside for safety. A giant wad of Easter basket grass is also used by breeders to create a dense mass that only the tiniest babies can swim in between.
If you prefer a more natural-looking form of shelter, a thick jungle of live aquarium plants also serves the same purpose. Our favorites for colony breeding include java moss, Pogosteman stellatus ‘octopus’, water sprite, and floating plants with bushy roots (like dwarf water lettuce and frogbit). Some species prefer a pile of rocks with small gaps in between for the youngest fish to squeeze past. Finally, aquarium decorations and small artificial caves can provide additional hiding places for fry to dart behind if being chased.
For colony breeding, adding lots of aquarium plants can help hide your baby fish.
4. Keep Good Water Quality
Baby fish are less hardy than adult fish and therefore can be more sensitive to any toxins or excess waste in the water. Make sure to include gentle filtration like a sponge filter, and regularly maintenance the filter so that it doesn’t become clogged up with fish poop. If you’re using a hang-on-back (HOB) or other filter with an intake tube, cover the intake with a pre-filter sponge to prevent little ones from getting sucked into the motor.
Since you will be feeding the fry a lot, consider doing daily or multiple water changes per week at first. This part can be a little stressful because no one wants to accidentally vacuum up any babies. When cleaning a breeder net or small container, a turkey baster is a nifty tool for carefully removing small amounts of water. For grow-out tanks, you can also create a tiny aquarium siphon using a length of airline tubing. Attach one end of the tubing to a chopstick with rubber bands, and then place that end into the aquarium water. The chopstick allows you to easily maneuver the siphon and avoid the baby fish. Use your mouth to suck on the other end of the tubing to start water flowing through the tiny siphon, and then place that end into a white bucket for collecting dirty water. The white bucket allows you to more easily see any fry that accidentally escape so that you can retrieve them using a turkey baster or little shrimp net. You can also have the siphoned water stream into a fish net or breeder net clipped to the side of the bucket, which will then collect any fry that escape.
Make a DIY fry siphon out of tubing, a chopstick, and rubber bands for cleaning grow-out tanks.
5. Feed Tiny Foods Multiple Times a Day
Fry have tiny mouths and tiny stomachs, and just like human babies, they must constantly eat all throughout the day. Newly hatched fish come with a yolk sac that feeds them until they are strong enough to freely swim and look for food. Then they require multiple small meals, up to 3-5 times a day if possible. You can set alarms on your phone or even use a automatic fish feeder for larger foods. The smallest newborns (e.g., rainbowfish and tetras) should be fed nearly microscopic foods like green water, infusoria, fry powder, and vinegar eels. Larger newborn fish (e.g., livebearers and African cichlids) can almost immediately eat crushed flakes, Repashy gel food, and Easy Fry and Small Fish Food.
Hatching live baby brine shrimp to feed your fish fry is the best way to increase their growth and health.
However, the #1 fry food that every veteran fish keeper and fish farm knows will bring out the best growth and numbers in your breeding projects is live baby brine shrimp. Not only are they packed with highly nutritious proteins and healthy fats, but they also actively swim in the water column, triggering your baby fish’s hunting instincts so that their bellies become filled with delicious, pink crustaceans. If you haven’t tried hatching your own baby brine shrimp, check out our step-by-step tutorial and give it a try.
Learn More
How to Feed Aquarium Fish Fry
By
Shirlie Sharpe
Shirlie Sharpe
Shirlie Sharpe is an aquatic expert and writer with over three decades of experience keeping and raising ornamental fish. She has consulted with The Minnesota Zoo and the National Aquarium. Shirlie has also authored a book on setting up aquariums.
Learn more about The Spruce Pets' Editorial Process
Updated on 12/02/19
Reviewed by
Nick Saint-Erne
Reviewed by Nick Saint-Erne
Dr. Nick Saint-Erne, DVM, is a highly accomplished veterinarian and writer who has treated zoo animals and exotic pets for more than 35 years. He has worked with the Centers for Disease Control and Prevention to improve pet store animal care among other endeavors. Dr. Saint-Erne is part of The Spruce Pets' veterinary review board.
Learn more about The Spruce Pets' Veterinary Review Board
Kai Schreiber / Flickr / CC By 2.0
The key factors to keeping the fry alive and healthy are keeping the water and environment clean, protecting the fry from adult fish, and providing proper nutrition. Most fish owners already know how to take care of the first two, but feeding fry is often the stumbling block that new breeders run into. Newborn fish cannot eat the same foods as the parents, so the challenge is providing the proper food until the fry grow large enough to eat standard foods.
Fry Type
Keep in mind that young fish will eat different foods at different stages of their development. Likewise, different species of fish have somewhat different needs. For instance, newly hatched Discus fry feed off their parents' slime coat for the first few days of life and therefore do not need to be fed until they have grown past that stage. It is wise to study the species of fish you are breeding to determine if the fry have special feeding requirements.
Taking a broader view, there are two general types of fry, those that are hatched from eggs and those that are born live. Fry that are born live are larger and have developed more fully than those hatched from eggs. Consequently, these live-born fry have a larger mouth than the typical fry hatched from an egg, and can, therefore, eat larger foods from the start. It is quite common for live-born fry to eat a finely ground version of the same foods as parent fish.
Fry from egglaying fish are smaller when they hatch and often are not free swimming for the first few days. In these cases they remain at the site where the egg was attached, feeding off their yolk-sac until they begin to swim free on their own.
Feeding Stages
Fry that are freshly hatched have very tiny bodies, and can only eat the smallest of foods. However, they are growing rapidly, and have demanding nutritional needs. This stage is particularly critical, as newly hatched fry can starve to death quickly. Some of the best foods at this stage are infusoria, freshly hatched brine shrimp, and green water. These foods must be available immediately when the fry hatch, as they cannot wait even one day for foods to be prepared. If the previously described foods are not available at the time the fry hatch, egg yolk preparations, and commercially prepared fry foods are good alternatives that don't require a lot of time to prepare.
Once the fry have passed the first week or two of life, they are generally large enough to eat similar foods as the parents, just in smaller portions. Virtually all purchased foods, either flake, pelleted, or freeze-dried, can be ground to a fine size that fry can eat. This article describes simple steps for creating your fry foods, using simple tools that you probably have on hand. As the fry grow larger, you can make the food particles larger until they can eat the same size food as the parent fish. Keep in mind that although the fry may now be eating the same foods as the parents, they need to be fed more often due to the small size of their stomachs.
Fry Foods
There are several basic high-quality foods that most fry will do well on. As previously mentioned, these foods must be on hand at the time the fry hatch, and the supply must be continuous until they can eat traditional foods. So prepare ahead of time to ensure you have what you need. Aquarium clubs come in handy when rearing fry, as there are often members who can help you in a pinch. If you want to breed and raise fish, consider finding a local club for support.
- Infusoria: Infusoria grows naturally in most tanks, particularly those with live plants. However, there may not be sufficient quantities to sustain the full hatching of fry. Therefore, it is helpful to culture your own infusoria to ensure having an adequate amount. This infusoria article from your Guide gives plenty of tips for growing your own culture.
- Brine shrimp: Few things can rival the nutritional value of freshly hatched brine shrimp or the appeal it has to virtually all fish. If you choose to raise it yourself, you will have to start the culture before the fry hatch and keep it going for a while to ensure the fry have sufficient quantities. Another option that owners use is a commercially prepared live brine shrimp preparation, or frozen baby brine shrimp.
- Green water: Green water is exactly what it sounds like, water with microscopic algae growth that turns it green. It makes excellent first food for young fry and is easy to grow. Simply take a gallon jar and fill it with aquarium water, scrape some algae out of your tank and add to the jar (if you have no algae, a bit of grass will suffice). Add a few drops of plant fertilizer, then leave the jar in full sun. Within a matter of days, the water should be green and teeming with microscopic nutrients that are ideal for your fry.
 Take a few ounces out of the jar for each fry feeding, and replace it with treated freshwater.
 - Egg yolk: Egg yolk is a power-packed food that is easy to make into preparation for newly hatched fry. Hard boil an egg, take the yolk and wrap in a small piece of gauze, compressing it so small portions protrude through the cloth. Hang it in the tank and the fry will feed off it. Remove and replace daily for the first several days.
- DIY fry food: Live born fry, or fry that are a week or more old can usually eat finely ground foods, that you can prepare yourself.
- Purchased fry food: Commercially prepared fry foods.
Live-Bearer Development Period Inside Female and as Fry
Food and nutrition for aquarium fish
The diet of fish in natural waters is very diverse. So, bitterlings, platypetsilia, mollins, gourami living in an aquarium in nature eat mainly plant foods, haplohilus pick up insects falling on the water, and cichlids (angelfish and others) are predators. In the aquarium, all species receive the same common aquarium food, which is very limited.
The diet of fish in natural waters is very diverse. So, bitterlings, platypetsilia, mollins, gourami living in an aquarium in nature eat mainly plant foods, haplohilus pick up insects falling on the water, and cichlids (angelfish and others) are predators. In the aquarium, all species receive the same common aquarium food, which is very limited.
A distinction is made between natural and artificial food. Whenever possible, fish should be fed with natural food that fish eat in natural conditions. But, of course, we cannot give African food to African fish. We just select the right ones.
Bloodworms are the most common natural food. A bloodworm is a larva of non-biting mosquitoes of twitchers, or bells, which looks like a bright red, segmented worm from 0.5 to 2 centimeters long. These larvae are caught at the bottom of ponds, lakes and slowly flowing rivers. This is not an easy task, and besides, it is very dirty. Therefore, when bloodworms can be bought (it is sold in almost all zoological stores), you should not catch it yourself.
Bloodworm is an excellent food for all aquarium fish larger than 1.5 cm. You need to give it based on the calculation of one to five worms for each fish one to two times a day. You can not throw a lot of bloodworms into the aquarium at once. If the fish do not have time to eat it, then the bloodworm burrows into the sand, where it often dies and, rotting, spoils the water. Bloodworms can also be fed to fish fry from 6 to 7 millimeters in size. For them, the larvae have to be cut into tiny pieces. A bunch of bloodworms (20-30 pieces) is placed on the glass and the blades are cut with quick movements, turning into a mushy mass. Having tilted the glass, the blood is allowed to drain, after which the slurry is thrown into the aquarium. You need to be especially careful when feeding fish with cut bloodworms. If even a few uneaten pieces remain in the aquarium, rotting immediately begins and the water becomes cloudy. You can store the bloodworm in a clean, damp cloth, laying it in a thin layer and placing it in a cool place (preferably with a temperature of 2-5 degrees). Sometimes bloodworms are stored mixed with sleeping tea. In this case, he lives longer, but it is difficult to choose him when feeding. In the summer, it is convenient to store the larvae in a plate with water and a Riccia aquarium plant placed in a bright light.
There is another very good way to store bloodworms. If the larvae are laid out in a thin layer in a flat vessel with a tight-fitting lid and slightly sprinkled with water, then the so-called wet chamber will be obtained. The air there is saturated with water vapor, and there is a lot of oxygen. Larvae in such a chamber, installed in a cool place, live for a long time. There are other ways to store. Bloodworms can be prepared for future use by drying live larvae. Most fish eat dry bloodworm well, but when feeding, it is easy for them to muddy the water, and the fish do not grow fast enough. Better dry bloodworm frozen. Do not feed fish with dead, spoiled bloodworms.
Bloodworm is rare in the southern regions of Russia. But in very heavily polluted reservoirs, the surface of the silt is often, like a carpet, covered with many thin red worms, half buried in the silt. These worms sometimes multiply strongly in the aquarium, if it is poorly lit and kept untidy. This is a tubifex, or tubifix. This worm is a good food for fish. Store it in the same way as a bloodworm, or in a plate of water, changed twice a day. This method is the best, tubifex can live in such conditions for months. Before feeding, the worm is cut, otherwise it will immediately burrow into the sand.
Excellent food for fry and small adult fish: various swimming crustaceans and mainly cyclops and daphnia. They are small, translucent and move in the water with the rowing movements of their oar-antennae. Their size is often less than a millimeter, and they are indispensable when feeding juveniles.
The brought Cyclopes are placed in a basin, changing the water from time to time. To do this, the upper layers of water are filtered through a net, and the dead crustaceans that have settled to the bottom are thrown away. Too many cyclops should not be kept - they die when overcrowded and become unsuitable for feeding fish.
As many cyclops and daphnia should be allowed into the aquarium as the fish eat within 1 - 2 hours. Daphnia are also sold dry. But if you feed the fish with one dry food, they grow and reproduce poorly. When vitamin D is added to dried daphnia, growth and fertility are improved in fish. One or two drops of an oily solution of vitamin D or fish oil are added to a matchbox of dry daphnia.
Powdered dry daphnia are placed in a special plastic or foam feeder floating on the surface of the aquarium. Like bloodworms, cyclops and daphnia can be frozen for a long time.
Amphipod (Gammarus) is another dry food for aquarium fish. Live amphipods are tasty food for many commercial fish. It is not for nothing that even a winter fishing hook (mormyshka) is shaped like an amphipod, which is sometimes called a mormysh. When dried, the crustacean is quite hard. No aquarium fish can eat it whole. But if the crustaceans are ground into dust, the fish eat them very willingly. In terms of nutritional value, this food is better than dry daphnia, but, of course, it is inferior to live food. This food is suitable for many fish. It is good to feed the fish with dry food mixed with chopped bloodworms.
Corretra is also a live food for fish - a mosquito larva. The dimensions of the core are about a centimeter. Equal in nutritional value to the bloodworm, the coretra has some advantages in comparison with it: it does not burrow into the sand and is very insensitive to the amount of oxygen dissolved in water. In one glass, you can put several hundred correts. These larvae are very resistant to adverse conditions.
Coretra should be kept at low temperatures; in heat, it quickly pupates and becomes unsuitable for feeding. Fish accustomed to bloodworms are reluctant to catch a coretra, however, when they are hungry, they begin to eat it greedily.
Slipper ciliates are the best food for newly hatched fish larvae. It's quite easy to break it down. Take rotten parts of aquarium plants and squeeze them into a test tube.
When the turbidity settles, looking at the light, they catch with a pipette shoes, which are easy to recognize by their characteristic shape. The ciliates are placed in a jar (2-3 liters in volume) with cooled boiled water, adding two to three drops of milk or yeast diluted in water. The water temperature should be 20 - 25 degrees. After clarification of the water, the ciliates are again fed with milk or yeast. After 10 - 15 days, there are usually a lot of shoes in the bank.
Ciliates breed well if you throw a banana peel into a jar, fresh or dry - it doesn't matter. In this case, feeding with milk or yeast is not necessary. And pieces of banana peel can be placed every 10 to 15 days.
To feed the larvae, take 1 - 2 glasses of water with ciliates per day. In the jar, you immediately need to add cooled boiled or plain raw tap water and feed the ciliates. The more often you change the water, the better the shoes will multiply. One three-liter jar of shoes is usually enough to dig up a hundred fish larvae.
Large fish - crucian carp, goldfish, adult macropods, gourami and others - eat earthworms well.
Artificial aquarium food should only be used when natural food is not available. A good artificial food is raw meat or fresh fish. Meat and fish are scraped with a knife, separating the smallest pieces. A substitute for ciliates is a hard-boiled egg yolk. Having shaken it in a glass of water, the liquid is dripped with a pipette into the places of accumulation of fish larvae. The yolk greatly spoils the water, and therefore it can be used only in the absence of ciliates. Instead of the yolk, you can successfully use egg powder. By the way, they can occasionally feed unpretentious adult fish, throwing the powder into the feeder to the surface.
Steamed in boiling water and washed in a net, semolina, balls of white bread, biscuits can be used in very small quantities.
Whatever you feed your fish, you must first of all follow the basic rule: do not throw too much food into the aquarium. You need to feed once or twice a day, and immediately after the fish have eaten, the remaining food should be removed from the aquarium.
Often, leaving for a few days, they let in a full aquarium of cyclops or, even worse, give a lot of dry or artificial food. In such cases, they usually come "to the broken trough": the water has deteriorated, the fish have died.
The picture would be different if these days the fish were not fed at all: they would all survive, if only they lost a little weight.
Always throw food in the water and in the same place in the aquarium.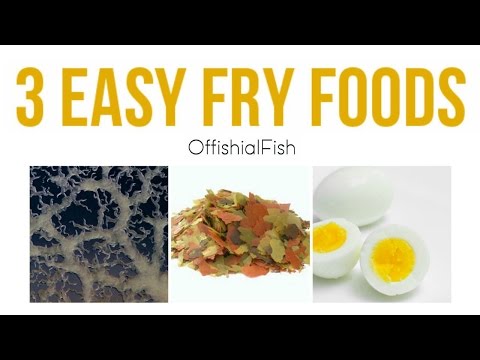 In order for the fish to immediately find it, it is useful to develop a conditioned reflex in them to knock on glass or to the ringing of a bell. You should always knock or call just before feeding. Usually, even without special "training", hungry fish immediately gather to the glass where they are fed, as soon as they notice a person approaching the aquarium. In this case, "learning" happened against our will: feeding was always preceded by the appearance of a person near the aquarium.
How to properly feed aquarium fish with dry food
High quality dry fish food is a complete substitute for natural food. They are completely free from parasites and, when properly fed, rarely cause bacterial diseases. Remember to follow the basic rules for feeding dry food: soak it for 7-10 minutes before feeding it in the aquarium and do not overfeed fish, especially voracious goldfish and cichlids. You can find out what types of feed are available on the domestic market in the corresponding article. And we are moving on to the selection of specific diets - it's time to learn how to feed the fish with dry food!
Buying tips for dry fish food
Decide on the volume: it makes no sense to take a large jar to try - but if you are sure of the manufacturer and the specific diet, this will save you money. Feel free to consult: the choice of food is influenced even by seemingly indirect conditions of detention, such as the presence or absence of a filter. Many manufacturers produce special lines for fry or even medicated feed containing an antibiotic.
Don't forget that marine fish need special food, many freshwater diets will not reveal their natural color and shape. Speaking of color problems, leading pet food manufacturers make rations to improve coloration.
If your fish do not lay enough eggs during spawning, look for foods with a high protein content or special ones to increase fertility. Remember that the cleanliness of the water is especially important in the spawning area, and if earlier the solution to the problem was a short-term hunger strike of the fish, today you can use food that does not pollute the aquarium.
Popular sections:
Aquariums Sale of kittens and puppies Terrariums Products for cats Products for dogsTo properly feed your fish with dry food, try taking into account the needs of all your pets or planting species that need diametrically opposed food. Hungry fish can grab any food because they do not understand the composition of the pellets. But excess animal protein can lead to poisoning and gastrointestinal problems in herbivorous species such as tropheus.
For those who like to travel or often go on business trips, so-called. weekend food that can be stored in water for a long time without decomposing, without polluting the aquarium environment and without losing useful substances.
Buy food in specialized stores. Check the expiration date and the integrity of the packaging before buying, it can save the life of your pets. Loosely closed packaging leads to rapid oxidation of vitamins and reduces the nutritional value of the feed.
Feeding of one species of fish
The feeding regime in monospecies aquariums is determined by the age of the fish they contain. Adults perfectly manage 1-2 meals a day. Young growth is desirable to feed 4 times with an interval of 6 hours. It is recommended to feed fry under the age of 1 month every 4 hours, including at night; therefore, automatic feeders are often purchased in children's aquariums.
Even within the same species, the rate of food intake can vary significantly and depend on the time of year, the number of fish in a flock, and the stage of the reproductive cycle. Therefore, you should focus on the average saturation rate for the available fish. Some feed rapidly and are completely full in a few seconds; slower types of meals require up to 15 minutes. If you don't know how long it takes fish to eat, watch out: slower movements and less active feeding indicate that their stomachs are full.
When choosing a feeding regimen, the natural diet of pets should also be taken into account; it determines how often you will have to feed your aquarium fish. Algae-eaters and similar fish usually feed almost around the clock, but always in small portions. Hideout-loving bottom fish may not come out of their caves all day, so their portions should be well kept in the water until nightfall. Large predators absorb a large amount of food at a time, and then do not need food for a long time up to 2-3 days.
Remember: even if the aquarium contains fish of the same species, the food should not be monotonous. Don't get hung up on one food. For example, you can use food to improve the color as a supplement to the main food several times a week.
Feeding different types of fish
Some fish species are universal in terms of nutrition, they feed in all layers of the water and willingly eat any food. But others need special nutritional conditions. How to feed aquarium fish with different needs? Bottom-dwelling fish that like to collect food crammed into crevices and voids between pebbles are better at eating specialized sinking diets with a stabilized shape. Fish that feed in the middle layers are usually unpretentious, but it can be difficult for them to pick up spilled chips from the surface, so remember to soak them before feeding. Species that prefer to feed near the surface usually have an appropriate bulldog mouth structure; it is better for them to choose light balloons that stay in the upper layer for a long time and do not sink, because such a fish cannot collect them from the bottom. Many manufacturers produce food labeled for all types. When choosing this or any other diet, make sure that its fraction makes it easy for all the inhabitants of the aquarium to swallow pieces.
If the aquarium population consists of euryphages (omnivorous species), there are usually no feeding problems. But even within the same species or flock there is a hierarchy. If you can't make sure that every fish eats its fill, take the advice of experienced aquarists: arrange a buffet twice a week, almost without limiting the fish in the feed. It happens that within one aquarium it is necessary to organize selective feeding. In this case, you will have to go to the trick and play on the differences in the size of the fraction and the layer where the fish feed. You can also train the fish to flock for feeding by lightly tapping on the glass.
Feeding fry
Feeding fry in the first month of life determines their species value and potential for further reproduction. At this time, they are especially vulnerable, so the vast majority of aquarists use special food for fry. Such diets are distinguished by the optimal size of granules, soft but stable texture and the addition of biologically active complexes for healthy development and maintenance of immunity. The feeding regimen is determined by the type of fry. On average, the interval between meals for fish up to a month should not exceed 2-4 hours. Whatever food you choose, remember that it should be a source of easily digestible proteins.
Feeding herbivorous fish
Dry food ideal for species that prefer plant foods. The fact is that high-quality feeds also contain animal protein in small quantities, because in nature algae and plant residues are usually eaten along with crustaceans and invertebrates that have stuck to them. Properly feeding fish with such a diet at home is quite difficult.
Remember that most herbivorous fish have very small (or no) stomachs and long intestines. Therefore, for them it is necessary to choose food that does not lose its properties during a long stay in the water. Feeds for benthic species fully meet this criterion, so sweet clover is often added to vegetarians.
Choose a feed fraction: too small, it will cause anxiety in the fish, and too large will get stuck in the throat or be reluctant to eat. Pay attention to the needs of filter feeders, who prefer almost dusty food. If you are not sure that all the fish eat dry food, try additionally feeding them with vegetable food, tied to a sinker, it decomposes slowly, and it is convenient to remove the leftovers a couple of hours after feeding.
Feeding predatory fish
Predatory fish can be trained to eat factory food and still do without natural food. It is only important to find food with the optimal composition: at least 45% protein, 4-6% fat and a minimum (2-3%) fiber. The diet of predators involves increased intervals between feeding, most species are enough to feed 1 time per day, and fish hunting for large prey, 2 times less often.
Feeding bottom fish
Normally, fish should eat the food within 2-3 minutes. To fill more means to overfeed the fish, and systematic overfeeding leads to obesity, gas accumulation, dropsy, problems with the kidneys, liver, gastrointestinal tract and bacterial diseases. But what to do with catfish and other bottom fish? Many of them eat algae and waste, but this cannot be called a complete diet.
Sinking plates and tablets have been created especially for bottom feeding species. Often they contain ground wood, which is part of the natural diet of sweet clover. They are also distinguished from other feeds by their dense texture, due to which the feed particles do not disintegrate even after a long stay in the water and do not cloud it.
Feeding Siamese fighting fish (Betta fish)
Due to the popularity of Siamese fish as pets, some manufacturers have produced special food for betta fish.