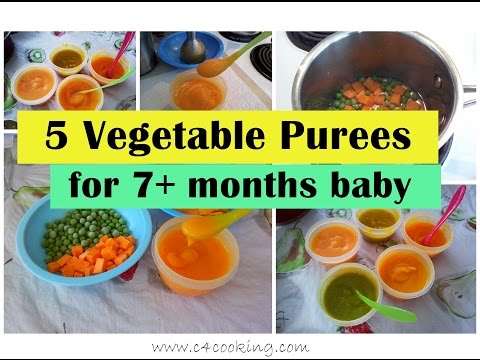
What table foods to start baby on
Giving Baby Finger Foods at 7-8 Months
Written by Rebecca Felsenthal Stewart
Reviewed by Dan Brennan, MD on August 09, 2022
Month 7, Week 3
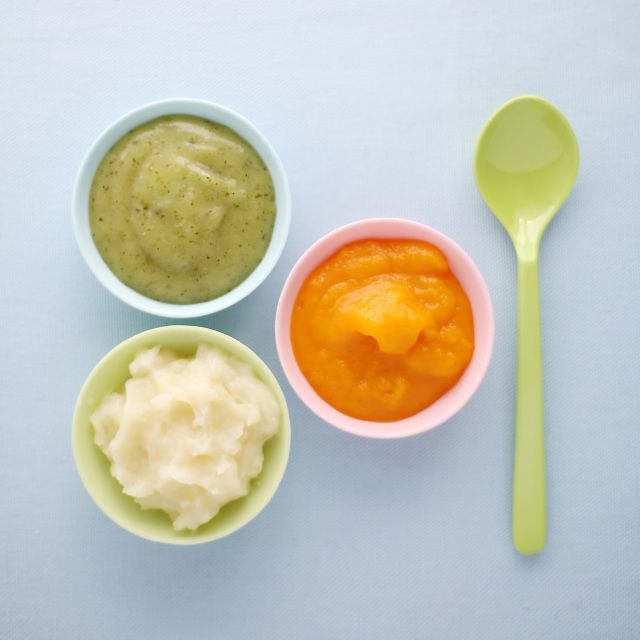
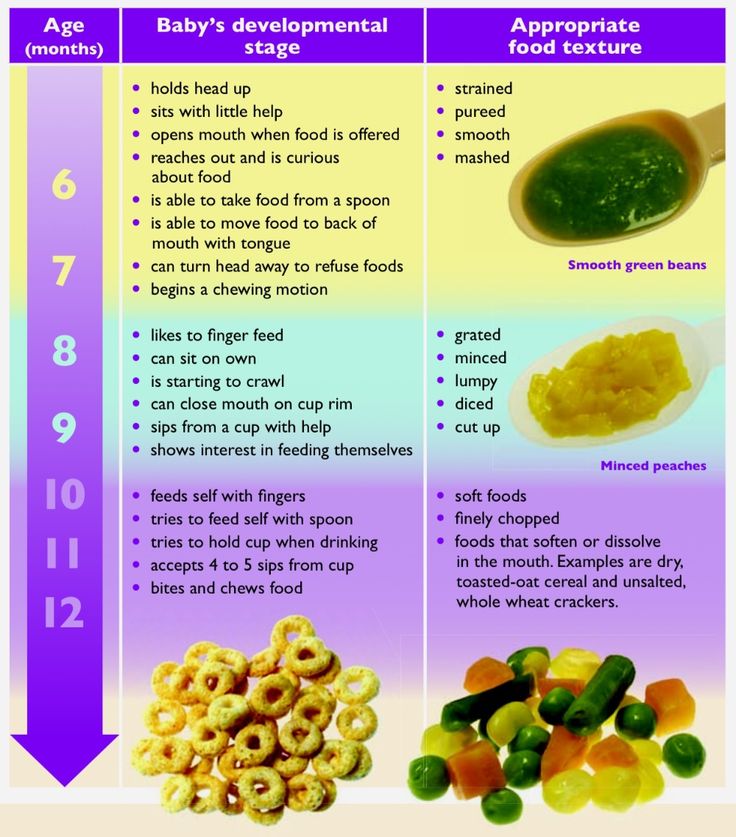
featureOnce your baby is a pro at eating soft mashed foods, they may be ready to move on to finger foods around 8 months. They have the dexterity to pick the food up and release it or mash it, and will become more efficient and independent as they master the pincer grip around 9 months. At that point they'll be able to use their thumb and forefinger to pick up the small chunks of food.
Your baby may grab at everything on your plate, but follow these guidelines for healthy and safe feedings.
- Start with menu items like pieces of soft cheese; small pieces of pasta or bread; finely chopped soft vegetables; and fruits like bananas, avocado, and ripe peaches or nectarines. These foods should require minimal chewing, as your baby may not yet have teeth. Do NOT let them have hot dogs, raw vegetables, nuts, meats, hard candy, or sticky textures such as nut butters that have increased choking risks at this stage.
- Introduce new foods one at a time in case there are any concers about allergies.
- Chop all foods into soft, bite-sized pieces, 1/2 inch or smaller.
- Watch out for choking hazards: Avoid round, firm foods like carrots, grapes, and hot dogs and skip anything like raw veggies and peanuts. Raisins and popcorn are dangerous for babies.
- Keep up your formula or breastfeeding schedule, but as your baby eats more solids, they’ll naturally start to take less milk. Your baby needs to start eating more solids and drinking less milk for the nutritional value at this stage.
Your Baby's Development This Week
Your baby is getting stronger and may even be moving around, whether they are sliding around on their belly in reverse, scooting on their behind, or actually crawling forward. If you haven’t childproofed your house already, don’t wait any longer!
You may notice these growing signs of motor development:
- Your baby is probably now able to sit on their own for several minutes, without using their hands for support and they may be able to get up into a sitting position all by themselves.
- While you offer them support, they should be able to bounce up and down, and possibly even pull up to a stand.
- Their little hands are increasingly agile -- they are getting better at passing a toy back and forth from one to the other.
You might wonder about:
- Their vision. Your baby should be able to see nearly as far as an adult by now and can track moving objects with their eyes.
- Stranger anxiety. You’re not imagining it: They may fear new people and situations. So give them time to warm up and reassure them if they are upset.
- What they can understand. Your baby might comprehend more than you realize, so it’s important to keep talking to them about everything you’re doing and try to be consistent about the words you use for familiar objects.
Month 7 Week 3 Tips
tips- If food allergies run in the family, talk to your pediatrician about introducing highly allergenic foods like peanuts and eggs.
- Fried foods are not good choices for babies. If you offer them at all, do so rarely.
- Avoid feeding your baby juice unless it is fresh-squeezed.
- By now, your baby’s diet should include grains, fruits, vegetables, and meats, and they should be eating two to three meals a day.
- In addition to rice, barley, or oat cereal, you can introduce grain products your baby can grab, such as toast, crackers, and dry cereal. Avoid any colorful, sugary cereals.
- Sit baby in their high-chair for feeding time. If they eat finger foods while crawling around, they are more likely to choke.
- You’re not done with breast feeding or bottle feeding. Your baby is starting the transition, but breast milk and formula are still key.
- Pureeing or mashing vegetables may make them easier for your baby to eat when they are first transitioning from a liquid diet to solids.
Today on Grow
<blank>Recommended for You
Doctor-approved information to keep you and your family healthy and happy.
- Pregnancy & Baby Bulletin
- Parenting & Children's Health
13 Best Finger Foods for Baby
Introducing finger foods for baby is an exciting and nerve-racking time. Between the mess, possible allergies and potential choking hazards, it’s enough to give some parents white knuckles as they hover over the high chair. But while you should certainly exercise caution, there are lots of great baby finger food ideas that will make mealtime fun and nutritious, and let your growing child practice the important art of self-feeding.
In this article:
When can babies eat finger foods?
Baby finger food safety
How to introduce new finger foods for baby
Best finger foods for baby
When Can Babies Eat Finger Foods?
There’s no hard and fast rule in terms of when babies can start eating finger foods, says William Dietz, MD, PhD, director of the Sumner M. Redstone Global Center for Prevention and Wellness at the Milken Institute School of Public Health at the George Washington University in Washington, DC, and co-editor of the American Pediatric Association’s (AAP) Nutrition: What Every Parent Needs to Know. Rather than focusing on baby’s age, says Dietz, “the first indicator you should look for is that the baby is interested.” So how can you tell when baby’s interest is piqued? Reaching for the food as you’re feeding her, grabbing the bowl or spoon, putting the spoon in her mouth and fussing when she sees you eat (because she wants in!) are all signs your child may be ready. “Babies generally want to feed themselves,” Dietz says. “That’s a normal drive.”
Being able to sit independently is another good clue that babies are physically ready to try finger foods, says Susan M. McCormack, MA, senior speech language pathologist at Children’s Hospital of Philadelphia and a board-certified specialist in swallowing and swallowing disorders. If they can sit up in the high chair, then they might be ready to try their hand at finger foods.
Some guides suggest waiting to introduce baby finger foods until your child has mastered a pincer grasp—the ability to pick up small objects between the thumb and forefinger—but Dietz says this isn’t totally necessary. “Initially when children start to feed themselves, they don’t have a pincer grasp,” he says. “So they’re using their whole hand and putting their hand in their mouth. And that’s fine.”
If you’re waiting for your infant to sprout teeth before moving on from purees, think again. “Babies don’t need teeth to learn to eat solids and learn to chew,” McCormack says. Those strong little gums are perfectly capable of mashing up soft solids—if you’ve ever let baby teethe on your finger, then you have some idea of just how powerful they are!
Baby Finger Food Safety
When choosing the best finger foods for baby—whether you’re starting at 6 months or 9 months—experts agree that it’s best to begin with small pieces of soft food that dissolve easily.
As your infant grows and becomes comfortable eating finger foods, you can branch out, McCormack says. “As a baby develops better tongue patterns to control food pieces as well as more mature chewing, he can better ‘chew’ the foods that break apart, like pieces of fruits and vegetables. A one-year-old can also bite off pieces of food that a 6-month-old can’t.”
Avoid giving baby finger foods that are large, sticky or don’t dissolve easily, because they’re potential choking hazards, Dietz warns. He suggests steering clear of foods like hot dogs, carrots, nuts, grapes, popcorn, candy and globs of peanut butter.
Another thing to keep in mind when you’re picking out the best finger foods for babies is that a lot of adult foods—particularly snacks—can be super salty. “Often parents will doctor a food so it appeals to their tastes, and their taste may have bigger amounts of sodium than a baby’s taste,” Dietz says. When preparing food for baby, leave out the salt whenever possible. (You can always add it separately to your portion if you’re cooking for the family).
How to Introduce New Finger Foods for Baby
When babies first start on finger foods, breast milk and formula will still be their main source of nutrition, followed by purees. You should continue to spoon-feed your child initially, “but during the feeding process, they should also be allowed to feed themselves,” Dietz says. Put some finger food on her high-chair tray and let her try to get it into her mouth in between the spoonfuls of food you’re feeding her. If she gets really frustrated, go ahead and help her out.
Most important, follow your child’s cues and “let your baby be the guide,” McCormack says. If he doesn’t respond positively, take a step back and try again later. But keep in mind that babies often crinkle up their faces when they try something new, which can look like they don’t like something, Dietz says. It can take up to 20 times before they’re used to certain foods. “Parents shouldn’t force food, but they should be persistent in offering,” Dietz says.
McCormack also suggests easing into finger foods by offering thicker purees with a bit of texture to them. “Try alternating bites of the smooth puree with a slightly thicker or mashed food to help your baby get used to the new textures in her mouth,” she says.
Remember, too, that this is a messy process. Parents might want to lay newspaper or an easy-to-clean vinyl tablecloth on the floor, since it’ll be a while (like, years) before your kid manages to get more food in his mouth than on the floor, Dietz advises.
Finally, never leave baby unattended while she’s eating, and keep an eye out for signs of choking. It may be tempting to hold off on introducing finger foods until your child is older, but helping baby develop this skill has multiple benefits, McCormack says, including “development of independence, fine motor skills and self-feeding skills, as well as development of oral patterns to support texture progression.” Whether you start baby finger foods at 6 or 9 months, just follow baby’s lead and let him have fun with it.
Best Finger Foods for Baby
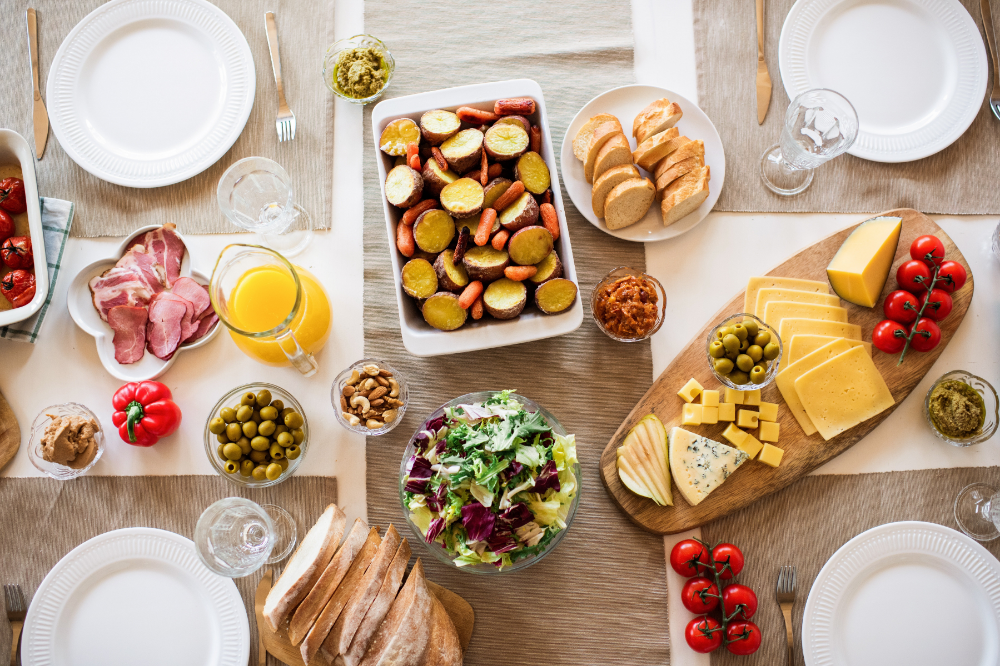
If you’re looking for baby finger food ideas, think about options that are soft, small and easily gummed. Here are a few of the best finger foods for baby to get started—including finger foods for baby with no teeth! While the same finger foods are as appropriate for a 6-month-old as they are for a one-year-old baby, you can begin to offer slightly larger pieces that they can bite off themselves as they become more confident. Stick with these healthy options, and you’ll start baby off on the right path for healthy eating.
Image: The Bump
1. Puffs and dry cereal. Puffs and O-shaped dry cereal are some of the most popular first finger foods for good reason: They let baby practice the pincer grasp by picking up one at a time. And as McCormack explains, they also “mix well with saliva and are easy for the infant to manage in their mouth without choking.”
2. Teething biscuits and lightly toasted bread. Teething biscuits and small pieces of lightly toasted bread are another great starter finger food, since they soften quickly. Just note that some breads can turn gummy and stick in baby’s mouth; lightly toast the bread and cut into very small pieces to avoid a choking hazard. As baby gets older (around 9 to 12 months), you can offer slightly larger pieces or serve bread topped with mashed banana or avocado, or a super-thin layer of hummus or peanut butter.
3. Scrambled eggs. Doctors used to advise waiting to introduce eggs, but the AAP now recommends early exposure to potentially allergenic foods. Which is great news, since scrambled eggs are an ideal early finger food! Keep your love of runny yolks to yourself for now, however, and cook those eggs thoroughly, cut into small pieces and avoid adding salt.
4. Soft fruit. Very ripe fruit is naturally soft, making them some of the best finger foods for babies. Ripe banana, peach, watermelon, raspberries, blueberries and cantaloupe cut into small pieces are all great finger food options.
5. Avocado. A rich source of omega-3 fatty acids—which can help boost baby’s brain development—avocados are, like puffs, often one the first baby finger foods, even when your little one has no teeth.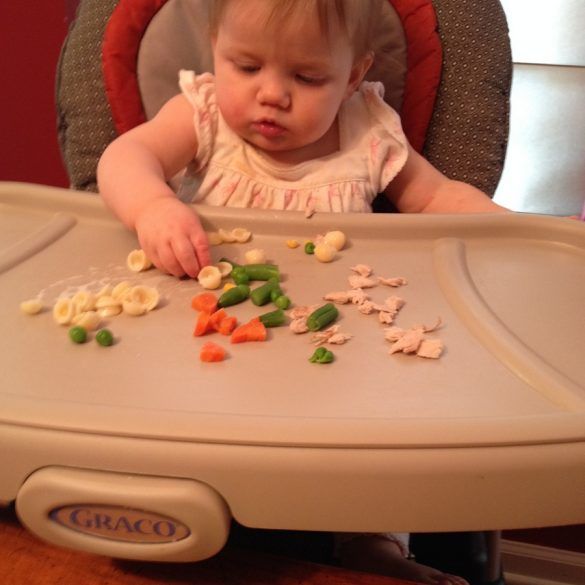 Be warned: Avocado can get messy fast, but it’s well worth it (and can result in some hilarious pics for the baby album).
6. Pasta. Though recipes often recommend cooking pasta al dente, when it comes to feeding baby, you’ll want to slightly overcook it so it’s nice and soft. To start, try small pasta shapes like orzo or mini shells, or cut up fusilli or penne. Initially serve it plain, but as baby is introduced to more foods you can toss the pasta in a little butter, olive oil or low-sodium tomato sauce.
7. Tofu. Whether cooked or uncooked, tofu is a wonderful plant-based source of protein and a perfect finger food for babies. Opt for firm tofu, which is still quite soft, as opposed to soft or silken tofu, which will likely fall apart in baby’s hand and frustrate her.
8. Cooked vegetables. Though it will be a while before baby can hit the crudités platter, cooked vegetables make excellent baby finger foods. To get the most nutrients out of your vegetables, steam or roast them until soft, and, of course, cut them into small pieces. Try sweet potato, carrot, broccoli, cauliflower or beets (opt for yellow beets for less mess) to start. As baby gets bigger, you can offer steamed carrot sticks or peeled, roasted sweet potato wedges.
9. Cheese. If baby has shown no signs of a dairy allergy, then it’s perfectly safe to introduce soft cubes of cheese as early as 6 months. Opt for small bites of a pasteurized cheese that’s soft but not overly sticky or stinky, like Monterey Jack or cheddar.
10. Beans. Looking for more protein-rich, vegetarian baby finger foods? Try beans. Opt for canned, low-sodium beans for convenience, or soak and cook dry beans yourself to save money (they’ll freeze well too!). When first introducing beans, smash them just a bit between your fingers before serving to baby.
11. Homemade muffins. While store-bought muffins are often loaded with sugar, there are plenty of healthy muffin recipes out there. Use whole-wheat flour, sweeten with applesauce instead of sugar and add healthy ingredients like mashed banana or grated zucchini. Bake in a mini muffin tin or use a standard-size tin, and, once baked, break off into small pieces for baby.
12. Meat. After soft foods, diced chicken breast and ground beef are pediatrician-approved next-stage finger foods for baby. Just make sure they’re thoroughly cooked and cut into very small pieces.
13. Fish. Fish is another allergenic food that doctors now say can be introduced before baby is a year old. Be sure it’s thoroughly cooked, and opt for a low-mercury fish like flounder, cod or salmon. Most important, make sure to remove any tiny bones.
Please note: The Bump and the materials and information it contains are not intended to, and do not constitute, medical or other health advice or diagnosis and should not be used as such. You should always consult with a qualified physician or health professional about your specific circumstances.
Plus, more from The Bump:
Baby-Led Weaning Basics
Why Variety Matters in Baby’s First Foods
The Dos and Don’ts of Homemade Baby Food
Various breastfeeding positions
Try different breastfeeding positions to find the one that works best for you and your baby. You can see the options in our selection of photos
Share this information
There is no right or wrong way to hold the baby while
feeding, and mom and baby are sure to find their favorite position.
It is important that both you and your child feel comfortable. 1.2 It's good to learn a few different breastfeeding positions and techniques because life's circumstances often require us to be flexible, especially as your baby gets older and you start to leave the house more often.
Whatever position you choose to breastfeed your baby, remember a few simple rules.
- Prepare everything you need before feeding, including drinks, food, mobile phone, TV remote control, book or magazine. And do not forget to go to the toilet - the feeding process can take a long time!
- Make sure your baby is comfortable. Whichever position you choose, it's important to keep your baby strong, level, and provide good support for their head, neck, and spine.

- You should also be comfortable. Don't stress. If necessary, use pillows of different sizes or rolls of towels to support your back or arms.
- Make sure your baby is latching on correctly. Proper grip is the key to comfort when breastfeeding.
- If your baby does not latch on well or you experience pain while feeding, contact a lactation consultant for help. The specialist will also be able to show you how to hold your baby more comfortably.
1. Relaxed feeding or reclining position
The relaxed feeding position, also known as biological feeding, 1 is often the first position for most mothers. If, immediately after birth, the baby is placed on the mother’s chest or stomach, normally, he instinctively reaches for the breast and tries to grab the nipple. This phenomenon is known as the breast seeking reflex. Skin-to-skin contact stimulates the infant's feeding instinct, and gravity helps him to latch onto the breast and maintain balance.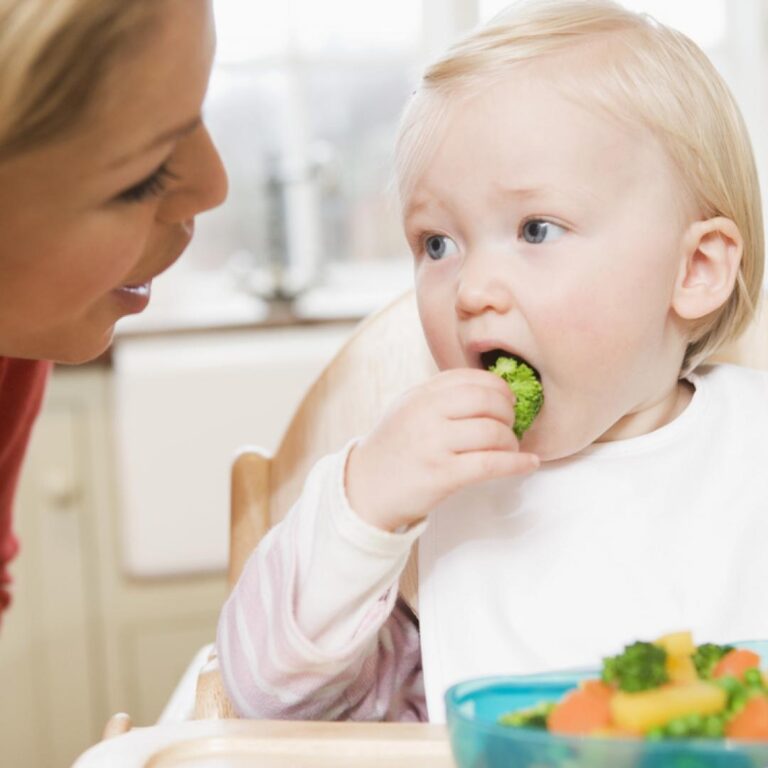
But it's not just newborns that can be fed in the reclining position - this position is great for babies of all ages. It can be especially helpful if your baby does not latch well in other positions or does not like to be touched during feeding, and also if you have too much milk flow or too large breasts. Isabelle, a mother from the UK, shares her experience: “I had large breasts, and the baby was born small - 2.7 kg, so it was not easy to find a comfortable position at first. After a few weeks, it became clear that there was no “correct” posture for me. As a result, I most often fed lying down, putting the baby on my chest. ”
It is more convenient to feed not lying flat on your back, but half-sitting, leaning on pillows. So you will have a back support and you will be able to watch the baby during feeding.
2. Cradle position
This is the classic
first thought of breastfeeding. Mom sits straight
, and the baby lies on her side on her arm, pressing his stomach against her stomach. 3 Although this is a very popular position, it is not always easy to master with newborns because it gives the baby less support. Try putting a pillow under your back, and put a special breastfeeding pillow on your knees and lean on it with your hands. So you can more reliably support the child, without overstraining your back and shoulders. Just make sure that the baby does not lie too high on the pillow for feeding. The breast should remain at a natural level so that the baby can grab it without effort, otherwise sore nipples cannot be avoided.
“I breastfed in the cradle position because it suited me perfectly! It was comfortable and I loved just sitting and looking at my little one,” recalls Rachel, a mother of two from Italy.
3. Cross Cradle
This breastfeeding position looks almost the same as Cradle, but the baby is on the other arm. 3 This gives your baby support around the neck and shoulders so he can tilt his head to latch on. This position is great for breastfeeding newborns and small babies, as well as for babies who do not latch well. Since the baby lies completely on the other hand, it becomes easier to control his position and you can adjust the chest with your free hand.
Julie, a UK mother of two, finds this position very practical: “I usually breastfeed my youngest in the cross cradle position. So I have a free second hand, and I can take care of an older baby at the same time. ”
Do not hold the baby's head at first, otherwise you may inadvertently press his chin against his chest. Because of this, the child will not be able to take the breast deeply, because the nipple will rest against the base of the tongue, and not against the palate, which will lead to inflammation of the nipples. As the child grows, this position becomes more comfortable, and he can rest his head on your palm (as shown in the photo above).
4. Underarm breastfeeding
In this position, also known as the “ball grip”, the mother sits with the baby lying along her arm at the side, legs towards the back of the chair (or any other seat).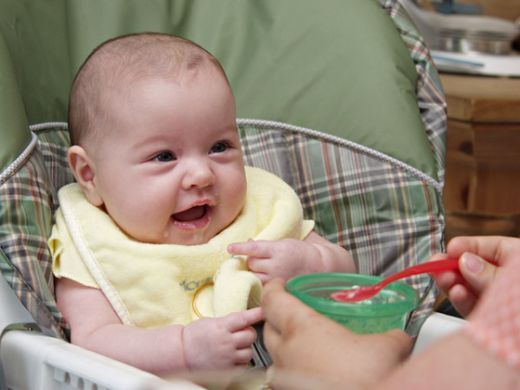 3 Another comfortable position for newborn breastfeeding, you can give your baby good support, full control of his position and a good view of his face. And the baby feels safe in close contact with the mother's body. This position is especially good for those who have had a caesarean section or a premature birth, as well as mothers of twins and women with large breasts.
“When I breastfed my first daughter, I had very large K-sized breasts—twice the size of her head,” recalls Amy, an Australian mother of two. - I put rolls of towels under each breast, because they were very heavy, and fed my daughter in a pose from under the arm, but only sitting straighter so as not to crush her. This position was also convenient because I had a caesarean section and could not put the baby on my stomach.”
5. Side-lying position
The side-lying position is ideal for a relaxed
nighttime feeding in bed or on the couch. If you had a
caesarean section or ruptures during childbirth, this position may be more comfortable than sitting down.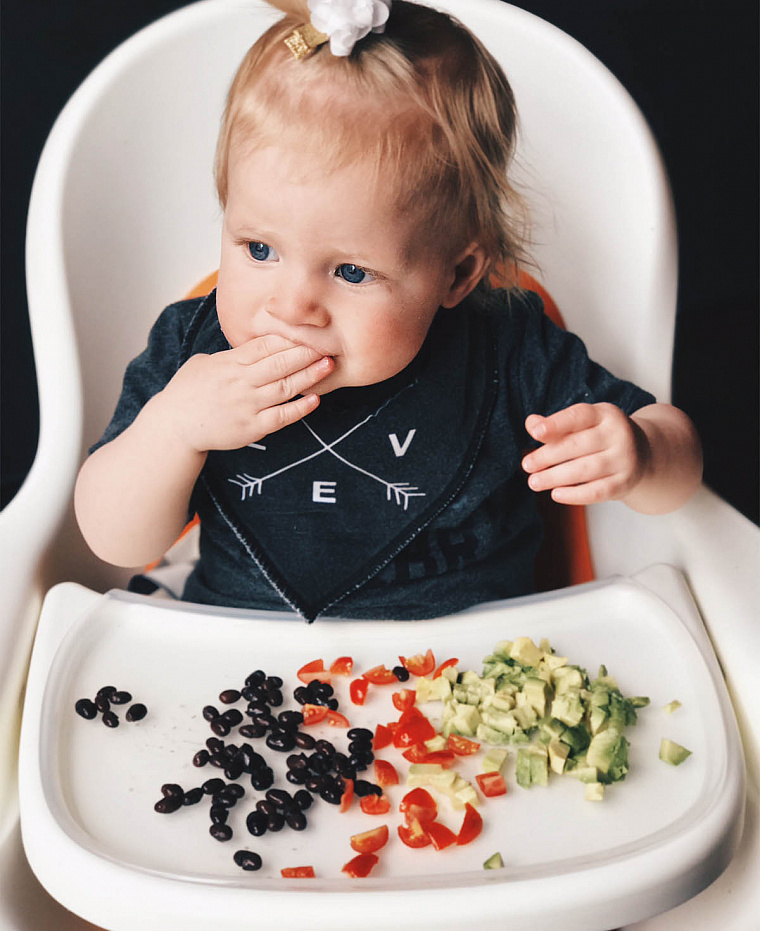 3 In this position, mother and baby lie side by side, tummy to tummy.
“It was difficult for me to sit during endless night feedings, firstly because of the caesarean section, and secondly because of lack of sleep,” recalls Francesca, a mother from the UK. “And then I discovered that you can feed your baby lying on your side and rest at the same time.”
“Because of the short tongue frenulum, Maisie could only properly latch on to her breasts while lying on her side. The lactation consultant showed me how it's done. In this position, the flow of milk was optimal for my daughter, and it was easier for her to keep the nipple in her mouth. As she got older, she became much better at grabbing her breasts in normal positions,” says Sarah, mother of two from Australia.
6. Relaxed breastfeeding after caesarean section
If you can't find a comfortable position for breastfeeding after caesarean section, 3 try holding the baby on your shoulder in a reclining position – this does not stress the postoperative suture and allows you to breastfeed your baby comfortably. You can also try side feeding.
7. Sitting upright breastfeeding or “koala pose”
When breastfeeding in an upright position or “koala pose”, the baby sits with a straight back and a raised head on the mother's hip. 4 This position can be tried even with a newborn if it is well supported, but it is especially convenient for feeding a grown child who can already sit up by himself. The upright sitting position, or “koala pose,” is great for toddlers who suffer from reflux or ear infections and feel better sitting. In addition, this pose may be suitable for children with a shortened frenulum of the tongue or reduced muscle tone.
“When my daughter got a little older, I would often feed her in an upright position, which was more comfortable for both of us, and I could still hold her close,” recalls Peggy, a mother from Switzerland. “Besides, it was possible to discreetly breastfeed her in public places.”
8. Overhanging position
In this position, the baby lies on his back, and the mother bends over him
on all fours so that the nipple falls directly into his mouth. 4 Some moms say this breastfeeding position is good to use occasionally for mastitis, when touching the breasts is especially unpleasant. Some say that this breastfeeding position helps with blockage of the milk ducts, although there is no scientific evidence for this yet. You can also feed in the “overhanging” position while sitting, kneeling over the baby on a bed or sofa, as well as reclining on your stomach with support on your elbows. Pillows of various sizes that you can lean on will help you avoid back and shoulder strain.
“I have breastfed several times in the 'overhang' position for clogged milk ducts when no other means of dissolving the blockage worked. And this pose seems to have helped. I think it's because of gravity, and also because the breasts were at a completely different angle than with normal feeding, and my daughter sucked her differently, ”says Ellie, a mother of two from the UK.
Feeding in the "overhanging" position is unlikely to be practiced regularly, but in some cases this position may be useful.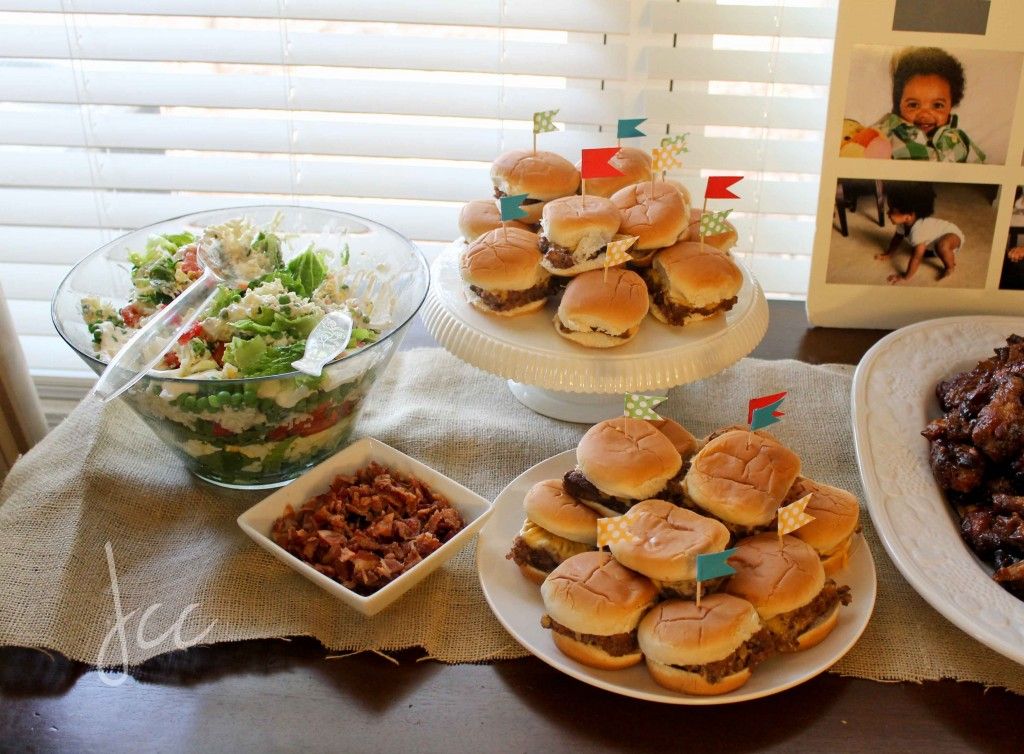
“I used to breastfeed in the overhang position when my baby was having trouble latch-on,” says Lorna, mother of two in the UK. - This, of course, is not the most convenient way, but then I was ready for anything, if only he could capture the chest. We succeeded and have been breastfeeding for eight months now!”
9. Breastfeeding in a sling or in a sling
Breastfeeding in a sling takes some practice, but it can be used to go out, look after older children, or even do a little household chores.
The sling is also useful if the baby does not like to lie down or is often attached to the breast. Lindsey, a mother of two in the US, notes: “I used the carrier frequently for both of my children. When we were out, I tied the sarong around my neck and covered the carrier with it. Under such a cape, the baby can eat as much as he wants until he falls asleep.
This breastfeeding position is best when the baby is already good at breastfeeding and can hold his head up by himself. Any slings are suitable for breastfeeding, including elastic and rings, as well as carrying bags. Whatever option you choose, the main thing is that you can always see the face of the child, and his chin does not rest against his chest.
10. Double hand-held breastfeeding
Double hand-held breastfeeding (or “double-ball grab”) is great for mothers of twins—you can breastfeed both at the same time and keep your arms relatively free. 4 When feeding in this position, it is advisable to use a special pillow for breastfeeding twins, especially at first. It will provide extra support and help keep both babies in the correct position, as well as reduce the burden on the abdomen if you had a caesarean section. In addition, the hands are freer, and if necessary, you can deal with one child without interfering with the second.
“My twins were born very tiny and had to be fed every two hours at any time of the day or night. Very soon it became clear: if I want to do anything besides feeding, I need to feed them both at the same time, - says Emma, mother of two children from the UK. “I breastfed them two by hand using a breastfeeding pillow.”
Other good positions for breastfeeding twins are two criss-cross cradles, one baby in the cradle and the other close at hand, reclining feeding, or sitting upright (one baby on one side, the other on the other).
11. Breastfeeding in the "hand-supported" or "dancer's hand" position
muscle tone (which is typical for premature babies, children suffering from various diseases or Down syndrome), try supporting his head and your chest at the same time. 4 Grasp your chest with your palm underneath so that your thumb is on one side and all the others are on the other. Move your hand slightly forward so that your thumb and forefinger form a "U" just in front of your chest. With the other three fingers, continue to support the chest. With your thumb and forefinger, hold the baby's head while feeding so that his chin rests on the part of the palm between them, your thumb gently holds the baby on one cheek, and your index finger on the other. So the baby gets excellent support, and you can control his position and see if he is holding his breast.
Literature
1 Colson SD et al. Optimal positions for the release of primitive neonatal reflexes stimulating breastfeeding. Early Hum Dev . 2008;84(7):441-449. - Colson S.D. et al., "Optimal Positions for Provoking Primitive Innate Reflexes to Induce Breastfeeding." Early Hume Dev. 2008;84(7):441-449.
2 UNICEF UK BFHI [ Internet ]. Off to the best start ; 2015 [ cited 2018 Feb ]. - UNICEF UK, Baby-Friendly Hospital Initiative, Start the Best You Can [Internet]. 2015 [cited February 2018].
3 Cadwell K. Latching - On and Suckling of the Healthy Term Neonate: Breastfeeding Assessment. J Midwifery & Women's Health. 2007;52(6):638-642. — Cadwell, K., "Latching and sucking in healthy newborns: evaluation of breastfeeding." F Midwifery Women Health. 2007;52(6):638-642.
4 Wambach K, Riordan J, editors. Breastfeeding and human lactation. Jones & Bartlett Learning ; 2014. 966 p . - Wambach K., Riordan J., "Breastfeeding and female lactation". Burlington, MA: Publishing House Jones & Bartlett Learning ; 2014. Pp. 966.
How and when can a child be transferred to a common table?
It is premature to transfer a baby who has not yet turned 3 years old to a “common” table. Unlike an adult, a child needs food not only to maintain the health and functioning of the body, but also for growth and development. Most of the nutrients we get exclusively from food, and at the general table it can be quite difficult to provide a child with a balanced diet that would fully meet his needs and meet the requirements of children's nutrition.
Therefore, leading experts in the field of pediatrics and baby nutrition in Russia and the Ministry of Health of the Russian Federation have developed separate nutrition recommendations for young children, which are periodically reviewed and updated. Pediatricians rely on these recommendations and advise using ready-made baby food of industrial production: it is made from natural raw materials, complies with safety requirements and has an indication of the composition on the labels, which allows you to make the best diet for your baby for every day.
Every second baby who is one year old is seated by the parents at the “common” table – as if the child has instantly overcome some bar. Experts in pediatrics say: choosing what to feed a child in a year is just as important as in the first months of life. It is necessary to transfer the baby to the “common” table gradually and much later - it is no coincidence that experts develop separate nutrition recommendations for young children.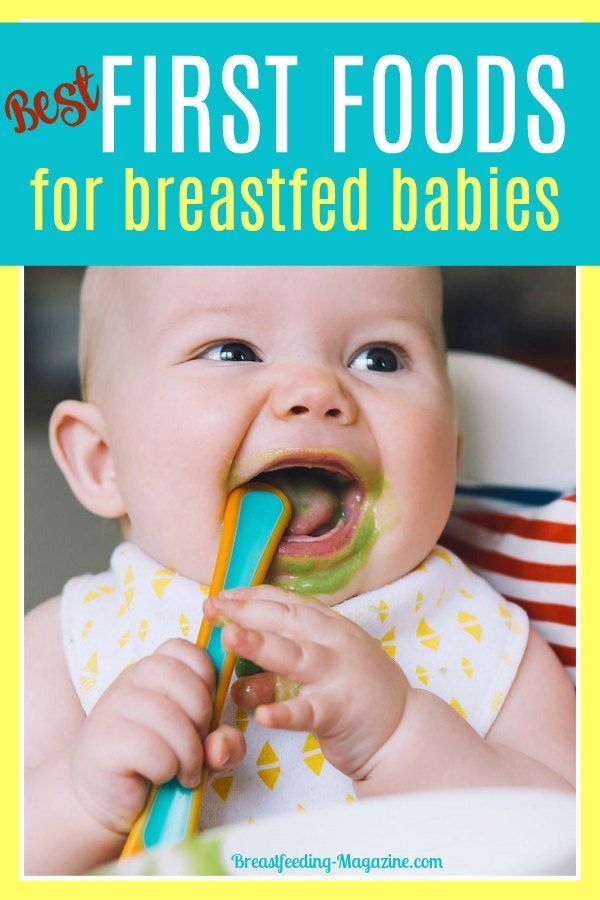
Why the baby is not yet ready for most "adult" foods
The physiology of a small child and an adult is different. The baby needs food not only to maintain the health and functioning of the body, but also for growth and development:
- after a year and up to 2 years, the child needs to add 12 cm in height and 2.6–2.7 kg in weight;
- by 3 years - another 9-10 cm and 2.1-2.2 kg;
- during this period, immunity is very intensively formed, internal organs develop, bones and muscles, central nervous system and psyche.
What is the “artful” of the common table
It seems that the “common” table is varied and plentiful. But in fact, it is difficult to make sure that the child's diet is balanced and the baby gets everything he needs every day. Studies have shown that:
on average, children 1-3 years old receive less than normal dairy products;
30-35% of children from 1 to 3 years not getting enough fruit;
46% of children over 1 year old and 35% of children from 2 to 3 years old do not get enough vegetables;
52% of children over 1 year old and 44% over 2 years old do not eat enough meat;
64% of children over 1 year old and 58% over 2 years old do not get enough fish.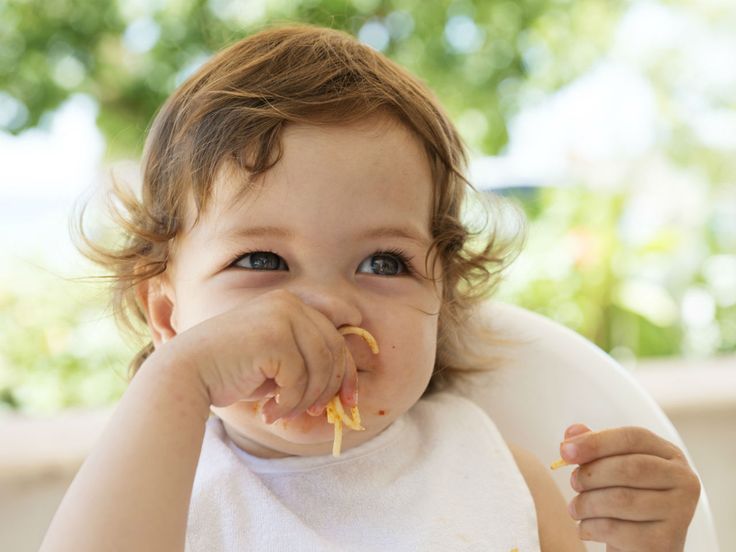
These foods are the most important sources of proteins, fats, carbohydrates, vitamins and minerals, most of which the body cannot produce and receives only with food.
What a baby needs to grow and grow
1–2 years
36 g/day
40 g/day
174 g/day
2-3 years
42 g/day
47 g/day
203 g/day
B squirrels
Proteins are the main material for building cells and body tissues, are into hormones, immunoglobulins, enzymes and other vital compounds.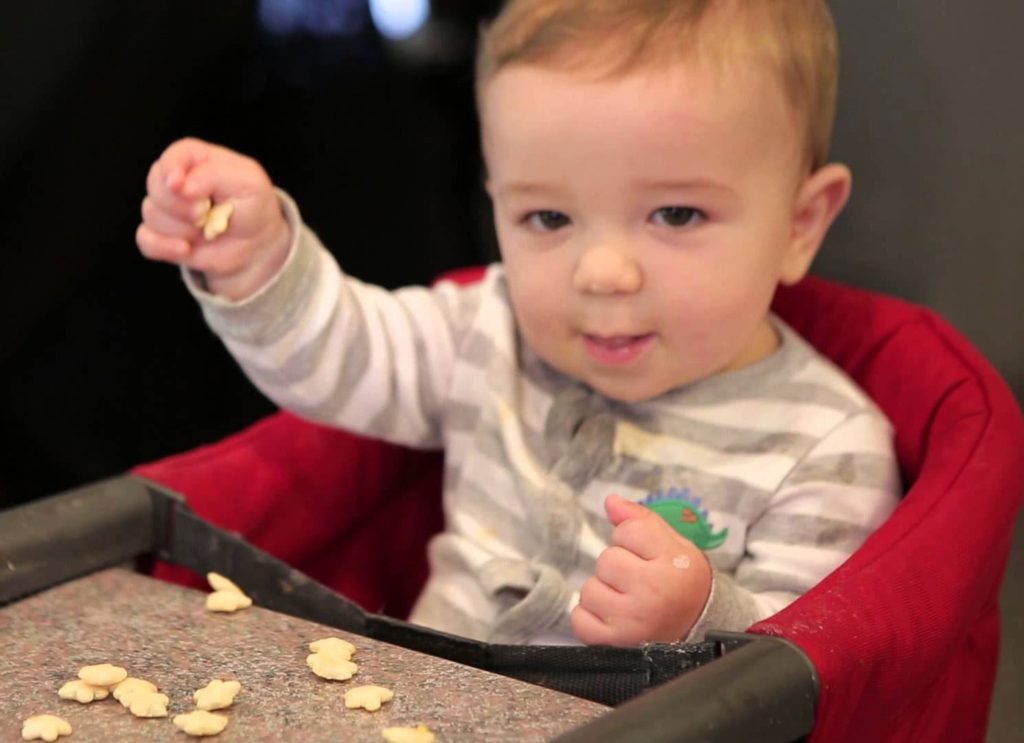
Proteins are especially valuable, which include essential amino acids, as many of them are not synthesized in the body and come only with food.
At carbohydrates
In "energy capacity" carbohydrates are inferior to fats, but "they take on quantity and speed": they are the main and main source of energy for both an adult and a growing organism. In general, they supply up to 58% of "fuel" to the diet. There is not a single tissue, not a single cell in the body that did not require carbs for their work. For the brain to develop, it needs glucose, and the body gets it from carbohydrates.
AND fats
Fats are equally important for the growth and development of the child's body. They perform three main functions: they are an important structural component of cells, participate in nervous and hormonal regulation, as well as a reserve energy reserve in case a developing organism for some reason, there will not be enough incoming energy. In addition, fats themselves are also a valuable source of energy, since 1 g of fat will give a growing body 9kilocalories of energy is more than 2 times more than protein or carbohydrates provide.
And it is thanks to fats that the body can absorb and store fat-soluble vitamins:
- A, essential for vision and growth;
- E, which is an antioxidant and needed to protect cells;
- D involved in the formation of the skeletal system;
- K, important for the proper functioning of the blood clotting system.
AT vitamins
This is a group of indispensable and vital nutrients, without which the metabolism, growth processes, the functioning of the immune system and other vital functions of the body are disrupted.
M min. in-va
Without them, the growth, development and normal functioning of the body is also impossible. Moreover, each element has several “fronts of work”. For example, calcium deficiency is bad for not only on the bones, but also on blood clotting, provoke nervousness. The lack of phosphorus also affects the health of bones and teeth.
Lack of nutrients is dangerous - but too much is also dangerous. For example, if the baby eats too much protein food, the body tries to get rid of the excess - and this is a burden on the kidneys.
The ratio of BJU in the diet of children under 3 years old
A growing body needs more than just a set of certain nutrients: it is important to maintain the correct ratio of proteins, fats and carbohydrates in the diet of children. To remember the ratio of BJU in children will help a special circular diagram "balance wheel"
What foods should be in the diet, how much and why
Nutrition optimization program for children aged 1 to 3 years, prepared by experts and leading specialists in the field of pediatrics and baby nutrition of Russia and the Ministry of Health of the Russian Federation, recommends:
Dairy and sour-milk products, at least 3 servings per day
- animal protein
- animal fat
- calcium
- phosphorus
- vitamins A, B2, B12
Meat of poultry or animals, 1 per day
- animal protein
- iron, zinc, potassium
- vitamins of group B and PP
- substances important for lipid and cholesterol metabolism
Vegetables and/or fruits, 4 times a day
- glucose, fructose, sucrose
- potassium
- organic acids
- folic acid
- vitamin C
- beta-carotene
- flavonoids
- dietary fiber
Bread, bakery and pasta, cereals, 2-3 servings per day
- minerals
- dietary fiber
- vegetable proteins
- B vitamins
Butter and vegetable oils, 10-20 g of butter and 10-15 ml of vegetable oil per day various dishes
- saturated and polyunsaturated fatty acids
- fat-soluble vitamins
Fish, 2-3 times a week instead of meat
- animal protein source
- polyunsaturated fatty acids
- vitamins B1, B2, D
- iodine
- iron
- phosphorus
Eggs, 2-3 times a week
- protein source
- vitamins of group B, as well as A, D, E,
- lecithin
- cholesterol
- iron
- phosphorus
What foods should be excluded
Experts from the Union of Pediatricians of Russia have compiled a separate list of foods that a baby under 3 years old should not eat:
-
popcorn
-
mayonnaise, vinegar, spicy sauces
-
dry concentrates juices and side dishes
-
products with artificial dyes
-
marinated products
-
cakes and cakes
-
eateries canned food
-
natural coffee
-
sweet soda
-
mushrooms
-
flavored products
-
seasonings
Ready for everything: why pediatricians recommend ready-made baby food
To make it easier to properly feed a child and maintain a balance of nutrients in his diet, a specialized category of products for babies 1-3 years old has been created to help mothers.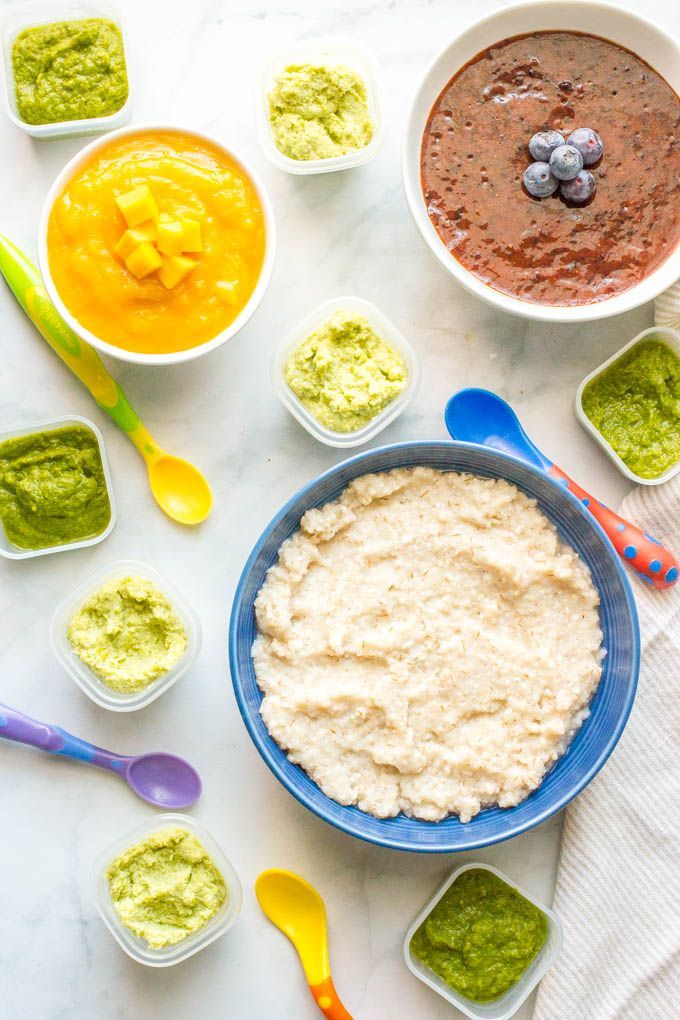
Prepared baby food:
made from natural raw materials
complies with strict safety requirements
does not contain artificial colors, flavors and preservatives
is often additionally enriched with minerals and vitamins in strictly verified amounts that meet the needs of the child
On the label of Agusha products you can always find information about their nutritional value and nutrient content. This will help to check and calculate the required daily intake of nutrients and adapt the children's menu to the needs of the baby. For example:
Squirrels
- One serving (180 g) of the classic drinking yoghurt Agusha contains 16% of the daily value of protein;
- in one jar of Agusha meat puree, with beef, 80 g - 25% of the daily protein requirement
Fats
- in one serving of classic cottage cheese Agusha (50 g) — 5% of daily fat;
- in one jar of meat puree Agusha, chicken-beef, (80 g) - 8% of the daily value of fat
Carbohydrates
- Agusha fruit puree (115 g) contains 11% of the daily carbohydrate requirement;
- in Agusha Vstavay-ka drinking milk porridge (200 ml) - 8.