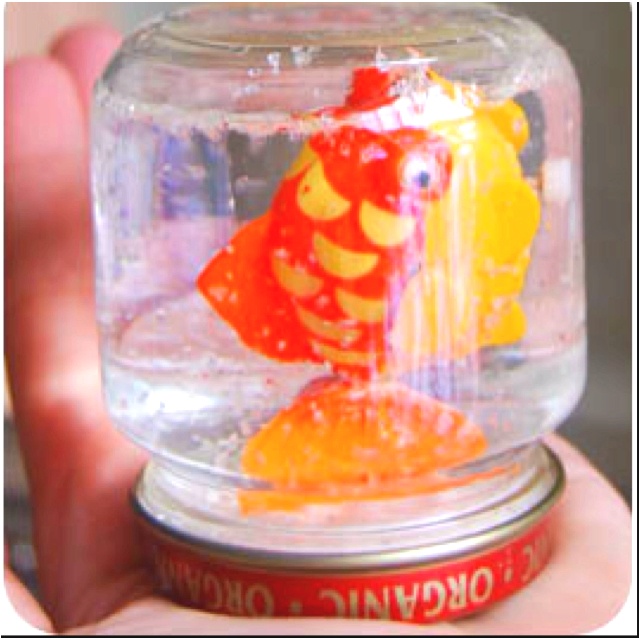
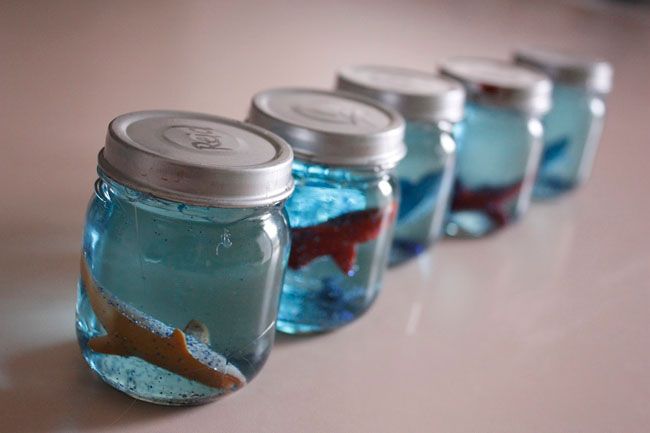
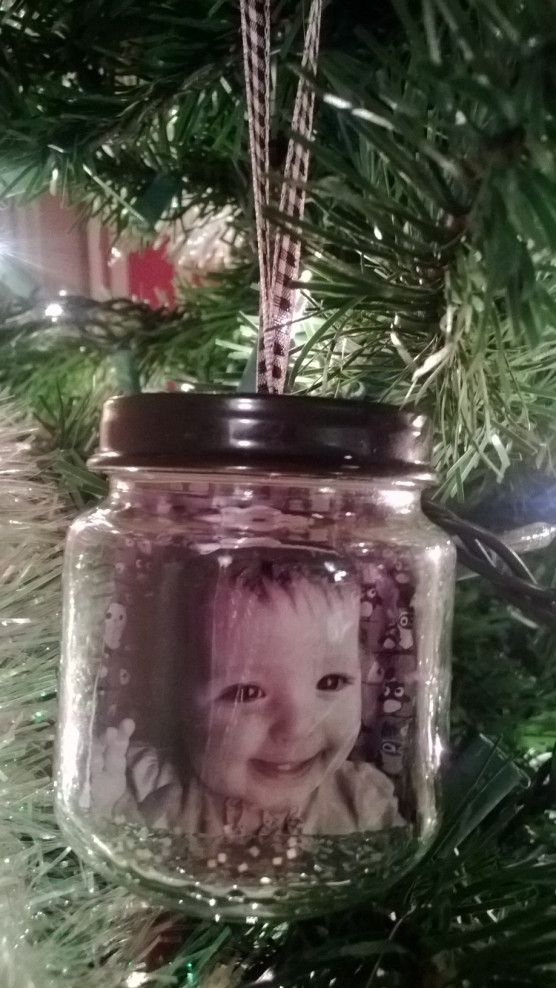
Baby food jar snow globes with picture
Craftaholics Anonymous® | Baby Food Jar Snow Globes Tutorial
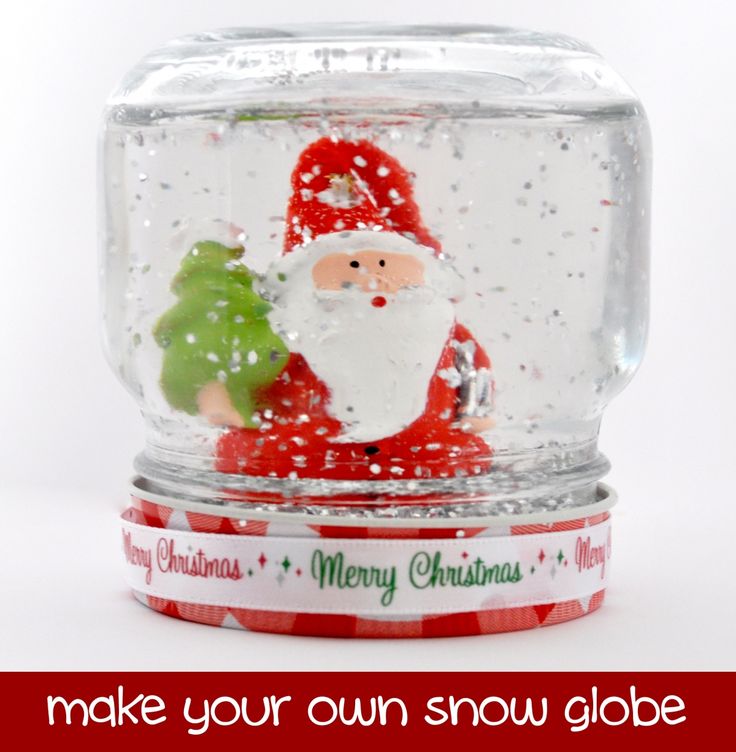
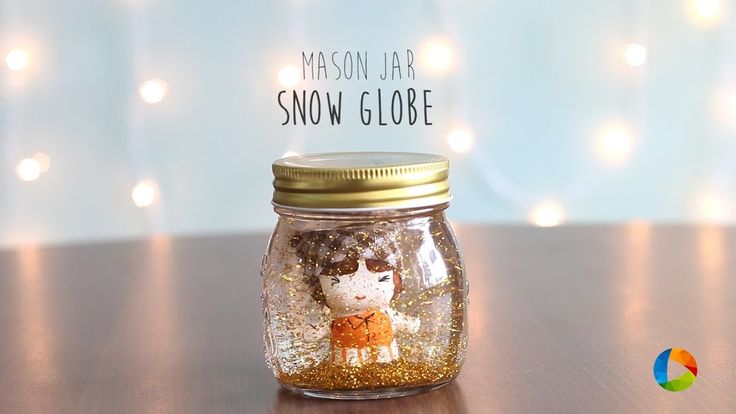
Have a bunch of baby food jars hanging around? Here’s a great upcycle for all those cute little jars! Turn them into mini snow globes with a few household items. Baby Food Jar Snow Globes are easy to create and make a fantastic gift idea!
This is Part 3 in the #JustAddMichaels promotion! Check out Part 1 {announcement} and Part 2 {Dream Christmas tree reveal}.
My baby girl is just starting to eat solids, so I have a bunch of baby food jars hanging out. So I turned a bunch of them into mini snow globes and they turned out so stinkin cute!! I’m seriously in love with them! Oh, and I might just be handing these out to neighbors and friends. They make such a cute little Christmas gift!
I love it when I find a way to reuse and make it beautiful!
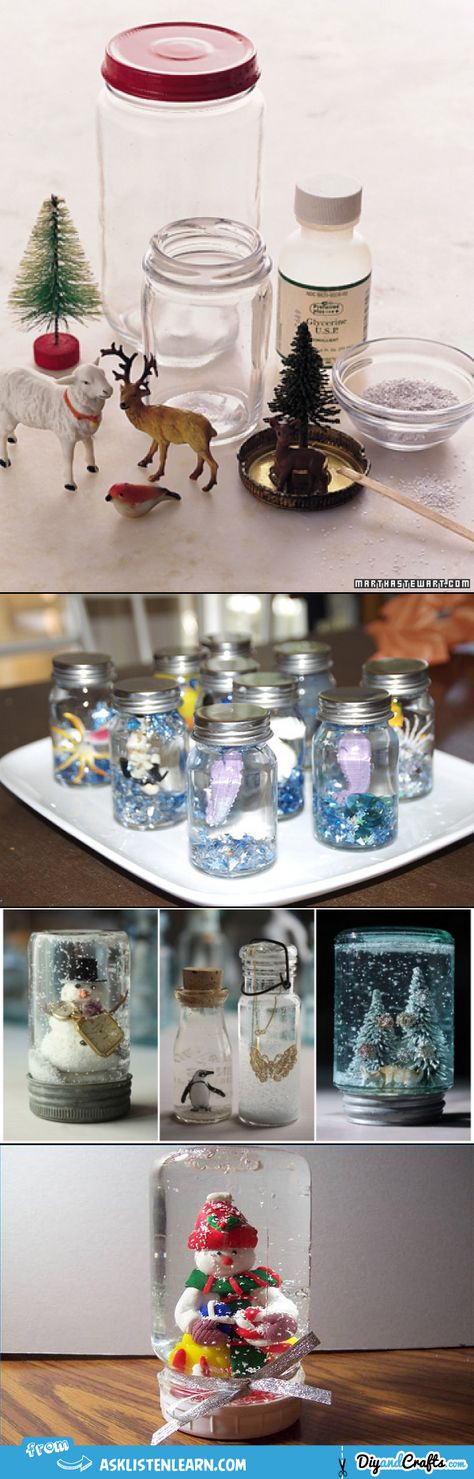
How to Make Snow Globes TutorialSupplies:
- empty baby food jars {Stage 2 size is the cutest, in my opinion, but all sizes work just fine!}
- mini fake trees
- Goo Gone
- Glycerin {I found it at the Walmart pharmacy}
- Glass & Bead glue OR Epoxy
- Glitter {colored chunkier glitter works best.
Don’t use clear or fine glitter}
- Gold spray paint
- distilled water
- Remove the labels off the jars and clean off the glue with Goo Gone.
- Spray paint the lids gold {or desired color}.
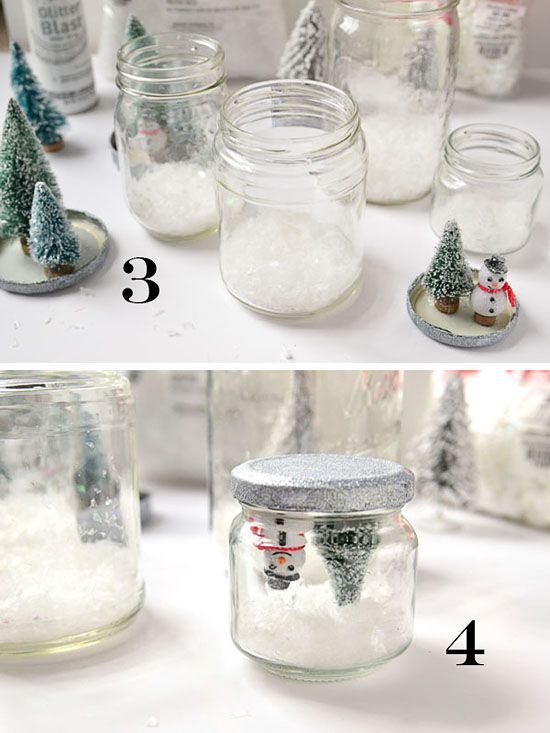
- Put a little glue on both the inside of the lid and the bottom of the fake tree. Allow to dry for 1-2 minutes and then press the tree onto the lid. Allow to dry for 24 hours.
4. Add about 1 teaspoon of glitter into each jar.
5. Fill with distilled water and add 5 drops of Glycerin. {5 drops seemed to work the best.} Screw the lid {with the tree} onto the top and you’ve got yourself the cutest mini snow globe ever!
And that is how you make Baby Food Jar Snow Globes!
Mini Snow Globes
What could you do with this tiny snow globes?
Disclosure: This post is brought to you by Michaels. I received free product{s} featured in this post. All opinions are 100% mine!
Check out my Gold Ombre Christmas Tree! It turned out gorgeous! {and yes, I can’t believe I already have my tree up this year! haha}
Follow on Pinterest for craft ideas from around the web!
- Bio
- Google+
- Latest Posts
Hi! I'm Linda, the craft addict behind Craftaholics Anonymous®, a craft blog.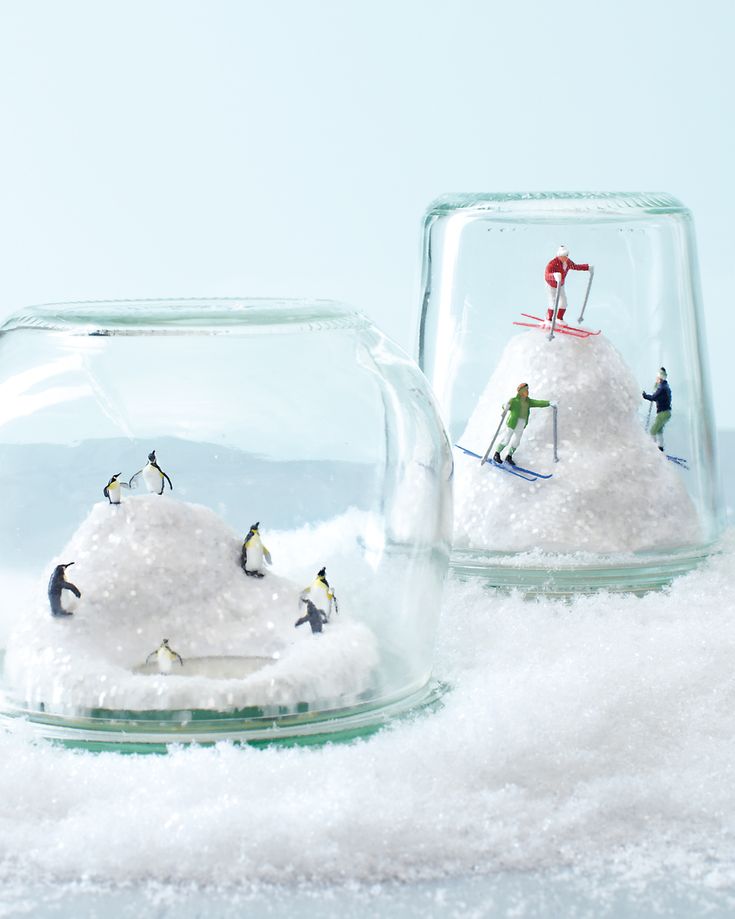 Crafting is cheaper than therapy, right? When I'm not DIYing something, I can be found taxiing around our 4 crazy kids or working out. Or shoe shopping... because you can never have too many shoes! Happy crafting! ♥
DIY Snow Globe Ideas: Picture Snow Globe Craft
Need DIY snow globe ideas? How about creating your own snow globe with photo inside? This awesome photo snow globe is great Christmas Craft ideas for kids or holiday craft gift ideas for giving / getting personal photo gifts (or if you need homemade holiday gifts). Fun make and shake craft for kids!
DIY SNOW GLOBE IDEAS
You’ll not only love making these for DIY snow globe craft ideas, but everyone will love getting them as homemade Christmas gifts, too!
Can you make a snow globe at home?
How To Make A DIY Snow Globe
- Use a sturdy glass jar with a lid that fits tightly.
- Choose and waterproof your pictures. (Learn how to waterproof your pictures in the full craft directions below.
 )
) - Select a variety of small seasonal items to include in the snowglobe.
- Attach the items to the inside of the lid. (See important tip in directions.) All items to dry completely.
- Add liquid to the snow globe jar and add glitter (optional).
- Test and reseal as needed.
Get the full snowglobe with picture directions and tips and homemade snow globe ideas below! Fun winter crafts for kids or group snow globe activity! KEEP SCROLLING for picture snow globes printable directions!
What do you fill a snow globe with?
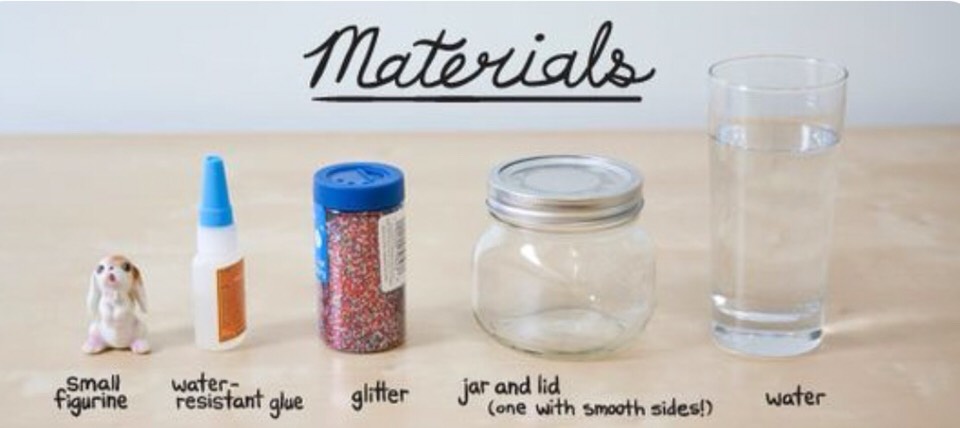
To make your own snow globe, you’ll need:
- Filtered water
- Glycerin (or glycerin substitute)
- Foil glitter
- Laminated pictures
- DIY snow globe figurines or snow globe fillers for the globe lid
*See full list of how to make Christmas snow globe directions and more tips for photo snow globes below.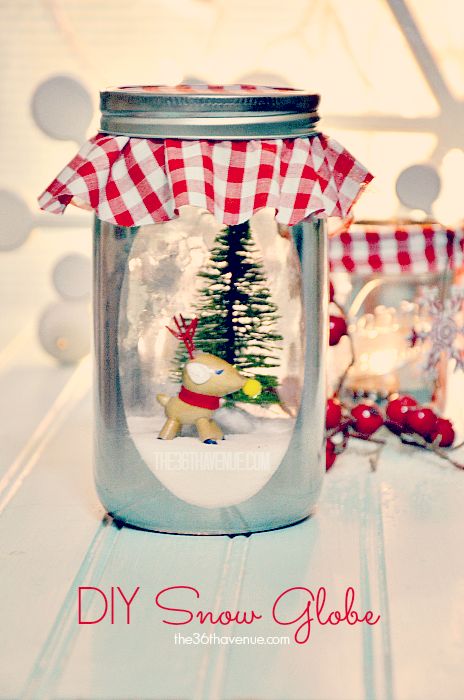
Can you make a snowglobe with tap water?
It’s best to use distilled water and not tap water in your homemade snow globe project. The iron in tap water can sometimes make the water turn a yellow or dirty tinged color over time.
How do you put pictures in a snow globe?
To make a DIY photo snow globe, cut out the pictures that you want to use. Then use laminating sheets to make the pictures waterproof for your photo snowglobes.
How To Waterproof A Picture For A Snow Globe
To waterproof a picture in a snow globe, you need to protect the photograph. The best way to do this is to use self-laminating sheets or a laminator to cover your photographs. If you don’t laminate photographs, they will disintegrate in the water.
*SECRET snowglobe photos tip: Do not cut your laminated pictures right on the edge of the picture for your snowglobe picture. Leave a bit of laminating sheet border around your snowglobe photo to give it a waterproof seal before glueing the picture on the lid.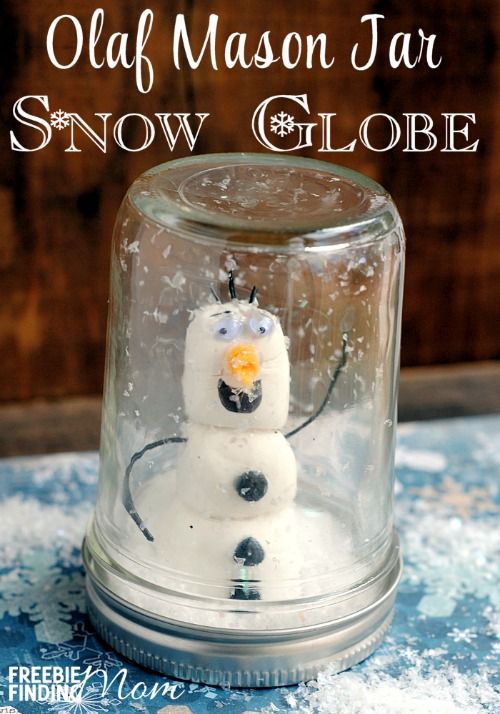
You can get self-laminating sheets like these for your homemade snow globe with picture project.
How long do water globes last?
Your water snow globe can last up to 2 years or more. How long a DIY Christmas snowglobe with water lasts will depend on several things: how tight your jar lid is attached / how you sealed the globe lid, how you waterproofed the images (snow globe photos), what kind of fake snow for snow globes used, and if you used snow globe decorations with paint (as the paint wears off fairly quickly).
Homemade Christmas Crafts: Make Your Own DIY Snow Globe
Looking for photo gifts? How about this how to DIY snow globe mason jar / craft jar because…
Is there anything better than the innocence of a child at Christmas time?
How about capturing that moment by learning how to make a snow globe with picture inside (also called snow globe mason jars)?
But, how do you make a DIY snow globe with picture laminated inside (also called the baby oil and water snow globe)?
Here’s how the DIY Christmas snow globe started…
I have always loved the holidays.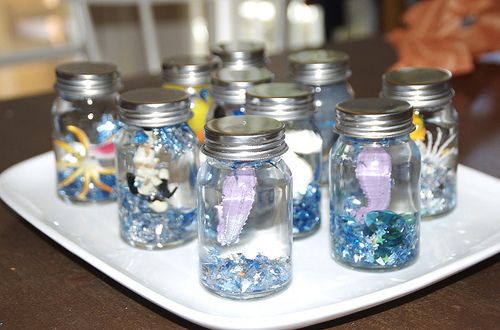
Even before I had children, I would adorn any apartment I ever lived in with seasonal decorations, DIY Christmas wreath and decor.
Much to the confusion of my then-boyfriend (now husband), he would cock his head to the side and ask, “Why do you go all out with all these Christmas decorating ideas and themes?”
My answer was always the same:
“One day, I will have children and I will do the same Christmas holiday fun with them from awesome Christmas tree decorating ideas to Christmas cookie decorating and kids Christmas craft ideas. I love the holidays and I want anyone who passes by my window to know that, too.”
Then I had my own children and my love for the holidays kicked into overdrive!
It was like a second chance to experience the magic of the season all over again in a new way.
I get to experience the holidays through their eyes.
But, life is funny. Time passes. We get older.
Unfortunately, as adults, the holidays can transform into something else entirely.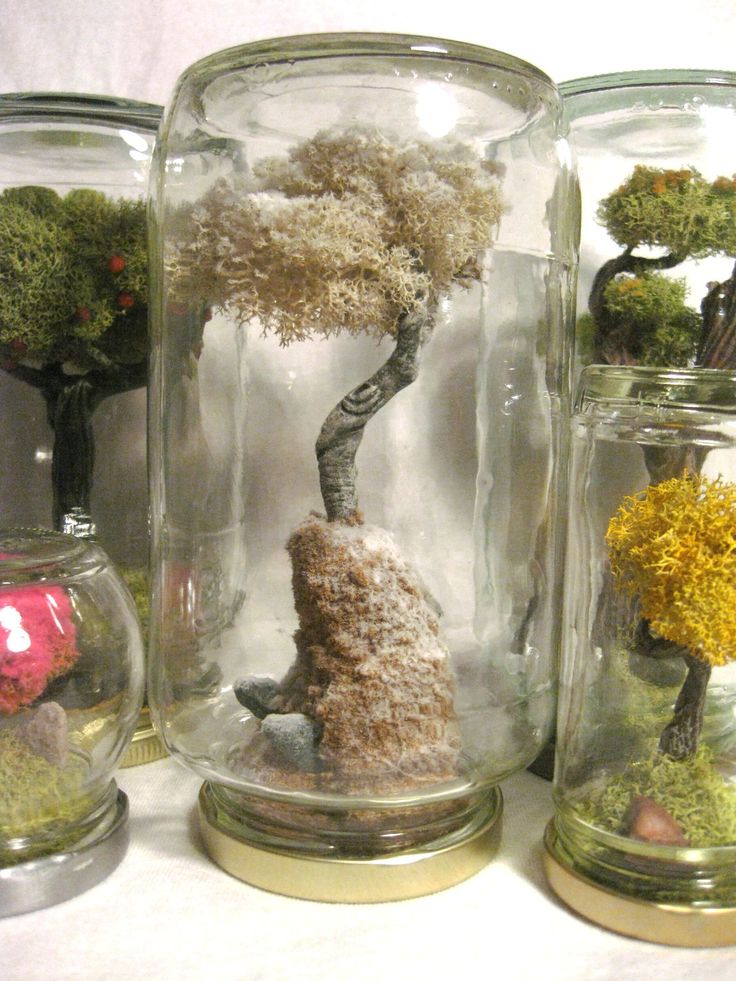
For one reason or another, we begin to focus more on the stress, the gifts, and the financial burden that the holidays can bring.
We lose our sense of wonder.
Enter our children.
Recently, while navigating a department store, searching for Christmas ornaments, my 4-year-old son stared in amazement at the glass snow globes on the shelf.
Gently turning over the globe to allow the shimmery snow to delicately fall to the bottom, his blue eyes remained transfixed on the magical scene in front of him.
“Mom, I wonder what it’s like to live inside a snow globe,” he pondered, awestruck.
To him, everything in that moment stood still.
He was truly at peace.
Observing his wonder, I suddenly found myself reverent.
It was humbling.
For a few moments, my little one gently reminded me of the depth and wonderment of the season.
You can also buy snow globe with picture insert –or DIY snow globe kit– if you want to get it that way. Also, if you’re short on time, I love this glitter snow globe picture frame.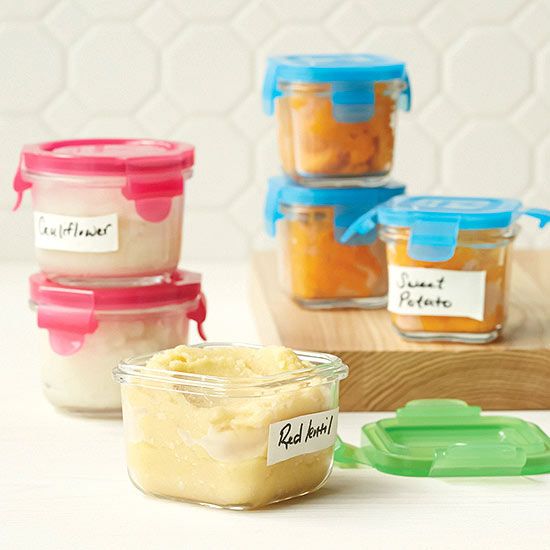 A DIY picture frame snow globe is great as a fun gift, too.
One of the best things about this DIY snow globe is that you can make a unique snow globe for each kid or even customize them as gifts.
MORE FUN KIDS ACTIVITIES WITH SNOW AFTER THE PHOTO SNOWGLOBE ACTIVITY FOR KIDS:
31 Snow Day Activities for Kids
How to Make Your Own Snow Globe With Photo
Christmas is a time to slow down and reflect on our faith and our family, rather than misplaced importance where it needn’t be.
I thought a lot about his reaction to those Christmas snow globes that evening after my son fell asleep.
At first, I thought maybe I would purchase him a little snow globe that I had seen at the store earlier.
Then, I realized what better way to help him feel what’s it like to be inside a snow globe then to have him put himself in DIY snow globe jars (metaphorically, of course)!
(And, it seemed like one of those easy Christmas craft ideas to make snow globes with pictures inside!)
The next morning, off to the craft store we flew like a flash to get the stuff to make a snow globe with a picture inside (and learn how to make a snow globe DIY craft! Plus, I thought it would be fun for the kids to learn what’s inside snow globes).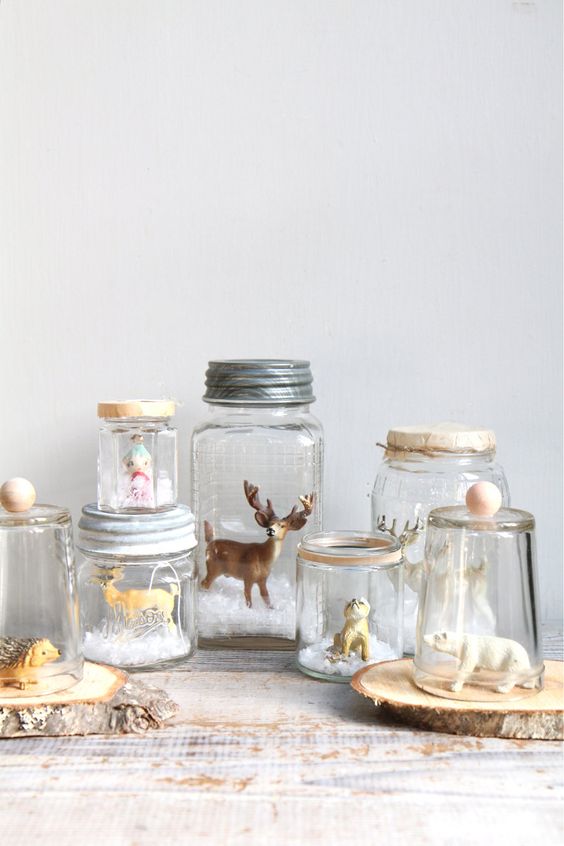
You could also easily turn this into a DIY picture snow globe ornament, too, if you can find the DIY snow globe ornament with water like these for making snow globe ornaments. (I think we’ll do the DIY snow globe picture frame craft next year.)
Our snow globe craft would be great made into Christmas ornaments if you’re looking for cute DIY snow globe ideas as gifts or want to make a DIY mason jar snow globe with canning jars you already have at home!
(I mean, you could buy a Hobby Lobby snow globe, but what holiday fun would that be?)
Before we get to the homemade snow globe craft directions, I want to cover common questions for this DIY snow globe kid craft:
What liquid do you use to make a snow globe?
The liquid used to make a snow globe is distilled water, but the secret to making the snow suspend in the liquid is glycerin, which is made from vegetable oils. To get that slow, snow falling effect when you shake the snow globe, you can add different things to the DIY snow globe liquid like liquid glycerin, mineral oil, olive oil or more to create this holiday craft.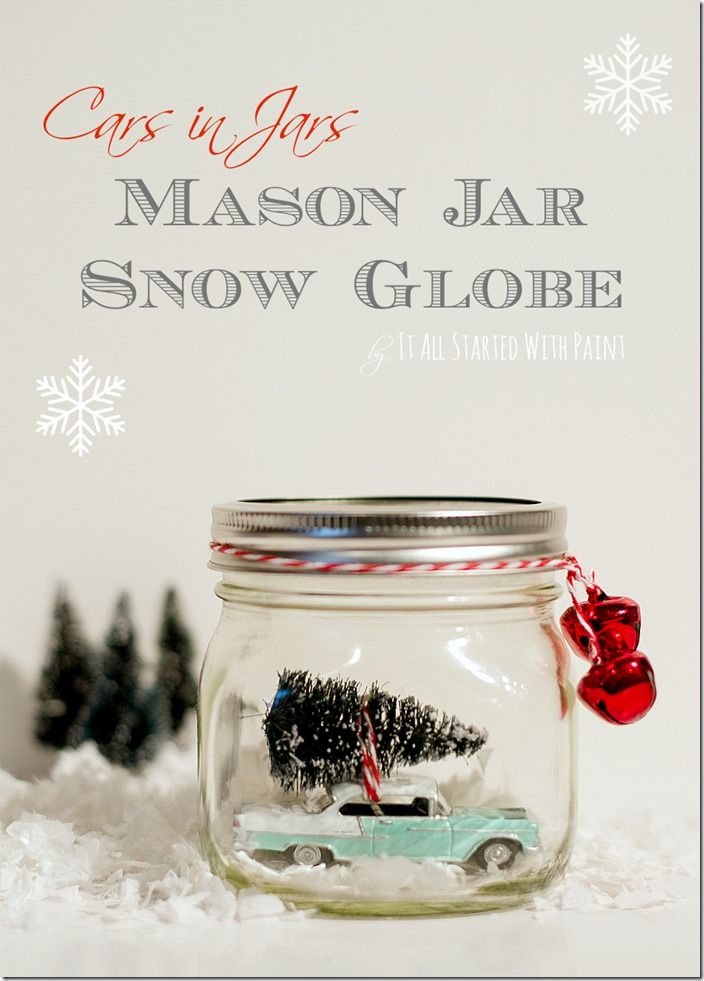 That’s what makes the snow “swirl” in the snowglobe.
YOU MAY ALSO LIKE: DIY Snow Globe Kit
How do you make a snow globe without glycerin?
Can you make a snow globe without glycerin?
If you don’t have glycerin, you can also make your snow globe without it using any of the following:
- Olive oil
- Light corn syrup
- Mineral oil
- Baby oil
- Clear cooking oil
Just understand that none of these work as well as glycerin and each will give a little different effect and may not work with your glitter snow.
How to make a snow globe with olive oil?
You can make a snow globe with olive oil or vegetable oil (substituting it for glycerin). But, it will make your water heavier and doesn’t mix as well as glycerin, so it won’t have the same effect as a glycerin snowglobe. Test out olive oil and water first before making the craft. (Remember, oil and water don’t mix very well!)
But what about how to make a snow globe with baby oil?
Can you use baby oil (or mineral oil) instead of glycerin for snow globes?
You can make a DIY snow globe with baby oil instead of drops of glycerin.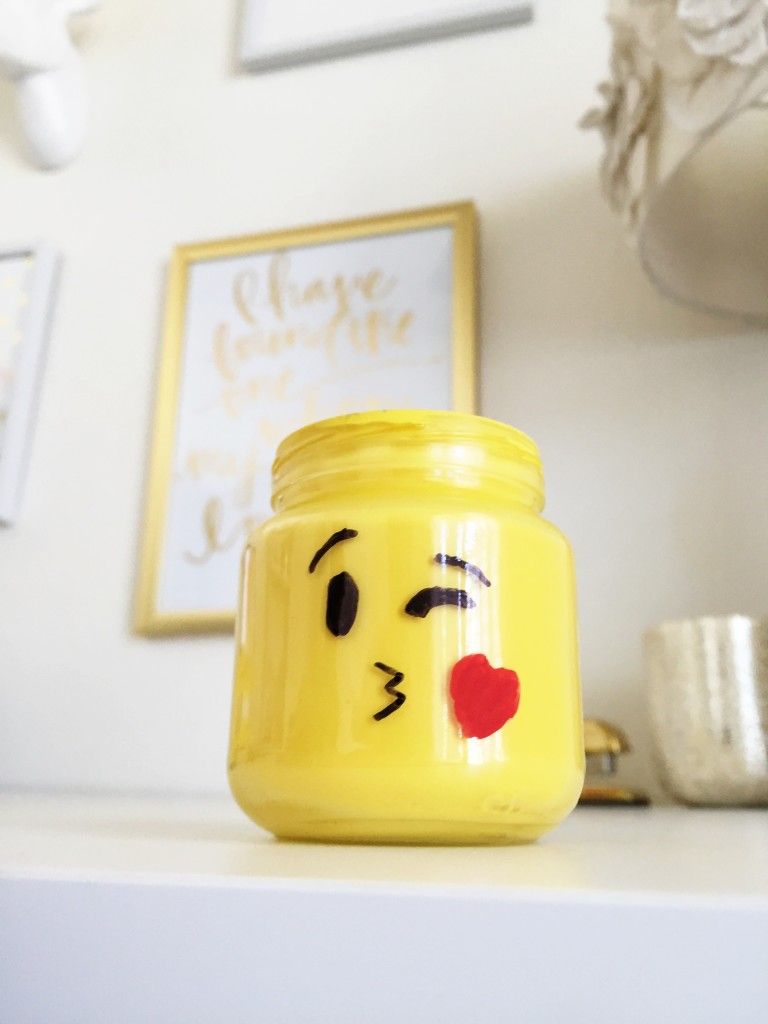 Some people have reported using baby oil instead of glycerin for snow globes with successful results. You can try this if you want to make a DIY snow globe without glycerin, but baby oil or mineral oil doesn’t mix well or dissolve in the water. Use sparingly and test it out first by adding it to a jar with some of your glitter and shaking well to see if you get the snow effect you want.
What kind of glitter is used in snow globes?
Stick with a higher quality glitter (like chunky iridescent glitter), as it tends to float more (and clump less). Do not use craft “snow” or any paper-based product as snow for snow globe. The trick is to use only a little glitter and to also use glycerin to help the glitter float and give that swirl effect of snow in the globe.
What can you use instead of glitter in a snow globe?
Any waterproof, foil confetti or glitter of different colors can be used in a DIY snow globe. White glitter will give you the best snow effect and snow swirl ing for your DIY snowman globe.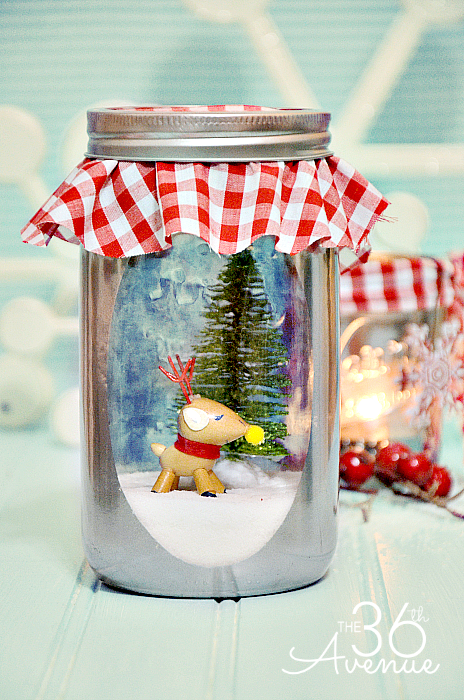
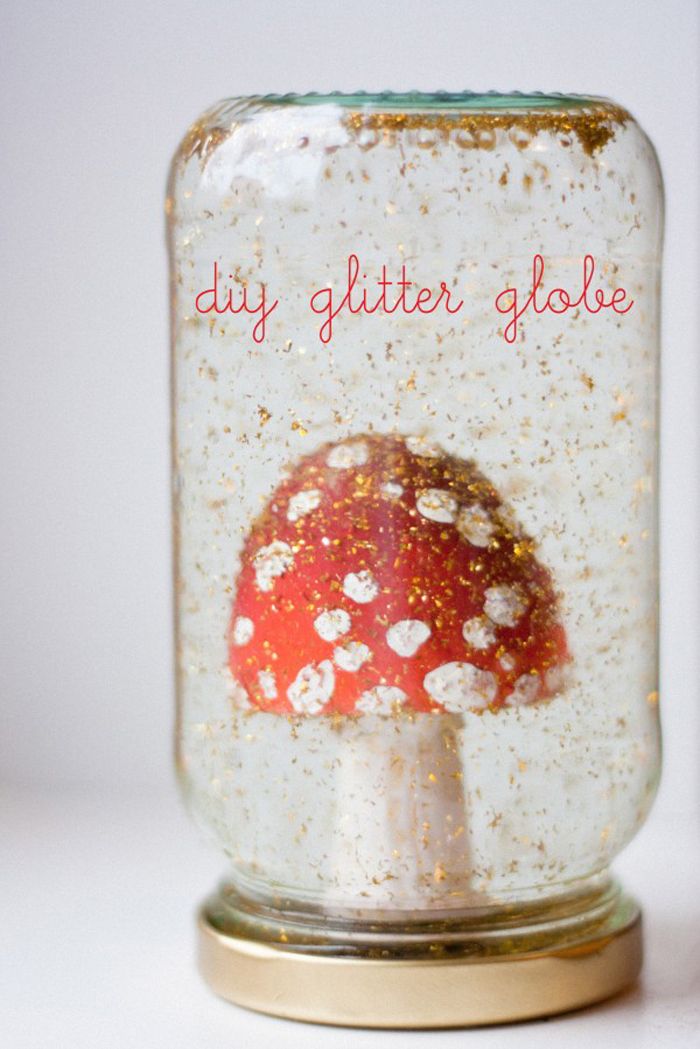
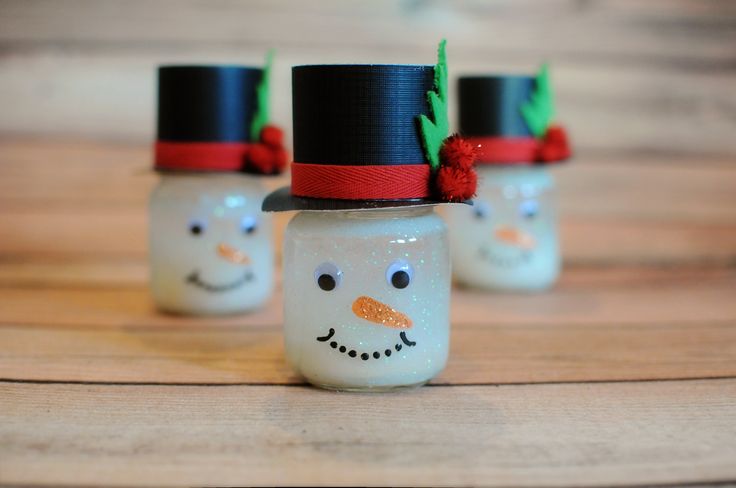
Now let’s get to how do you make a homemade snow globe (aka: glitter globe DIY) — such an easy craft for Christmas or homemade holiday gifts for the holiday season! It’s a fun way to give pictures of your kids to friends and family! (Some people make baby food jar snow globes and just put faces in them!)
How To Make DIY Snow Globe (Snowglobe Craft)
Making your own snow globes or picture globes is easier than you think!
What materials do you need to make a snow globe?
For your craft snowglobe, you can use any glass jar with a tight fitting lid or even make these a DIY snow globe in mason jar with a lid (or baby food jars). Test your mason jar lid with a little water before starting the craft!
You can make it a plastic snow globe DIY, but just test out the plastic container for any leaks!
You will glue the laminated pictures and decorations on the inside of the jar lid and become bottom of the jar when finished.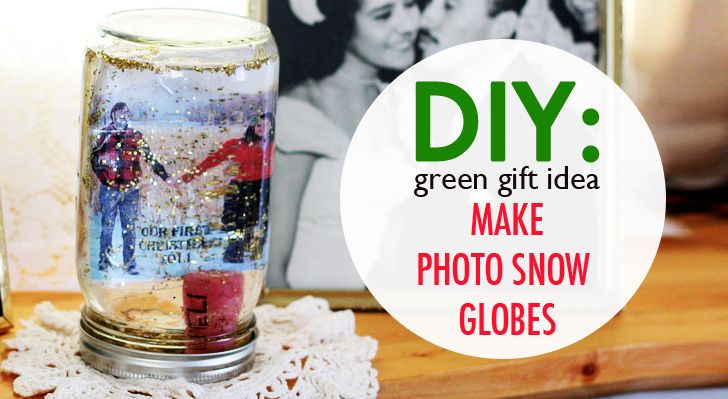
So be sure it fits tight enough so no water spills out for the best result.
To make your snow globe craft with picture laminated, use these easy, self-seal laminating pouches. (If you don’t want to use pictures, you can make it a snowman globe DIY!)
Also, we’ve never tried this with hot glue. We always use a waterproof glue / waterproof adhesive.
HOW TO MAKE A PHOTO SNOW GLOBE CRAFT PROJECT TIPS: When choosing DIY snow globe figurines or bottle brush trees / little trees, remember that those with a lot of paint or bright colors may erode or fade over time. Same goes for paint or spray paint.
Also, keep an eye on the clearance aisles at stores like the Dollar Tree, Hobby Lobby, Michaels, or your local craft store for cheap figurines and holiday decorations for your snow globe craft or DIY picture snow globe mason jar.
You really don’t need much glitter. Keep that in mind! The amount of glitter will depend on the size of your jar. You need just enough for this DIY project so that the end result makes a swirl of snow fall over your winter wonderland snowy scene.
Your snow globe picture craft might get a little messy, so be sure to cover your table and floors.
Here’s how to make snow globes at home and how to put a picture in a snow globe. (I really love these as homemade Christmas gift ideas!)
Prep Time 10 minutes
Active Time 45 minutes
Total Time 55 minutes
Difficulty Medium
Materials
- Clean, glass jar with tight, screw-on lid
- Laminated photo (self-laminating sheets work well)
- Mini Seasonal décor items (plastic works best so they don't rot in the water eventually and the colors don't bleed)
- Glitter
- Glycerin or baby oil
- Glue (like white drying, waterproof Gorilla Glue)
- Distilled Water
Tools
- Plastic tablecloth to protect the table (optional)
Instructions
- 1Use a sturdy glass jar with a screw-on lid.
 Use an empty glass jar you find around the house like salsa, spaghetti sauce and baby food jars. (They can be all different sizes if you're making multiple globes. Just adjust your photo size to fit into the jars.) After peeling off any labels, give the jar a nice thorough washing and make sure it seals tightly.
 - Waterproof your pictures. Cut out the outline of the photo and run it through a laminator or use the self-laminating sheets.
- Select a variety of small seasonal décor. We stopped by a local craft store because they were having a CRAZY great sale in their floral department. But, a trip to the dollar store would suffice as well. Just be sure that you select items that will withstand water! If possible, test them for a day in water and see if they flake or break apart. *Important tip: don’t go overboard when creating your scene. Space is limited. Less is more in this case.
- Create your magical winter wonderland by gluing the items to the inside of the lid.
 To begin, remember that you will be gluing your items on the inside of the lid of your jar. Make sure to work in the middle, keeping space along the edges to allow the jar to screw shut. We started by putting a big pile of gooey glue in the middle of the lid and mounting our decorations to the inside of the jar lid. We added small glass beads (red and green, of course!) to the top of the pile to hide any unsightly glue and hold our other decorations in place. Allow time for the glue to dry and test the sturdiness of your creation. Turn the lid upside and give it a couple good shakes to see if anything comes loose.
 - Add distilled water to your jar and sprinkle in the glitter. A good ratio is: 1 cup of water, 3 teaspoons glycerin, 3 teaspoons glitter. You may need to adjust the ratio based on the size of your jar and the kind of glitter you use. IMPORTANT: DO NOT fill the water all the way to the top! Remember, you are adding items to the water and it will increase the water line.
 Some people choose to add glycerin (found in baking aisles in the craft store) to the water to make the snow fall more slowly. We did not, and the kids still loved the snowy effect. But, it might help preserve the glitter a bit longer by using the glycerin. IMPORTANT TIP: To prevent snow globe glitter clumping, do not use paper glitter/confetti or that fake snow in bags. You should be able to use the any of the regular type of glitter.
 - Attach the lid. It’s time to attach the lid of the jar with all your decorations. You may need to squish some of your holiday foliage to get it to fit, but once everything is completely in, tighten the lid firmly.
- Reseal, if needed. After checking the final placement of all your items, you can add some glue to the inside lip of the jar and reseal to prevent curious little ones from giving themselves a glitter bath.
- SHAKE AND ENJOY! Enjoying your own winter wonderland is the best part of this kids activity for Christmas!
Notes
Some people make a DIY snow globe with baby oil, but the glycerin for snow globes seems to work better. Just use a little bit - just a few drops of glycerin. You don't need a lot!
Picture Snow Globe Ornament DIY Part 2: How To Make Snowglobes Without Water
If you want to do a quick and easy snow globe ornament without water (or liquid – aka: waterless snow globes or a how to make a picture snow globe without liquid), simple snow globes crafts for kids, or a great project for homeschool co-op, scouts, or group crafts, try these photo ornaments and just add the artificial snow as your next step instead of water and glitter.
(These are snow globe with photo insert that you can buy.)
You can still make these homemade snow globes with pictures. Just place your photo in with the artificial snow. Get creative with your snow globe with picture DIY project!
Light bulb ornament also work well for snow globe crafts with no water. You can still make winter scenes with falling snow and after a good shake and still get a snowy effect!
(Great for winter sensory bottles, too!)
Just follow the same simple tutorials from above (in the globe ornament instructions) and leave out the water for easy DIY snow globes that you can also hang on the tree.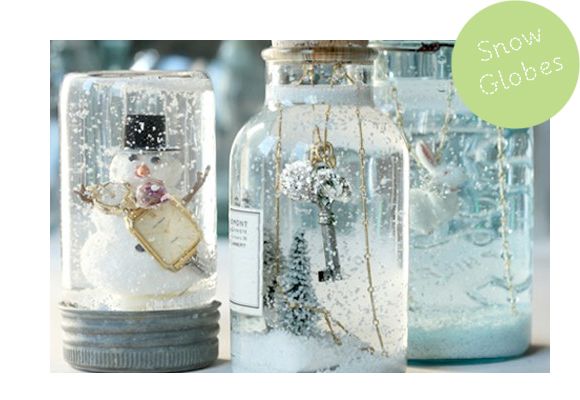 These are a great alternative to snow globes with photos in water because you still get the most important part — the photo in snow globe!
Kids of all ages (even adults) always love this holiday craft (especially for personalized photo globes).
You may even find that making snow globes becomes one of your holiday traditions!
Contributor Samantha Lee is a homeschooling mom and blogger in the Pittsburgh area.
Get into the holiday spirit, put on some festive Christmas music and have a great time with this fun craft for holidays! Have fun with your snowglobe with picture in it!
LET US KNOW WHAT YOU DECIDE FOR YOUR DIY SNOW GLOBE IDEAS!
8.2K shares
As an Amazon Associate I earn from qualifying purchases. Please refer to our DISCLOSURE
STARTING HOME SCHOOL? CHECK OUT OUR HOW TO HOMESCHOOL GUIDE
Crafts for the new year ball with sparkles.
 New Year's souvenir - do-it-yourself snow in a jar. How to make a glass ball with snow
 How many times have you had to turn the ball over to see how the snow falls in a small world? Today we will tell you how to assemble such a ball with your own hands step by step.
Christmas ball with snow inside always evoke a sense of celebration, joy and evoke childhood memories. Watching the falling flakes is a pleasant experience, isn't it? And the created snow globe with your own hands will add magic to the interior, plus it will charge the whole family with a Christmas mood. Start the master class and enjoy the process!
P.S.: You will find another idea for decorating the new year at the bank.
Christmas ball with snow: video instruction
Christmas ball with snow: 4 easy steps
What you need:
- glass jar with screw cap
- artificial snow
- spruce / animal figurines
- glue / double-sided tape / glue gun
- paint
- brush
- decorative star
Bear, deer, bunny, penguin are suitable as animals.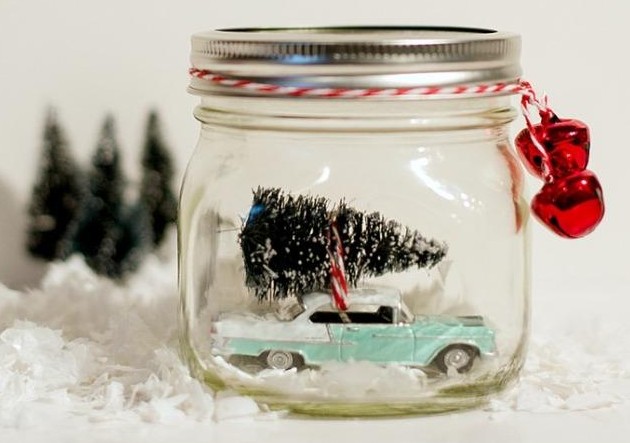 Also in the ball you can hide a snowman, Santa Claus, a nutcracker, a gingerbread man, a symbol of the coming year.
Step one: The color rim of the screw cap will be noticeable, so in order not to break the magic, it should be painted. By the way, this can be done not only with the help of paint and brushes, but also with the help of an aerosol can. It seems that the second option is simpler and more convenient. Leave the lid alone until completely dry. Apply an extra ball of paint if necessary.
Step two: Animal and spruce should be glued on the inside of the lid. This can be done with glue, double-sided tape or a glue gun. In the video, the master uses a special glue that resembles chewing gum. If you know where to buy one, let me know in the comments, suddenly someone will come in handy.
Step three: Our glass ball with snow is still without the most important component. You can find it in large stores that sell New Year's decor or order it online. Artificial snow should take up about a quarter of the can.
Fourth step: Screw on the lid, turn the jar over and enjoy. The composition of several cans looks more interesting and bewitching.
How to make a snowball so that the snow slowly descends?
Pour glycerin, which is sold in pharmacies, and water in equal proportions into a container. Make sure that there is nothing foreign in the water, otherwise it will be difficult to catch this particle later.
Stir the mixture well and sprinkle snow and glitter on top.
Important: When calculating the amount of water and glycerin, keep in mind that there should be room for figurines and decor in the container. Of course, if your eye is not accurate, which happens 98% of the time, when you close the lid, water will flow out. There is nothing wrong with that, the main thing is to substitute the plate in advance. If there is not enough water, turn the jar upside down, unscrew it again and add the required amount.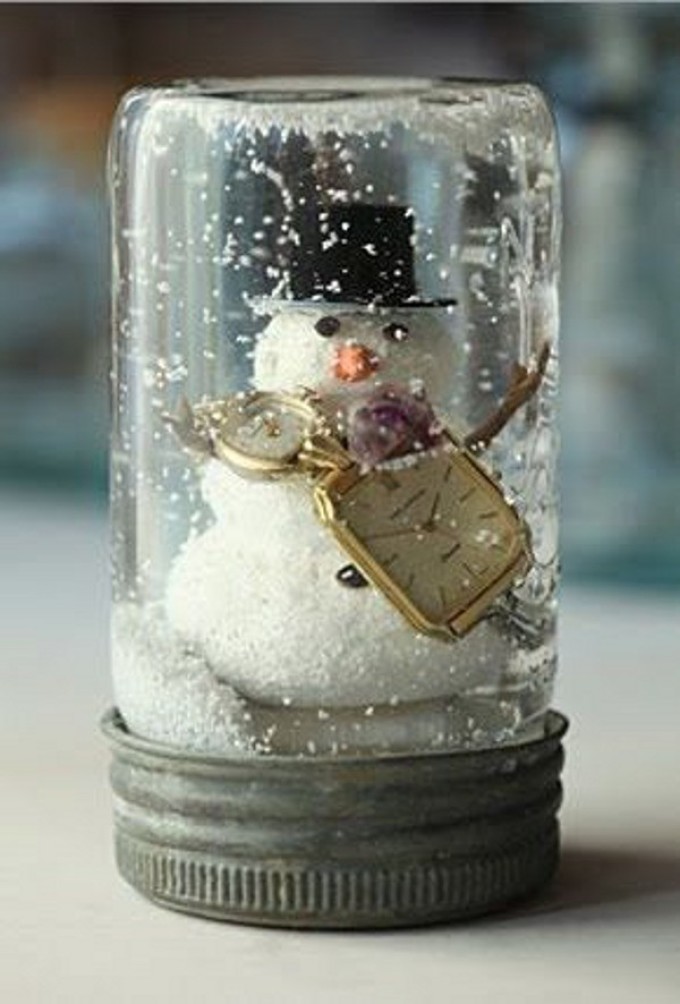
Making your own snow globe is easy with these instructions! And it won't cost much. You will have to spend money on decorative figurines, although, perhaps, your child himself will want to enclose his bear or deer in a ball? Or do you have souvenir Santa Clauses or snowmen at home that are covered with dust?
We offer you some ideas on how to make a snow globe without glycerin with your own hands. This New Year's craft is suitable for or as a task for the advent calendar, but also as, for example.
The legend associated with this toy is quite interesting. To everyone who saved Christmas, Santa Claus gives a magical snow globe - a gift in honor of resourceful decisions and clever actions.
Create your own snow globe - and present it for the New Year 2020 to those who you see fit.
To make a snow globe without glycerin and water you will need:
- jar, plastic cup, cardboard or foam base,
- thin plastic or heavy cellophane,
- figurines or photos to be inserted inside the snow globe,
- synthetic winterizer, foam balls or cotton wool.
How to make a snow globe without glycerin
Such crafts will brighten up everyday life not only for children, but also for adults.
Canned snow globe without glycerine
You don't have to use a glass jar for this craft, you can also use a clear plastic cup with a lid.
Making such a snow globe without glycerin is as easy as shelling pears: pour filler (snow) into a jar. It can be small foam balls, cotton wool, synthetic winterizer or even coarse salt. Then we install the figures (you can also put a safe candle in such a jar). And cover the jar with a lid.
In the case of a plastic cup, we build the whole composition on the lid, and therefore it is better to attach all the elements to the base with glue. When the snow and figures are mounted, cover the lid with a glass and glue them together. Here is the snow globe.
Photo gretasday.com
Glycerine-free foam snow globe
To make such a snow globe with your own hands, you will need a three-dimensional base: a circle of foam or foam.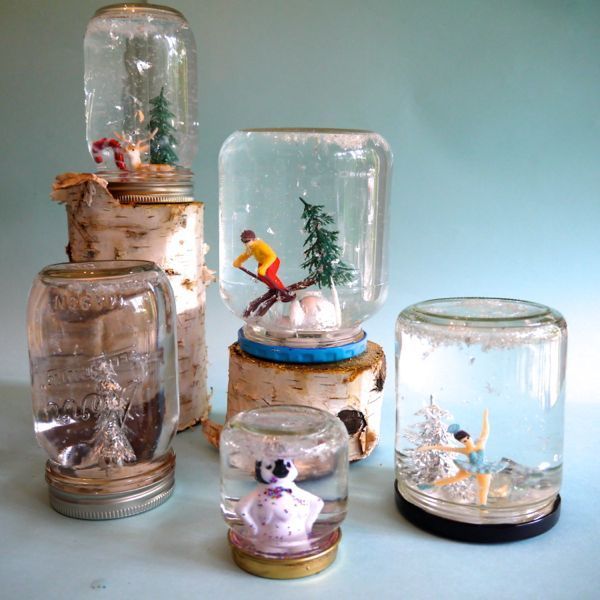 Also useful fabric to decorate the base, foam balls, New Year's figurines, plastic circles around the diameter of the base (you can use transparent plastic folders, for example) and hot melt adhesive.
First you need to decorate the base. You can not sheathe it with fabric or just wrap it with a beautiful bright flying one. Then you need to glue a plastic circle on one side around the perimeter of the hole. Put a transparent plastic strip (the width should be equal to the depth of the base hole) to divide the interior of our future snow globe into two parts. And fill in the smaller part of the foam balls.
On top of this strip glue the figurines, pour some foam balls. And we glue this whole composition on the second side of the base with plastic.
To make it look prettier and the glue is not conspicuous, we glue a neat canvas around the perimeter of the plastic circles. That's it, the snow globe without glycerin is ready.
This craft can be used as a New Year's wreath to decorate doors before the holiday.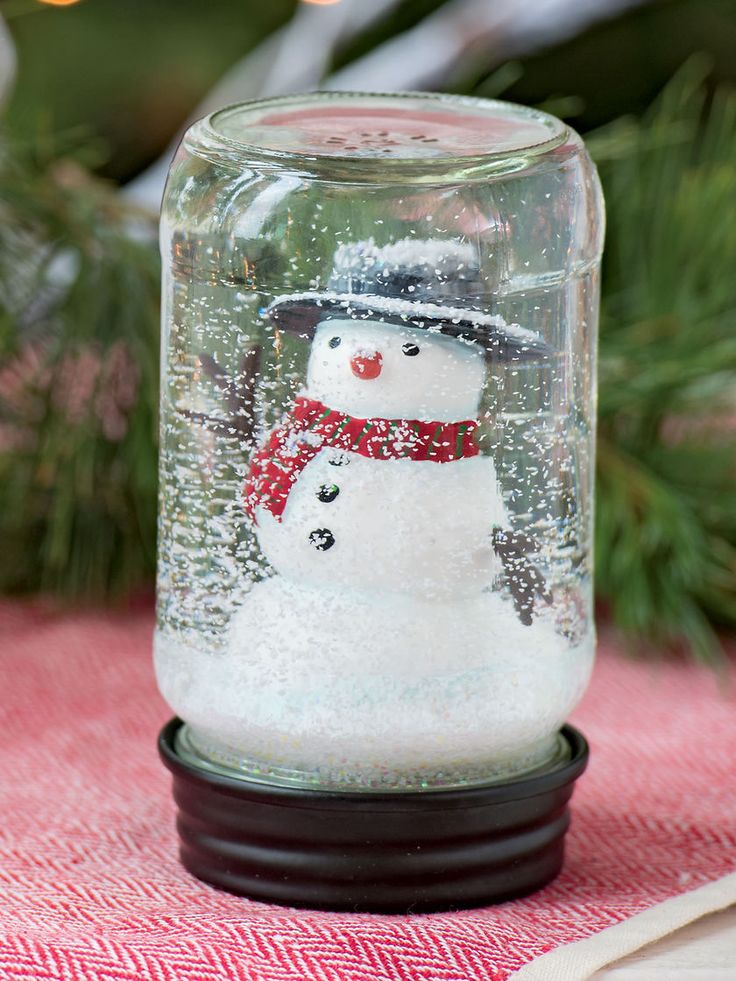
Photo www.createcraftlove.com
DIY paper card "Snow globe"
Another way to make your own snow globe without glycerine is to make it out of paper in the form of a postcard. Such a card can then be presented to grandparents for the New Year.
- Take a sheet of white paper and fold it in half. Cut out a circle on the front.
- Open the card, stick the photo on the whole half of the card so that it can be seen in the ball.
- Cut out two circles from the paper files. which are slightly larger than the hole in the postcard. Put confetti, glitter or sequins between them. Glue the plastic circles together along the edge.
- On the inside of the half with a hole, glue a construction of plastic circles with sparkles inside.
- We glue sheets of paper together.
- Coloring and decorating the Snowball card outside.
Photo by thebestideasforkids.com
Glycerin-free snow globe from disposable plates
Take a white or blue paper plate and a clear plastic plate. On paper - glue: Christmas tree, sengovik, Santa Claus. Fill with paper confetti (you can even make your own with a hole puncher). And glue a plastic paper plate on top.
Photo iheartcraftythings.com
Gift box - snow globe
To make such an unusual snow globe box, you will need the box itself, a sheet of colored paper, a sheet of transparent film, confetti (sparkles), an image of your favorite character, glue and scissors.
First, cut out a circle on the lid of the box. From the inside, we glue a transparent film to the lid, pour confetti, and on top of the confetti we glue a sheet of colored paper with a figure of our favorite cartoon character glued to it.
Photo handmadecharlotte.com
Now you have some ideas on how to make a DIY snow globe without water and glycerin.
WikiHow is a wiki, which means that many of our articles are written by multiple authors. When creating this article, 10 people worked on editing and improving it, including anonymously.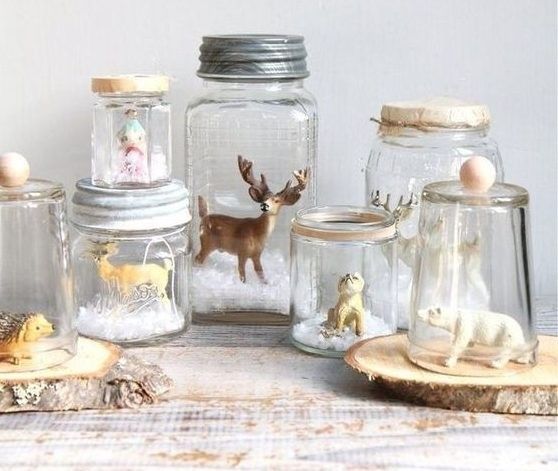
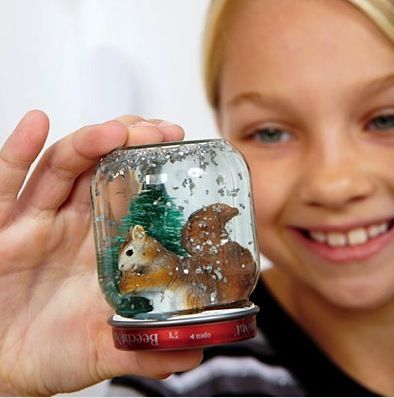
Do you want to have fun next weekend with your kids (or parents) doing something together? Then you can make a snow globe! The snow globe looks cute and interesting and can be made using common items that are in every home. Alternatively, you can buy a ready-made kit online or at a craft store to make your snow globe look truly professional and enjoy year after year. Whatever you choose, read step 1 to get started.
Steps
Making a snow globe from household items
-
Find a glass jar with a tight-fitting lid. Any size will do, as long as you have the right figures to fit inside the jar.
- Olive, mushroom or baby food jars are good - as long as there is a tight-fitting lid; just look in the fridge.
- Wash the jar inside and out. To clean the label if it doesn't come off easily, try rubbing it under hot soapy water using a plastic card or knife. Dry the jar thoroughly.
-
Think about what you want to put inside.
 Anything can be placed in a snow globe. Cake figurines or small winter-themed children's toys (such as a snowman, Santa Claus, and a Christmas tree) that can be purchased at craft or gift shops are good.
 - Make sure the figurines are made of plastic or ceramic, as other materials (eg metal) may start to rust or turn over funny when submerged in water.
- If you want to get creative, you can make your own clay figurines. You can buy clay from a craft store, shape it into any shape you want (snowmans are easy to make), and bake them in the oven. Paint them with water-repellent paint and they're done.
- Another suggestion: take a picture of yourself, your family or pets and laminate them. Then you can cut out each person along the contour and put their photo in a snow globe, it will turn out very realistic!
- Even if it is called snowy balloon, you don't have to limit yourself to creating only winter landscapes. You can create a beach scene using seashells and sand, or something playful and fun like a dinosaur or a ballerina.
-
Decorate the inside of the lid. Apply hot glue, super glue, or epoxy to the inside of the jar lid. You can first rub the cover with sandpaper - thanks to this, the surface will become rougher and the glue will hold better.
- Place your decorations on the inside of the lid while the glue is still wet. Glue your figurines, laminated photographs, clay sculptures, or whatever else you want to put on there.
- If your piece has a narrow base (such as laminated photographs, a piece of garland, or a plastic Christmas tree), it might be best to glue a few colored pebbles to the inside of the lid. Then you can simply clamp the object between the pebbles.
- Keep in mind that the decoration you are making will need to fit in the neck of the jar, so don't make it too wide. Place the figurines in the center of the lid.
- After you've created your story, set the lid aside for a while to dry. The glue must dry completely before you can submerge it in water.
-
Fill the jar with water, glycerine and glitter. Fill a jar almost to the brim with water and add 2-3 teaspoons of glycerin (found in the bakery section of the supermarket). Glycerin "compacts" the water, which will allow the glitter to fall more slowly. The same effect can be achieved with baby oil.
- Then add glitter. The amount depends on the size of the jar and your tastes. Just add just enough glitter to compensate for the fact that some of it will get stuck in the bottom of the jar, but not too much or it will completely obscure your decoration.
- Silver and gold sequins are great for a winter or Christmas theme, but you can choose any color you like. It is also possible to buy special "snow" for the snow globe online and in craft stores.
- If you don't have glitter on hand, you can make pretty realistic snow out of crushed eggshells. Use a rolling pin to crush the shell well.
-
Carefully put on the cover.
 Take the lid and fasten it firmly to the jar. Close it as tightly as you can and wipe off the displaced water with a paper towel.
 - If you are unsure if the lid will close properly, you can make a ring of glue around the rim of the jar before closing it. You can also wrap some colored ribbon around the lid.
- In any case, it will sometimes be necessary to open the jar in order to touch up loose parts or add fresh water or glitter, so think about this before sealing the jar.
-
Decorate the lid (optional). If you wish, you can finish your snow globe by decorating the lid.
- You can paint it in bright colors, wrap it around with decorative ribbon, cover with felt or stick on holiday berries, holly or bluebells.
- Once you're done, all that's left to do is give the snow globe a good shake and watch the glitter gently fall around the beautiful decoration you've created!
Create a snow globe from a store-bought kit
- Add glitter, beads or other small particles to the water.
 Anything will do, the main thing is that they do not obscure the main decoration.
 - For a quirky effect, try adding a few drops of food coloring to water before adding glitter, beads, etc.
- An object inside a snow globe can look more fun with glitter or artificial snow. This can be achieved by first painting the object with clear varnish or glue, and then pouring glitter or artificial snow on top of the wet glue. Note: This must be done before the item is placed in water, and the glue must dry completely. Otherwise, this effect will not work!
- Small plastic dolls, plastic animals and/or elements from board games such as Monopoly and a set of model trains can be used as the main item.
With a figurine and falling snow inside, a Christmas souvenir known all over the world. It is believed that the French were the first to make such crafts back in the 19th century. Today, on the eve of the New Year holidays, you can buy a similar product in any store, but it is much more interesting to make a snow globe with your own hands.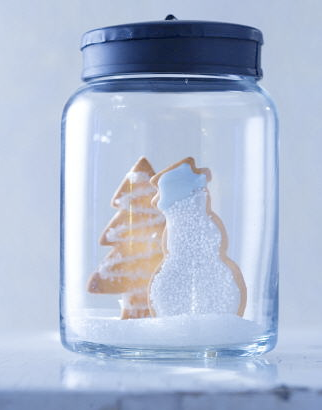
Preparing Materials Needed
To make this Christmas craft, you will need: jar with lid, any waterproof glue, decorative figurines, glitter or styrofoam, glycerin, water. You can make a snow globe with your own hands from almost any container. Jars from baby food and other food products are excellent for this purpose. Remember, the more interesting the shape of the container, the more original the finished craft will look. Any figurines can be placed inside the jar: factory-made souvenirs, small children's toys, decor can be made independently from polymer clay. Rinse and dry the container well before proceeding with the manufacture of crafts.
Making interior decorations
A homemade Christmas snow globe can be placed on the lid or bottom of the jar. Decide in advance how you like it best and start decorating the part that will become the bottom.
Option one: Glue your chosen figures directly onto the lid or bottom. Pour the remaining space around with glue and sprinkle with foam shavings or sparkles.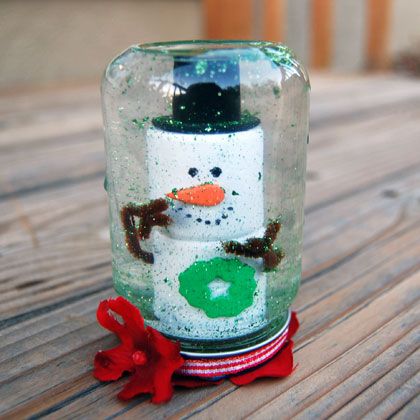 Leave the decor to dry for a while. It is believed that a do-it-yourself snow globe will look most impressive if you install the interior decor on a slight elevation. The easiest way to achieve this effect is using a piece of plasticine. Blind a cake that is suitable in shape and size and glue it to the lid or bottom with glue. Next, install the decorative figures by drowning their base in plasticine, and then mask the base with foam or sparkles.
The magic begins
As soon as the blank with the interior decor is dry, we can start filling our container and assembling it. at home? To fill the container, you will need glycerin - you can buy it at a pharmacy. Pour into a jar of distilled water - 2/3 full. Fill the remaining space with glycerin. Don't forget to add sequins, sequins, beads or other small elements that imitate falling snow. If there was nothing suitable at hand, you can make "snowflakes" from finely chopped rain, foil or waterproof confetti.
Sealing and finishing touches
Even if your jar's lid closes tightly, it's a good idea to coat it with glue before screwing it on.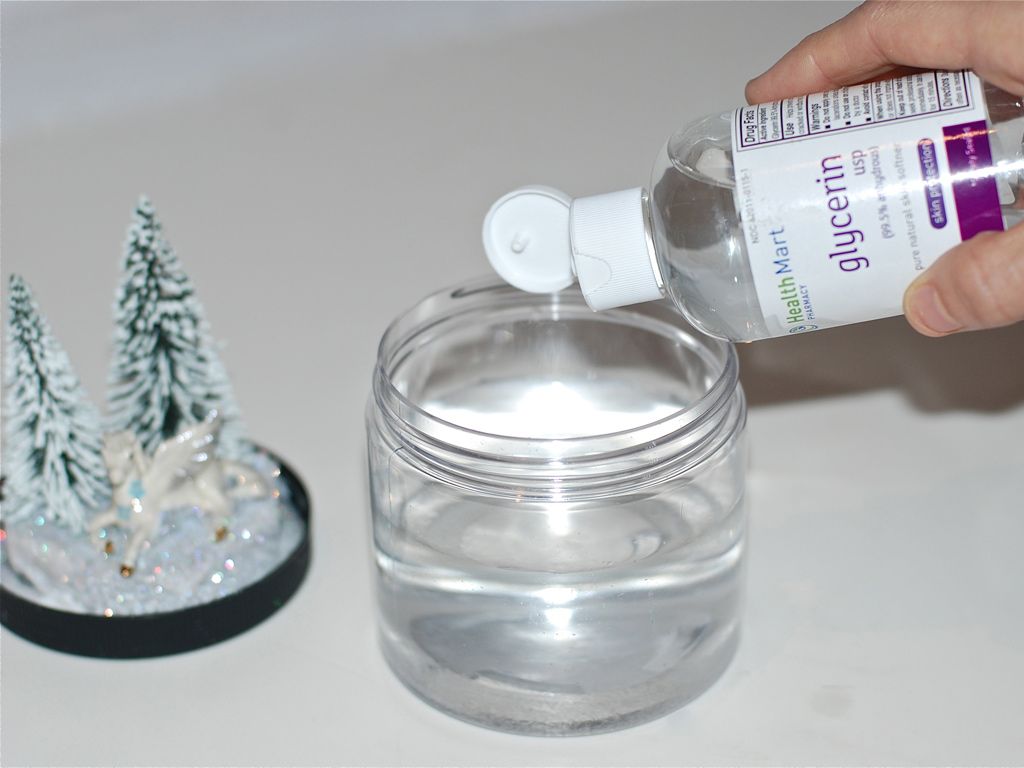 Handle the finished souvenir very carefully. Remember, if the glass snow globe leaks or breaks, you will ruin the textiles or stain the furniture very badly.
Your magical Christmas craft is ready, but you can add a few finishing touches if you like. Decorate the outside of the lid using foil, wrapping paper, or a pretty fabric. If the top of the souvenir is flat, you can glue a small decorative figure on it.
Is it possible to make a falling snow ball without glycerine?
A popular question among those who decided to make a snow globe for the first time with their own hands - is it possible to use ordinary water without additives to make this craft? Actually, this is not a good idea, as glycerin slows down settling to the bottom and extends the “shelf life” of the souvenir. Ordinary water will deteriorate faster, the interior decor may become covered with an unpleasant coating, or the liquid itself will become completely cloudy.
If glycerin is not at hand, but you want to start the creative process right now, you can replace it with refined vegetable oil or a very sweet transparent syrup. But remember, no matter what product you choose, in any case, after a few months it will go bad. This also applies to glycerin.
It is believed that the smaller the snow globe and the more interesting its shape, the prettier it looks. Whether or not you follow this rule is your own business, but do not use jars larger than 1 liter for this craft.
A souvenir with falling snow can also be made from a plastic container. The main condition is a tight-fitting lid, the transparency of the vessel and the absence of unnecessary edges and ugly seams on its surface. A glass jar is selected according to a similar principle. A container with smooth walls or a small number of edges is best for making this craft. But a complex cut will interfere with viewing the fascinating inner world of the composition.
Now you know how to make a snow globe, but still wondering what to put inside? Small houses, Christmas trees, snowmen, Santa Claus, figurines of animals or fairy-tale characters - if you create with your child.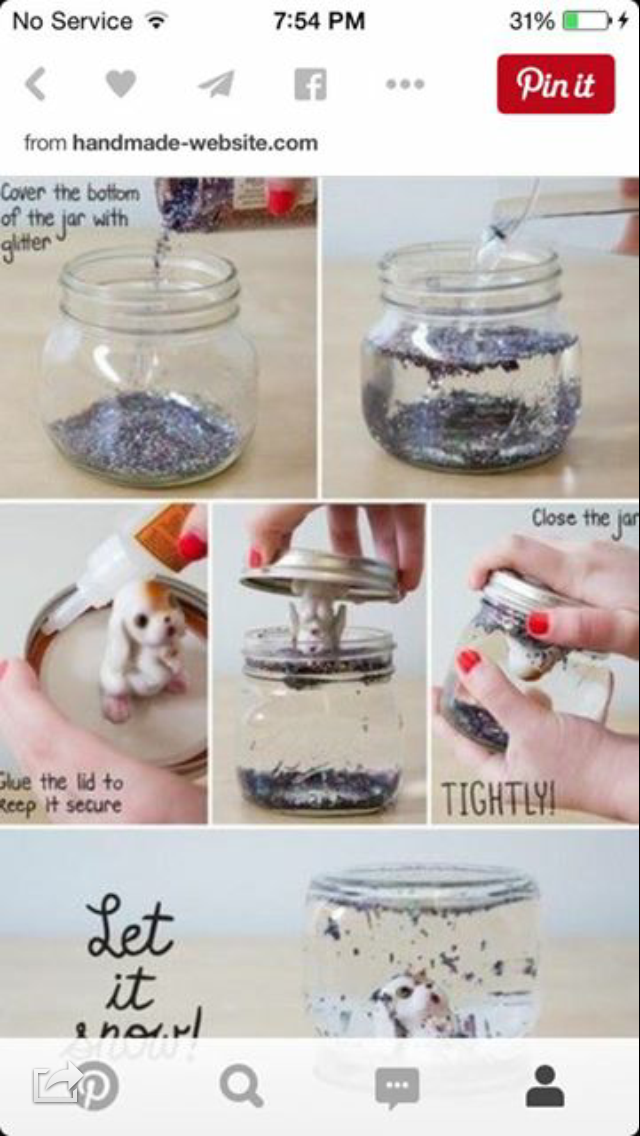
Craft with "falling" snow can be not only New Year's. Try to make such a souvenir for March 8 or Valentine's Day. Accordingly, the interior decor should support the theme of the holiday, and only sparkles, multi-colored beads and confetti can fall in such a ball, foam chips are not needed.
Another interesting idea is to make a balloon with a postcard or photo inside. You will need a paper photo or a beautiful picture of a suitable size. Tape the blank with transparent tape so that it does not get wet. Next, as always, place the decor inside and mask its base, add glitter and finish the craft by pouring the mortar and sealing the lid tightly.
How to make a "Snowball" with your own hands step by step with a photo
Yunusova Alsu Rifkhatovna, teacher, Kindergarten No. 177, Kazan, Republic of Tatarstan
Description: Master class of a simple "snow globe". A great option for Christmas crafts. Suitable for making by older preschool children.
 Useful use of baby food jars.
 Purpose of the workshop: Do-it-yourself creation of a New Year's "snow" globe.
Tasks: to acquaint teachers and parents with the method of making a wonderful "snow globe". Show the steps and suggest the secrets of manufacturing.
New Year - a time of miracles and magic! Waiting for the New Year and preparing for it is probably even more interesting than the holiday itself. In kindergartens, teachers and children, in homes, children and parents are immersed in the process of creating a New Year's mood. They decorate rooms, watch movies and cartoons, buy gifts and toys, interior decorations such as snow globes... Snow globes have long been one of the main symbols of the New Year. And do-it-yourself snow globes are symbols of creativity, magic and New Year's mood at the same time!
To make a "snow globe" you need:
baby food jar, glitter and sequins, toy (this time my daughter and I chose Olaf the snowman), super glue, glycerin, water, rhinestones and ribbon or ribbon to decorate the jar, hot glue gun.
Ball manufacturing progress
First of all, you need to see how the toy will look inside the jar, whether it is too small.
The photo shows that the toy is less than half of the jar, so I placed a lid of hand cream under the toy, thereby lifting the snowman above the middle. You can choose toys higher, there will be less hassle.
Then I glued the stand and the toy with super glue. Glue used a lot, one might say, flooded the edges. I left the lid with the toy to dry overnight. Hint: Even though it's super glue, when it's thick it takes a long time to dry.
The next step is to prepare a liquid where sparkles and sequins will float. The proportion of water and glycerin is about 50% to 50%. I always pour by eye. Keeping the proportion exactly in milliliters is not so important. Sequins are light, they fall for some time even in water.
Before adding glycerin to the water, I added sparkles, sequins and stirred well so that they were saturated with water.
It's the turn of glycerin. When adding it, you need to take into account the volume of the toy and the stand (in my case).
I did a couple of fittings.
The main thing is that when the lid of the jar with a toy is tightly closed, the liquid should be exactly along the edge so that there is no air left in the jar.
It remains to decorate the edges of the jar. I used golden braid and rhinestones to match the color of the braid. They were glued on with hot glue.
The snow globe is ready))
Such snow globes can be not only snowy, but also so glamorous with princesses))))
Last year my kids and I made these funny souvenirs.
40 ideas for winter crafts from glass jars
It's a pity to throw away glass jars, but is the time for home preservation long gone? We have collected 40 great ideas that can be made from cans to decorate an apartment for the New Year 2021, surprise guests and family, and just create a festive mood.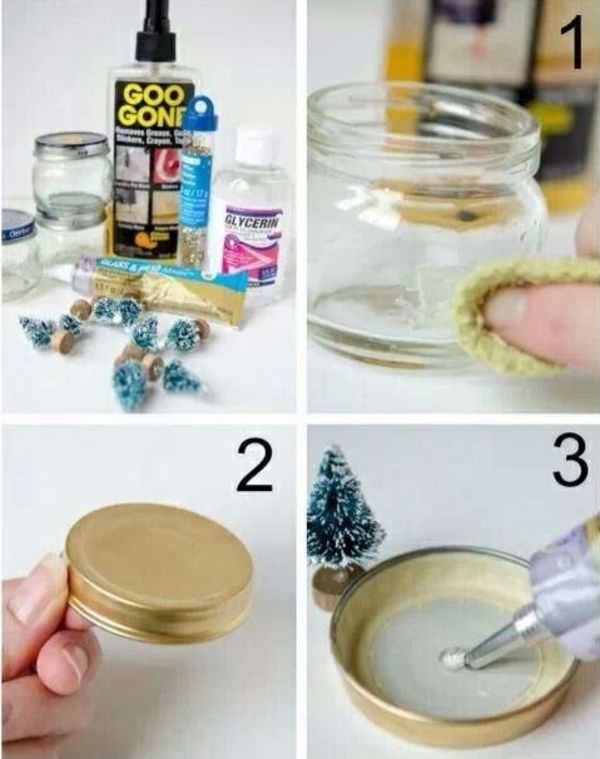
Almost every housewife in the house has a separate locker or a place where glass jars are stored. If you also have a similar corner, and the number of various jars there has already reached a critical point, and you still have not figured out what to do with them, we suggest you use them for New Year's decor. Such New Year's decorations from cans will create an additional atmosphere of celebration and comfort.
These holiday can crafts are a great way to reuse other things. After all, in this way you not only get a new original thing, while not spending a penny, but also save the environment.
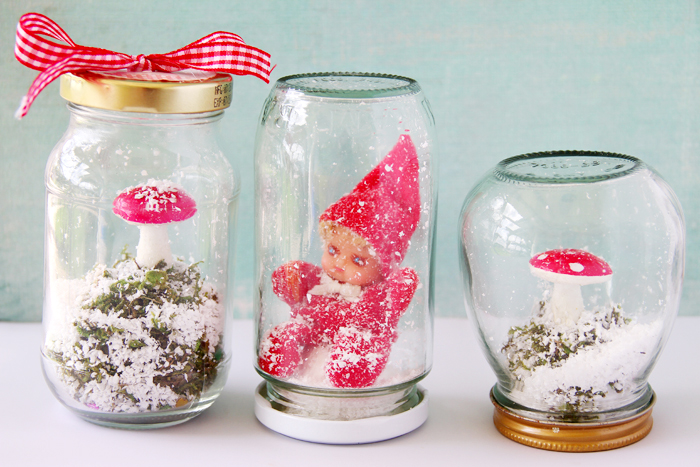
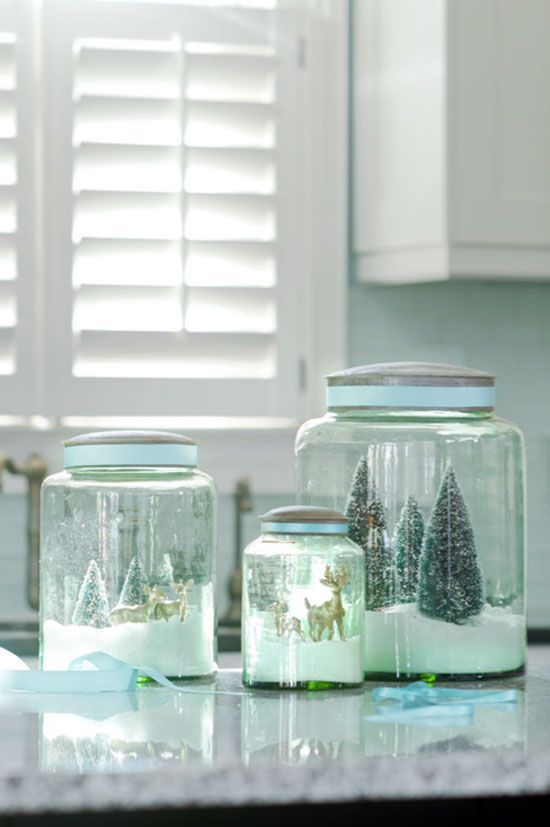
Snow globe from a glass jar
The most beautiful winter decor option that can be made from a glass jar is a snow globe. And it is not necessary to fill it with water so that the snowflakes envelop everything inside the jar. It is enough just to fill the jars with mini trees, animals, toy houses and artificial snow made by one's own hands.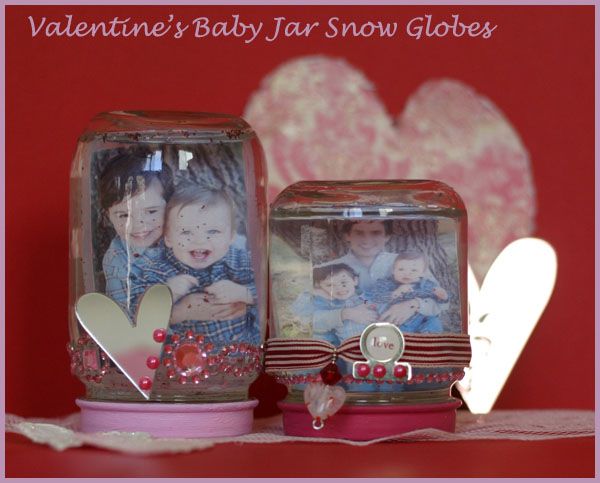 Then arrange the snow globes from cans on shelves and nightstands to create a winter atmosphere.
To make snow globes, you can take a variety of jars, not necessarily spherical.
Canned Christmas tree
A Christmas tree in a small apartment is at risk of being knocked over or hit. But such a do-it-yourself Christmas tree from cans will create a holiday even in the smallest room. Fill six jars with small Christmas decorations, arrange them in a pyramid, decorate with a garland and a Christmas star. Your unusual Christmas tree is ready!
Festive cookie or candy tin
For the New Year and Christmas period, forget about the tins in which you store sweets all year round. Paint an ordinary glass jar with bright colors, decorate with snowflakes and festive ribbons, fill with cookies or sweets and put on the table.
To keep Christmas cookies fresh longer, choose a glass jar with a convenient lid that is easy to open and close.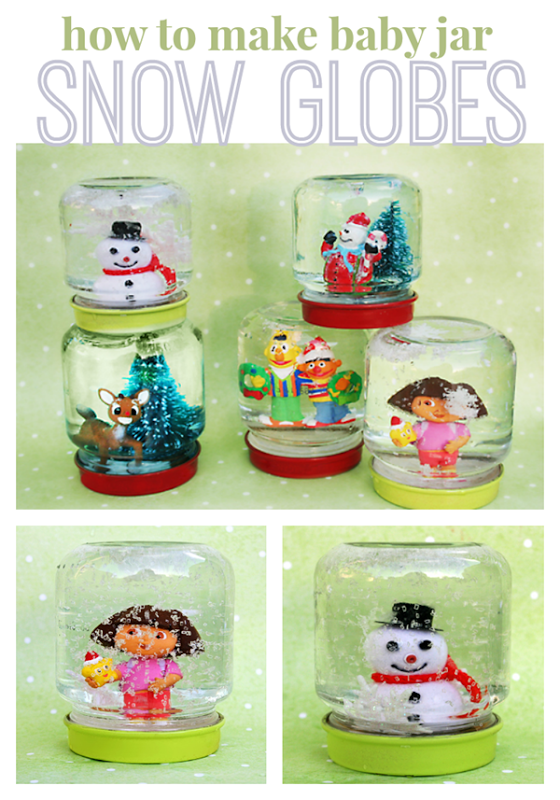
Christmas lights in jars
If you put LED garlands in transparent jars, you will get creative Christmas lights from jars with your own hands. And if you decorate such an installation with cones, needles and other winter elements, you get a fabulous decor.
Candle lamps
Children will be delighted with these candle lamps made from small jars. On the outside, stick templates of winter landscapes and New Year characters cut out of paper on the jars, and put candles in the middle.
Candlesticks from glass jars
Painted jars with candles inside are the easiest way to decorate your holiday table and apartment for the New Year. Involve the kids in such crafts, because they will certainly enjoy painting the jars in different colors.
Berries, cones and needles will add a real winter mood to New Year's candlesticks from jars.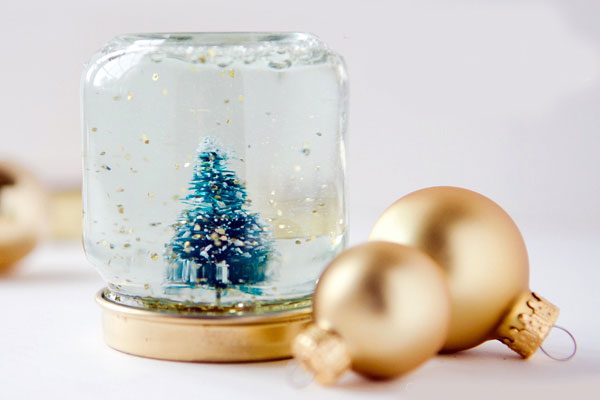 Decorate jars with them to create an atmosphere of celebration and comfort.
Glass jar vases
For the winter, replace your regular vases with beautifully decorated jars. In such impromptu do-it-yourself vases, you can put sprigs of spruce or pine, or winter flowers to fill the house with beauty.
Flavors in jars
Winter aromas in the house create a festive mood and soothe. It is very easy to make flavorings with your own hands, and in order for the special aroma of the New Year to spread throughout the apartment, place it in a jar.
Edible terrarium in a jar
Do you want to surprise your guests with an unusual dessert for the New Year? Prepare them edible terrariums in jars! Use crushed biscuits, shredded coconut, marzipan to make trees or succulents, and crushed chocolate for the earthy layer.
Drinking jars
In the new year with new family traditions, for example, use decorated jars instead of cups in winter.