Diy snow globes with baby food jars
Craftaholics Anonymous® | Baby Food Jar Snow Globes Tutorial
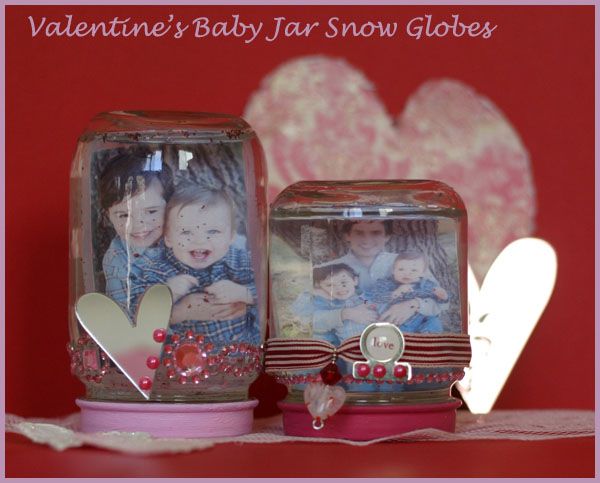
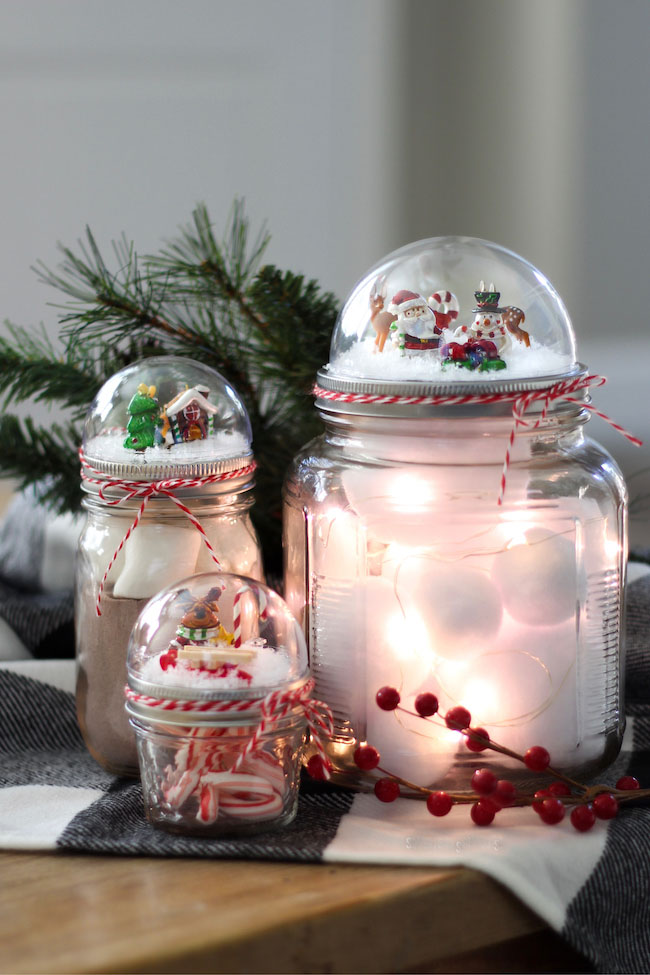
Have a bunch of baby food jars hanging around? Here’s a great upcycle for all those cute little jars! Turn them into mini snow globes with a few household items. Baby Food Jar Snow Globes are easy to create and make a fantastic gift idea!
This is Part 3 in the #JustAddMichaels promotion! Check out Part 1 {announcement} and Part 2 {Dream Christmas tree reveal}.
My baby girl is just starting to eat solids, so I have a bunch of baby food jars hanging out. So I turned a bunch of them into mini snow globes and they turned out so stinkin cute!! I’m seriously in love with them! Oh, and I might just be handing these out to neighbors and friends. They make such a cute little Christmas gift!
I love it when I find a way to reuse and make it beautiful!
How to Make Snow Globes TutorialSupplies:
- empty baby food jars {Stage 2 size is the cutest, in my opinion, but all sizes work just fine!}
- mini fake trees
- Goo Gone
- Glycerin {I found it at the Walmart pharmacy}
- Glass & Bead glue OR Epoxy
- Glitter {colored chunkier glitter works best.
Don’t use clear or fine glitter}
- Gold spray paint
- distilled water
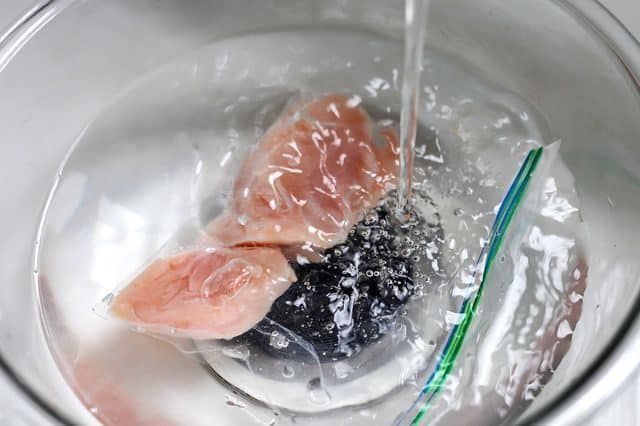
- Remove the labels off the jars and clean off the glue with Goo Gone.
- Spray paint the lids gold {or desired color}.
- Put a little glue on both the inside of the lid and the bottom of the fake tree. Allow to dry for 1-2 minutes and then press the tree onto the lid. Allow to dry for 24 hours.
4. Add about 1 teaspoon of glitter into each jar.
5. Fill with distilled water and add 5 drops of Glycerin. {5 drops seemed to work the best.} Screw the lid {with the tree} onto the top and you’ve got yourself the cutest mini snow globe ever!
And that is how you make Baby Food Jar Snow Globes!
Mini Snow Globes
What could you do with this tiny snow globes?
Disclosure: This post is brought to you by Michaels. I received free product{s} featured in this post. All opinions are 100% mine!
Check out my Gold Ombre Christmas Tree! It turned out gorgeous! {and yes, I can’t believe I already have my tree up this year! haha}
Follow on Pinterest for craft ideas from around the web!
- Bio
- Google+
- Latest Posts
Hi! I'm Linda, the craft addict behind Craftaholics Anonymous®, a craft blog.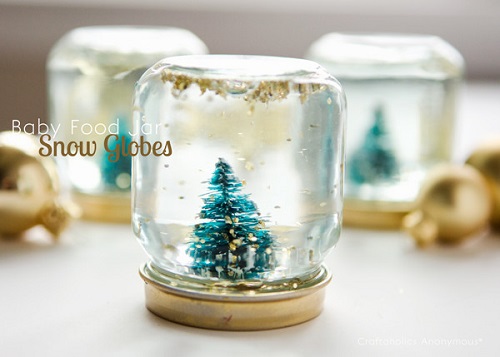 Crafting is cheaper than therapy, right? When I'm not DIYing something, I can be found taxiing around our 4 crazy kids or working out. Or shoe shopping... because you can never have too many shoes! Happy crafting! ♥
Baby Food Jar Snow Globes!!
By Brooke Wilson, 7 years ago
Oh my goodness! Here is a completely adorable (and affordable) do it yourself idea to give to your family and friends this Christmas. Start saving those baby food jars, because you are going to be addicted to making these fun Baby Food Jar Snow Globes! I have yet to see a cuter way to upcycle all those old baby food jars laying around. Just a note, the glass jars will work much better than the plastic ones. I am actually not sure if the plastic ones will work at all. This tutorial is pretty simple, and there is lots of room for customizing your very own baby food jar snow globes. You will need to make a trip to your local Michael's Arts & Crafts or other craft store for sure. So keep your eyes peeled for fab Michael's coupons in our Bargainmoose forum.
So let's get started! I am so excited to make my very own Baby Food Jar Snow Globes. I love cute little things like this. If you love these, then you would probably enjoy the DIY Fairy Gardens idea I wrote about some time ago.
Here's what you're going to need to get started:
- emptied and clean baby food jars
- mini fake trees and other mini fake items you want to place inside
- Goo Gone
- Glycerin (found in the Walmart pharmacy)
- Glass & Bead Glue OR Epoxy
- Glitter (chunky coloured glitter is best)
- Gold or Silver Spray Paint
- Distilled Water
Your first step is going to be removing the labels and cleaning your baby food jars by using the Goo Gone. You will want to wash them again and rinse them well after using the Goo Gone. Then take the lid of the baby food jars and spray paint them whatever colour you want.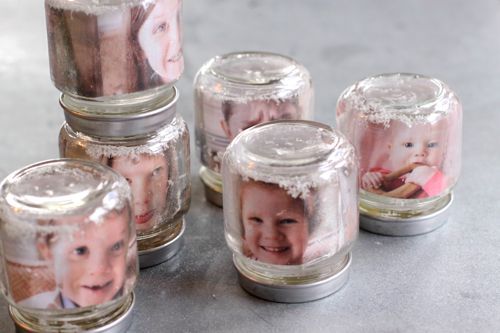 I find gold or silver works the best, but you could go with Christmas colours like red or green as well.
Then you are going to add a little bit of glue to the inside of the baby food jar lid as well as the bottom of your fake tree and other items you are placing inside your little snow globe. Let this dry for a good minute or two so the glue is a little firmer, and then stick your tree to the baby food jar lid. Let this step dry for a good 24 hours before proceeding any further with the project.
Then you can take your glass portions of the baby food jars and add about 1 teaspoon of your chosen glitter into each jar. Once you have added the glitter, you can fill the jar with distilled water. Get the water as full as possible, but leave enough room so you can add a little bit of Glycerin. Then add 5 drops of Glycerin and screw the lid on (with the glued tree) really right. Then you have your very own super adorable (and super affordable) miniature snow globe that you made yourself!
I would get a little bit creative with this one personally.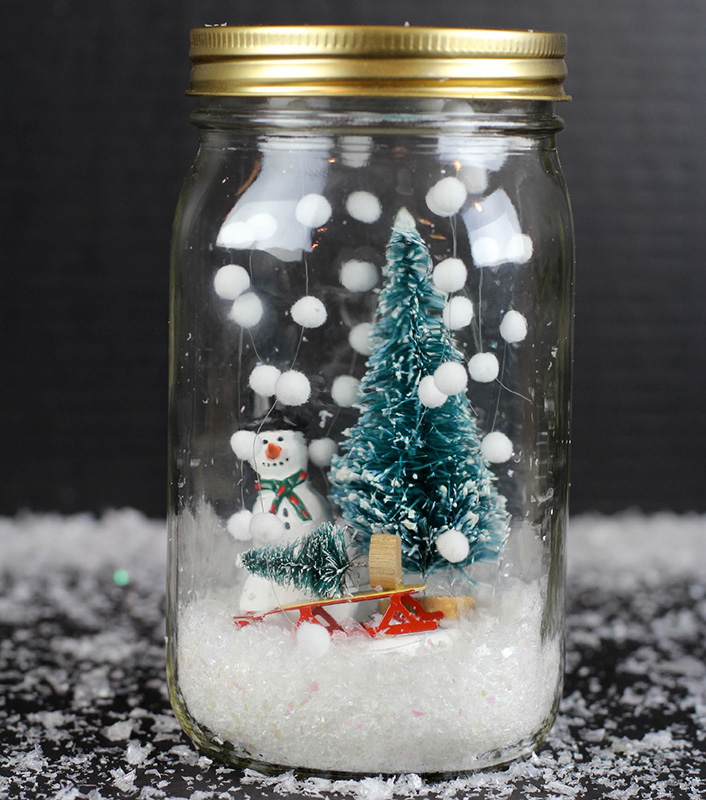 Michael's Arts and Crafts has so many different items you can glue to the lid. You will see all sorts of goodies when you locate the fake trees! There are little houses, horses, farm animals, people and so much more. This project has me giddy with excitement! Can you guys please show us the end result on our Facebook page? It would be super fun for me to see them all.
Moosers, what are you going to add to your Baby Food Jar Snow Globes!?
A big thank you to Craftaholics Anonymous for this beautiful idea.
DIY snow globe
The snow globe is one of the most popular Christmas gifts around the world. Inside a glass toy, there are usually some figures - snowmen, small Christmas trees, elegant houses or other traditional characters. It is worth shaking this unpretentious composition, as a fairy tale comes to life: artificial snow or sparkles slowly swirl and gradually settle.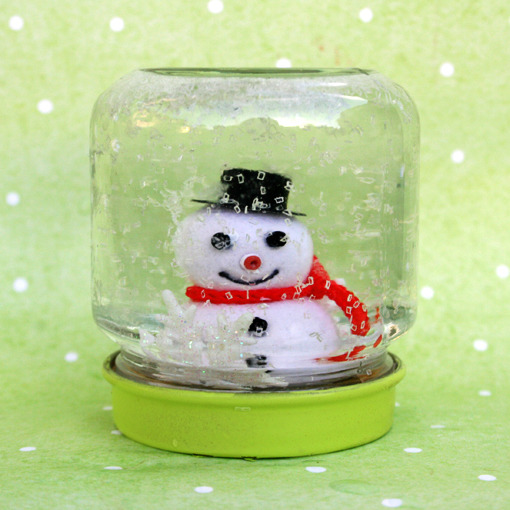 Such an interesting craft and a memorable gift can be easily made with your own hands and at home.
How do you make a snow globe?
To make snow globe bright, add sparkles, but not too small. If you are not sure about the quality of the sequins, which may contain gold dust instead of small grains, then you can use ordinary tinsel, which is finely cut with ordinary scissors. You can also use artificial snow or beads.
You will also need:
- figurine (any suitable size and which does not dissolve in water, you can even laminated a photo or picture),
- beautiful jar with a well-closing lid (I used half a liter, but even baby food jars can be used, the main thing is to find a figurine of the right size),
- universal adhesive moment,
- liquid glycerin at least 1/3 of the volume of the jar (the amount also depends on how slowly you want the “snow” to fall, the more glycerin, the slower. The main thing is not to overdo it, otherwise the “snow” will hang in the air all the time time),
- water (either filtered, or boiled, or distilled.
 If you take plain tap water, your snow globe will become cloudy over time),
 - glue gun.
If you are decorating a jar or making a decorative coaster like me, additionally prepare:
- satin ribbons, decorative twigs, flowers, etc. for decorating a jar,
- cardboard (but not rigid),
- tape,
- scissors,
- self-adhesive film - gold,
- PVA glue,
- dry glitter - gold,
- fine brush,
- and, already listed, the hot glue gun.
So let's get started!
Wash the jar, lid, figurine, and any additional decorations well to prevent the water from becoming cloudy over time. I processed everything with boiling water, as for conservation.
We fix all the decorative elements to the lid with hot glue.
I have already used tinsel, sparkles and beads as an imitation of snow.
I'll tell you how to make a snow globe with sparkles, because there are some subtleties.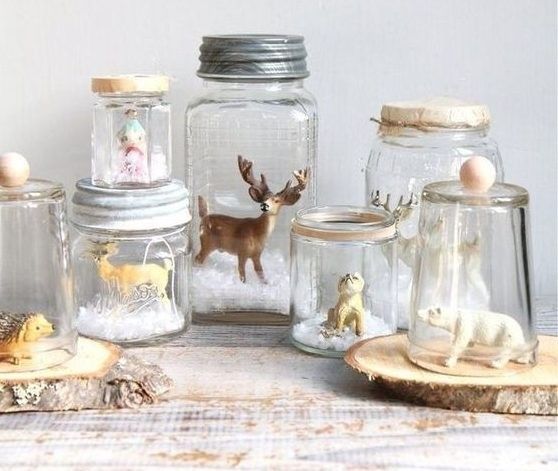 There are no such problems with tinsel and beads.
We take a clean jar, in my case half a liter, pour 150-250 ml of glycerin.
Fill the rest with water (we don’t fill the jar to the brim, because we still have a figurine in it, which will displace a certain amount of water).
Add glitter and mix with a clean spoon.
Even if the glitter is large, there are some particles that did not settle to the bottom of the jar. We must definitely collect them, otherwise they will always float on top, and this, frankly, does not look very good. You can do this with a small spoon or the tip of a clean waffle towel.
Now, very carefully, preferably over a plate, we immerse our composition in a jar, twisting it a little so that there are no air bubbles anywhere. Screw on the lid tightly. You need to try to close so that there are no air bubbles left in the jar. Since we did not glue the lid inside, if necessary, it will be possible to redo it.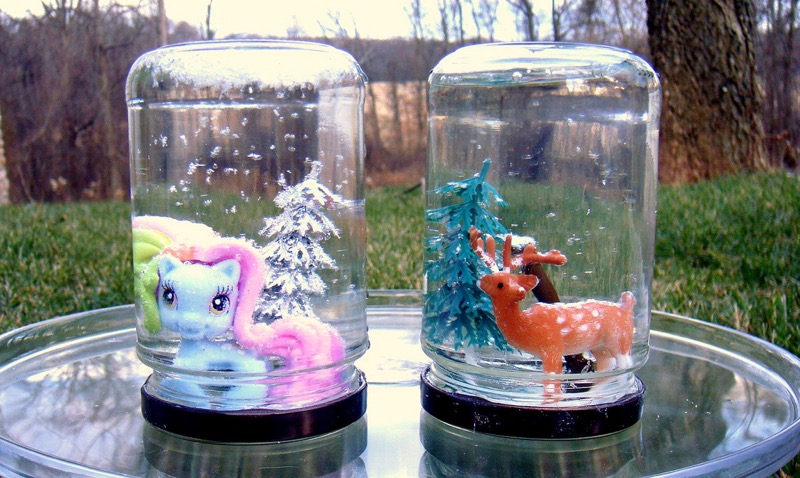
When the lid is screwed on, for insurance, you can go over the joint from above with all-purpose glue (if available, it can be waterproof). There have never been problems with such jars, so the glue, in principle, serves only to fix the lid so that no one accidentally opens it.
Our snow globe is ready! Let's decorate it a little to hide all traces of the lid and jar.
From several strips of cardboard, you can make a strong coaster, paste over it with a gold self-adhesive film. The diameter is equal to the diameter of the cap. We decorate with all kinds of ribbons, twigs, it all depends on your desire and imagination!
I added a little curls of sequins, with their help I hid the thread on the bottom of the jar and all sorts of unnecessary numbers. To do this, dilute 1: 1 water and PVA glue, generously add dry sparkles to this mixture. Curls painted with a regular thin brush.
And here's what I got!
And with flying sparkles…
This magical gift is sure to please both children and adults.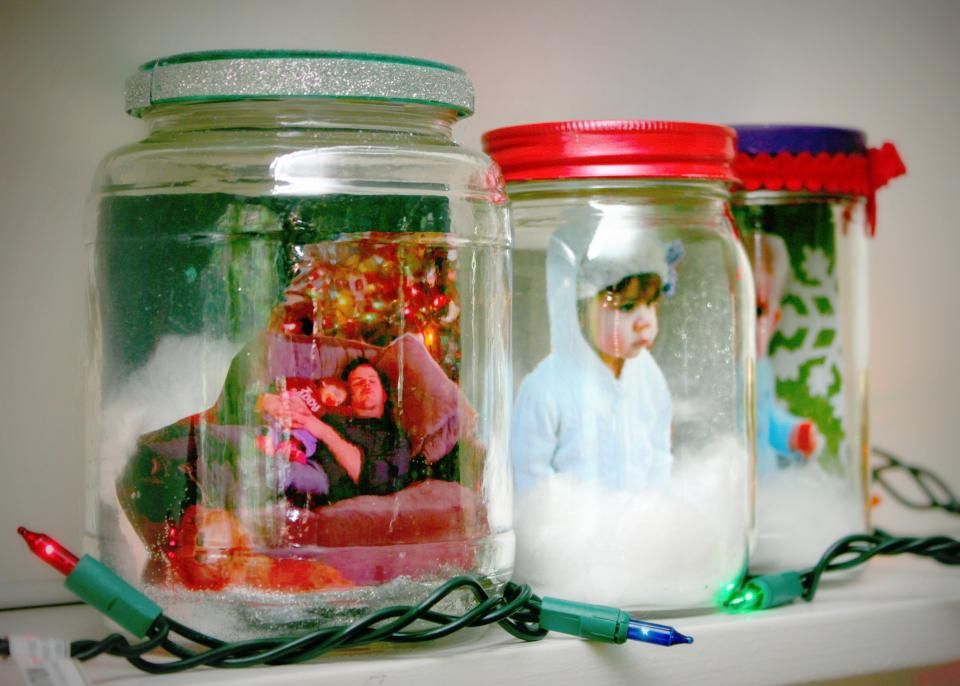 Everyone will be mesmerized by the magic behind the glass. Give each other joy and such wonderful snow globes made by yourself, in which a piece of your soul and warmth is invested!
Happy to help!
Do-it-yourself snow globe - master class
Who in childhood was not fascinated by the magic snow globes standing in the windows? I think we still need to look for such indifferent to this beauty. And since this pleasure is expensive, not everyone has this piece of New Year's magic. Therefore, I propose to make such a snow globe with your own hands!
Who was not fascinated by the magic snow globes standing in the windows as a child? I think we still need to look for such indifferent to this beauty. And since this pleasure is expensive, not everyone has this piece of New Year's magic. Therefore, I propose to make such a snow globe with your own hands! It is done quite simply and quickly.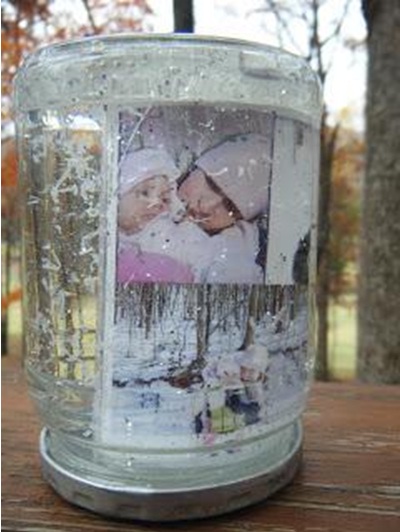 The main thing is to choose a figurine or composition that you would like to see inside your snow world.
We will need:
- a figurine (any suitable size and which does not dissolve in water, you can even adapt a laminated photo or picture there),
- a beautiful jar with a well-closing lid (I used a half-liter, but you can even use baby food jars, the main thing is to find a figure that is suitable in size),
- superglue,
- waterproof moment glue,
- sparkles (my advice to you: better use larger ones, because small ones muddy the water instead of the snow effect),
- liquid glycerin 100-150 ml (it all depends on the size of the jar and how slowly you want the “snow” to fall, the more glycerin, the slower The main thing is not to overdo it otherwise the "snow" will hang in the air all the time),
- water (either filtered or boiled, or distilled or bottled. If you take plain tap water, then over time your snow globe will become cloudy and take on a completely indecent look),
- glue gun,
- lace, ribbons, buttons, etc.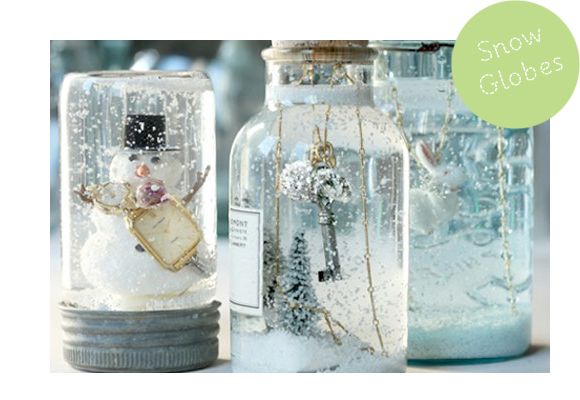 to decorate a jar,
- 30 minutes of free time.
So let's get started!
Preparation: Wash the jar, lid and figurine well so that they do not muddy the whole picture for you later.
Step 1. Attach the figurine to the lid.
Take a figurine/composition, generously smear it with superglue and attach it to the lid. Let's dry for a couple of minutes. I also smeared glue around the lid and poured small sparkles there to create the effect of snow lying on the ground.
Step 2. Prepare the snow world.
We take a clean jar, in my case half a liter, put glitter in it, pour 100 ml of glycerin (maybe a little more), and fill the rest with water amount of water), mix.
Step 3. Settling the snow world with characters.
Now, very carefully, preferably over some kind of bowl, we immerse our composition in a jar and screw the lid tightly, after lubricating the edges of the jar and lid with waterproof glue.