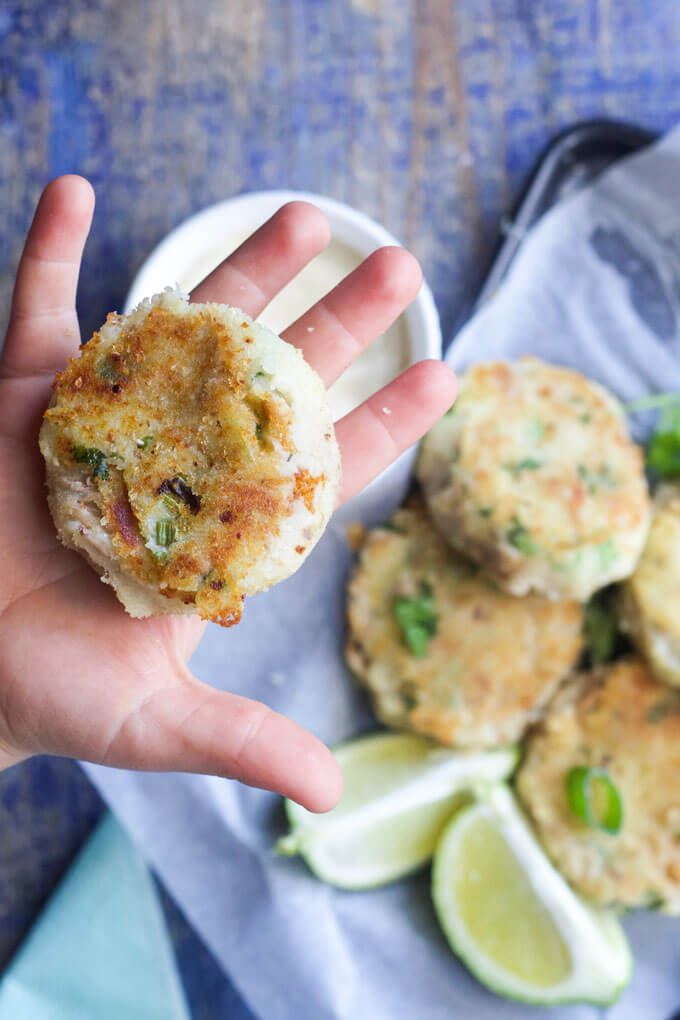
Finger food for baby led weaning
Ultimate Guide to Baby Led Weaning (and Best First Foods)
Learn the basics of how to do the feeding approach known as “baby led weaning” and the best first foods for baby to make starting solids easy and fun. Plus: Learn why it’s perfectly okay to use a combined approach of blw and purees.
Baby Led Weaning
The feeding approach known as “baby led weaning” or “BLW” for short, is a style of feeding infants that allows them to feed themselves right from the start. The food is offered in thick finger-size pieces and is soft and easily squishable between your fingers. This way, the food is both easy to hold but has a low risk of choking.
TIP: This method became popular about a decade ago after the publication of the Baby Led Weaning: The Essential Guide to Introducing Solid Food by UK author Gill Rapley.
BLW Baby
One of the many reasons that people are starting to opt for this style of feeding more and more is simply that it’s easy. In many cases, you can modify foods you’re already making to share with your baby and there’s not always a lot of separate cooking involved. It also allows a baby to have control over what goes into their mouths, which sets a good precedent for letting them eat intuitively from the start.
What age should I start baby led weaning?
According to the American Academy of Pediatrics, a baby is ready to start solids with baby led weaning when:
- They’ve doubled their birth weight (at least).
- They can hold their head up well and are starting to sit up unsupported.
- They show signs of being interested in food (watching you eat, reaching for food when you’re eating, etc).
- When you feed them, they are able to move the food around in their mouths—rather than spit it right out.
TIP: Look for a highchair that allows a baby to sit up relatively straight so they can have good posture and better control over their arms and hands.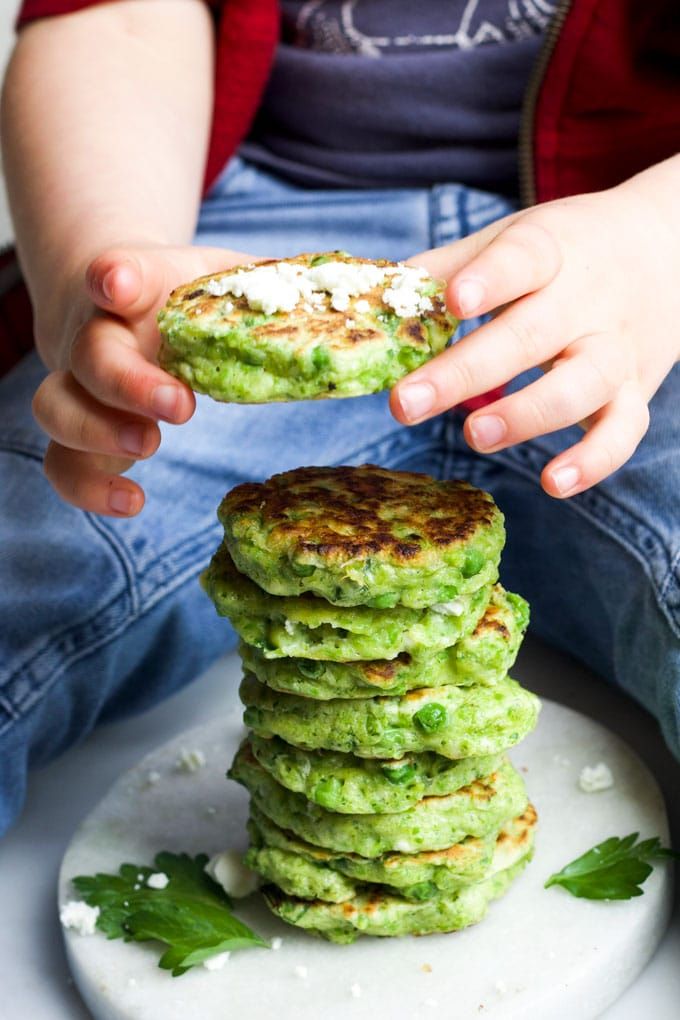
How to Start Baby Led Weaning
The first time you offer solids is such a fun milestone, so you’ll be ready once you follow these simple steps.
- Make sure baby has hit the milestones listed above to let you know that he’s ready to start.
- Get the highchair ready and adjust the straps and foot rest as needed.
- Plan to introduce water when you start solids. I recommend a trainer cup.
- Choose one food to start with and plan to offer only one food at a time.
- Stop when baby starts to fuss, turns his head away, or shows any other signs of not wanting to continue. It’s usually fairly obvious when they are done!
TIP: If you start offering solids and baby just doesn’t seem interested at all, it’s okay. Take a break for a few days or a few weeks and start again. Each kiddo has their own unique timeline.
Best Tips for Starting BLW
Here are a few more tips to consider and review before you get started.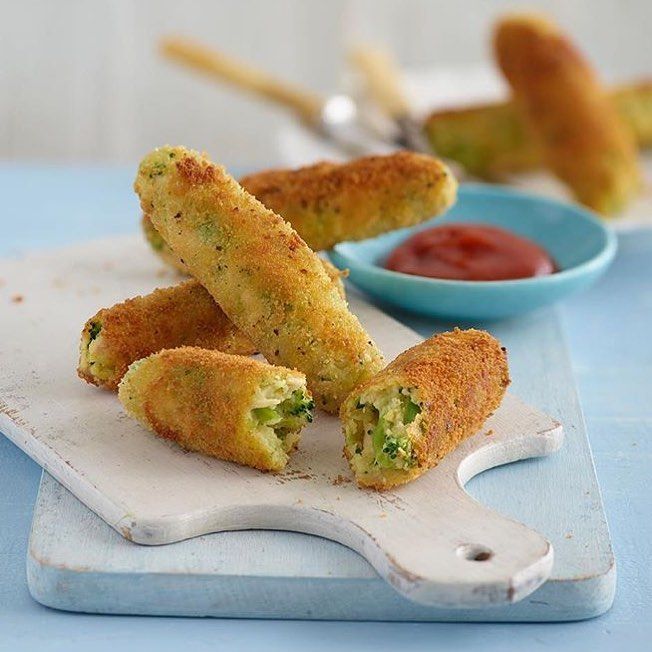
- Understand the gag reflex. Gagging is different than choking though and is most often a sign that baby is learning to move food around in their mouths—and to get it out of their mouths, which is a skill you want them to have!
- Brush up on the basics of how to know when baby is ready to start solids. (Go back to the top of this post for the signs to look for.)
- Set them up for success with a highchair that allows them to sit up straight and has foot support.
- Sit with them as you offer food.
- Check your own expectations of what will happen and simply allow your baby to take the lead.
- Start with one new food a day or every few days.
- Vary the textures of foods you offer to start exposing baby to many right from the start.
- Offer water in a sippy cup or small open cup.
TIP: Remember that breastmilk or formula will continue to satisfy baby’s hunger for the first few months of eating solids. Do not expect solids to replace milk feedings at this age.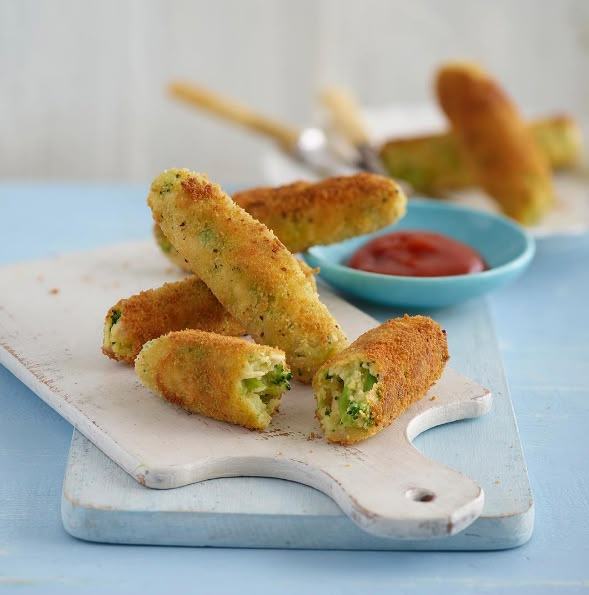
First Foods for Baby
Starting solids with baby led weaning or purees are both perfectly acceptable ways to introduce a baby to solid foods—but the topic can get so heated! There’s a lot of pressure to do it the “right” way and I’m here to say that there isn’t one. You 100% can do one or the other, or combine the two to make it work for your family. It’s all good!
Remember, the goal with first foods for baby is that they’re introduced to flavors, nutrients, and foods they can easily eat or suck on. It should be an enjoyable milestone for all involved.
TIP: It’s a good idea to get into the habit of offering an iron-rich food since iron stores in babies start to run out around 6 months and they’ll need to start ingesting it in their food.
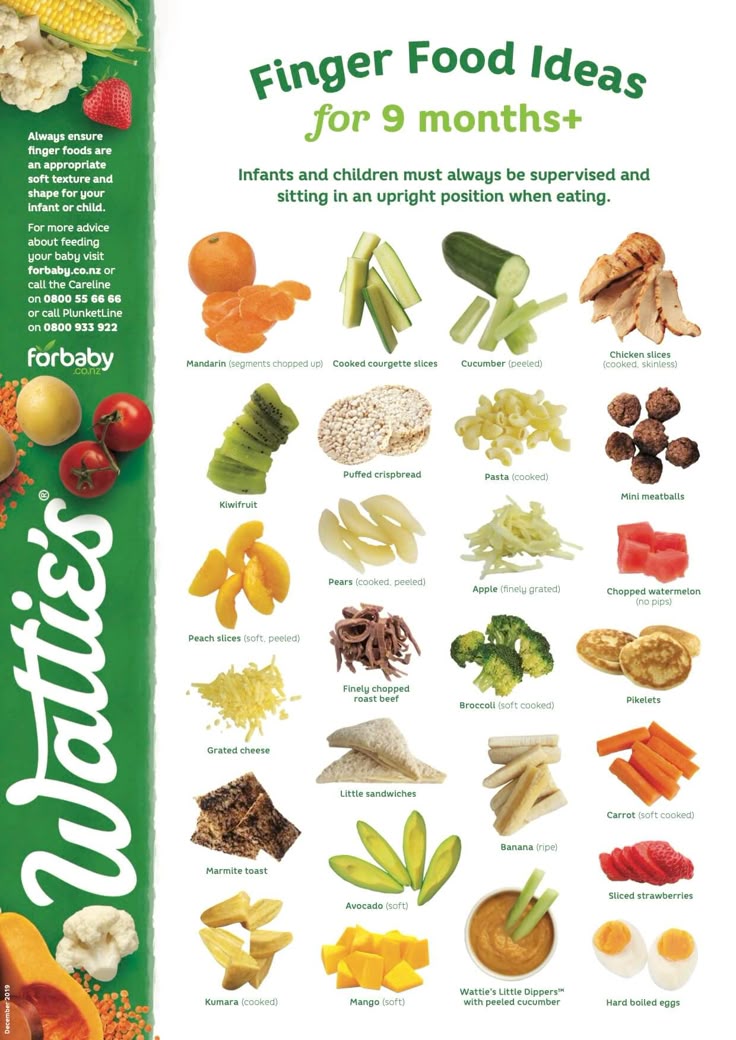
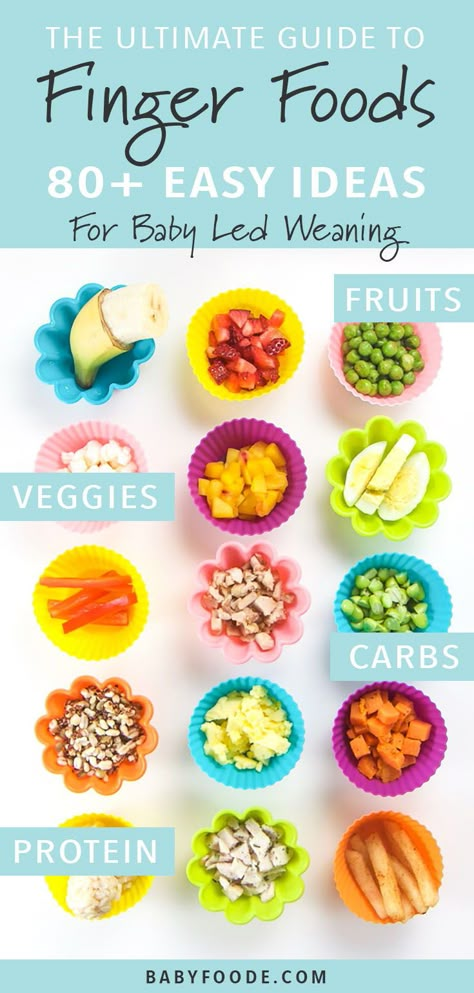
Best First Foods for Baby Led Weaning
Here are some of our favorite first foods to offer baby led weaning style. You want foods to be finger sized so they are large enough that baby can’t force the whole piece into their mouth, and a shape that’s easy for a 6 month old to hold with their chubby little hands.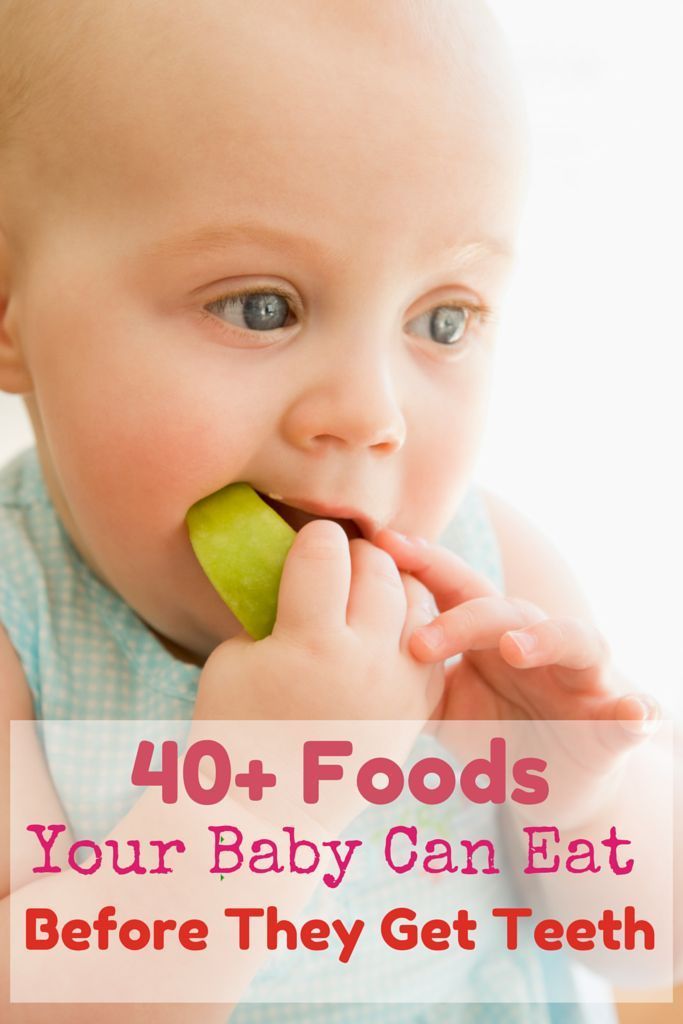 These are some of our favorites.
- Roasted sweet potato wedges
- Roasted apple wedges, skin on to help them hold together
- Roasted or steamed broccoli florets (big enough for baby to hold)
- Melon slices
- Thick mango slice
- Banana with some of the peel still on
- Toast sticks with mashed avocado
- Avocado spears (make sure the avocado is ripe and soft)
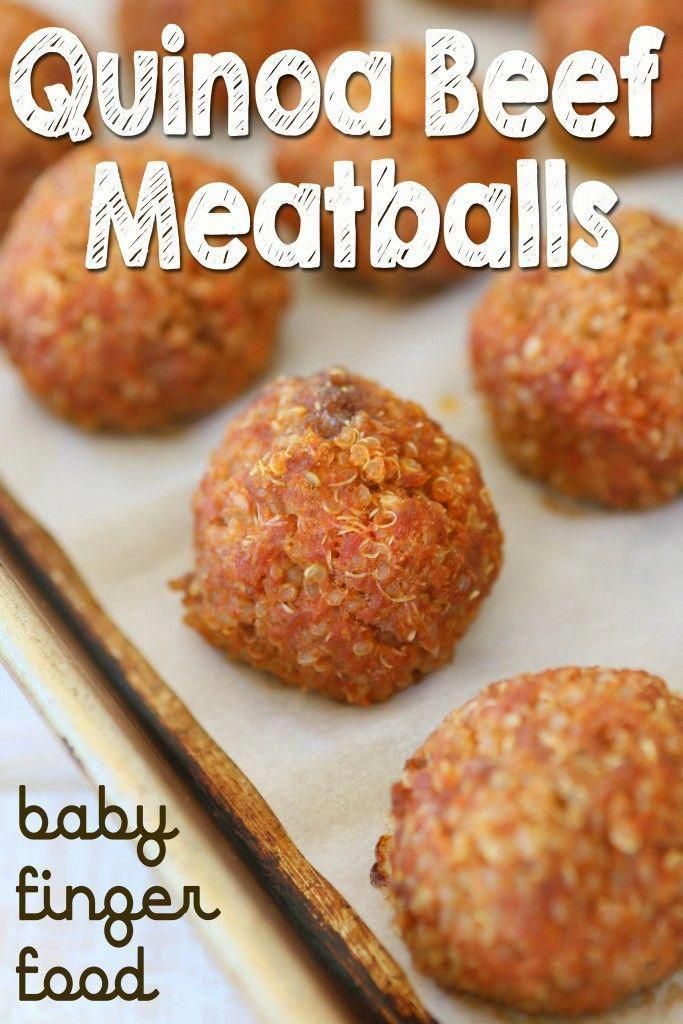
- Lamb or beef, on the bone or a large piece for baby to suck on
- Dark meat chicken, on the bone or a large piece for baby to suck on.
TIP: The foods should generally be soft enough to squish between your fingers with the exception of the large pieces of meat. If baby gnaws a piece down into a smaller piece, replace it with a larger one to avoid her putting a chunk of food into her mouth.
Baby Led Weaning Banana
To serve a banana to a baby, wash it well, then slice it in half. Cut off an inch or two of the peel, but leave the rest of the peel on so it’s not slippery for baby to hold.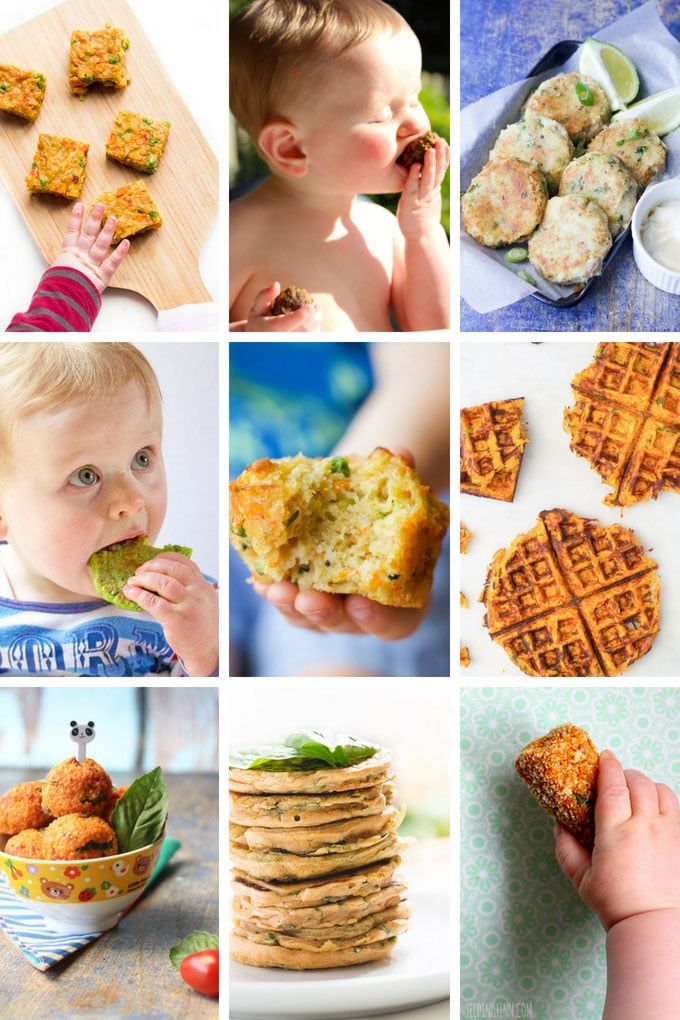 They’ll suck on the top part like a little popsicle! You can also help them hold the banana if needed.
Foods to Avoid Serving While Doing BLW
You want any foods you offer to a baby while doing baby led weaning to be soft enough to squish between your fingers and safe for them to eat and digest. Plan to avoid:
- Anything hard, sticky, or crunchy (like raw apple or carrot, whole nuts, crackers, or a big spoonful or nut butter)
- Added salt
- Cow’s milk (which is difficult for kids under 1 to digest; plain yogurt is fine though)
- Added sugar (they simply don’t need it)
- Honey (to avoid a risk of botulism)
- Super slippery foods that would be hard for baby to hold (which can be frustrating)
TIP: Always sit with your baby and watch them try to eat. They are your best guide for making adjustments to the foods you serve.
Baby Led Weaning and Choking
There are many parents who dislike this method of feeding because it often sounds like a baby is choking.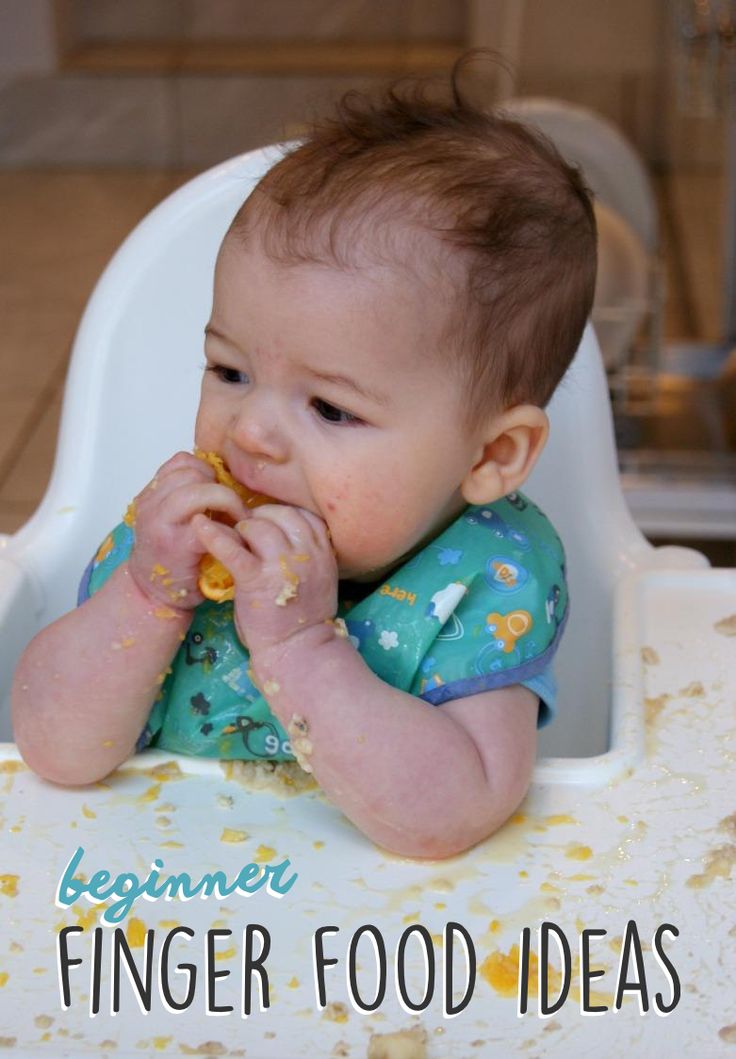 And while there are surely some incidences of choking, what’s more likely is that a baby will occasionally gag on a piece of food that gets into their mouth that they weren’t expecting.
But remember: Gagging is a sign that baby is doing what she needs to in order to move the food around in their mouth as they learn to eat. It usually sounds more dangerous than it actually is.
TIP: If the sound of gagging really freaks you out, you’re not alone. Consider offering more preloaded spoons with purees to start your journey more slowly.
How to Cut Foods for BLW
You generally want the food to be big enough that it would be difficult for baby to put the entire thing into their mouths. Here are some specifics:
- Foods that are roughly the size of a finger, so about a 4-inch stick.
- Foods that are easy for the baby to pick up—they can’t pick up small pieces until closer to 9 months when they develop the ability to use their fingers in what’s known as a “pincer grasp”.
- Foods that aren’t too slippery—so you can wash and leave some of the peel on fresh foods like bananas, avocado, kiwi, and mango.
TIP: You can also go even bigger if you’re worried about size. Think half of a slice of bread or a big chunk of watermelon.
Will my baby actually eat much food with BLW?
Probably not at first. There will likely be more tasting of the food than eating of it and that is totally fine. They will still rely on breast milk or formula at this age for their main nutrition, so don’t expect them to suddenly start eating full meals. (They’ll get there in a few months, but it takes time!)
Do babies need teeth for baby led weaning?
No! Gums are super strong and front teeth aren’t used for chewing—that happens when the back molars come in. Teeth really have nothing to do with whether or not a baby can eat solids.
TIP: Learn more about what to expect from teething here.
Can you mix baby led weaning and purees?
Absolutely! I think it’s a great idea to mix the two methods simply because it gives you many more options for foods and allows the baby to experience more textures. I recommend allowing babies to feed themselves preloaded spoons—so you put the puree on a spoon, then hand it to them to actually put the spoon into their mouth—so they still have control over what goes into their mouths.
TIP: Feeding some purees is also helpful if you’ll be sending food with a baby to daycare since the care provider may not have experience with blw.
Best First Foods for Baby: Purees
Here are some of our favorite purees to start offering baby when they’re ready to start solids. Remember: There’s no evidence that says that you need to start with vegetables versus fruits, so go with something that tastes good to you. Start with single foods pureed smooth and offer just a little at a time on a spoon.
- Mashed roasted sweet potato puree
- Mashed avocado puree
- Mashed banana puree
- Butternut squash puree
- Applesauce, unsweetened
- Mashed pea puree
- Oatmeal baby cereal (with added iron)
TIP: One of my favorite baby food companies is Amara Organic Baby Food, a company using a nutrient protection technology that makes organic purees just as good as homemade. I love how easy they are to use when I need a shortcut and that they have fun baby-led weaning recipes on the side of every box! (paid affiliate link)
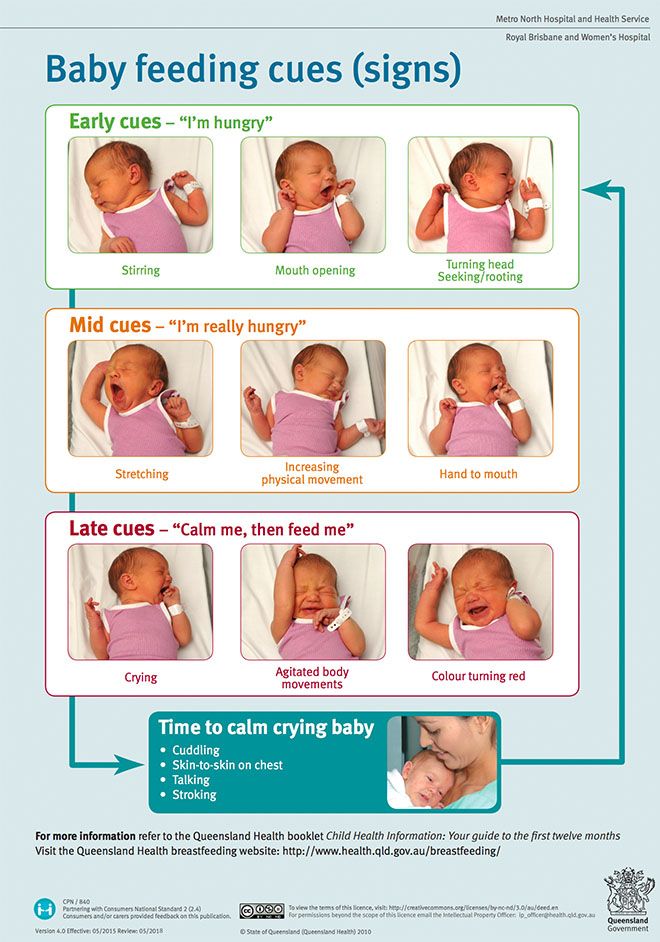
How do I know when baby has had enough?
If your baby is eating and then starts to turn her head away or just refuses to open her mouth, she’s done! Babies may also start to fuss if they’ve had enough. Learning this new skill takes time and babies can become tired fairly quickly into the process, so don’t expect them to always eat very much or to last very long at the table. This stage is about exploration!
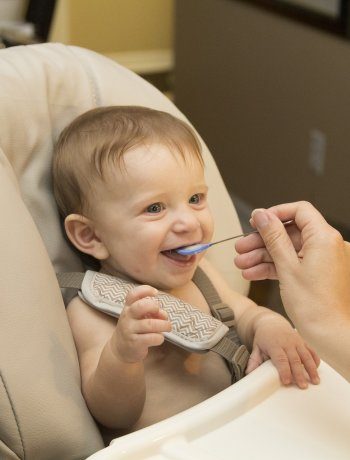
Baby with preloaded spoon of yogurtHow to Let Baby Self Feed Purees
I love offering purees on a preloaded spoon. To do this, the parent, puts some of the food on the spoon and hands it to baby. Then baby can bring the food to their mouth all by themselves. This gives you some of the same advantages of baby led weaning, but can be more comfortable for many parents.
Remember, you can mix what you offer, going back and forth between purees and blw finger foods, so you can offer the same food two different ways to let baby explore.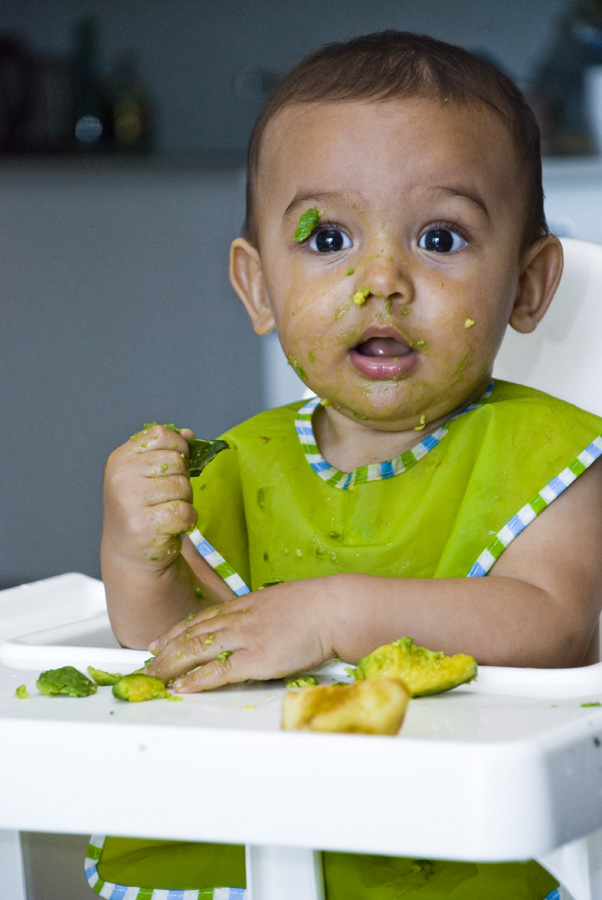 The main goal is to avoid forcing baby to take more bites than they want to, which can sometimes happen with purees.
When to Introduce Potentially Allergenic Foods
In recent years, guidelines have been updated on when to introduce potential allergens including peanuts, eggs, and shellfish, so unless you have a family history of a food allergy, you can go ahead and introduce them soon after baby starts eating solids. In fact, research is showing that introducing these foods early can actually protect baby from developing an allergy. Talk to your pediatrician if you have concerns.
TIP: Thin unsweetened peanut butter with water to form a very thin Peanut Butter Puree until it’s about the consistency of regular yogurt and offer a very small amount on a spoon or spread on a toast stick.
What does a baby led weaning meal look like for months 7 and 8?
Until a baby is closer to 9 months and is able to pick up smaller pieces of foods, but after they have gotten the hang of one food at a time, I try to offer 1-2 foods they can feed themselves and one puree.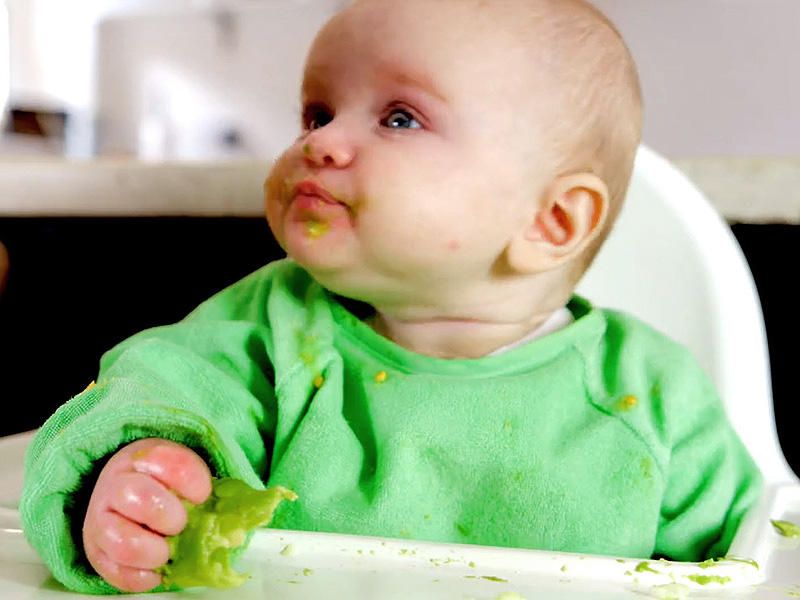 This offers them a chance to ingest more via the puree but still feed themselves a range of textures. You can do more or less food following the lead of the child.
TIP: My Baby Food Chart has loads of with ideas for blw foods and purees by month.
Recipes for Every Stage of Starting Solids
If you’re ready to start solids with baby, or you’re just curious what it looks like to do a mix of baby led weaning and purees, check out my Yummy Baby Food cookbook. It goes stage by stage with specific foods to start in each, with simple recipes and easy feeding tips.
Listen to a recent podcast episode to hear about some of the basics of BLW with our guest Megan McNamee, MPH, RDN, CLT, and a Registered Dietitian Nutritionist specializing in pediatric nutrition who runs Feeding Littles.
I’d love to hear any questions you have with BLW or if your baby had a first food that I didn’t list here. Please comment below to share your experience!
Prep Time 5 minutes
Total Time 5 minutes
Author Amy Palanjian
Cuisine American
Course Dinner
Calories 28kcal
Servings 1
Banana
- ▢ 1 small ripe banana with peel on
Roasted Sweet Potato
- ▢ 1 small sweet potato + 1 teaspoon olive oil
Roasted Apple
- ▢ 1 small apple + 1 teaspoon butter or neutral oil
Roasted Broccoli
- ▢ 1 cup broccoli florets + 1 teaspoon olive oil
Sauteed Green Beans
- ▢ 4 green beans 1 teaspoon olive oil
Melon
- ▢ 1 small piece watermelon or cantaloupe
Avocado Toast
- ▢ 1 slice whole grain bread
- ▢ 1 tbsp ripe avocado
Avocado Spear
- ▢ ⅛ ripe avocado
Lamb or Beef
- ▢ 1 lamb chop, roast, or steak
Pan-Seared Chicken Thighs
- ▢ 1 chicken thigh
- ▢ 1 tsp olive oil
- ▢ 1 garlic clove, optional
Banana with some of the peel still on
Cut a banana in half.
 Use a knife to gently cut around the peel about 2 inches down, leaving some of the peel on so that the banana is easy for baby to hold and less slippery.
Roasted Sweet Potato Wedges
Preheat oven to 400 degrees and line a rimmed baking sheet with foil. Wash and dry the sweet potato. (You don't need to peel it.) Cut in half, then cut lengthwise into strips. Cut each strip in half again until each is about 1/2-inch thick. Slice in half horizontally if the sweet potato is very long. (Each strip should be about the size of your finger.) Place into a bowl and toss with the olive oil. Spread onto prepared baking sheet and roast for 22-25 minutes or until soft. Let cool slightly and serve.
Roasted Apple Wedges
Roasted Broccoli Florets
Preheat the oven to 400 degrees F. Place the broccoli onto a rimmed baking sheet and toss with the olive oil, coating and mixing well until all of the florets are a little shiny and coated with oil.
 Roast for 15-18 minutes or until tender. Let cool slightly and serve.
Sauteed Green Beans
Warm the oil in a large skillet over medium heat. Add the green beans and stir. Cover and cook for about 8 minutes. Remove cover and taste one to see if it’s soft enough. Cook for an additional minute or two as needed.
Melon slices
Avocado Toast
Avocado Spears
(Make sure the avocado is ripe and soft): Cut a thick strip of avocado and offer to baby. You can leave the peel on if that makes it easier for baby to hold (just wash it first).
Lamb or Beef
Prepare a roast, steak, or chop without salt and with butter or olive oil until cooked medium well. Offer a thick slice at least the size of your finger or a drumstick.
Pan-Seared Chicken Thighs
Warm 1 tablespoon olive oil or butter in a large skillet over medium heat. Add the chicken thigh and top with a few slices of fresh garlic, if desired.
 Cover and cook for 4-5 minutes. Remove cover. Flip over and cook for an additional 4-5 minutes uncovered or until a meat thermometer registers 165 degrees F.
- Add spices like garlic powder, cinnamon, cumin, oregano, or any other non-spicy flavor you like to make these more interesting.
- Offer just one piece at a time when starting out.
- If baby gnaws a piece down into a smaller piece, replace it with a larger one to avoid her putting a chunk of food into her mouth.
- Store any leftovers in an airtight container in the fridge for 3-5 days. Reheat briefly if needed.
- Remember that it's normal for babies to take time to actually ingest the food. Part of the process is exploring all of the senses related to the experience of eating.
Calories: 28kcal, Carbohydrates: 2g, Protein: 1g, Fat: 2g, Saturated Fat: 1g, Polyunsaturated Fat: 1g, Monounsaturated Fat: 2g, Sodium: 6mg, Potassium: 75mg, Fiber: 1g, Sugar: 1g, Vitamin A: 23IU, Vitamin C: 2mg, Calcium: 2mg, Iron: 1mg
Tried this recipe?Rate in the comments and tag @yummytoddlerfood on IG!
Best Sippy Cups for Toddlers and Babies (Updated 2022)
Find the best sippy cups for babies and toddlers to ensure you buy one that works, lasts, and is easy to clean.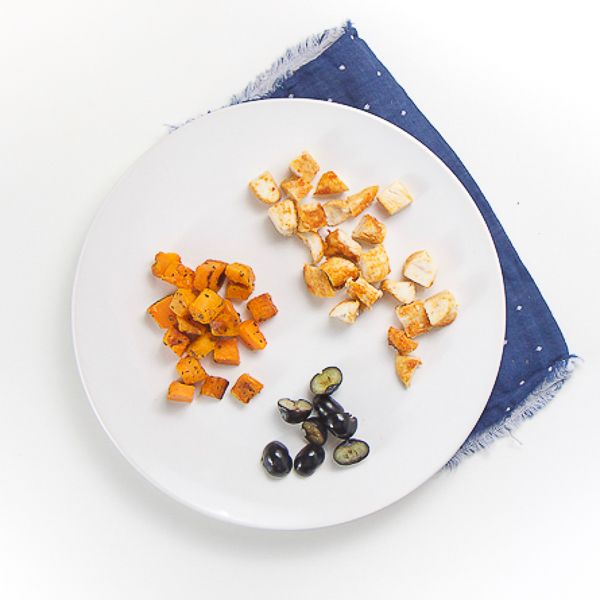 Here you’ll find reviews and recommendations on the best transition cups, sippy cups, stainless cups, straw cups, no-spill cups, and more.
Sippy Cups for Toddlers
Navigating the aisles of toddler and baby gear can feel super daunting and it often seems impossible to know which sippy cup is best to buy for our kids. There are just SO many options and they all claim to be the “best”!
To help, this list will go through the popular styles and materials, share my best picks, and give you reasons behind each choice. My goal is to help you waste less money with picks for cups that are durable, easy to clean, and easy for the kids to use.
How to Choose a Sippy Cup for Babies and Toddlers Step-by-Step
There are a few factors to consider when choosing a sippy cup for a baby or toddler, so I’m going to start with a quick look at factors involved in making this decision.
1. Decide on a material.The top options include stainless steel, glass, silicone, and BPA-free plastic as they hold up and don’t have concerns about releasing potentially harmful particles into the liquids within the cups (like some other plastics may do).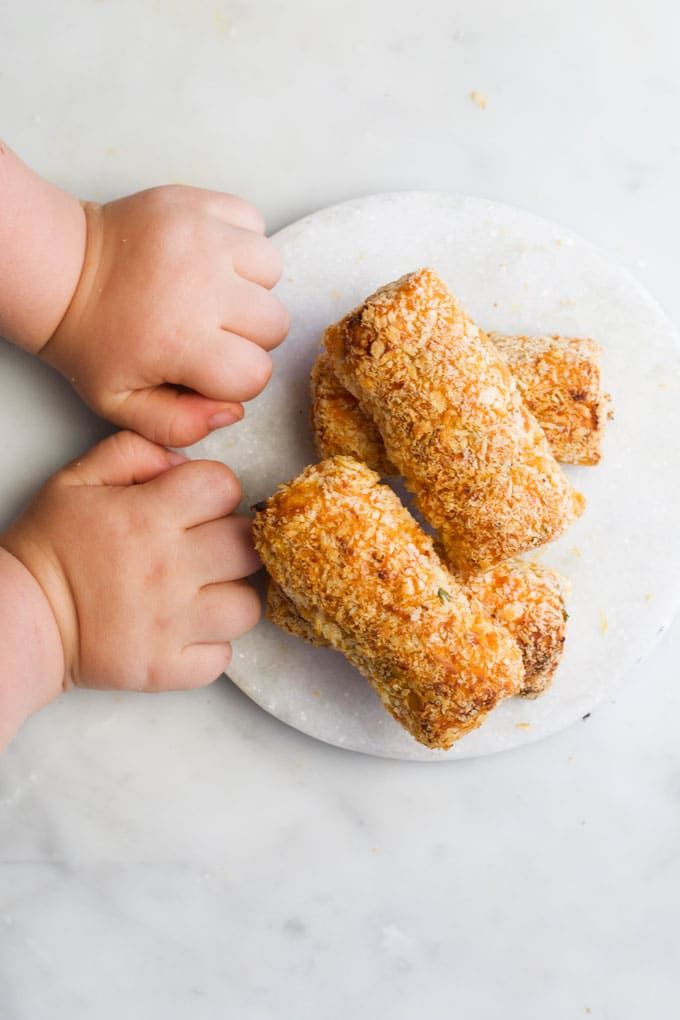 These also tend to be very durable.
Many feeding and speech therapists recommend open cups and straw cups, but open cups can be messier and harder to use on the go. Some straw cups are hard to clean. There are many options that take these challenges into consideration on the market now though. (Do not stress too much about this—there is no one right or perfect cup for kids!)
I personally like to use open cups and straw cups at home and insulated bottles for on the go.
3. Consider the longevity of the cup.Some of the stainless and glass cups are more expensive upfront, but they also tend to last for years. Chances are that unless you lose it, you’ll have a stainless or glass cup for the duration of your toddler’s childhood. We’ve had some of our cups for 9 years now and they still work just as well as they did when I first bought them.
This silicone cup is so well designed.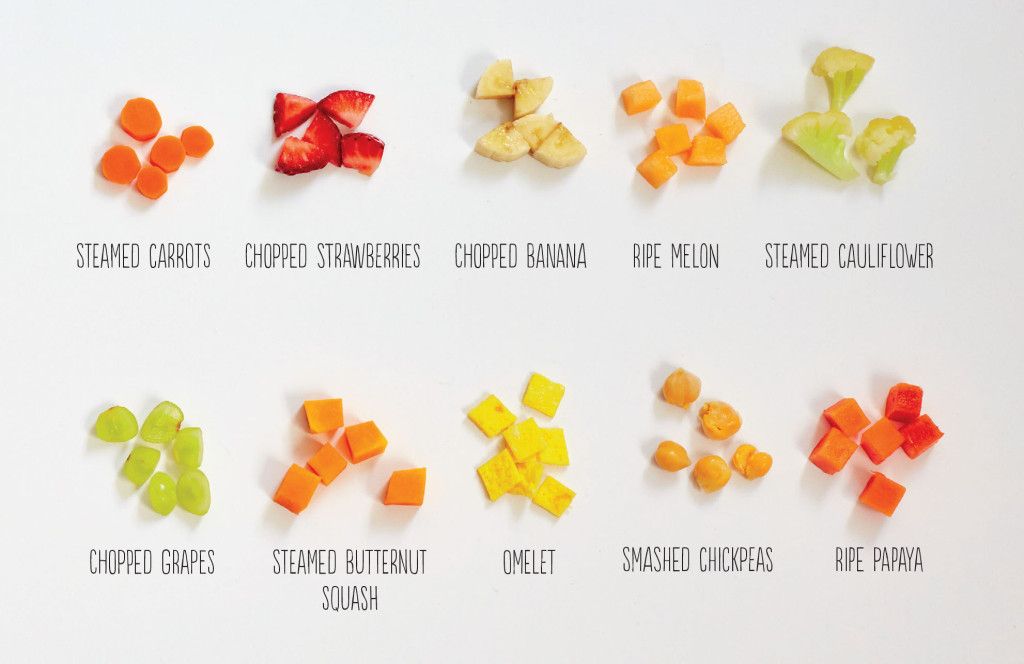 It’s an open cup, a sippy cup, and a straw cup all in one. It’s incredibly easy to clean and the kids cannot pull off the top. It is on the smaller side at 4 ounces, but it’s a great cup for milk or water—and comes in really lovely colors.
BUY IT: Lalo Little Cup, $10
We used these cups for 5 straight years through two kids. They hold up incredibly well, are great for storing leftover liquids in the fridge, and are made from glass, which eliminates any concerns about plastic. You can also use the bottles as storage containers once the kids outgrow them.
This sippy cap comes with a plastic insert, but we’ve always removed it for greater drinking success. (The company also makes a stainless bottle with a straw top that’s a good option as well.)
BUY IT: Lifefactory Glass Bottle and Soft Sippy Cap or Hard Cap, starting at $14.50
Have a kiddo just learning to drink from a sippy cup? Try this one! It’s easy to hold and easy to drink from and is the one I used with all three of my kids. It’s a great way to serve water to a baby just learning to use a cup. It’s also an appropriate size at 5 ounces, so it won’t be too heavy for a baby to drink from either.
There is also a great Nuk sippy cup option for a trainer and transition cup with a similar design that I like too.
TIP: You can start serving water with meals starting at 6 months, or whenever baby starts solids in consultation with your pediatrician.
BUY IT: Avent Trainer, $6.49
For many meals at home, we use open cups to let the kids practice their motor skills and also because we want them to eventually drink from a regular cup. Practice makes perfect! Ezpz has a new tiny cup designed to be easy for babies and toddlers to hold and drink from.
And at only 2 ounces, you don’t have to worry about too much being spilled and it’s super durable and lightweight. Add only a small amount of liquid to a baby or toddler’s cup to reduce the amount that can potentially spill.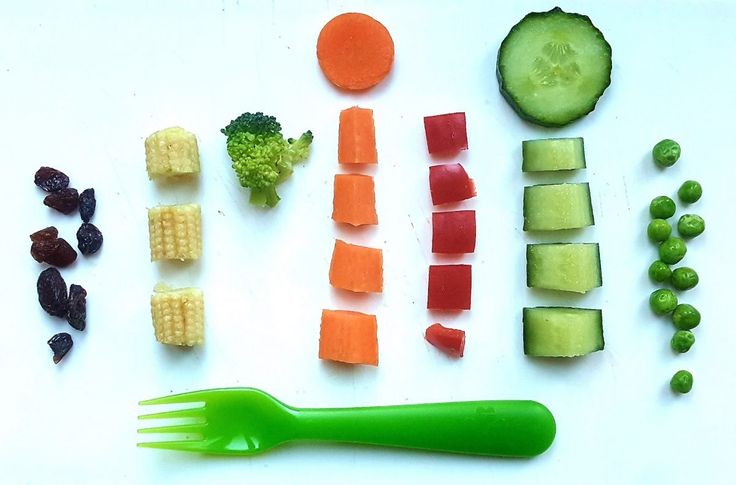 (They do have a straw cap and lid, but it is not remotely toddler-proof so I don’t recommend it.)
BUY IT: EZPZ Mini Cup, $11.99
We also like these Duralex glasses. which are incredibly durable and are juice glasses that the rest of the family can use too. And this stainless steel one that comes as part of a set from Kiddobloom.
Best Insulated Cup for Kids: Hydroflask
Last summer, I invested in these cups for my two youngest kids to use when we’re outside in the summer and they are totally awesome. They are easy to drink from, keep liquids cool, and are easy to clean. Do make sure to clean the straw often (as in take the straw off the base and clean it with the little brush it came with!).
We love this so much that we regularly use it around the house too.
This is an investment at one of the higher priced bottles, but as long as you can keep track of it, it should last for years. (I once drove across town to retrieve it when we left it at a playground…)
BUY IT: Kids Hydroflask 12 ounce bottle, $44
This spoutless sippy cup for toddlers is beloved by so (SO!) many parents.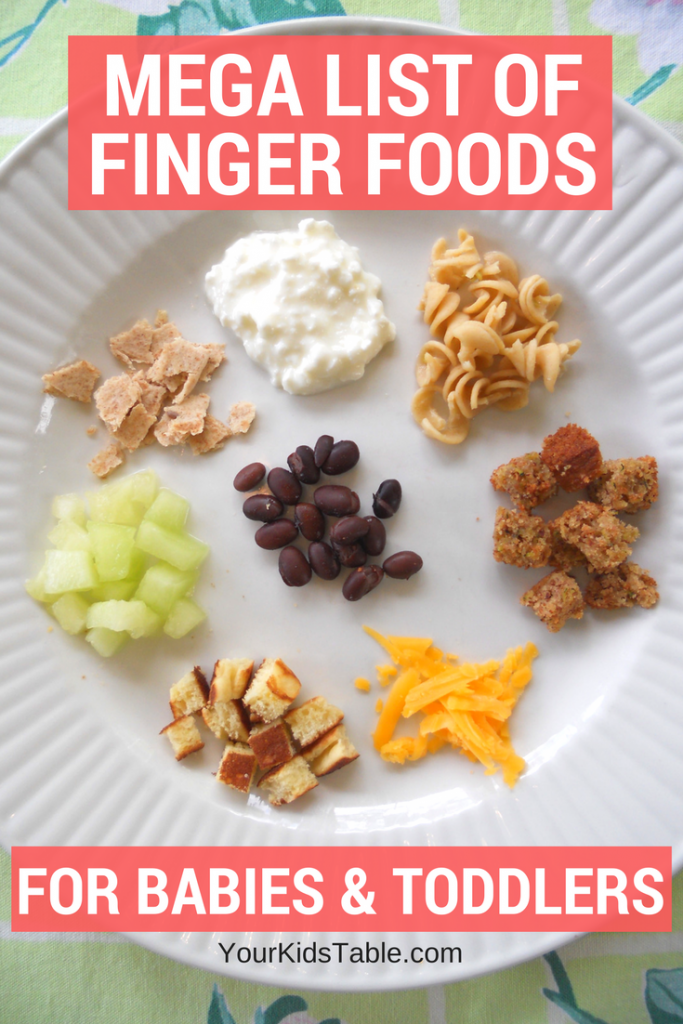 Kids can drink from anywhere around the rim, so it’s incredibly easy to use… once they figure out how it works. (Note: It can take some kids a loooong time to figure this cup out!) It also has a newer Straw Cap option.
They pretty leak-proof when they fall over too, which is always a plus. Be sure to take the two pieces of the lid apart when washing and drying to prevent mildew.
BUY IT: Munchkin 360, $14.75
(You may also like the Klean Kanteen 12-ounce Stainless Steel Bottle.)
Other than the straw cap that goes with the 360 Miracle Cup that I mention above and the Lalo cup, I also like these two weighted straw cups. They are easy for little ones—babies and younger toddlers included—to figure out how to use and as long as you’re diligent about cleaning the underside of the tops and replacing the straws regularly, they should last a while.
Straw cups are recommended by many speech and feeding therapists due to how it positions the child’s tongue, which is partly why these are so popular. These cups will not last nearly as long as stainless, glass, or silicone, and you will likely need to replace the straw at some point.
BUY IT: Lollacup, $15.95, or Munchkin Weighted Straw Cup, $5.64
These stainless cups are fitted with a silicone sleeve so they’re easy to hold (even when cold) and they’re bright and fun. They’re easy to clean, come in 8 ounce and 10 ounce sizes, and are very durable.
They come in a set of 4 cups with both air-tight lids for storage and straw lids. The straws even have a stopper (a little raised edge) on them to prevent the kids from being able to pull them out. Smart!
TIP: You could also use these without the lid as an open cup.
BUY IT: Elk and Friends Stainless Tumbler (10-ounces), $28.99
Frequently Asked Questions
What about the Pura Kikki Bottle?
In my experience, the sippy tops and the straws on the Pura Kikki Stainless kid’s water bottle are hard to clean and they need to be replaced fairly often. It’s farther down on my list for those reasons, though the stainless steel base of it is fantastic—and that you can get a flat top and use it as a storage container after the kids are done with it. And people love it!
What about a no-leak sippy cup?
Many parents love this no-leak cup from Replay Recycled, which is made from recycled plastic milk containers. Honestly, almost every cup we’ve tried leaks at least a little bit when turned upside down, so it’s a tough thing to promise. The Munchkin 360 cup is a good option too.
If you were going to buy just one cup, which one would be it?
It depends on the age of the child and where you’ll mainly be using it. For a baby and one year old for milk or water, the Lalo cup is great especially since you can use it as an open cup for years to come. I really love the Hydroflask as an all purpose water bottle that will last for years.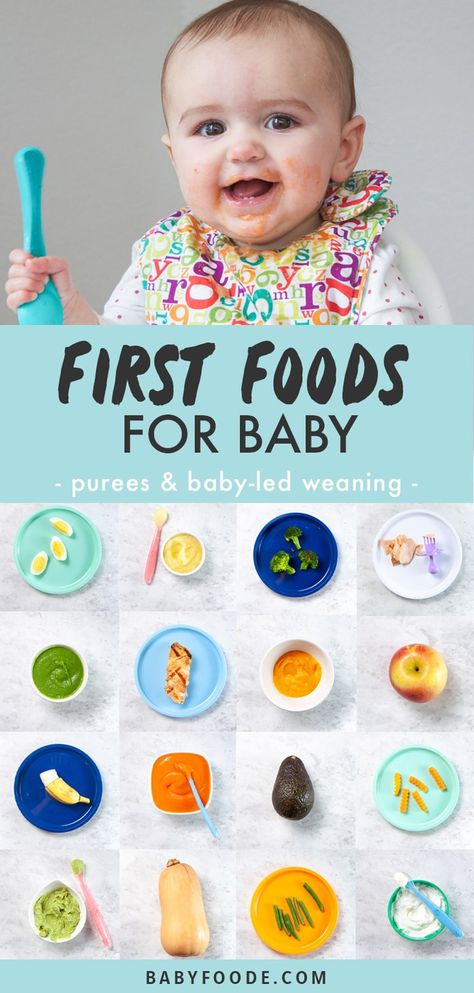
Do kids have to use an open cup? I keep seeing that and worry my kid is behind!
It can be helpful for kids to learn how to use open cups, but it does not need to be the only kind of cup you use. Nor do you have to stress about this happening immediately. This will happen eventually and I think there is far too much pressure on social media about this particular milestone.
Best Tips for Sippy Cups
- Think through which material you prefer and how long you’d like to use the cup.
- Think through where you’ll mostly be using the cup—at home, on the go or packed for daycare or preschool.
- Whichever cup you have, be sure to take it fully apart to wash and dry it to be sure to avoid mildew.
- Use the thin brushes that come with straw cups to clean thorough. Replace straws as needed.
- Add small amounts of liquids to open cups as kids learn to use them to limit spillage.
- Check out my kids water bottle picks.
- You may also like Best Kids Utensils, Best Snack Containers, Best Lunch Boxes, Favorite Suction Bowls, Top Highchairs, and Favorite Kids Plates.
I’d love to know what your favorite sippy cup is so please chime in below in the comments!
This post was first published January 2017.
Ten truths about weaning a child
Levchuk Victoria©Congratulations! The first six months are over. Now it's time to feed your baby. Many books have been written about weaning a child from the breast . However, nutrition for kids can be quite confusing and competitive, and yet another thing that makes the average mom feel a little cheesy and inadequate.
Contents:
What every mother needs is the pure truth about weaning a baby. This is the real truth! Here they are, ten truths about weaning a baby.
On excommunication1. The rule of six months is rarely observed
"When is the right time to wean my baby from my chest?" should be one of the most searched phrases on Google among parents, along with " why is my baby crying? " and others we won't mention, mostly dialed by moms when dads go to bed.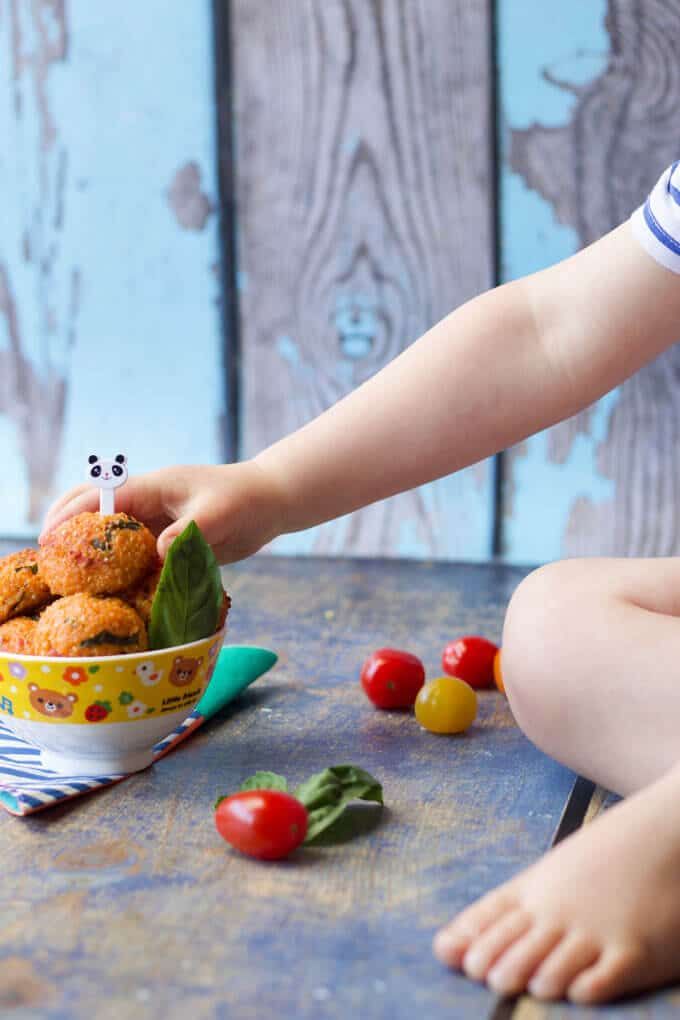 From observation of many mothers I know, the truth is that the right time to start the introduction of baby food is different for each child.
There are reasons why the Department of Health guidelines say that babies should not be weaned for up to six months. Studies have shown that breast milk or formula provides all the nutrients babies up to this age need, and children in studies had fewer gastrointestinal and respiratory infections. But it's a hotly debated topic, and many mothers begin introducing complementary foods before six months of age. Following the example of friends or Soviet pediatrics. There is also a persistent misconception that with artificial feeding it is worth starting complementary foods much earlier, from about 4 months.
But it turns out that the baby himself gives signals that he is ready for weaning. The classic example is stealing food from your mother's plate.
Seriously, before weaning, the mother needs to make sure that the baby sits well on the high chair and holds his head steady.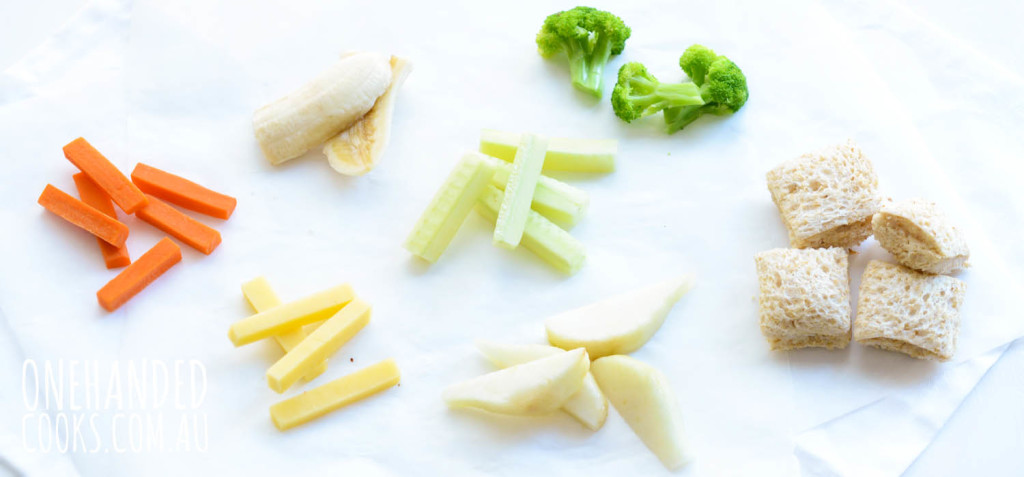 It is also worth paying attention to the reflex of pushing out the tongue, whether the child can swallow food; babies who can't will push food out every time, not just once in a while. The very minimum age for complementary foods should be 17 weeks (four months), because before that, the baby's digestive system is simply not ready.
Good foods to start complementary foods are mashed marrow, rice, steamed apples. As a rule, weaning foods begin with vegetables and cereals and are gradually introduced to fruits, fish and meat over several weeks, not days. Milk or formula remains a vital component of a baby's diet until at least one year old.
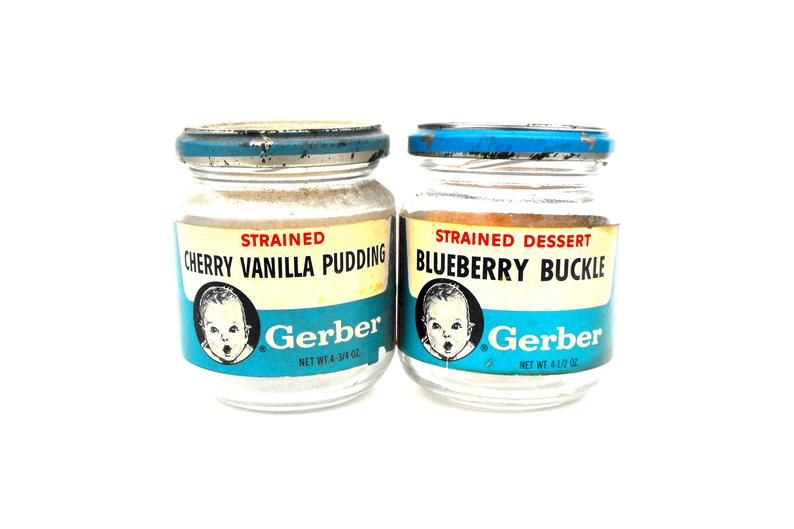
2. Ready-made baby food isn't so bad
The truth is that ready-made baby food is actually a good complementary food option, and the perfect lifesaver in a force majeure situation.
3. Self-weaning really works
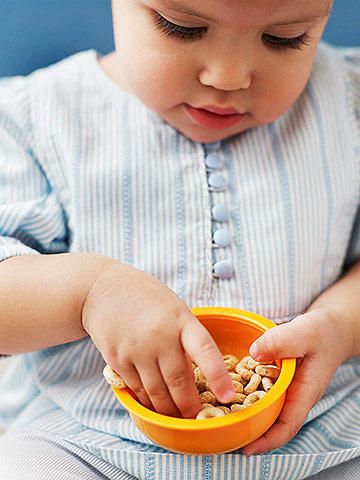
about weaning Child-guided weaning is the art of getting babies into solid foods by allowing them to explore, pick up, chew, and eat the right pieces of soft food they choose themselves instead of spoon-feeding mixed food. By self-selection, I don't mean that they will do it in a shop, in a supermarket. And I do not propose to give pieces of new food without control.
The idea is that self-weaning is intuitive feeding where the child learns food on their own and the parents provide healthy and safe food at the table. This method results in less fussy eating, a wider palette, a healthier weight, and aids in the development of hand-eye coordination and chewing.
Walk at the pace of the child, determine tastes and textures based on his preferences and the possibilities of already acquired experience.
4. If you don't like it, then you need to cook it differently
Who knows that pears go very well with broccoli or apricots with chicken? How about rice and cauliflower? Curd with garlic? We have certain food combinations in our heads, but kids are a blank slate who can try and enjoy all sorts of incredible food combinations. Therefore, I advise you to use cookbooks on baby food from different countries, because what is familiar to Russia is unfamiliar in Portugal.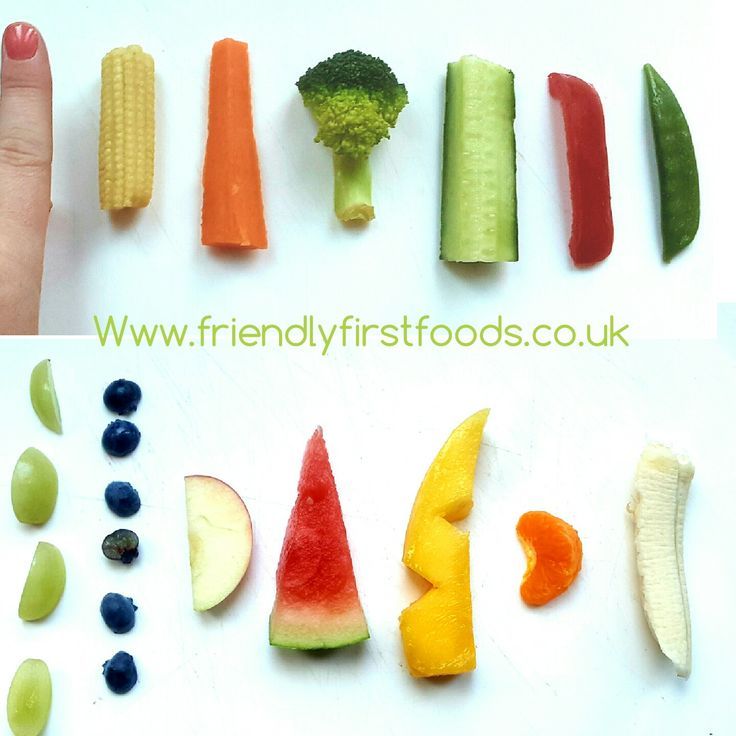
5. It's dirty and it stays dirty
We invest in things that can be washed quickly and easily. Washable bibs, washable high chairs (no small parts where food will get stuck for years), washable pets. Everything will be covered with liquid puree, even mom and her hair. If there is a carpet in the kitchen, then you should get rid of it. In summer, it is ideal to feed your child naked, with an oilcloth under the chair. A kitchen renovation to be done after 5 years of age.
6. French kids spit food
" French kids don't spit food " by Pamela Druckerman is a brilliant book about parenting. It's only worth buying for the food chapter. An American married to a British man and living in Paris, Druckerman notices that all the French children she knows eat well and have impeccable table manners, while American and British children are fussy and moody at meal times. She attributes this to a radically different cultural approach to food and the dining experience in general, from the weaning stage onwards.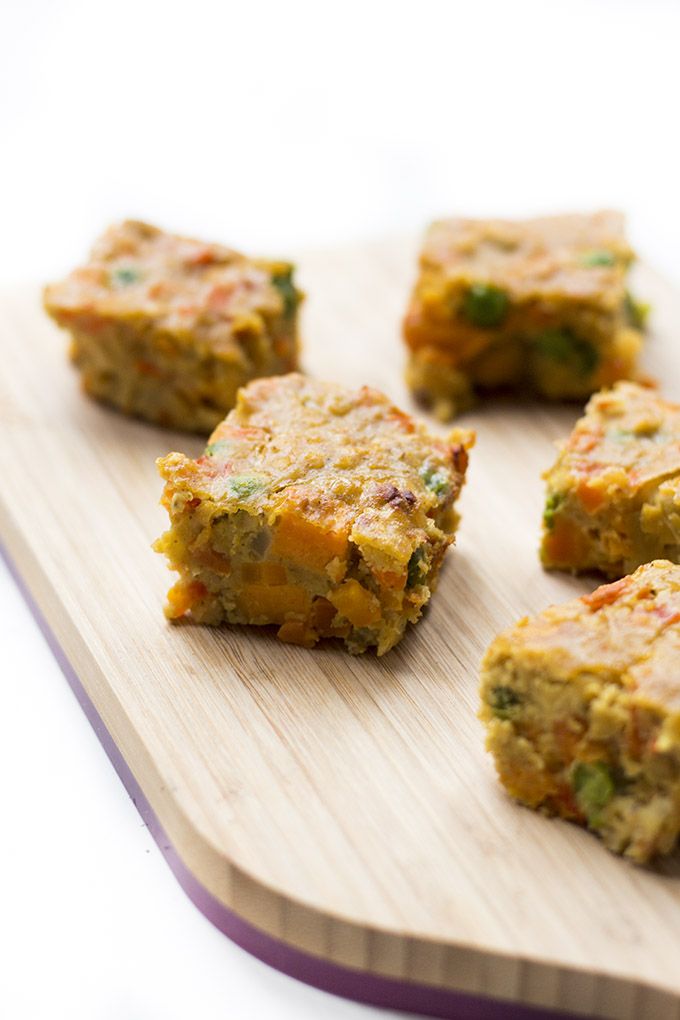 It's not true that French kids don't throw food, but it's true that they have a set of gourmet rules that we could learn from. One of them is the seventh truth...
7. The value of good habits
French children learn good eating habits from the very beginning. Meals are taken at regular and predictable times, over-snacking simply does not exist, and one meal can consist of three or more meals, often starting with a fruit/vegetable/salad dish, before meat or fish, and a small selection of cheese or yogurt afterwards.
Meal time is a special part of the day that is spent with friends and family and given time. Adults set an example for children. Rushing while eating Bad idea; what is saved in time now will be lost later in negotiations with children who will not sit at the table beautifully.
8. The freezer is your best friend
Babies eat tiny portions of food and sometimes they crave one tiny spoonful. The rest is best frozen for later use. I wrote about the remains of baby purees and where to use them here. You can buy special freezer containers, bags, etc., but even ice cube trays are fine for small quantities.
In this case, a lot of time and sanity is saved if at least some of the homemade dishes are in the freezer. If suddenly mom has a lot of time every day to cook fresh food, then it is better to put yourself on the bed and sleep. You need a break.
9. What they love today, they will hate tomorrow
As soon as mom is happy that he has eaten broccoli [insert product of choice], they will shut their mouths even at the slightest whiff of it. No tantrums (mother's) will change anything. This is what small children do.
10. The really important things to take seriously are…
- Milk should still be the main food for the baby during weaning. In addition, do not forget that other liquids will be required - we develop the habit of keeping water within reach.
- Never leave a child unattended when he is eating.
 It is important to know how to help a child who is choking - it is a good idea to study this topic before starting complementary foods.
 - There is a list of choking hazards and the risk of allergic reactions. I think it is worth studying, memorizing or printing. This is the case when a well-done home preparation will save a life.
- Please, I remind you to cut, cut, cut all food into small pieces. A large piece is the number one cause of choking in infants and young children. Therefore, even if there is confidence in the child and his skills, until the age of 5, food must be cut into at least 4 parts, depending on the size.
- We always check the temperature. Before serving food on the children's table, it is worth checking it for the optimal temperature for the child.
How to wean a child from breastfeeding? - Once Upon a Time
The topic of today's article excites almost every nursing mother. And this is no coincidence, because weaning a baby from the breast is a very responsible process. It is important to organize it so that it goes as gently and painlessly as possible for the baby. Erroneous actions of the mother can lead to a violation of the psychological comfort of the baby and even cause bad habits, such as sucking fingers or surrounding objects. Therefore, before starting this responsible event, it is better to immediately deal with the main issues.
When should I start weaning my baby?
Let's start with the fact that it is highly undesirable to stop breastfeeding a baby before the age of . For a child who is not yet a year old, mother's milk is the main source of nutrition (complementary foods at this time play a more familiar role), provides the child with the so-called passive immunity and contributes to the maturation of his own immune system, central nervous system and other organs. Breast milk contains substances that a child needs for active development and which are absent even in the best artificial mixtures.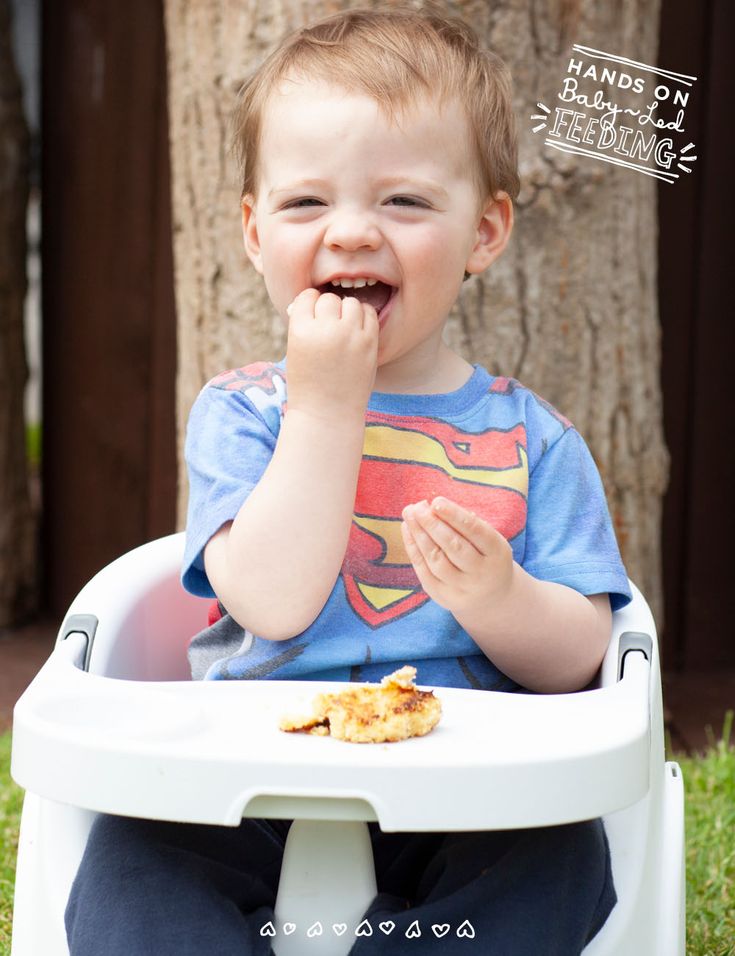 Of course, there are situations when you need to urgently stop feeding (for example, a mother’s illness that requires treatment with serious drugs), in other cases, you should try to keep breastfeeding up to a year.
Many psychologists consider the age from 1 to 2 years to be the most optimal period for weaning a child from the breast . At this age, feeding for a child becomes not so much a physiological need as a psychological one. The child is increasingly attached to the breast just to communicate with his mother, to be closer to her. However, if the mother can, in return for communication during feeding, provide the baby with more other types of joint pastime (games, conversations, hugs) and keep her role as a protector and comforter in the mind of the child, then weaning at this age will be painless for the baby.
Previously, it was believed that feeding up to a year is useful, and after a year it is harmful. It was as if the composition of breast milk changed overnight, and with it all the benefits of breastfeeding disappeared.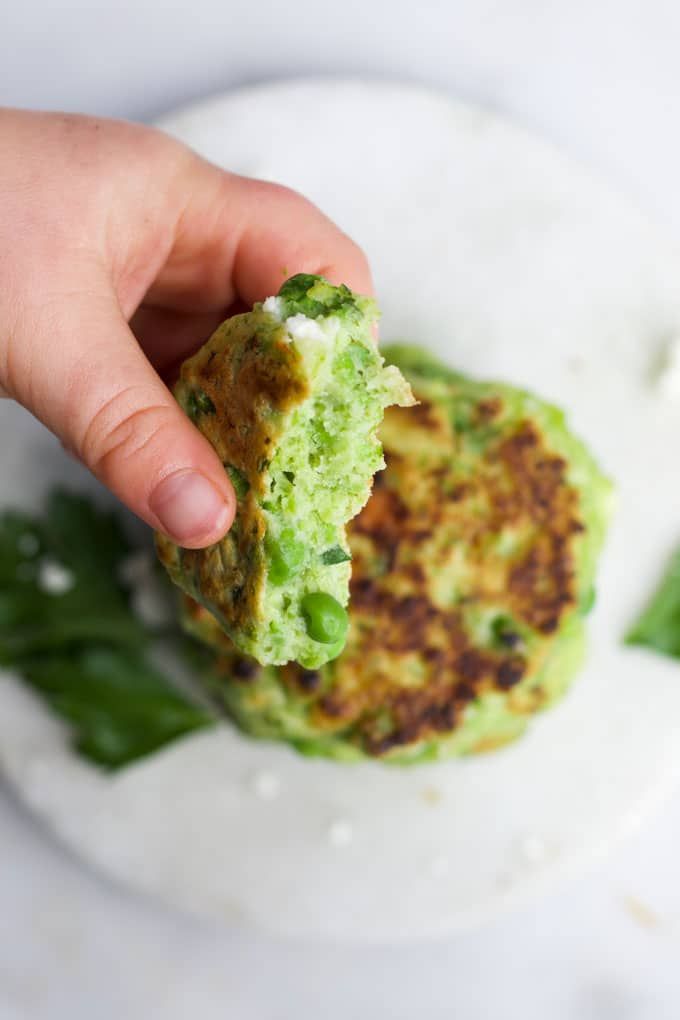 Sounds unconvincing. Do not listen to grandmothers and other advisers who urge you to stop feeding your baby as soon as possible. If you think your baby still needs to be breastfed, continue to breastfeed for as long as you need to. Each mother has the right to make her own decision, based on her beliefs and priorities, and paying attention to her own condition. The only thing you need to focus on is the physical and psychological state of the baby : how often does he get sick, how strongly he is attached to the breast, can he go without his mother for quite a long time, does he calmly skip daytime feedings.
What NOT to do while weaning?
-
One of the rather popular methods of weaning a baby from the breast is separation of mother and baby . In practice, this happens like this: the child is given to live with his grandmother for a week or two, after which it is assumed that the child will not even remember about the breast.
 This is a rather sharp and painful way for the child, since he simultaneously loses contact with both his mother's breasts and with his mother herself. In itself, weaning is a serious stress for the baby, during this period, the mother, on the contrary, must make up for such a significant loss for the child in every possible way: take the baby in her arms more, massage, hug him. In other words, the child must learn to receive psychological support and comfort from the mother not through the breast, but in a different, more “adult” way. If mom is not around, then this becomes impossible.
 -
It is highly undesirable to wean a child from breastfeeding, when he is ill or when serious changes are taking place in his life : admission to kindergarten, moving, mother going to work. Too many changes can be very difficult for the child's psyche. If you know that a change is coming in your baby's life, start weaning your baby a few months before or after the planned event.
-
Doctors usually suggest a "medical" way to stop breastfeeding. For this they assign hormonal drugs that reduce the production of the hormone prolactin, which is responsible for lactation. Here, firstly, you need to remember that such drugs have serious side effects: nausea, vomiting, headache, depression. Moreover, it happens that these drugs have a prolonged effect and complicate lactation already with the next child. And, secondly, if you do not reduce the number of attachments of the baby to the breast at the same time as taking the drug, the medicine will not work effectively enough, so the introduction of hormonal drugs does not cancel other methods of weaning.
-
It is also worth avoiding the once-popular method of pulling the chest . It has now been established that this method is not only ineffective, but also very dangerous! Pulling in itself does not contribute to a decrease in the amount of milk, it only causes a violation of blood circulation in the tissues of the mammary gland.
 As a result, the ducts are clogged with milk clots and stagnation is formed. It is as a result of breast tightening that the largest percentage of lactostasis and mastitis occurs.
 -
It is also believed that it is not necessary to wean a child from breastfeeding in the summer season . This is due to the fact that in summer the baby is more susceptible to various infections during his research in the sandbox and other outdoor games, in addition, a lot of fresh vegetables and fruits appear in the baby’s diet, all this increases the likelihood of gastrointestinal disorders. Therefore, in summer, more than ever, a child needs strong immunity, which he receives thanks to breast milk. However, it is worth noting that if weaning occurs after two years, the season does not play a big role.
How to safely wean a child from breastfeeding?
So, in order for weaning to pass with a minimal negative impact on the psyche and health of the child, in order to avoid lactostasis in the mother, the “soft” method is best suited, based on a gradual reduction in the number of attachments of the baby to the breast.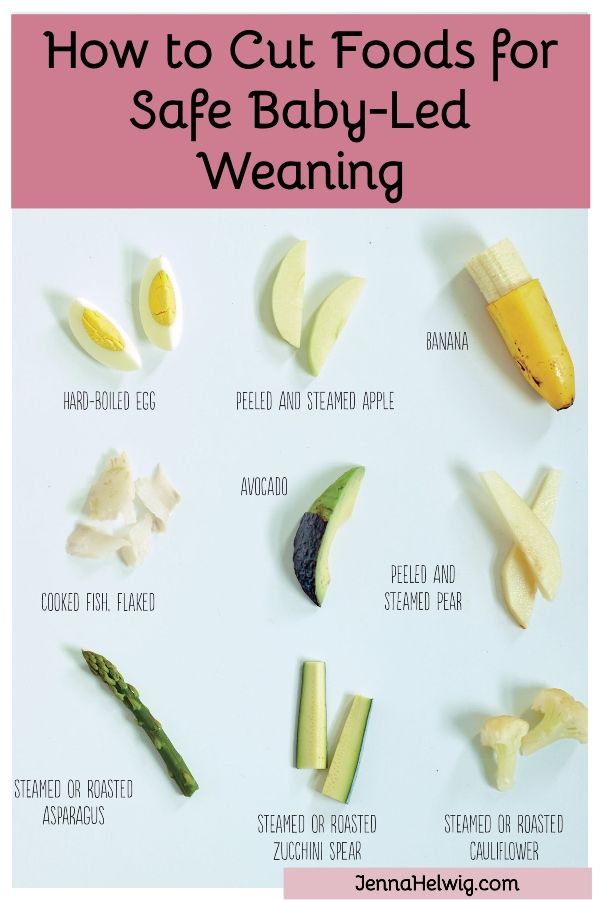 This process is not fast, but the most natural. It can be divided into several stages:
1. Gradually reduce and then cancel all attachments of the baby to the breast during the daytime (we leave only feeding before bedtime and at night)
To do this, minimize all situations that remind the baby of feeding: walk and play more, do not change in front of the baby, do not walk in underwear, avoid zip-up clothing, maintain a lot of physical contact without feeding - hugging, massaging, wearing on hands. If the child wants to kiss the breast, it is better to pretend that the mother did not notice or understand this. You need to try to distract the child with something: offer some kind of game, an interesting book or the baby’s favorite food (cookies, fruits, etc.)
2. Getting used to going to bed without breastfeeding
Perhaps this is the most difficult moment. Although children, of course, are different, some even with the presence of a breast calmly fit in motion sickness, while others refuse to recognize anything other than the breast.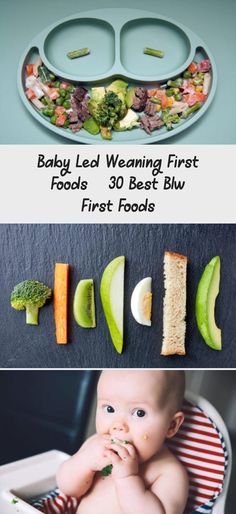
What can be offered to a baby instead of breast before bed? First, before going to bed, there should be a clear and unchanging ritual, for example, washing, reading books, a song (Read more about the ritual in the article "How to put a child to sleep without tears"). Well, then, until the baby falls asleep, you can stroke his back, tell rhymes, rock the baby, sing songs, do a massage. A bottle of diluted juice or tea will also come to the rescue. Well, and most importantly, you need to be patient, because in the first days the baby is likely to be worried and, perhaps, the laying process will be longer than before.
The most important thing in this difficult period is to be with the baby all the time and support him, in every possible way to compensate for the absence of a breast with other bodily contact.
3. Gradually reduce nighttime applications
To begin with, try to take the breast from the baby if he, after eating, quietly sucks it in his sleep and does not wake up from trying to take it.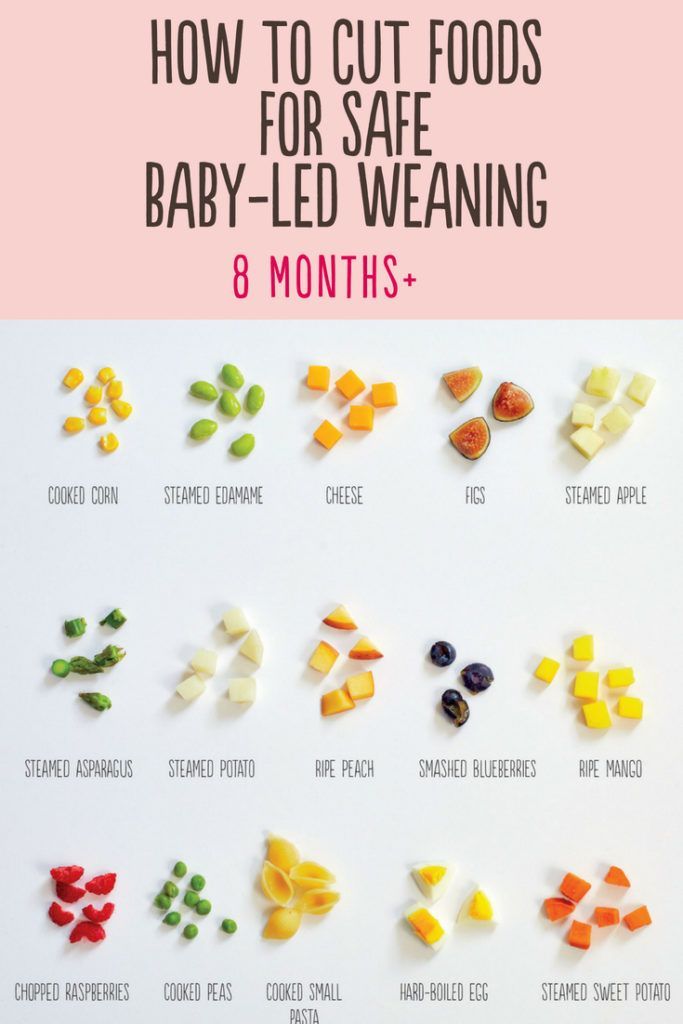 Try sometimes to replace the breast with another drink or just shake or stroke the baby when he wakes up. Since you won't be breastfeeding your baby before bed, he'll be less likely to wake up at night later on.
It is possible that the second and third stages of weaning will have to be combined. Especially if you go to the trick and explain to the baby that something is wrong with the breast. The most common examples of tricks are to smear the breast with brilliant green or stick it with a band-aid , present it to the baby and say that the milk has gone bad. As a rule, children after 1.5 years are imbued and refuse to take “breast with spoiled milk” themselves, for younger children such tricks may seem unconvincing.
Mom also needs to pay attention to her well-being. If you feel your breasts are full, express milk (by hand or with a breast pump). But always remember that you need to express only until you feel relieved, if you try to empty your chest to the last drop, this, on the contrary, will stimulate the production of new milk.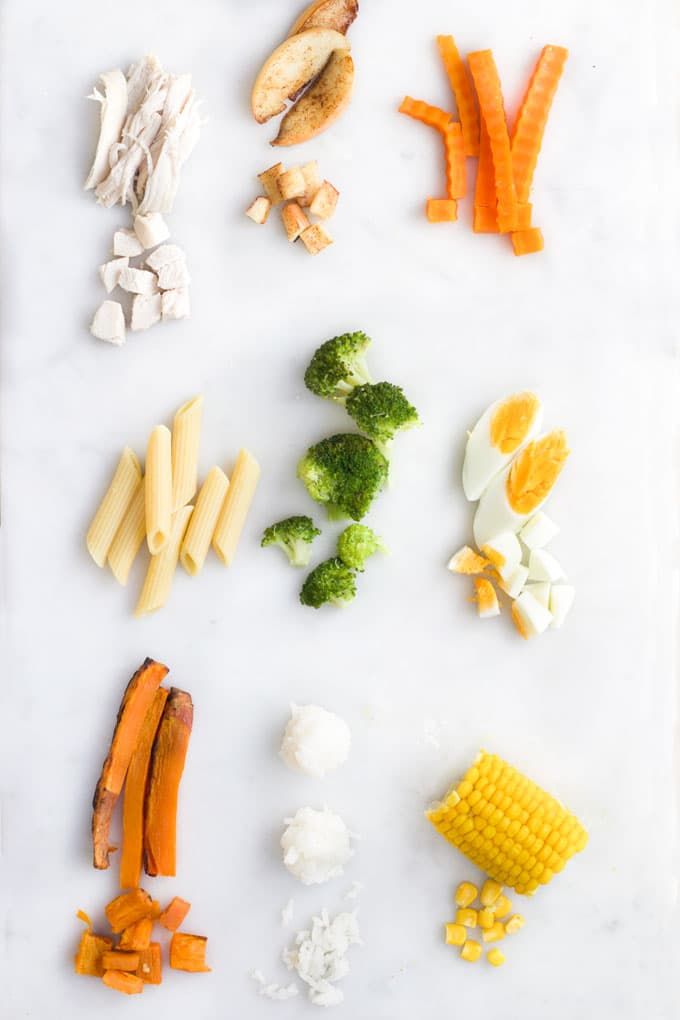 By expressing less and less milk, you let the body know that so much milk is no longer required, and the body slowly begins to adjust, reducing lactation.
Also, if there are no contraindications, you can drink herbal infusions. To reduce lactation, sage and mint help very well.
Our experience of weaning
I weaned Taisia at 1 year 2 months. By this time, she was already quite calmly doing without daytime feedings (with the exception of feeding before midnight). We actively spent our days, played a lot and walked together, ate complementary foods 3 times a day (+ cookies, apples), so during the day she didn’t even remember about her breasts. But we couldn’t manage to go to bed without breast sucking, and at night she generally “hung” on her chest almost all the time. As soon as the breast was taken away from her, she immediately woke up and demanded the continuation of the “banquet”. This whole situation was very exhausting for me, from an uncomfortable motionless posture in a dream in a constant mode, my neck began to hurt a lot. Then I decided to try to give up the remaining feedings.
So, one fine day, before going to bed, I told my daughter that her milk had run out. Although I offered her juice, massage, songs, rocking in return, she still demanded her own. I tried to outsmart my daughter by sticking a band-aid over my chest, but even this did not seem very convincing to her (apparently, she was still too small for such tricks). In general, the first day was quite difficult, both during the day and in the evening, she could not fall asleep for a long time and even cried a little. All this time, I did not leave her for a minute and convinced myself that I had to endure a couple more days. And on the second day, the process went much easier. Well, on the fourth day, she didn’t even remember her breasts at all!
Unfortunately, I did not manage to separate the second stage from the third one, I had to immediately remove both “pre-sleep” and night feedings. Well, at first I couldn’t convince Taisiya that the milk in the tita was over, and at night again put it on my chest.