How to vacuum seal baby food jars
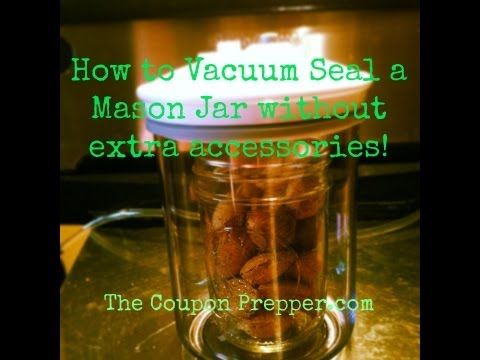
How to Vacuum Seal in Glass Mason Jars with a Foodsaver
I try to go with reusable over disposables options as much as I can with the exception of my freezer. After trying and failing - often spectacularly! - every method I could think of to stop freezer burn, I finally gave in and bought this Foodsaver vacuum sealer. The Foodsaver quickly paid for itself in the amount of food I didn’t have to toss or try to salvage due to freezer burn or spoilage. In fact, I like and rely on it so much I have no problem recommend it to you (and using my affiliate link) as a way to keep frozen and dry good fresh. (Disclosure: I am including affiliate links in this post for your convenience.)
Yes, I said dry goods. You can vacuum seal grains, spices, coffee, and such in mason and recycled glass jars you might already have at home. I particularly like to vacuum seal the garden vegetables and herbs I dry in my dehydrator (this is the exact dehydrator I have and I love it!) to keep the flavor from expiring until I remember I have them in the back of my cupboard.
Yes, I tried sucking the air out of the bag with a straw. It didn't work.
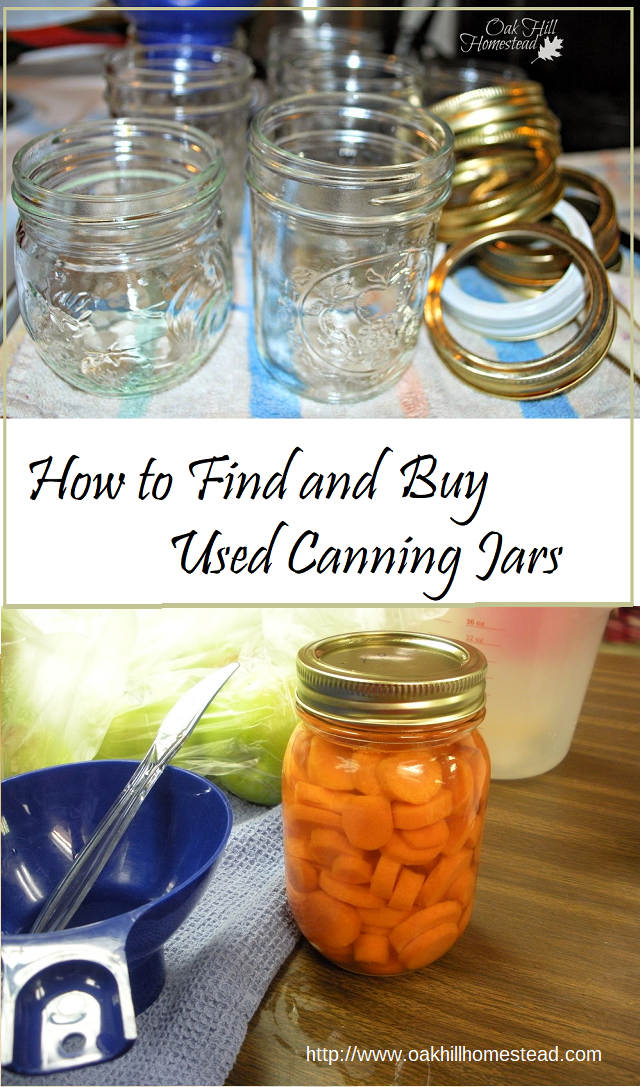
Mason jars are easy to vacuum seal but you will need to buy a Foodsaver wide mouth or regular mouth mason jar attachment here. You will also need a mason jar and metal lid. You don’t need a mason jar canning ring but I usually screw it onto my jars after I seal them to hold a paper jar label in place. Without jar labels I would be lost.
It’s super easy to seal a mason jar with a Foodsaver:
1. Put the food item in the mason jar. You may want to cover find powders and grains with a clean coffee filter or piece of paper towel to keep the vacuum hose from clogging.
2. Put the metal lid on the jar without the metal canning ring.
3. Attach the mason jar attachment to the hose on your Foodsaver.
4. Put the jar sealer firmly over the top of the mason jar.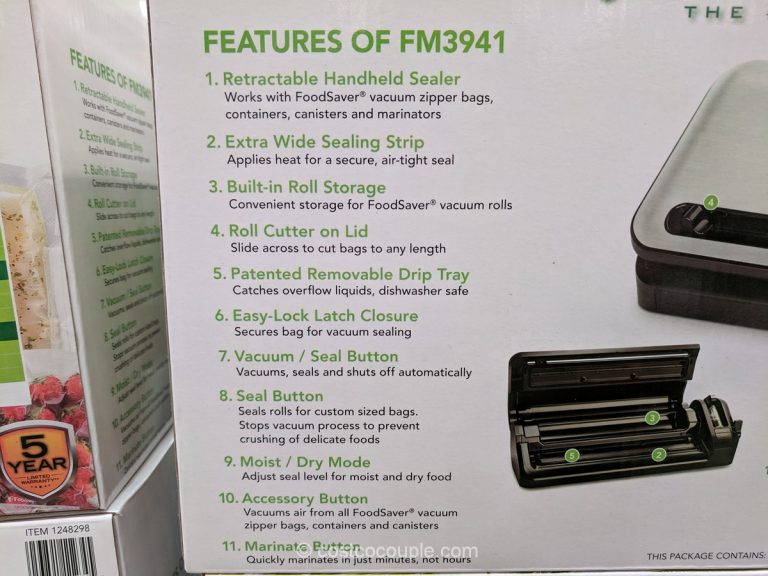
Pin this post to your Pinterest boards for later and to share it with your friends!
5. Press the locking lever on the side of the Foodsaver.
6. Press the Canister button on the Foodsaver. It will automatically shut off when the jar is completely sealed.
That’s it!
If your mason jar didn’t seal the first time, here’s a quick troubleshooting guide
1. Check to see if the rubber gasket inside the jar sealer attachment is flat or bend. Remove the gasket, fluff it wit your fingers and try again.
Sometimes this guy folds or bends when you are putting on top of your jars
2. You may have too much empty space inside your glass jar. Either pour the contents into a smaller mason jar or you can add a clean paper towel to the jar to fill the large head space.
3. Check to see if the lid is correctly lined up on the top of the jar.
4. There might be a small bend in the metal jar lid. Put a second metal canning lid on top of the first canning lid and try vacuuming sealing the jar again.
If you don't have extra lids you can buy metal Mason jar canning lids here
5. The jar sealer attachment may not be firmly seated on the jar before you tried vacuum sealing.
You can also vacuum seal your own empty glass jars for food storage as long as you have the original undamaged lid for the repurposed jar and one Foodsaver canister like this one.
How to Vacuum Seal a glass jar with a Foodsaver:
1. Put your food items in the empty glass jar and screw the metal lid onto the jar.
2. Put the glass jar inside the appropriate size Food Saver vacuum consider and attach the lid.
3. Attach the vacuum sealer hose to the canister and Foodsaver port.
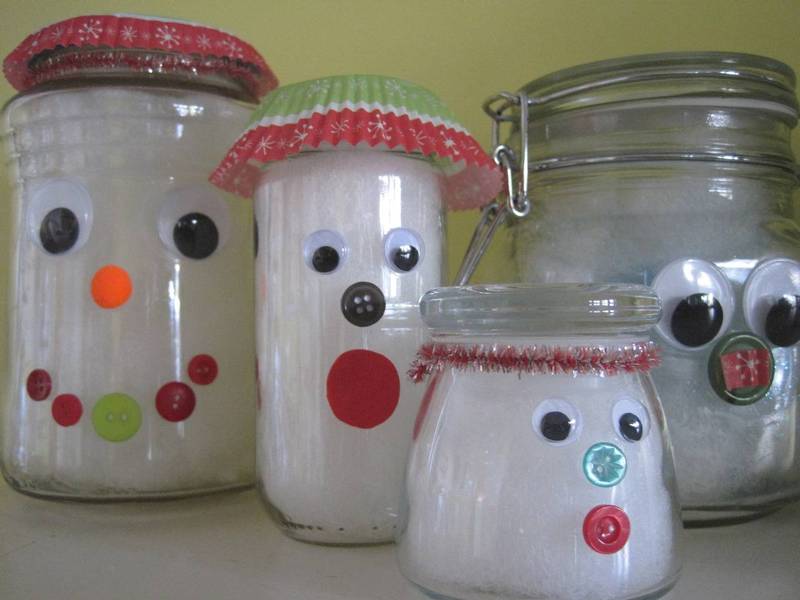
Recycled food storage!
4. Press the locking lever on the side of the Foodsaver.
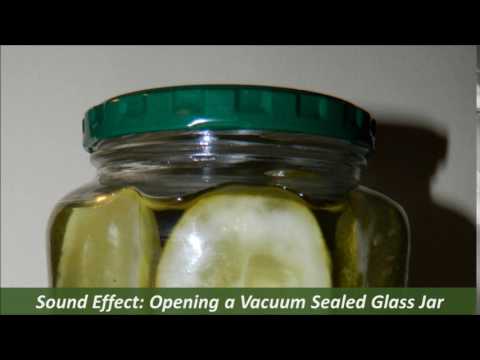
5. Press the Canister button on the Foodsaver. It will automatically shut off when the jar seals with a pop!
If you want more low waste vacuum sealing and food storage ideas check out the options - and more! - below!
Did you like this post? Get more like it by subscribing to the Lazy Budget Chef RSS feed or by subscribing to Lazy Budget Chef by email.
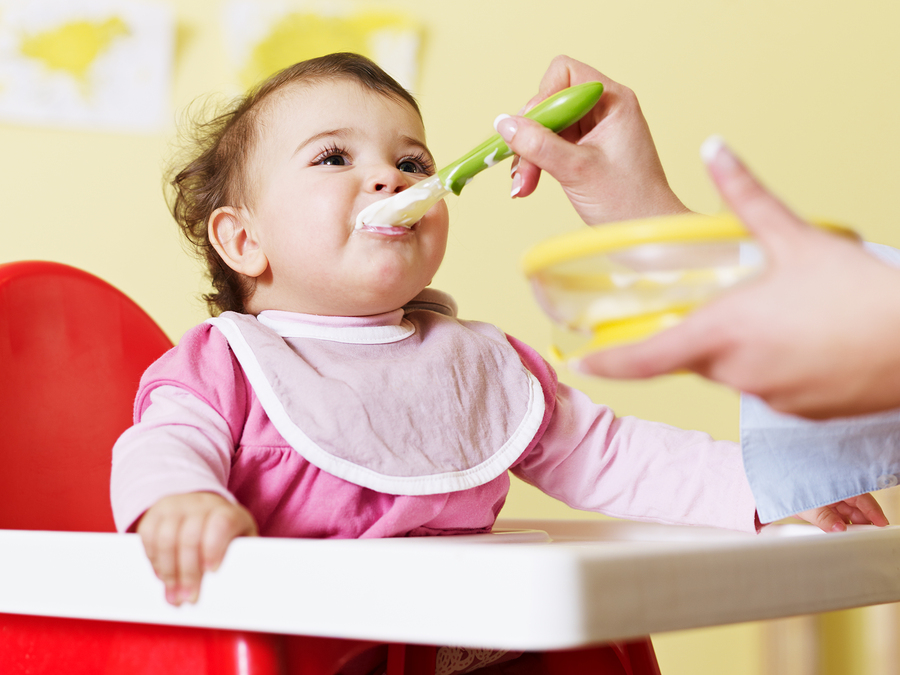
How To Store Homemade Baby Food?
I love to make my own baby food for our 18 months old. I don’t own any orchard, not even a vegetable garden.
But I do have my favorite fresh grocer I go to where I can buy fruits and vegetables by bulk and enjoy a good discount.
I allot one good day to make an assortment of baby food using this fresh produce.
In the long run, this method saves us money and best of all; I am sure that our baby gets the healthiest and safest baby food there is.
Table of Contents
- Why do you need to preserve your homemade baby food in the refrigerator?
- Here are a few tips when preparing baby food:
- What are the best methods to store homemade baby food in the refrigerator?
- Method 1: Use Baby Food Storage Containers
- Advantages:
- Disadvantages
- MY TIPS:
- Method 2: Use Ice Cubes Trays
- Advantages:
- Disadvantages:
- MY TIPS:
- Method 3: Use Ziploc Storage Bags
- Advantages:
- Disadvantages
- MY TIPS:
- Method 1: Use Baby Food Storage Containers
- Why mothers need a food vacuum sealer?
- Below are the practical benefits of food vacuum sealer machine:
When I buy bulk fresh produce, I have to make baby food out of them before they rot. So I boil, broil and puree it. Although after this process the food is already cooked, it is still prone to getting spoiled if just left on the countertop.
So where do you store it? In the refrigerator, of course. Specifically in the freezer area. Or if you have a stand-alone freezer, it will do a better job:
- Since the inside of the refrigerator is cold, it slows down the decomposition of the food;
- The temperature also slows down molds and fungi that rot food;
- Storing it in the ref also keeps it away from bugs, insects and pests.
Avoid using salt and sugar. Use spices instead, like cinnamon. Babies as young as 7 months old are safe to consume that, but it is best to get your pediatrician’s go signal. Some babies may have allergies;
Use fruits or vegetables that the rest of the family is eating. For example, if the older kids and adults are having potato salad, let baby have his own potato – but mashed instead;
If I have a lot of one kind of fruit, I peel, clean and cook all of them but I only puree half.
 The rest I still store in the refrigerator but not pureed yet.
The fruits and vegetables have been clean, cooked and pureed. You are ready to put it in the refrigerator for storage. But what containers do you use? Let us see the different options:
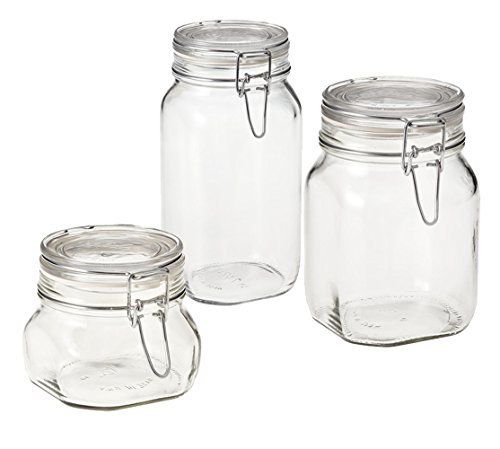
Method 1: Use Baby Food Storage ContainersThere are two kinds of food storage containers that may be used for your baby food. One is made from glass, and the other is plastic.
Glass jars are easily available. After cooking and pureeing your baby food, you can spoon it into the jar. The usual size is 4 oz.
The other kind, made of plastic, is similar to use, except that is made of high-grade plastic meant for freezer, and can even be used to re-heat baby food in the microwave.
Advantages:- You can store the baby food good for one serving only;
- From the freezer, it can be conveniently heated by placing in a bowl of hot water, or in the microwave for the plastic containers;
- Glass protects the food from being contaminated by other smells and flavors inside the refrigerator or freezer.

- Some jars are not meant for freezer use. It might crack or burst, and small bits may be in your baby food without you knowing;
- Jars take up so much space in the refrigerator / freezer. Even more do plastic containers as they are usually bigger than jars at 6 oz. smallest size;
- Plastic containers absorb the smell and color of the food it contains.
- Check your jars when you purchase and verify if it is labeled safe for freezing. There is a specific well-known brand of jars that has 4 oz. sizes fit for baby food. This famous brand’s glass containers are fit for freezer use;
- Old baby food jars used for commercial baby foods are not safe for freezing either so don’t recycle it;
- Don’t refrigerate the jars while the contents are still hot. It has to cool down first at room temperature.
 As soon as it is not hot, refrigerate or freeze. Don’t let it stay in room temperature for too long.
Puree the baby food in a Ninja blender. Pour it into an ice cube tray. Cover the tray with a cling wrap or use branded trays that come with lids. Don’t use foil as it easily breaks and may get mixed with the baby food.
Put the ice cube tray into the freezer. Once frozen, remove the baby food cubes and transfer into freezer bags. Label contents and date of preparation. Then you put in the freezer for longer storage.
Advantages:- The baby food come in small cubes, which is approximately 1 ounce;
- No food wasted because of this small size portioning;
- It is a two-step process that can take some time;
- It also requires more materials – ice tray, freezer bags.
Don’t put too many ice cubes in one freezer bag.
 4-6 is a good number. If there’s too many, you will be removing the bag from the freezer more often. Constant change in temperature is not advisable for frozen food. It is prone to spoil;
Just get enough cubes that your child can finish. Half-finished baby food is not to be re-frozen at all. To heat, place in a microwavable container and warm it.
After making baby food puree, spoon it directly into Ziploc storage bags. Let it cool down if it is hot. After which, put in the freezer.
Advantages:- It will not occupy so much space in the freezer or refrigerator compared to the jars.
- Since it was frozen in a lump form, and while still soft, much of the baby food will stick to the plastic;
- Baby food will be wasted as it would be difficult to remove from the plastic;
- Ziploc storage bags come in sizes: quarts, gallon and 2 gallons.
 The quart size would still be a big serving to consume in just one sitting;
 - If you don’t completely fill the quart bag, it would be too much waste of a bag;
- Ziploc storage bags are not freezer friendly. Ziploc specifically has freezer bags.
Freezer bags are made of thicker material than storage bags. Instead of getting storage bags, get freezer bags instead. The best part that freezer bags come in pint size, which is smaller than the smallest size of storage bags. I recommend buying high quality bags from reputable brands like Foodsaver.
- To heat it, place in bowl of hot water.
For easier dispersal of the baby food in the bag, instead of opening the zipper and spooning it out, I cut a small hole on the bottom and squeeze out the baby food.
The best possible method of storing baby food is method no 2 – freezing it in ice cube trays and then transferring the frozen baby food into bags. However, for best results, instead of just freezing the bags as is, we are going to vacuum seal it.
- Baby food is protected from spoilage because of the airtight vacuum seal;
- The freshness and the nutrients of the baby food are locked in;
- It will also prevent freezer burn from settling on your baby food;
- Removing the oxygen from the plastic bag will preserve it for a longer time because bacteria cannot thrive in an oxygen-free environment;
- Vacuum sealed bags also are smaller than regular packages so that you can save more space in the refrigerator.
You have saved money because of bulk buying the fruits and vegetables. In making your own baby food, you ensure that your baby gets top quality, nutritious and safe food.
When you vacuum-seal it before storage, you seal in the goodness and preserve the food up to five times more.
It also makes it easy for you just to grab a prepared food when your baby is hungry, and if you need to travel. Those are the great benefits when you own best foodsaver vacuum sealers.
Besides ensuring the quality of food for the baby, we also need to find out and choose the best items for our baby to have fun and go to bed every day. Refer to one of the best items at Baby Kid Center
Related posts:
- FREEZER BURN: All You Need to Know
- 7 Best Ways To Vacuum Seal Liquids
Jar Food Tips
Cooking Jar Meals
- Set aside as much as your baby can eat and heat this portion in a bain-marie or microwave.
- After heating, mix the contents of the jar thoroughly with a plastic spoon and check the temperature.
- Reheated food is not suitable for consumption.
- Store leftover puree that has not been reheated in the refrigerator for up to 24 hours.
Check glass packaging
Check glass packaging
Before jars leave production, packaging is checked for flawlessness. This ensures that only correctly closed products are sold. To ensure that your child's nutrition is safe, the safety of the packaging should be checked upon purchase and immediately before opening.
For jars, the so-called “lid test” will help you: the middle of the lid should be concave and should not sag when pressed. Do not use jars with domed lids. Additionally, a distinct click should be heard when first opened.
Introduction of low-allergenic complementary foods for children
To introduce low-allergenic complementary foods for children from the HiPP range, you can refer to this symbol on the label. With these products, you can gradually expand your child's diet.
Tip: HiPP meat dishes can be used to create individual set menus. To do this, simply mix the HiPP vegetables of your choice with a jar of mashed meat.
Learn more: Tips
Video: Introducing Complementary Feeding Tips from a Midwife Video: Massaging Your Baby DietFood and Drinks
How to Introduce Complementary Foods to Your Baby? ?Fish is also good for baby's health?What is Omega-3?Is your baby drinking enough?What and how much should babies and young children drink?Drinking from a cup
0019
Choice of complementary foods
No age restrictions from the first daysfrom 1st monthfrom 4 monthsfrom 5 monthsfrom 6 monthsfrom 7 monthsfrom 8 monthsfrom 9 monthsfrom 10 monthsfrom 12 months puree from 4 months - Vegetable puree from 5 months - Vegetable puree from 6 months - Vegetable puree from 7 months - Vegetable puree from 8 months Fruit puree - from 4 months - from 5 months months - from 6 monthsMeat purees - Meat pureesMeat and vegetable menu - from 8 months - from 12 monthsFish and vegetable menu - from 9Soups - from 6 months - from 7 months - from 8 months - from 12 months - From 18 months "Good night" in jars - Cereal cereals with fruits in jarsDrinks - Health drinks - Granulated teas - Tea bags - JuicesCookies - Cookies
Manual guide for vacuum packaging products
I.
 Who is this guide for
 Vacuum packaging increases the shelf life of products by an average of 3 times. However, vacuum packaging is not only about storage. With it, you can discover the Sous Vide cooking method.
Sous vide or sous vide is a culinary technique in which food is cooked in a vacuum at precisely controlled low temperatures for a well-defined time. Thanks to the sous vide, it is almost impossible to undercook or overcook anything. Meals are healthy because low temperatures do not destroy proteins, fibers and vitamins. Sous vide allows you to eat right and get the expected, perfect results.
To properly prepare and store products, you need to know some rules and nuances of packaging. We've created this guide to help you cook professionally and plan your meals well. We have created it to make packing and preparation easy for you, without the fuss and stress.
The guide will help you quickly master the vacuum packaging of products, if you are just familiar with this method.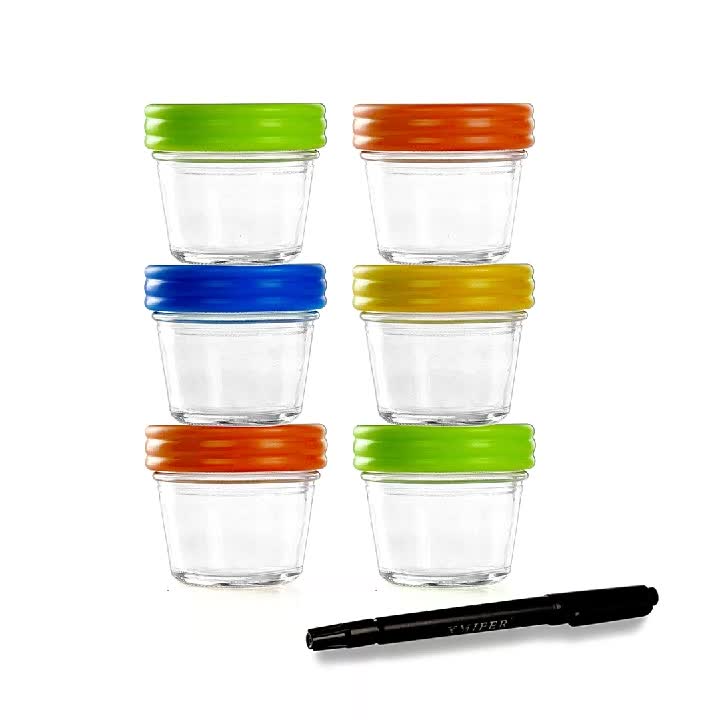 If you already know a lot about sous vide and packaging, the guide will serve as a guide that will be at hand at the right time and will not let you miss something important.
II. What are the types of packaging
There are 2 main types of vacuum materials* for packaging and cooking - sous vide bags and zip lock bags.
* - Please note that sous vide bags must withstand both high and low temperatures.
Sous vide bags come in both smooth and reinforced.
Smooth pouches are made from three layers of food grade plastic. They are quite dense, protect products from moisture and UV exposure. Such packages are used for chamber packers. They are not suitable for tubeless. This is related to the following. During evacuation, the edge of the bag, which is located on the welded bar, quickly sticks together. There are no gaps in the bag through which air can escape.
Reinforced packages are also called corrugated, corrugated or ribbed.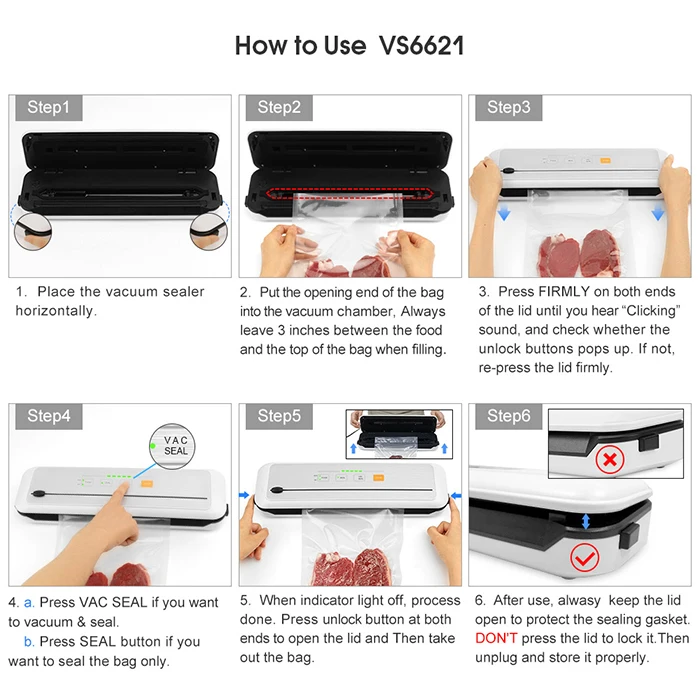 On the one hand they are covered with a reinforced mesh. Such a grid is obtained due to the fact that diamond-shaped cells are made in plastic. Because of the mesh, they are stronger and denser than smooth ones. Reinforced bags are used for both chamber and tubeless packers.
In the case of a tubeless vacuum cleaner, the edge of the bag is placed on a welded bar, the air from the bag is pumped out from the outside. Corrugated bags do not stick together along the entire length. They have channels for air to escape. Therefore, you can pump out all the air from the bag.
For chamber corrugated packages are used when products of non-standard size are packed that do not fit into the chamber. For example, to vacuum the whole fish - salmon, salmon.
Zip-lock bags have a special fastener. Zip locks are commonly used with hand pumps and hand vacuum sealers, which are more budget-friendly than even the simplest vacuum sealers. Such packages must be suitable for freezing and heat treatment.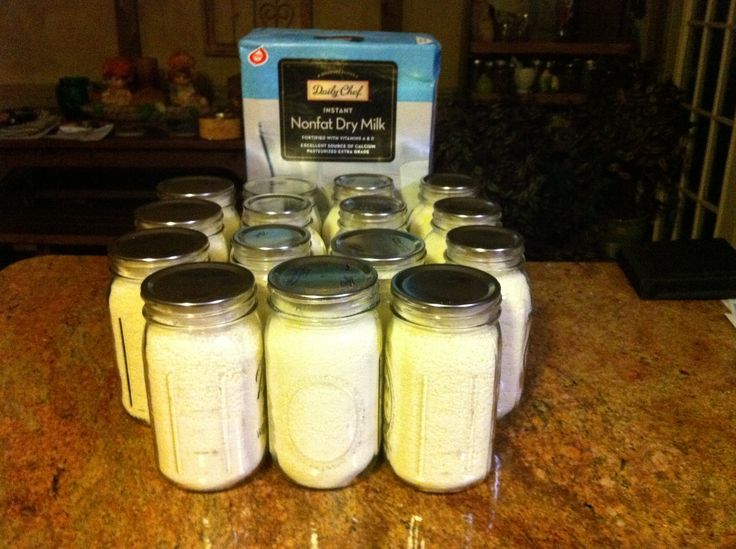
Of course, the question arises whether the plastic from which these bags are made is safe. The answer is safe. In the production of such bags, non-toxic types of plastic are used - polyethylene and polypropylene. Polyethylene and polypropylene are recognized by the European Commission as the safest types of plastic. They are marked with the numbers 1, 2, 4 and 5 - codes for categories of plastic that are safe for food and drinks.
Packaging is not limited to bags. It is also possible to pack products with ordinary cling film and in glass jars for canning. Glass jars are a good replacement for plastic. They are convenient for preparing desserts, portioned dishes, mousses, sauces, creams and more. However, some dishes are cooked in them much longer.
But, basically, it is vacuum bags that are used. The bags contain all the juices, aromas and flavors of the products. A languishing effect is created, thanks to which the dish acquires a truly delicate texture.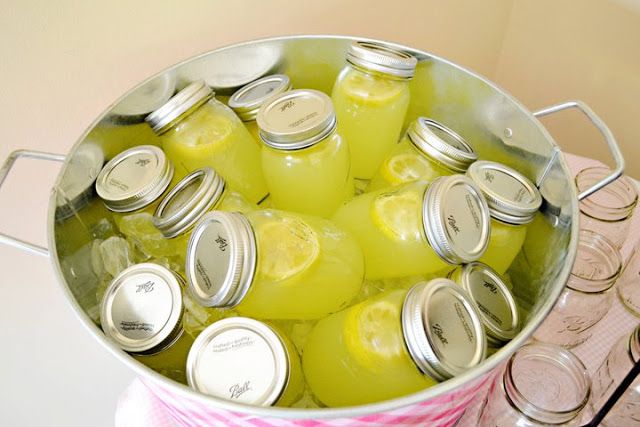
To get a perfect result, you need to follow several mandatory packaging steps and know some rules. Therefore, we have compiled detailed step-by-step instructions on how to properly pack products in vacuum bags.
III. Product packaging instructions
Which bag size to choose
The package size depends on the type, size and shape of the product. The standard sizes of vacuum bags are 16x25 cm, 20x30 cm, 30x40 cm, 25x35 cm. These sizes are suitable for almost all tasks: cook breast, steak, large piece of meat, pack cuts and so on.
These bag sizes are for professional use
| 10 x 15 cm | dried fish, dried fillet |
| 13 x 42 cm | small herring and mackerel, sausage, ham |
| 16 x 42 cm | large herring and mackerel |
| 16 x 20 cm | 100-150 g sliced |
| 19 x 28 cm | 200-300 g sliced |
| 20 x 45 cm | for fresh meat and offal |
If you want to pack or prepare a product of a non-standard size, use rolls.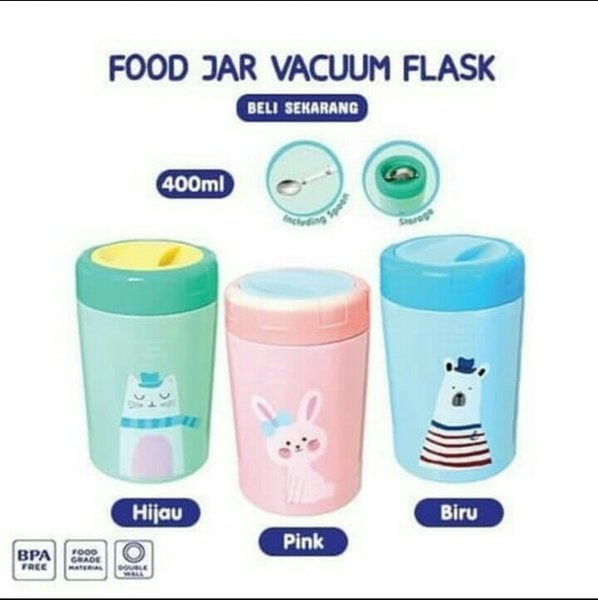
In order for the preparation and storage to be successful, the bag must be tight and thick enough. It is better to take bags with a thickness of 65 microns. This is a fairly versatile thickness, which is suitable for smooth, non-boney and not very hard products: fillets, cuts, pieces of boneless meat, and so on.
If you need to cook meat with bones, use bags with a thickness of 90 microns or more.
For more complex tasks, bags with the following thickness 9 are used0030
| 50-65 µm | meat and fish cuts up to 200 g (without bones) |
| 80 µm | meat and fish slices up to 500 g, sliced pieces, fillets or whole fish, vegetables, fruits, deli and sausage products, raw meat, dried fish, snacks |
| 90-100 µm | bony fish, oily fish, pieces of meat and fish, whole fish |
| 110-120 µm | frozen products, bony and oily fish |
Which bag type to choose
For packaging and preparation, 3 main types of bags are used * - smooth, reinforced and food zip-lock bags.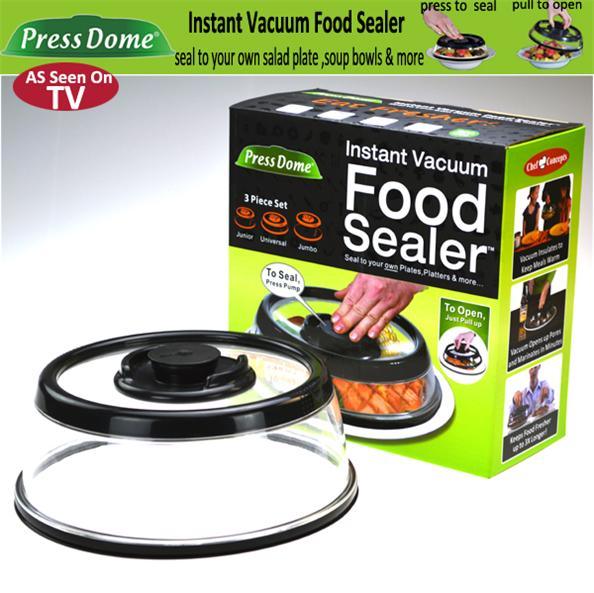
* - Please note that sous vide bags must withstand both high and low temperatures.
Smooth vacuum bags
Used only for chamber packers. They are not suitable for tubeless ones: during vacuuming, they stick together along the entire length, there are no gaps for air to escape.
Reinforced vacuum bags
Reinforced bags are commonly used for tubeless packers. This is due to the fact that corrugated packages do not stick together along the entire length. They have channels for air to escape. Therefore, you can pump out all the air from the bag.
However, these packages can also be used for chamber degassers. They often pack products of non-standard size that do not fit in the chamber. For example, whole fish is vacuumed - salmon, salmon.
Zip-lock bags
Zip-lock freezer bags are used for food storage and sous-vide cooking. Such packages have a special fastener. Zip locks are commonly used with hand pumps and hand vacuum sealers, which are more budget-friendly than even the simplest vacuum sealers.
How to prepare food before placing it in a bag
Before vacuuming food, you need to prepare it. Prepared foods are hygienic, store better and cook more evenly.
Preparing vegetables
- Wash vegetables before packing.
- After washing the vegetables, be sure to dry them.
- Cut large vegetables into small pieces.
- You can blanch vegetables before vacuuming. Pour boiling water over the vegetables or immerse them in boiling water for a few minutes. Then immediately chill with ice or cold water. When the food has cooled, remove any remaining water.
- You can marinate vegetables to add more flavor and aroma.
Preparing fruit
- Wash fruit before packing.
- Be sure to dry the fruit after washing.
- Cut large fruits into small pieces.
- Peel fruit when necessary.
- Freeze soft fruit for 1-2 hours. So they do not choke and do not lose their shape when vacuumed.

Preparing meat, poultry and fish
- Wash meat, poultry and fish before packing.
- Be sure to dry the food after washing.
- Remove unnecessary bones and skins.
- If the bones are still required by the prescription, attach parchment to them with plastic wrap. This way the bones won't damage the bag.
- Season the meat with the right spices or marinate.
Preparing Liquids
If you want to vacuum liquids for long term storage, you can pre-freeze them first. At the same time, in the freezer, the bag with the liquid should be placed vertically. As soon as the liquid freezes a little, you can vacuum.
How to properly place products in a bag
In order for the products to cook evenly and look more beautiful, it is important to correctly place them in the bag. If you follow these tips, your dishes will be attractive even at the packaging stage.
- Do not overfill.
 Always leave approximately ⅓ free space.
 - Do not let food stick together. If the food sticks together or becomes crumpled when placed in the bag, gently straighten or re-stack the food.
- Lay out food in layers. Gradually place product by product into the bag. For example, if you are packing 3 chicken breasts, arrange them so that they form a neat row.
- Add oil to delicate foods. Butter creates movement inside the bag, products do not stick to each other and retain their shape. Olive, butter and canola oil will do.
How not to stain a bag before sealing
If the sealing area of the package is dirty, liquid, herbs, spices will prevent the packer from making a quality seam. When particles of the contents of the bag enter the area of the welded bar where the sealing takes place, they can disrupt the process. Because of this, the seam may not be completely soldered. This affects the tightness of the bag and the quality of the vacuum.
To prevent this from happening, we recommend following these steps:
- Turn the ends of the bag inside out 2-3 cm. For security, the ends can be turned twice.
- Carefully place the product in the bag.
- Unfold the ends.
This will keep the welding area clean and nothing will get into the packer.
What to do if the bag gets dirty in the welding area
Don't worry if the package does get dirty. Simply wipe the welding area with a dry cloth. After that, the package can be soldered.
What to do to prevent liquid from getting into the packer
For liquid and delicate products, always use the pulse or delicate setting. Observe the movement of the liquid during vacuuming. Use these tips for packing wet foods. You can use these 3 tips individually or at the same time:
- When packing raw meat, sauerkraut and similar foods, place a paper towel between the product and the welding area.
 The cloth will absorb excess moisture and prevent it from penetrating into the device.
 - Lightly freeze the product before vacuuming - 1-2 hours is enough. This is especially important when vacuuming berries, bread, cake. Thus, the products do not lose their shape and do not stick during air extraction.
- Use an optional package. Just place one bag inside another bag and vacuum the food. This keeps the packaging clean and recyclable for longer.
For all 3 methods, it is better to use long packets, as this allows you to accurately observe the movement of the liquid.
If, despite the precautions, the packer still sucks liquid, press the “Stop” button. Wipe the camera or wash the tray. Next, use gravity method .
If you follow these tips, the vacuum cleaner will last a long time, and it will become easy and pleasant to work with liquids.
How to fix liquid bags. What to do if there is no pulse mode
The gravitational method is used to evacuate liquids.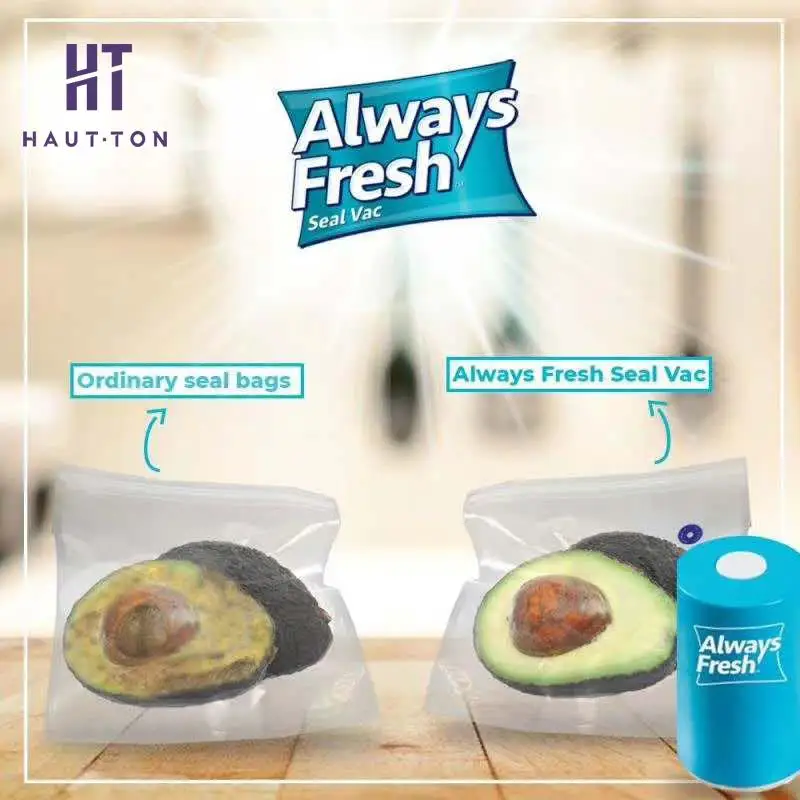 The vacuum sealer is placed on the edge of the table, liquid is poured into the bag. The edge of the package is fixed with the cover of the packer. At the same time, the bag is positioned so that its upper part remains on the table, and the lower one hangs in the air.
During this procedure, you may need second hands. Since it is desirable that one person controls the instrument and the other maintains the package. So there will be no mess and the process will be successful. Alone, it is more difficult to control both the bag and the movement of the liquid in the bag.
To work with liquids, vacuum cleaners have a pulsed or delicate mode. They are interchangeable: if there is no pulse mode, use the mode for moist and delicate products.
However, there are quite simple packers that have neither one nor the other mode. In this case, do the following procedure.
- Place the bag in the packer. Press "Automatic vacuum and welding" (Vacuum & Seal).
- Monitor liquid movement and food condition.
 When you see that the liquid comes to the weld bar, press “Stop” (Stop).
 - If you think the fluid is sufficiently vacuumed, press "Weld".
- If you have not yet obtained the desired result, repeat the procedure.
In this way, you can fix bags with liquids and vacuum them even without special functions.
How to remove air from a ziplock bag
It is not necessary to use professional bags to vacuum the product and cook it sous vide. It is enough to buy food zip bags for freezing * - they are inexpensive and allow you to achieve a similar result. You don't need a packer to remove the air from them.
* - Please note that the packages are suitable for freezing and cooking.
To manually remove air from a ziplock bag, use the following methods.
For solids
Use this method for chicken breast, hard vegetables, dry cereals and grains, beans, and similar foods.
Take a large bowl and fill it with water. Place a kitchen towel nearby.
- Take a zip lock bag. As with sous vide bags, turn the top edge of the zip bag right side out so you don't stain it. If there are several products, lay them out in an even layer, one at a time. This will freeze the food better if you want to cook it, or cook it more evenly.
- Press out as much air as possible with your hands. Close the zip lock almost to the end. Leave a small corner unsealed.
- Lift the bag by the unsealed corner and submerge it in water. Use your other hand to squeeze out air bubbles.
- When all air has been removed and you have reached the corner where you are holding the bag, close the zip lock completely.
- Remove bag from water. The bag must fit snugly against the product. If there seems to be a lot of free space or air in the bag, repeat all the steps again.
Once the product has been vacuumed, place it on a towel and let it dry. After the product can be frozen, stored or cooked according to the sous-vide method.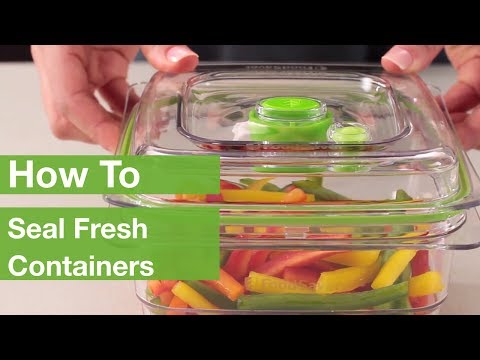
For liquids
Liquids or moist foods, like chicken stock or marinated meats, require a slightly different approach to vacuuming. How to do it:
- Fill the package almost completely. Leave 3-5 cm of free space on top.
- Press out as much air as possible with your hands. Close the package almost completely. Leave a small corner unsealed.
- Lift the bag and place the top of the bag on the edge of the table. In this position, all the liquid hangs under the table. If air remains between the liquid and the edge of the table, reposition the bag and squeeze out the air.
- Close the package. It is better to do this in a position where the top of the bag is on the edge of the table, and the liquid hangs down.
Your liquids are now ready to be prepared, stored or frozen.
Which functions of the vacuum cleaners will help in the work
Vacuum sealers have some useful features that make the job much easier.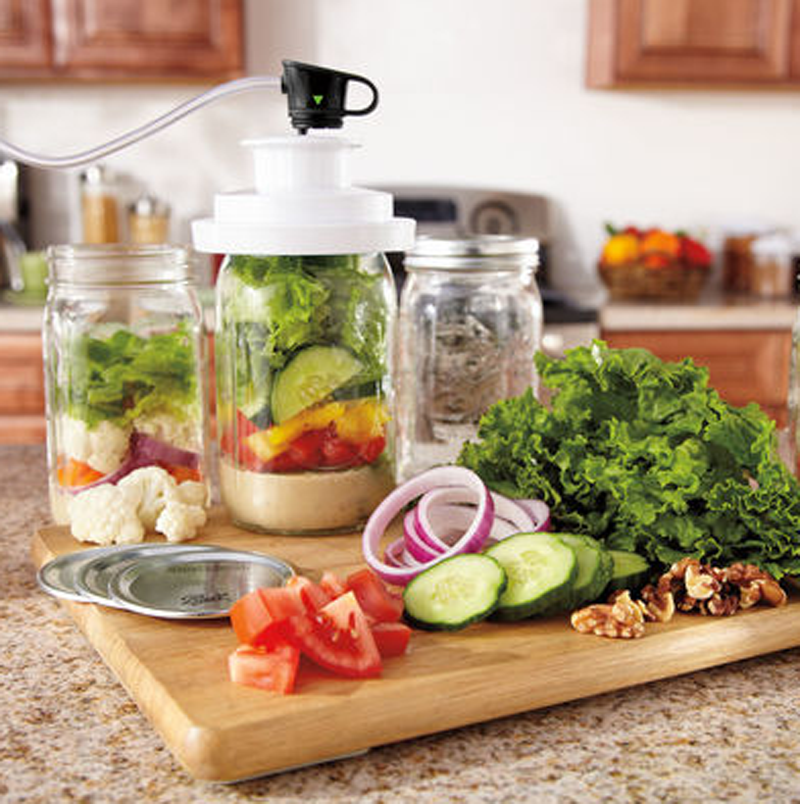
- Pulse mode. This mode allows you to adjust the vacuum level yourself. The packer pumps out air as long as you hold down the button. As soon as you release the button, the process ends. This function replaces the delicate mode if the device does not have one.
- Mode for delicate and moist foods. In this mode, the packer extracts air less intensively and does not injure delicate products. As a result, the contents of the package retain their shape, and the vacuum is of high quality. In impulse and manual modes, the quality of the vacuum is lower, since the degree of vacuum is determined intuitively.
- Container vacuuming. Food can be vacuumed not only in bags, but also in special containers. The same effect is achieved, and it is more convenient to store in containers.
- Pickling. Marinades are cooked quickly with the packer. If you have a tubeless packer, you can marinate in containers. If chamber - right in the chamber.
 Preparation of the marinade in containers takes up to 6 minutes.
 - Memory. Some models of packers are able to remember the settings. So the next time you use it, if you want to vacuum a similar product, you don't need to set the modes again.
How to seal a bag. Which seam is better: double or single
The vacuum cleaner does the sealing of the package on its own. You only need to press the right buttons. Different models of packers make different seams - single or double. As a rule, single seams are somewhat wider than double seams.
A single seam is enough to close the bag. If everything is done correctly, the tightness and vacuum are not violated. Double seam provides extra security. With a double seam, you will be more confident that nothing will break or open in the process.
How to seal a bag
- Prepare food for vacuuming as described in section Special considerations for preparing food before bagging.

- Prepare packages. If you are working with rolls, use a packer's knife or scissors to cut the package to the desired length. If you are using pre-made bags, turn the ends of the bag inside out, as in section How to avoid staining the bag before sealing.
- Make the first stitch*. If the bag is made from part of a roll, it is open on both sides. Therefore, you first need to close one side with a seam. Insert the bag into the grooves of the packer, close the lid and press the “Seal” button ( Seal/ Schweissen ). When the appliance is finished, remove the bag.
* - If you are using ready-made packages, skip this step.
- Place the product in the bag, straighten the ends and insert the bag into the grooves of the packer. Close the lid, set the required settings and start vacuuming.
- When you realize that the air has been evacuated, press the “Weld” button ( Seal/ Schweissen ). If the packer has only standard functions, after vacuuming it will make the seam on its own.

How to place the bags in the container. What are separators
In the container, the bags should not stick together so that water can freely pass between them. Packages can be fixed with a clothespin on the edge of the container or use dividers, drainage.
Separator - a metal device with sections where packages are placed. The separator itself is immersed in a container of water. Separators are simple and compound. The components include both a separator and a drain. Drainage is used to ensure that the bag is located above the bottom of the tank and the water can move from below.
What else you need to know about vacuum packaging
Vacuum packaging not only preserves the properties and freshness of products, but also helps to properly organize food, save time and resources.
Bags in which vegetables, fruits and similar products have been cooked can be reused. Simply washing them is enough. It's cost effective and doesn't harm the environment.