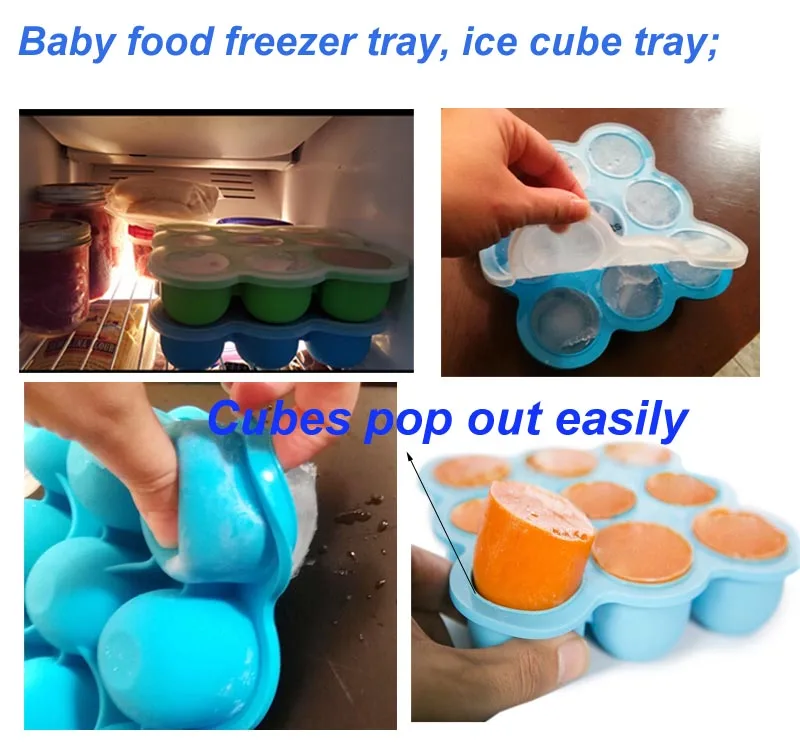
Ice cube trays for baby food
The 4 Best Ice Cube Trays For Baby Food
Introducing solids is an exciting milestone for both you and your baby. I’m not normally much of a meal prepper, but I found cooking and freezing big batches of purées was the key to making homemade baby food. Creating meals for my little one was much easier when I had a ready-to-go stash for the week, and for that, I needed the right gear. Whether you prefer silicone or plastic, the best ice cube trays for baby food store small individual portions of food (so nothing goes to waste) and come with lids for easy stacking.
Materials
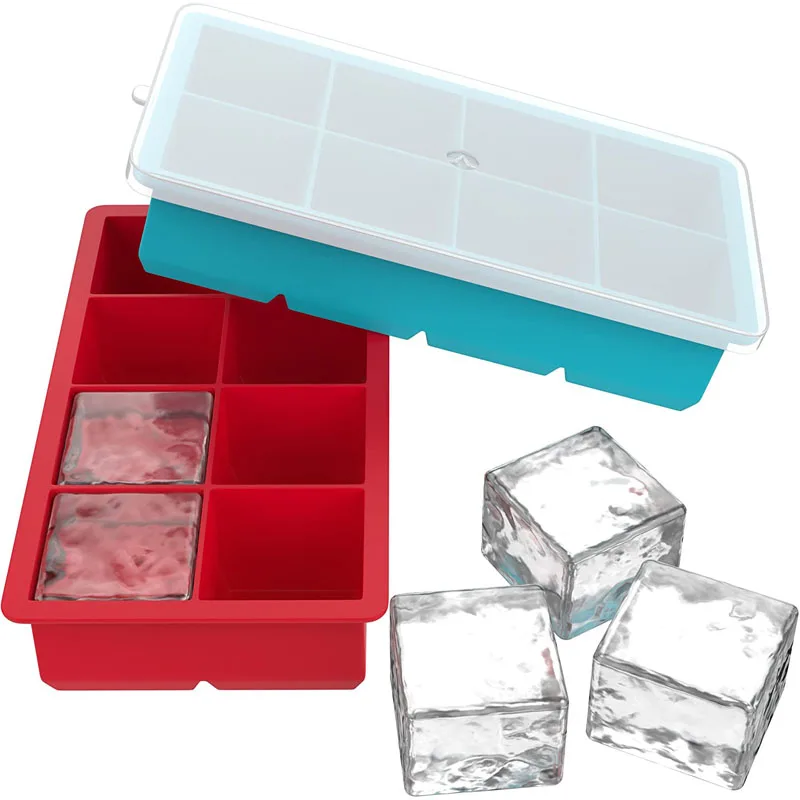
Ice cube trays for freezing baby food are typically made of either silicone or plastic. Silicone trays are more durable so they’re more of an investment up front, and they’re also flexible, so it’s easier to pop out individual portions as needed. Food-grade silicone trays are nontoxic and free of fillers, and they’re usually safe to use in the dishwasher, freezer, and oven. Plastic trays are the more affordable option and also tend to be dishwasher-safe, but keep in mind some may warp under the heat of your dishwasher. When opting for plastic, it’s best to choose a food storage tray that’s BPA-free and free of phthalates.
Whichever material you prefer, you’ll want a tray with a tight-fitting lid to help prevent freezer burn and the absorption of odors from other foods. A lid also makes the tray conveniently stackable.
Capacity
While trays vary in terms of the number of cups they have, it’s helpful to evaluate their total capacity. Smaller ones will be able to hold about 10 ounces total while others can house all the way up to 42 ounces. The individual cup size can range from approximately 1 ounce to 3 ounces, so keep in mind your baby’s mealtime intake. Some cups even have measurement markings so you can keep portions consistent even when you’re not filling cups all the way.
And a pro tip to keep in mind: It’s a good idea to transfer iced cubed baby food into storage bags and marking the date on the bag — discard any unused frozen baby food after three months.
Now, here are the four best ice cube trays for baby food, plus several accessories I’ve found make mealtime infinitely easier.
1. A Silicone Tray With Small Portion Cups
Kiddo Feedo Freezer Tray with Silicone Clip-on Lid
Amazon
- Tray Capacity: 9 Cups, 2.5 Ounces each
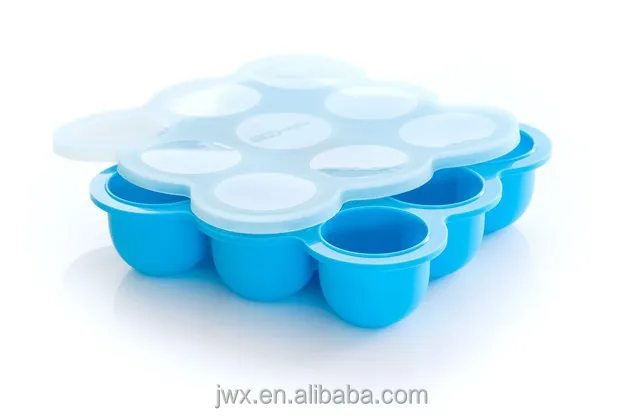
The best silicone ice cube tray for portioned baby food is made of food-grade silicone that’s free of BPA and phthalates as well as BPS, latex, and PVC. The sturdy and deep silicone cups set this highly rated pick apart from some that may look similar; each of the nine rounded cups holds up to 2.5 ounces, but has measurement marking insides for both 1 and 2 ounces. The one tray makes it easy to portion out homemade food for your baby when they first start solids and as their appetites grow, too.
The tight-fitting lid gives the tray a spill-proof seal, and the maker encourages labeling the lid (it washes off) with a dry erase maker or ballpoint pen. The tray and lid are safe to use in the freezer, dishwasher, microwave, and oven up to 460 degrees Fahrenheit. So as your baby becomes a toddler, you can use this same tray to bake egg bites, cornbread, brownies or just make extra-large ice cubes for yourself.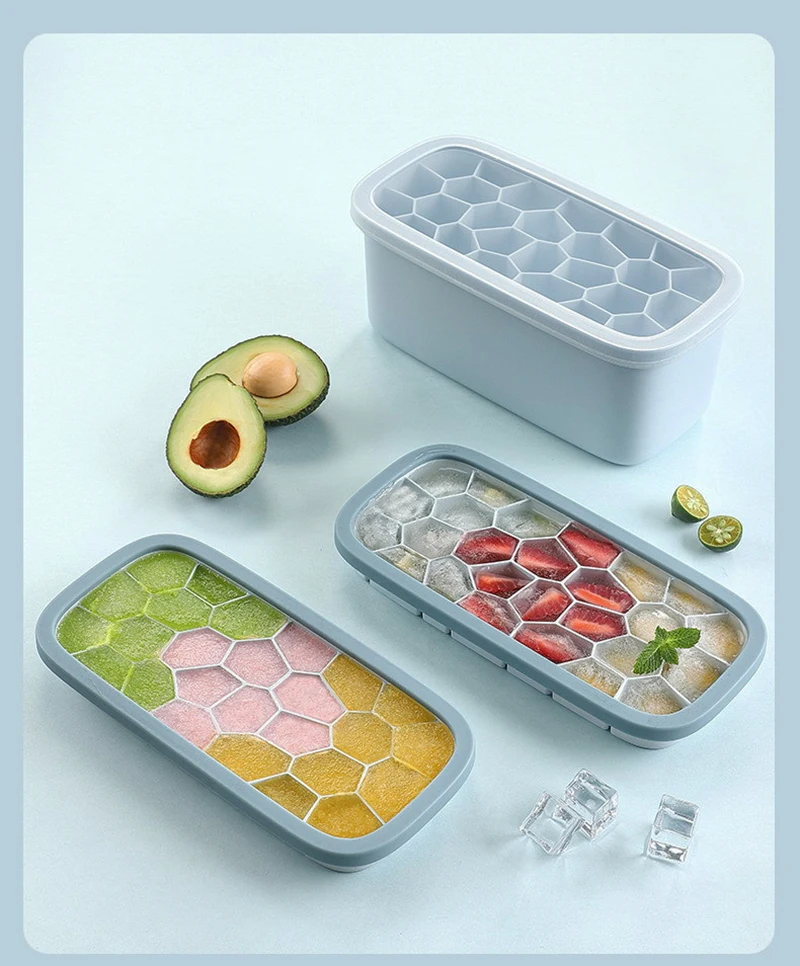 With nearly 6,000 reviews on Amazon, you can trust this pick and choose from seven colors, including blue, yellow, and gray. This ice cube tray for baby food also comes with an ebook with guidance on feeding babies and recipes to get started.
A helpful review: “Probably the best purée storage cubes I’ve found. I have three other kinds but they are either too small, the lid doesn’t stay on properly, or they are impossible to ‘pop’ out once frozen. This one is a game changer. The portion sizes are generous for my seven month old son, and yet not too bulky in my freezer. Also, the lid is secure and wraps around each edge of the base. The material is bendy and manipulative so when it’s drying you don’t have to worry about it getting misshapen. Getting the food cubes out is much easier than with other brands I’ve tried. All in all, very pleased.”
2. The Tray With Bigger Individual Portions That’s Perfect For Older Babies
BEABA Baby Food Tray
Amazon
- Tray Capacity: 6 Cups, 5 Ounces each
For an older baby that you’re realizing is ready for a bit more food at each meal, try this baby food tray with fewer but larger individual portions. Each of the six rounded cups holds up to 5 ounces. It’s made of food-grade silicone and reviewers commented repeatedly on the sturdy seal of this tray’s lid.
This tray is BPA-free and phthalate-free, and it’s safe to use in the freezer, dishwasher, microwave, and oven up to 425 degrees Fahrenheit. This made-in-Italy tray also comes in blue or green trays with 3-ounce cups.
A helpful review: “Love this! I make my own baby food purees and easily freeze them in this silicone tray. The frozen food pops out like a dream and it is super easy to clean. One of the biggest pluses is that the tray comes with a flat lid to cover your food while it’s freezing, also allowing you to easily stack multiple trays in your freezer at once for big batch freezing.”
3. The Most Budget-Friendly Ice Cube Tray For Baby Food
OXO Tot Baby Food Freezer Tray
Amazon
- Tray Capacity: 14 Cups, 0.75 Ounces each
The most affordable baby food tray looks the most like a traditional ice cube tray and is made of plastic.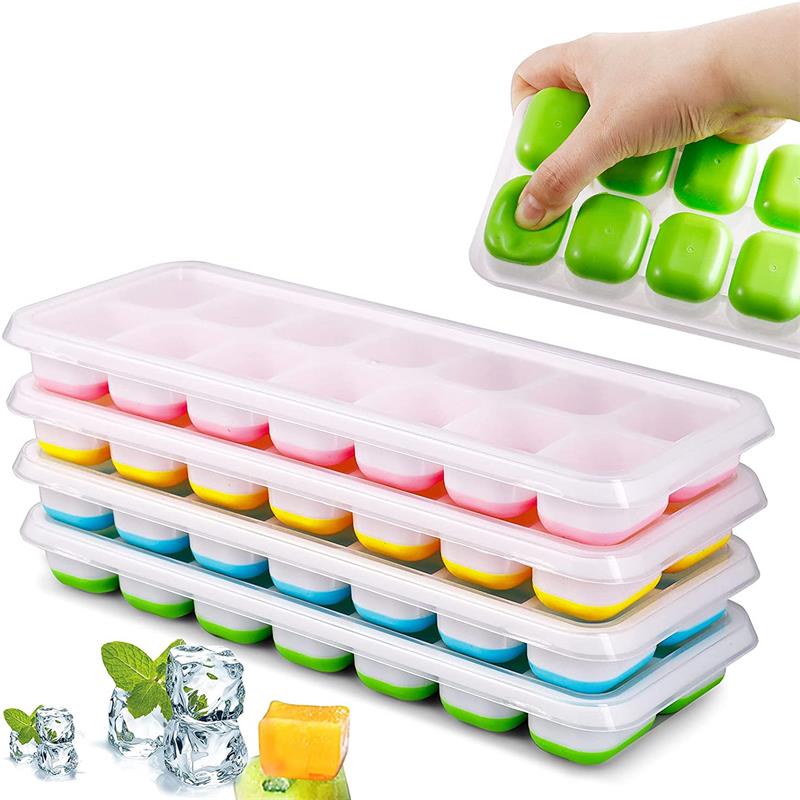 The tray has 14 rounded cube indentations holding 0.75 ounces each, but although the cubes are smaller, you are getting more of them and can make a total of 10.5 ounces of food at one time with these trays. Its unique sturdy sliding cover cleverly lets you release as many or as few cubes as you need without the risk of them all popping out, and the set is dishwasher-safe.
This pick is free of BPA, PVC, and phthalates, and the bright green lid is easy to spot in a full freezer.
A helpful review: “I'm pretty cheap, and I just use regular ice trays to freeze my baby's food. But someone recommended this tray to me and I'm glad I got it. The cover is nice so nothing falls in it in the freezer (if your freezer looks like mine, there is an avalanche of frozen meat and vegetables just waiting to happen). The plastic seems really durable, and the cube sizes seems adequate for what my baby needs right now. It's quite cost effective [...] I may buy more as my baby starts to eat more solids.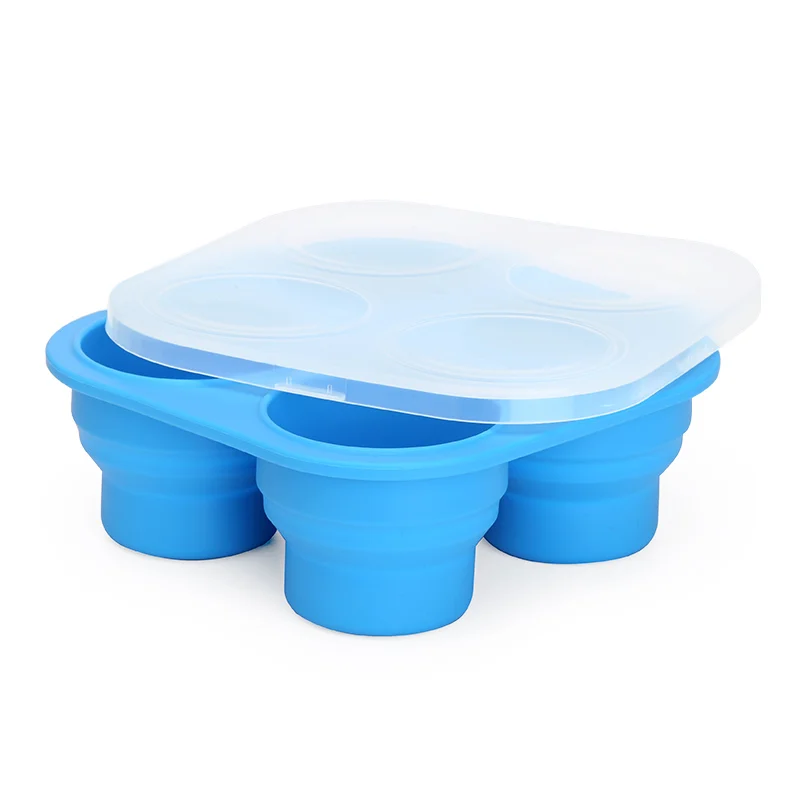 ”
”
4. The Set For Big Batches of Baby Food
Mumi&Bubi Solids Starter Kit (Pack of 2)
Amazon
- Tray Capacity: 42 Cups, 1 Ounce each
Now, if you’re really into making big batches of baby purée at a time, consider this set of two ice cube trays that hold 1-ounce portions in a total of 42 rounded cubes. These trays are wider but flatter, so they’re actually really easy to fit into a freezer, and they each come with tight-fitting stackable lids.
This made-in-New Zealand plastic tray set is dishwasher-safe and free of BPA, phthalates, and PVC. They’re also highly rated with over 1,500 reviews, and you get an ebook with 27 recipes to get you started with homemade baby food.
A helpful review: “These worked great for making purées at home. I make big batches of baby food, freeze them in these containers, and they last for weeks in the freezer. Or I pop the frozen food cubes out of the trays and put them in zip lock bags to store in the freezer and then I make another batch. I like the snap on lids! They were easy to get on and off. The lids stayed on nicely and I never had to worry about them coming off in the freezer. I also thought the trays stacked nicely on top of each other. [...] These saved us so much money, because we were able to make all of our own baby food! This really is a great product!”
Nice To Have: A Reusable Freezer Bag For Transferring Your Batches
Stasher Reusable Storage Bag
Amazon
The reusable storage bag that’s a bit of a cult favorite with over 22,000 reviews maintains its popularity in part because of its durability and versatility. This food-grade silicone bag is freezer-safe, and it’s an ideal storage bag for keeping individual portions of homemade baby food. The air-tight pinch-loc seal on the half-gallon bag will keep the baby’s food fresh, and you’ll find tons of use for it once your baby moves on to crunchier foods.
This silicone bag is safe to use in the microwave, dishwasher, boiling water, and oven up to 400 degrees Fahrenheit, and reviewers often use it for marinating food or cooking sous vide.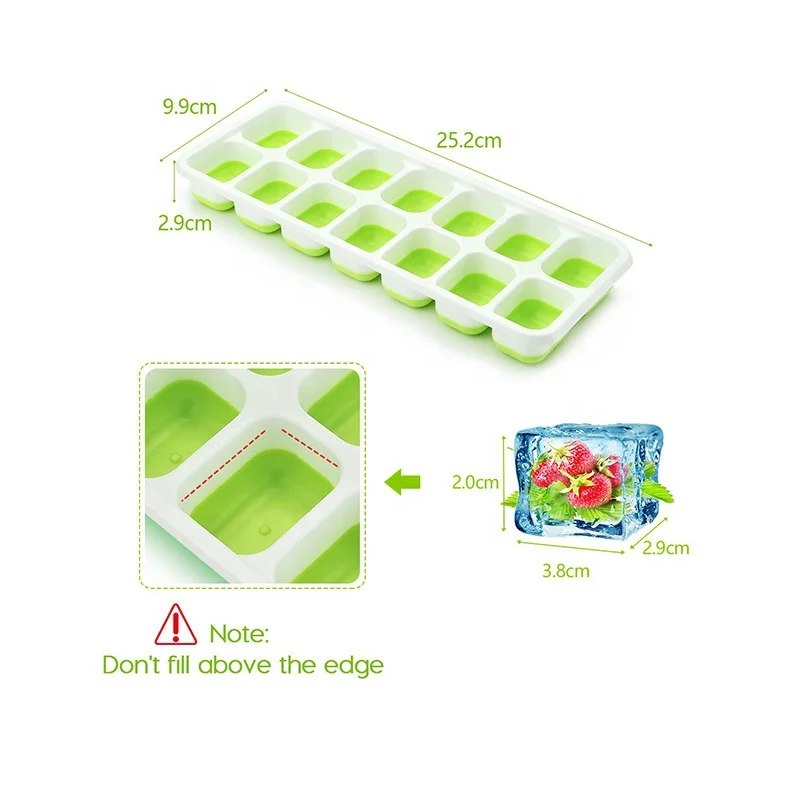 I’ve had these silicone bags for years, and they’ve really held up. You can also choose from several other sizes and colors, including a sandwich size and a snack size that’s perfect for a toddler's hands.
A helpful review: “I am one of THOSE people that totally cringes at the thought of ANYTHING plastic. I am so glad that I purchased this item. I use them in the fridge, freezer and just for storage. They are easy to clean too. I just throw them in the dishwasher and they come out clean and ready to reuse. LOVE, LOVE, LOVE them!”
Also Great: A Baby Plate & Mat That Stays Put
ezpz Mini Mat
Amazon
Now, where to serve your homemade baby food? This silicone suction plate is a bowl and placemat in one that’s made of food-grade silicone free of BPA, BPS, PVC, latex, and phthalates. The placemat sort of suctions to a flat high chair tray or dining surface, making it difficult for your baby to flip the plate or send food onto the floor. Plus, this piece is dishwasher- and microwave-safe.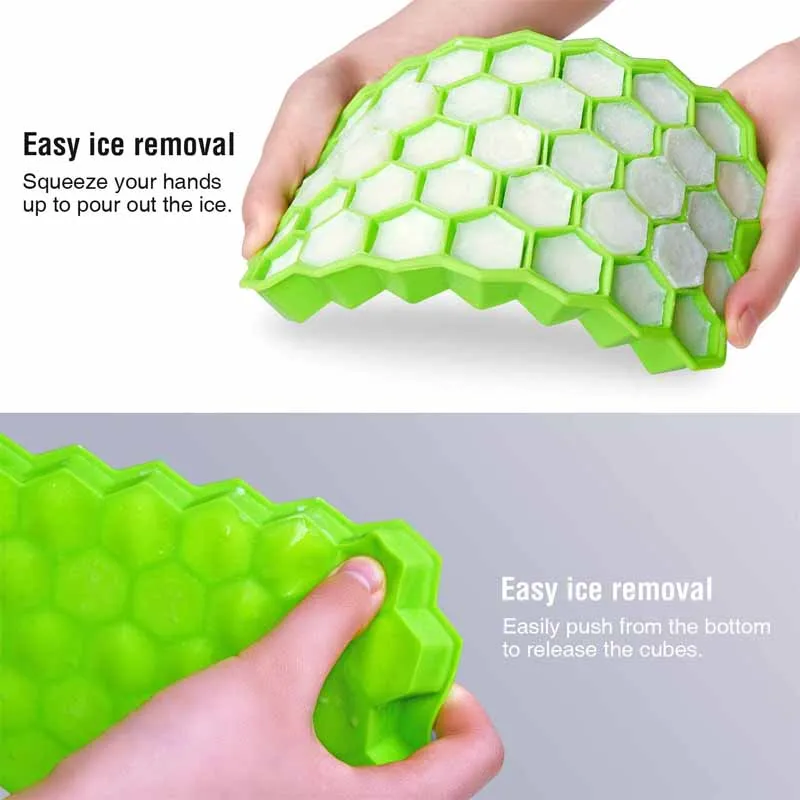
The walls of the three sections can actually help your baby scoop up food more easily as they’re still developing key motor skills. The two “eye” sections hold 2 ounces each and the wider “mouth” section holds 4 ounces. With nearly 6,000 reviews, this family favorite comes in blue, coral, gray, or green.
A helpful review: “This mat has really helped my self feeding 8.5 month old get more in his mouth. He used to have a hard time picking up the food, which would cause him to push it all over his tray & eventually on the floor. This mat keeps everything contained & stays in place. Plus, it's easy to clean & a good size to throw in my diaper bag for restaurants. I highly recommend this to anyone with a small child!”
Nice To Have: Baby’s First Easy-To-Hold Utensil
Olababy Soft-Tip Training Spoon (Pack of 2)
Amazon
Once your baby starts to get the hang of solid foods, it’s time to introduce a baby spoon. The leaf-shape design and flexible tip of this soft training spoon set it apart from others my son tried; this one seemed to fit in his small hands more naturally.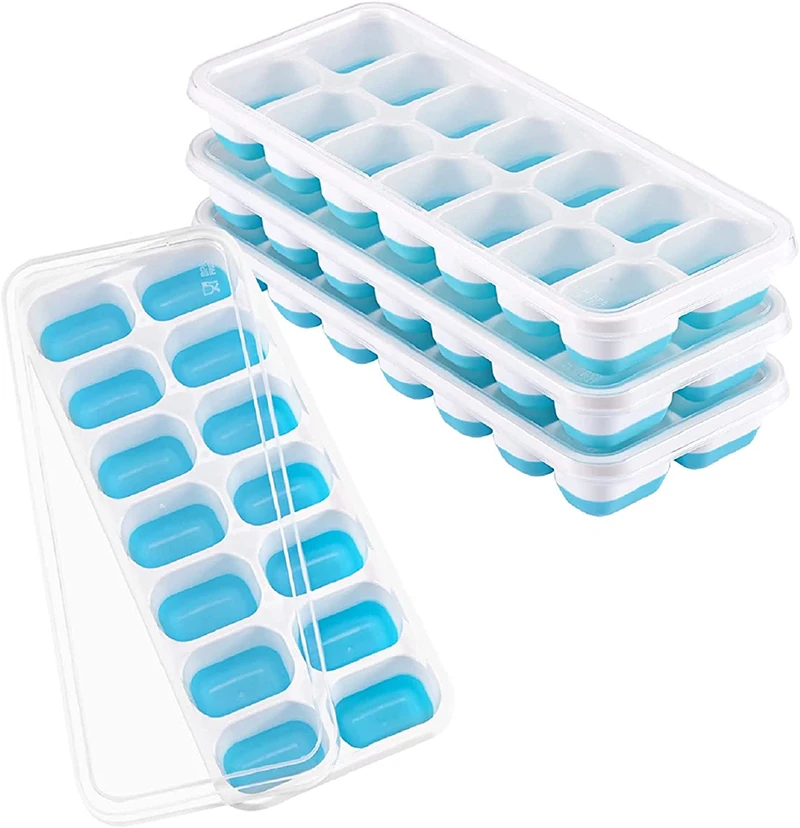 The flexibility of the spoon’s tip makes it much easier for babies to actually scoop up food, and the ergonomic shape with textured base is comfortable for little hands to hold.
It’s made of food-grade silicone that’s free of BPA, latex, and phthalates, and this pick is safe to use in the dishwasher and freezer. The flat bottom of the spoon can be stood upright on a table to keep it clean. This spoon maintains an impressive 4.8-star rating with over 6,000 reviews, and parents report their babies quickly understand how to use this spoon and also love using it as a teether. This award-winning spoon has won several awards, including a National Parenting Product Award (2018) and Family Choice Award (2017), and is designed to promote self-feeding.
A helpful review: “The best baby spoons on the market!! Incredibly easy for baby to hold and scoop food with. I was shocked that my 4 month old could use this spoon on her own. She's now 6 months old and we use these multiple times a day. They have a textured handle that makes it easy for baby to hold. The tip bends when baby dips it in the food so she can scoop from many angles- perfect for learners. They wash so easily. [...]”
Homemade Baby Food Purees | Ice Cube Tray Method
Dairy Free
Egg Free
Gluten Free
Nut Free
Paleo
Jump to RecipeThe Easy (and Realistic) Way to Make, Store, Serve Homemade Baby Food Without Spending All of Your Free Time Doing It.
Disclaimer #1, for those of you with babies: I’m not a pediatrician or a medical professional of any kind. This post is for informational purposes only, since so many of you asked me to share my experience & tips for homemade baby food puree.
Disclaimer #2, for those of you without: I promise this is not the start of a downward spiral into the realm of Kid Food. There are plenty of other blogs out there that do it, and do it much better than I ever could! But so many people have asked about my baby food system, that allows me to make my own without going bananas-insane from the extra work.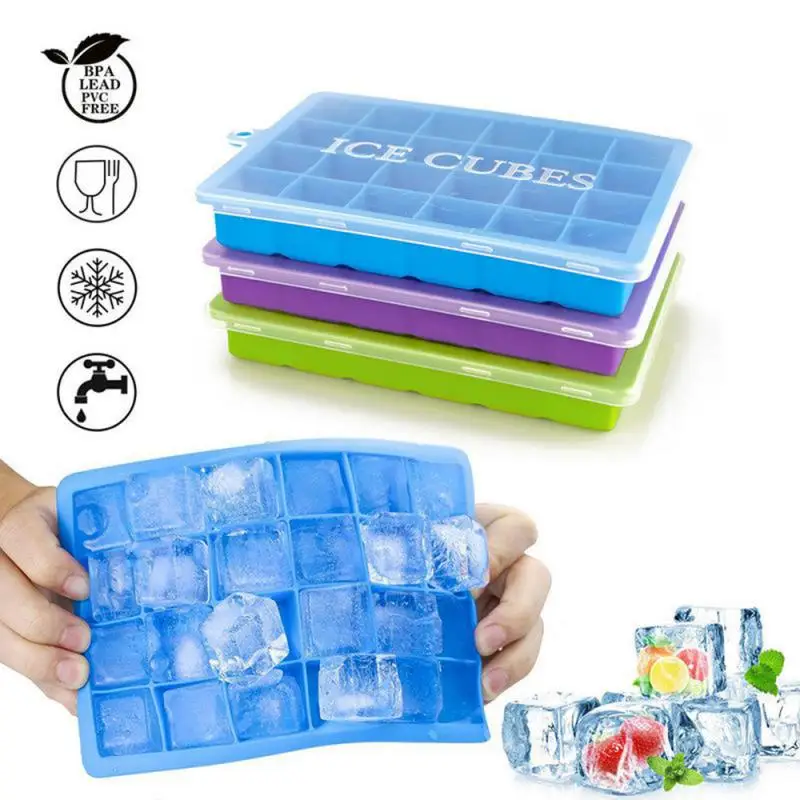 So, here we go! But rest easy: this is only one of 2 planned “kid food” posts, and that’s all I have planned.
The thing they most don’t tell you about parenting – because you’re totally informed about the whole labor-sucks-sleep-deprivation-sucks-but-just-wait-until-they-smile-and-you-forget-all-the-rest part – is how hard it is to feed a baby. At least it is for my baby.
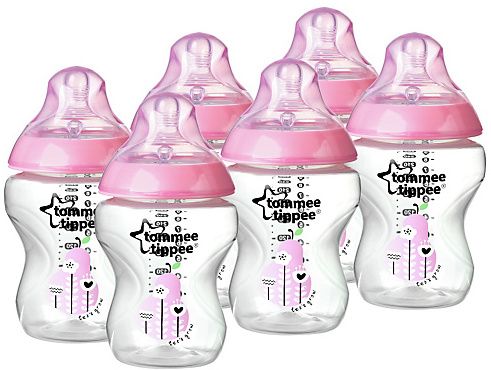
I mean, he’s healthy, he’s growing, I’m not looking for pity, etc. But I was surprised. First, nursing didn’t work. He had severe tongue and lip ties that prevented him from learning to nurse properly and it was just not in the cards once we finally had the ties corrected. So, we switched to bottle feeding a mixture of pumped milk and formula (#fedisbest).
After months of patiently (sometimes not so patiently) fighting to get every last ounce into Baby Bake, and painstakingly tracking his intake, it was finally, mercifully, time to introduce purees.
All of a sudden, things were easy/er.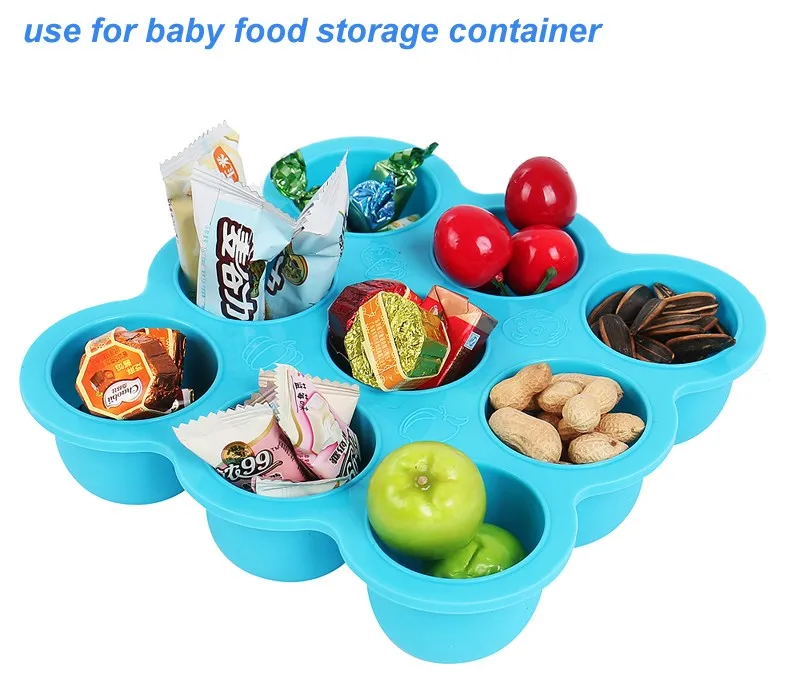 He ate! Reasonably volumes! In one sitting! (That, of course, changed drastically and abruptly, as things do – but more on that later.) He was back on his weight curve, which we’d been fighting to keep him anywhere near for months. And, I have to be honest, it was fun to see him try one food after another and invent combinations.
And, yeah, of course, I made my own homemade baby food. But wait! I’m not some crazy lady with too much time on my hands. It’s easy – so much easier and cheaper, in my opinion – than jarred and bagged food.
I go to the grocery store. I buy food. He eats some of it. Everyone is happy.
But enough sleep-deprived rambling! My goal today is to answer all of the questions that I’ve gotten over the last couple of months about making and feeding your child homemade baby food without losing your mind.
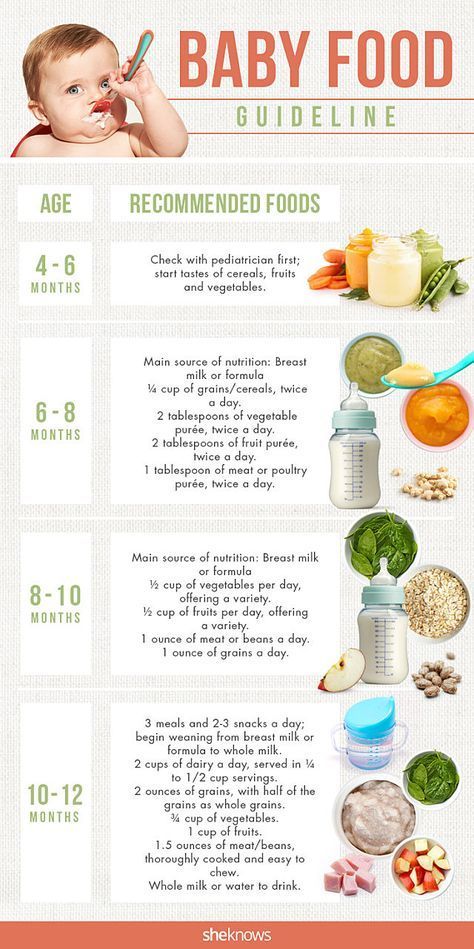
Introduction and First FoodsWe waited until 6 months to introduce purees, even though our pediatrician said that it would be ok anytime after 4 months.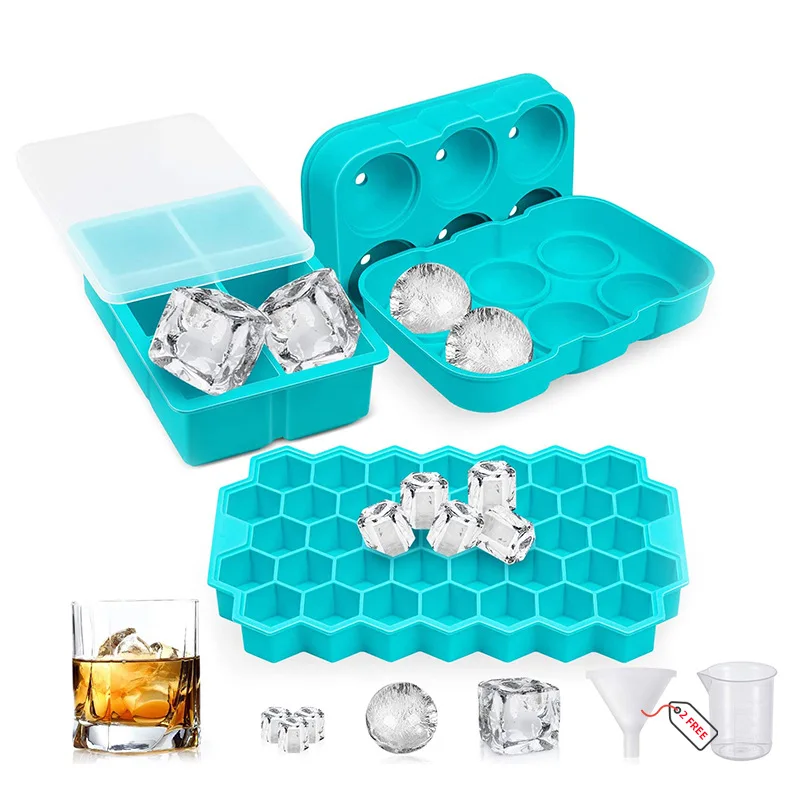 Some recent research has indicated that babies’ guts may not be fully sealed until 6 months, and that the leaky gut effect could, possibly, result in an increased risk of food intolerance.
Whether or not that turns out to be true, the possibility was enough for me to avoid the risk. Having endured and gone through the long, challenging process of healing my gut (and still going through it), I wanted to avoid any risk of putting Baby Bake through that, no matter how minute.
So, 6 months was right for us. Go with what’s right for you, per your pediatrician.
(This seems like a good moment to remind you that whenever you are introducing purees, and whatever you choose as the first food(s), make sure you are following the Four Day Rule! Talk to your child’s doctor for more info about this.)
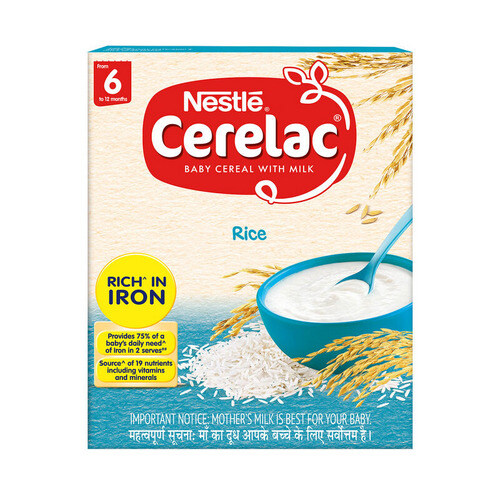
Many people said rice cereal “should” be the first food, but, well, that wasn’t right for us. While I have no issue giving Baby Bake grains, I neither wanted to start with grains, nor give him processed nutrient-stripped cereal just to fill him up when real, whole foods (that also, incidentally, filled him up) were an option.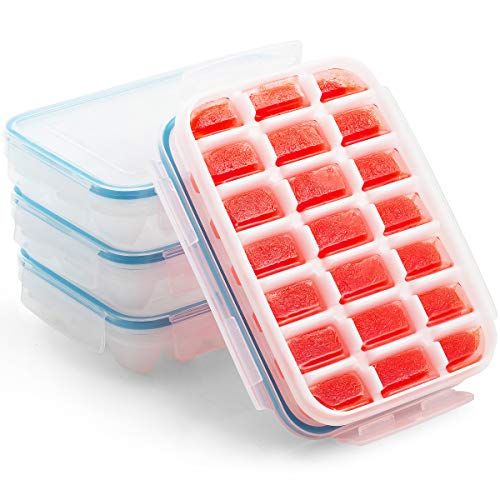 So we went with:
- Avocado. First pureed with milk, formula, or water until it was almost liquid. Then, gradually, reducing the liquid until you need almost none and you’re just pureeing the avocado alone. Eventually I stopped pureeing it altogether and just mashed it with a fork. If you’re just mashing it, make sure you are using a very soft avocado. If you can completely mash a piece easily with your tongue against the roof of your mouth without using any teeth, it’s probably the right consistency.
- Sweet Potato. Steamed until soft enough to mash with a fork, then pureed with milk, water, or formula until it is almost pourable, but doesn’t run off of the spoon. Make sure it is completely smooth and no lumps remain. I find that the Magic Bullet with the flat blade and small canister are the best tools for achieving a really smooth puree easily. Since sweet potatoes are so starchy, you’ll definitely need a little liquid to puree it, even if your child is used to very thick purees.
- Carrot. Peel and cut them, then prepare them like sweet potatoes.
- Green Beans. To make life easier, I bought these frozen. I also wanted to use organic and frozen organic green beans are typically more affordable than fresh. Plus they’re already cleaned and prepared, so it’s a win/win, if you’re looking for ways to save time. All you have to do is defrost them in the microwave or on the stove. Either way, make sure you are submerging them in water while they defrost and cook them a little longer than you might for yourself, so they will soften. Then puree with a tiny bit of liquid until smooth.
- Banana. Bananas are a tricky one because, by the time they are ripe enough to get them very smooth, they are very high in sugar and may upset your child’s stomach. So we had a couple of false starts before Baby Bake could tolerate them. It may be fine right away for your child.
I started by offering each food separately to make sure I was adhering to the 4-day rule. But once Baby Bake had tried enough foods to start mixing and matching, and I didn’t want to give him the same food a few times a day for several days in a row, I developed a system for batch cooking and storing a variety of purees, so that I could mix and match, thus feeding him something a little different every day without a ton of work.
There are several variations of this method floating around the internet, but this is mine.
Here’s exactly how to do it:
- Choose a fruit, veggie, grain, legume, or even meat.
- Prepare it: wash, trim, peel, rinse, etc – whatever it needs.
- Chop it into small pieces. This isn’t necessary, but aids in cooking it quickly and evenly. Obviously skip this if you’re cooking grains.
- Boil it until very soft.
- Transfer to a small blender or food processor with a little liquid (unless you are using a high water-content food, like zucchini).
- Puree until smooth.
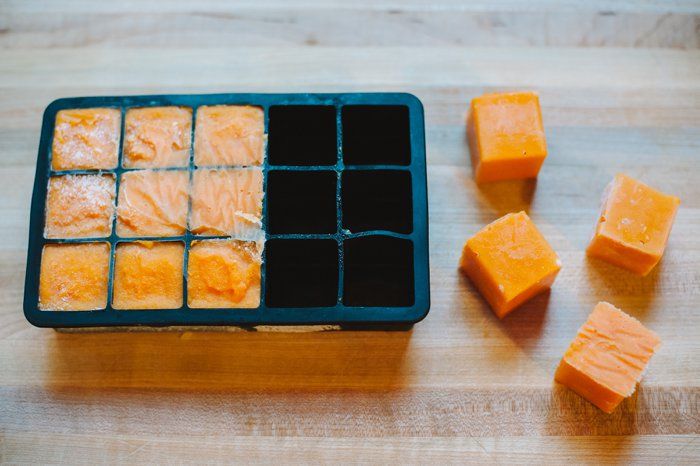
- Freeze the puree in ice cube trays. When you’re just starting out, fill the compartments in the tray halfway, or use small trays. If you know your child eats the food well, fill the compartment of a standard ice cube tray all the way. You can add several different foods to the same tray.
- Transfer the frozen cubes to a cold-proof container. Put each type of puree in its own airtight container. You can use a glass jar, plastic container, or zip top bag. Write the type of food and the date it was made on the container label (I keep these labels and a Sharpie in a kitchen drawer so I never have to hunt for labeling supplies).
- Remove a cube or cubes for each meal and defrost on the stove or in the microwave.
- Mix and match flavors to create an endless variety of combinations.
- Stop wasting your money on jars and pouches!
(keep scrolling for some of my favorite flavor combinations!)
Combinations
Now that you have a freezer full of puree cubes, the sky is the limit! You can, of course, stick to one food at a time, but once your baby’s palate has adjusted to each food on its own, it’s fun to mix it up.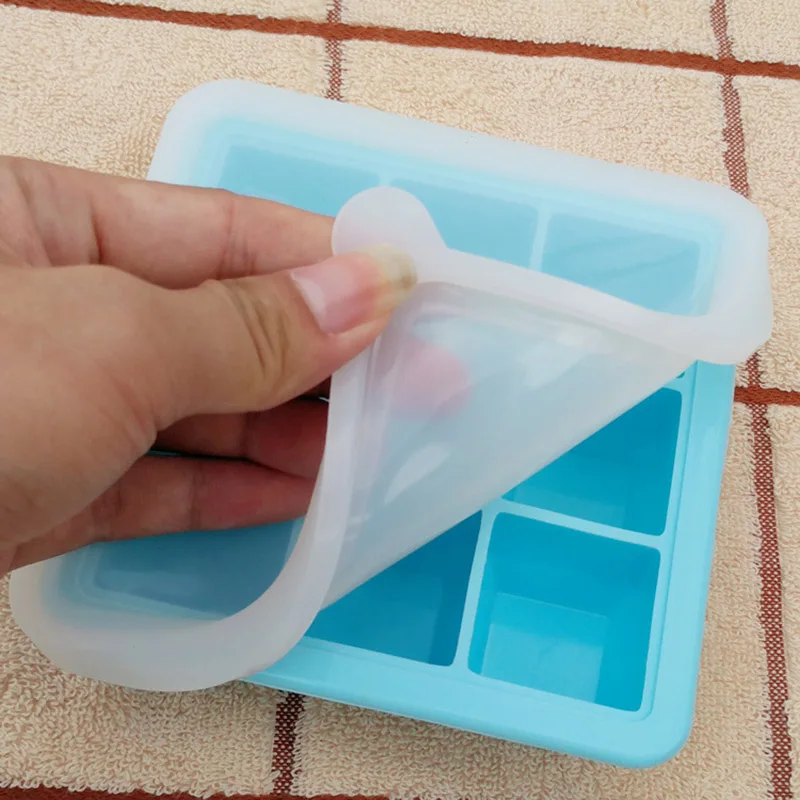
I even add a (teeny tiny) pinch of spices to some mixtures. If you want to do the same, stick to the teeniest, tiniest pinch – so little that you can’t possibly imagine it is detectable. Trust me: your baby will taste it!
Here are a few of my favorite puree combinations:
- A cube of carrot + a cube of butternut squash + a pinch of nutmeg
- A cube of apple + a cube of GF oatmeal + a pinch of cinnamon
- A cube of peas + a cube of zucchini + a sliver of fresh basil or mint (optional; you’ll have to puree this mixture again to incorporate the herbs)
- A cube of GF oatmeal or quinoa + a cube of apples + cube of zucchini (optional: punch of cinnamon)
- A cube of sweet potato + a cube of apple + 1-2 Tablespoons whole fat plain yogurt
- A cube of broccoli + a cube of spinach + a cube of green beans
- A cube of sweet potato + a cube of chicken (or turkey) + a cube of cauliflower
- A cube of lentils* + a cube of rice + a pinch of cumin (optional – it’s a very strong flavor, so proceed with caution!)
- A cube of carrots + a cube of sweet potatoes + 1/2 tsp unsalted tahini (you can make your own if you want)
- A cube of spinach + a cube of zucchini + a drop or two of fresh lemon juice
*Rinse your legumes (and grains, for that matter) well before cooking them, and consider soaking them overnight, which aids in digestion. To do this, put the beans in a small bowl, and add enough water to cover about 1″ above the beans. Place the bowl in the fridge for about 12 hours. Then drain and cook the beans.
A Note About Allergen Foods
When to introduce purees, and what to introduce in which order varies greatly from child to child, based on their own health history and the family’s. Baby Bake’s pediatrician advised us that, unless there is a family history of an allergy to something, it should be fine to introduce without concern. That’s why you see legumes, grains, and dairy in some of the combinations.
But make sure you are checking with your doctor before adding any new foods, especially high allergen foods, and double especially if there is a history of food allergies in your family!
The combinations above are just examples of what how you can mix and match, and of what I’ve tried with Baby Bake. So feel free to get creative with your combinations!
Ingredients
- Fruit, veggie, grain, legume, or even meat of choice
Instructions
To prepare and store:
- Choose a fruit, veggie, grain, legume, or even meat.
- Prepare it: wash, trim, peel, rinse, etc - whatever it needs.
- Chop it into small pieces. This isn't necessary, but aids in cooking it quickly and evenly. Obviously, skip this if you're cooking grains.
- Boil it until very soft. Or steam, covered about 1/3 - 1/2 way with water. Use more liquid for starchier foods, and less for waterier foods. (see note)
- Transfer to a small blender or food processor with a little liquid (unless you are using a high water-content food, like zucchini).
- Transfer the puree to a clean ice cube tray.
- Freeze the puree in ice cube trays.
- Remove cubes from tray and transfer to an airtight container of choice. (e.g. mason jar, or zip top bag)
To serve:
- Defrost as many cubes as needed on the stove or in the microwave.
- Mix and match flavors to create an endless variety of combinations.
- Cool before serving.
Notes
- When pureeing, be conservative about the water to start.
 You can always add more, but if your puree turns out soupy, it can be a real mess. If you're using starchier fruits and veggies like root vegetables (carrots, potatoes), squash, bananas, peas, or grains or legumes (oatmeal, lentils, etc), you'll need a little more water than if you are using waterier fruits and veggies (e.g. broccoli, zucchini, apples, pears, plums, etc).
 - If you end up putting too much water in the mixture, don't throw it out! Just serve it mixed with a starchier vegetable (potatoes are my go-to) or a grain to absorb the excess water. If you want, you can also strain some of the liquid out before freezing, but to be honest, I never do that. It just means more dishes!
- If you're looking to add some calories and nutrition to your purees, replace the water with milk or (prepared) formula. Please consult your child's doctor before doing this, though!
- Portioning note: when you're just starting out, fill the compartments in the tray halfway, or use small trays.
 If you know your child eats the food well, fill the compartment of a standard ice cube tray all the way. You can add several different foods to the same tray.
 - Storage note: I use mason jars or (new, clean) zip top bags labeled with the type of food and the date it was made. Just cross out the date and write the new one when you make a new batch of food.
- In fact, make sure to consult your child's doctor before starting purees, and before adding any new foods to his or her diet. Don't forget that certain foods should never be given to infants, including honey, corn syrup, and salt. Your pediatrician can give you a more specific list of foods to avoid tailored to your child's needs and age.
- I am not a doctor, so - again - make sure you clear any new feeding behaviors with your pediatrician before starting!
is it possible to prepare food for a child in this way
Each has its own advantages: how to fix a hole in a down jacket in different ways
Some dogs eat cat food with pleasure, but is it good for them
"He is always there": Natalya Antonova kept silent for two years about the loss of her fourth child
Crunchy and fragrant snack for the whole family: potato-garlic rings
French for the year of the Water Rabbit: which design to choose
Desserts can also be useful: learning how to make them from chickpeas
From ice and microbes.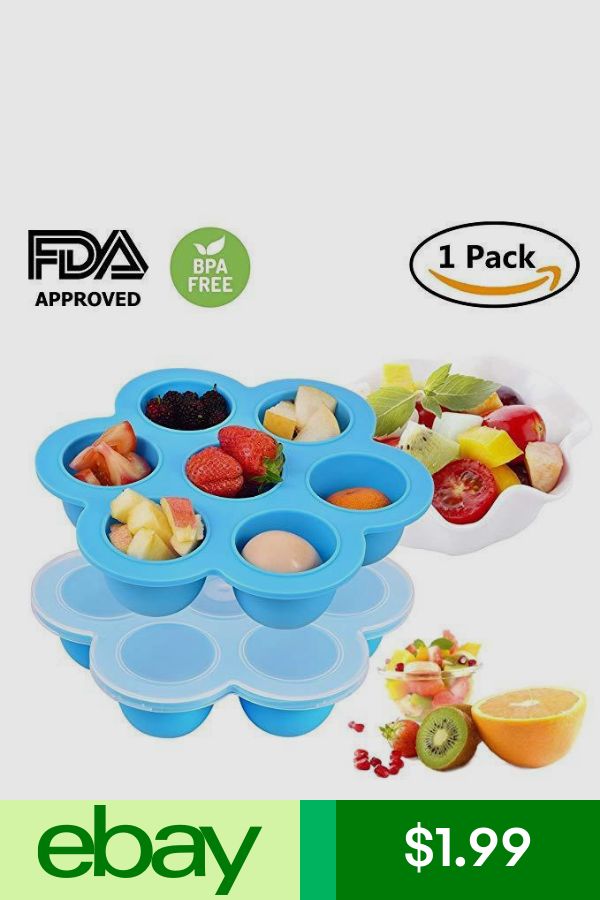 How often do you need to defrost the freezer
An excellent substitute for apples: how and what kind of pastries can be made with persimmon
Contrast of colors, benches: decorating the hallway in a village house (photo)
Libra is always looking for a soul mate: what the Moon says about the character in the natal chart
Author Olga Simchenko
It often happens that you prepare a large amount of puree for a child. It's a shame to throw away the rest. You can save leftover product. To keep baby puree for a sufficiently long time, you just need to defrost it. To do this is quite simple. Here are some tips on how to do it right.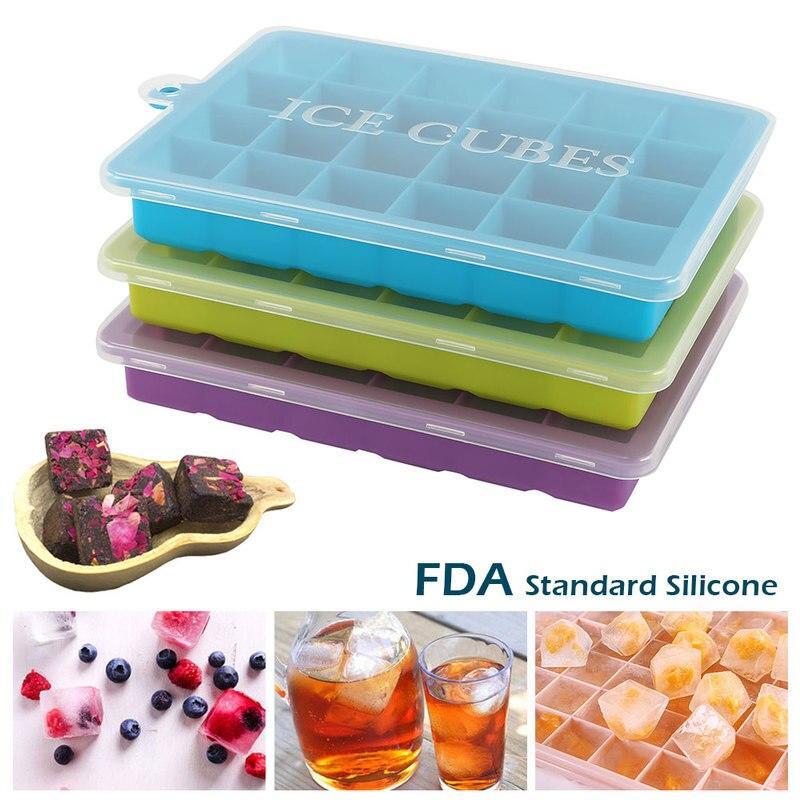
Freezing in boxes
Small storage containers must be used, previously washed with hot water. Dry well.
Put the puree into boxes and then pack it all in hermetically sealed plastic bags.
Remember that food expands when frozen. That is why there is no need to overfill containers. It is important to leave enough space. Be sure to label everything with the name of the product and the date it was frozen.
Be sure to indicate the date of freezing in order to know exactly how long this product can be stored.
Place the bags on the top shelf in the freezer or as close as possible. It is much better to preserve the product, as the top is usually the coldest and therefore everything freezes much faster.
Freezing in ice cube trays
Storing baby puree in ice cube trays has many advantages. Each cube contains about 30 g, which gives a complete picture of exactly how much children eat at one meal.
Since only one cube is used at a time, waste is minimized and food does not have to be thrown away.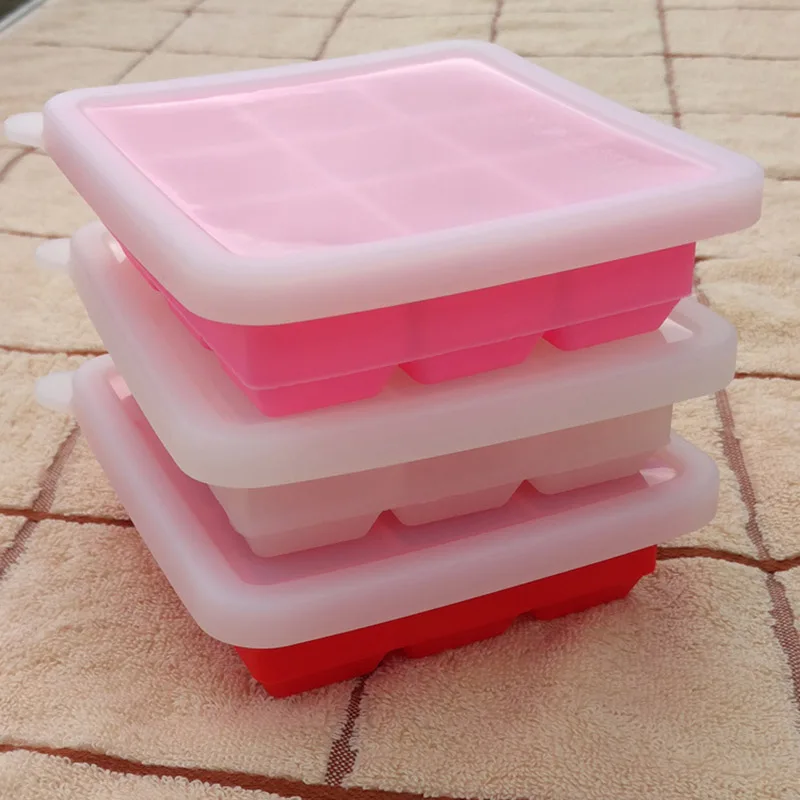
Another advantage is that you probably already have ice cube trays, which is why you don't have to buy them.
Once the puree has hardened in the molds, you can simply transfer the cubes to airtight bags and use as needed.
Women's jeans: one thing you need to pay attention to before you buy them
It's Good to Wash Frequently: The Shampoo and Hair Care Myths That Hurt
Why French Children Behave: Eight Ways to Raise Them
This method allows you to freeze several different types of baby food at once and saves a lot of time in the kitchen.
How long can baby puree be stored in the freezer?
Due to the formation of water crystals that form in grated fruits or vegetables, and the fact that nutrients can evaporate with water crystals when thawed, it is worth consuming this purge as soon as possible.
Most fruits and vegetables will last 8-12 months in the freezer.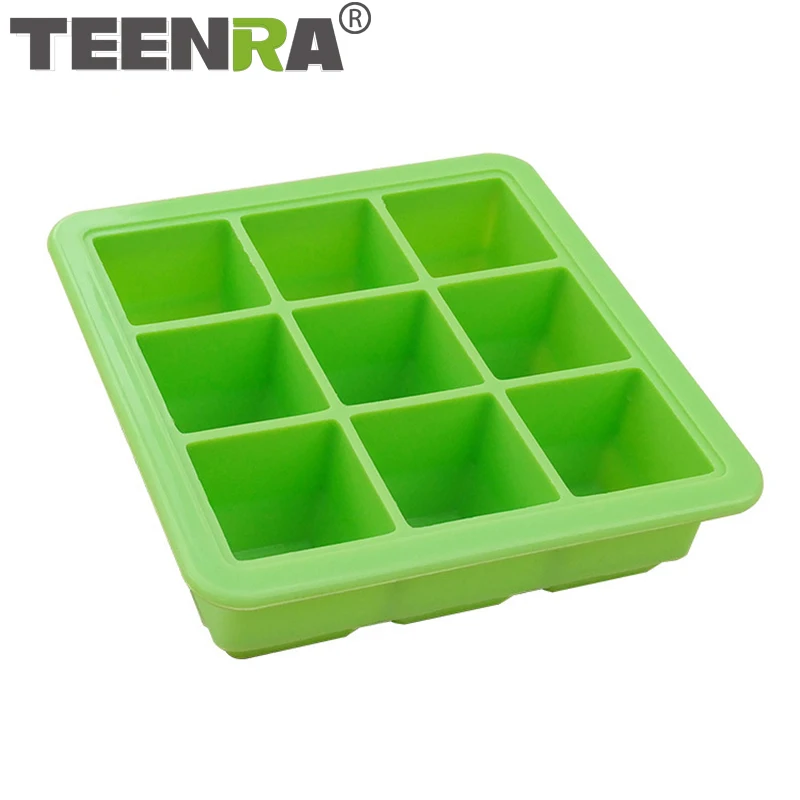 This applies to foods that have been frozen in their natural state. This assumes that a hundred in the freezer is maintained at a constant temperature below zero degrees.
If you want to keep frozen food for that long, you don't have to cook and grind vegetables and fruits. Simply cut into slices, arrange in hermetically sealed bags and place in the freezer. Thus, the products will be able to retain much more nutrients than when cooked.
"We are still friends": Derevyanko commented on the breakup with his wife
"Dad is offended." Agata Muceniece about relations with Priluchny after divorce
Vietnamese police academy student explains how to take care of her skin
How long can you keep baby puree in the refrigerator
It is not recommended to keep freshly prepared baby food in the refrigerator for more than 48 hours.
This ensures that bacterial growth in the puree is kept to a minimum and food tastes good.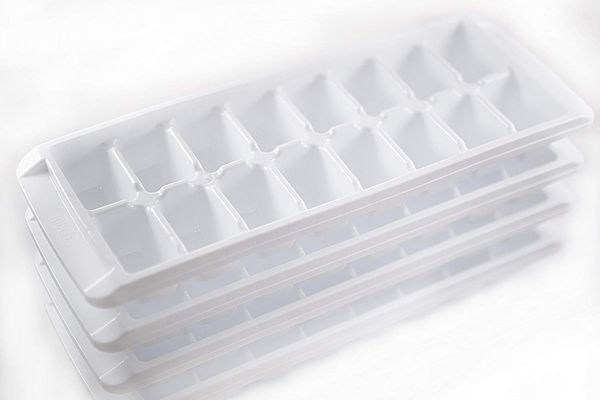 In addition, it will allow you to save more useful and nutrients.
This rule applies to fruits, vegetables, meat. It is important that in the refrigerator the baby food is on the top shelf, since this is where a constant temperature is maintained.
If you don't plan on freezing homemade baby food, it's a good idea to puree daily or every other day.
For example, you can bake a sweet potato and then freeze one half without mashing it and cook the other half. This will help reduce waste and ensure food safety.
Found a violation? Complain about content
Also read
Knitted skirt: New Year's looks with sequins and how to wear them after the holidays Short haircut trends for winter 2022-2023 and the best trends for women over 50 Back in fashion: how to make a hairstyle from the 90s for a party Clean up while you're at it: how to cook a big meal in a tiny kitchen Brown and pink: 5 colors that will be in fashion this winter And who will be loved? Happy relationships can be learned in advance Frosty lips from 90's - a fresh trend in winter makeup: how to repeat a make-up For some, it bloomed: how to water and feed the Decembrist during the flowering period It's time to forget about ugly passport photos: 12 makeup steps will helpPartner news
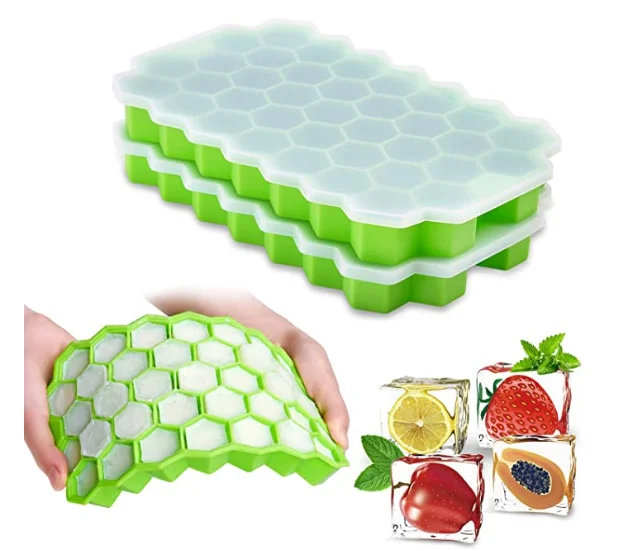
Silicone ice mold with lid / 24 cells
Art.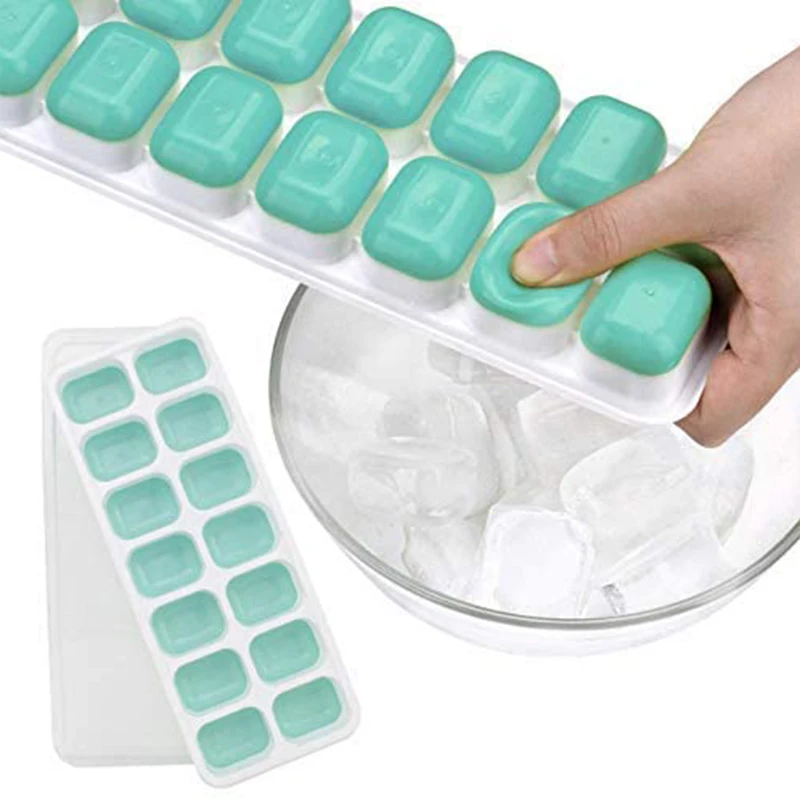 YN-2823
Organizer West 17.6
Ask a question Find reviews Buyer Protection Found cheaper?
L9 Silicone ice mold with lid / 24 cells
Ice mold with lid is made of flexible food grade silicone.
Ice cubes can be easily removed. The form perfectly bends and wear-resistant.
Tight lid keeps odors out.
Easy to use: just fill with water, soda, herbs, fruits or juices, then put the tray in the freezer and ice is ready in a couple of hours.