Ninja blender baby food recipes
Healthy Homemade Baby Food with Raw Ingredients
On busy days is definitely tempting to throw a bunch of junk food in your grocery cart that doesn’t require cooking or peeling. It’s also tempting to buy your baby those tiny tubs of baby food, and I have bought them on several occasions. The other day I loaded 10 tiny tubs of baby food into my shopping basket, only to look down and evaluate the small amount of baby food I was paying $12 for. I put the baby food tubs back, went to the produce aisle, and instead spent about $15 on a whole acorn squash, a bunch of bananas, several sweet potatoes, apples, and whole carrots. I got a lot of fresh produce for my $15 and best of all, my baby got to enjoy healthy baby food purees that were straight from raw fruits and veggies packed with nutrients and even a little fiber. Happy baby!
Making your own baby food is not as hard as it may sound. It requires a bit of planning but it’s completely worth it! I have 3 young children and my youngest is currently in the baby food stage. I’ve come up with a few tips and tricks so my little man can eat just as deliciously as the rest of the family. My favorite “tools” for making baby food include my Nutri Ninja Auto IQ blender and my Beaba BabyCook Pro, which allows me to make my baby smaller batches of baby food or a personal meal while I’m cooking the rest of the family’s dinner!
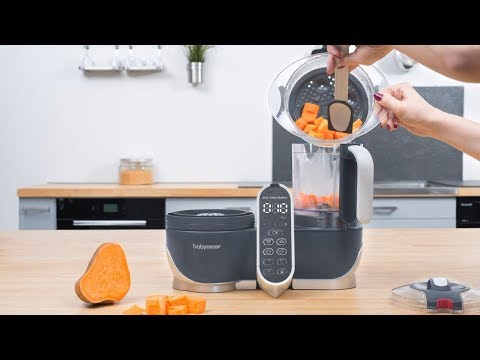
Beaba BabyCook Pro is an all-in-one appliance that allows you steam cook, blend, and reheat up to 4.7 cups of baby food in 15 minutes or less. You can refrigerate or freeze leftovers and simply defrost and reheat baby food right in the BabyCook. Steam cooking locks in vitamins and nutrients, a multi-purpose mixing blade provides just the right texture, the timer has an audible alert to tell you when meals are ready, and all of this with total one-handed operation.
I really appreciate the convenience of being able to throw a handful of raw sweet potatoes and have them fully steamed and ready to blend in 15 minutes.
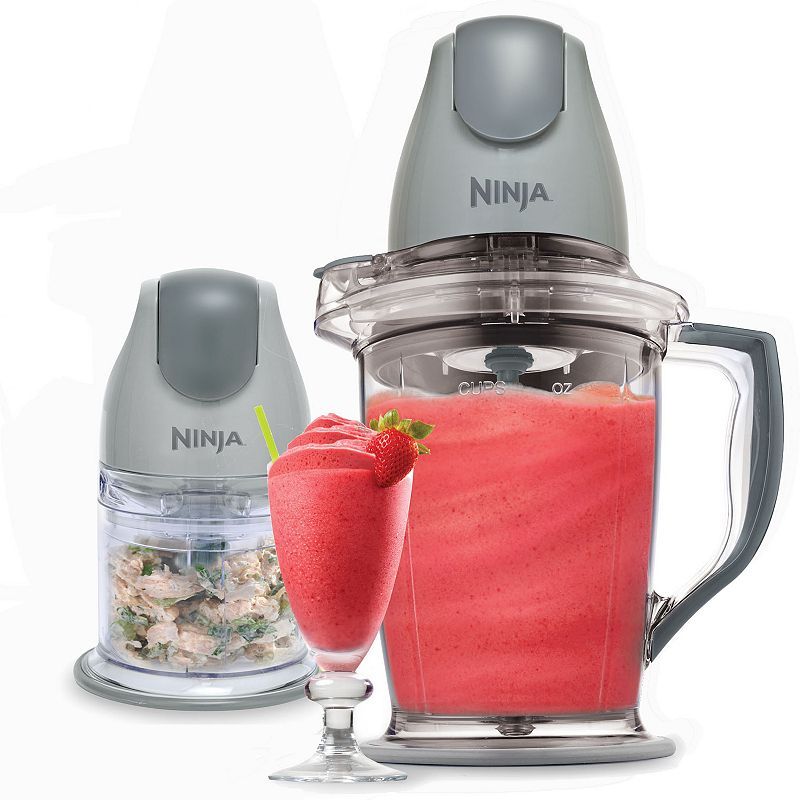
The universal Nutri Ninja Auto IQ blender is ideal for making baby food with chunkier ingredients. Its Smooth Boost technology purees even the toughest raw foods such as carrots, kale leaves, and chia seeds. I use our Nutri Ninja blender to puree large batches of baked squash or cooked chicken to store in the refrigerator and use as single food purees to combine with fresh mix-ins such as mashed banana and fresh berries. The Nutri Ninja has various settings and two mixing blades that offer a wide range of capabilities. Pulse allows you to control short bursts of blending. Low and Chop settings allow for mixing ingredients. Blend and Extract are high power settings, allowing you to make juices and shakes within the same appliance.
Yummi Pouch Brights combine style and convenience in an Eco-friendly portable baby food pouch you can fill with your fresh and homemade baby food purees. These reusable baby food pouches have a side spout with screw on cap and top zipper opening for easy cleaning and filling. You can fill a Yummi Pouch with homemade baby food, freshly steamed applesauce, yogurt, and smoothies. Moms can feed a baby directly from the pouch and older kids can hold the pouch to feed themselves, no spoon required.
Yummi Pouch reusable food pouches are a convenient way to store your baby food in the freezer to grab when you need it. I put Sweet Potato Mango baby food and Apple Butternut Squash baby food in my Yummi Pouch reusable baby food pouches. If you take a frozen Yummi Pouch along in your diaper bag, after a few hours it will be soft, cool and ready to enjoy! These reusable food pouches also have a feeding spout built in so you can conveniently feed your child on the go without taking a spoon along. Just position the food spout in your baby’s mouth and gently squeeze some of your homemade baby food into their mouth. Older kids can hold their own food pouch and feed themselves yogurt and healthy smoothies.
Just because a baby’s diet is limited, doesn’t mean they can’t enjoy a yummy variety of delicious baby food combinations. Check out my hearty baby food recipes below and tips for creating lots of baby food combinations.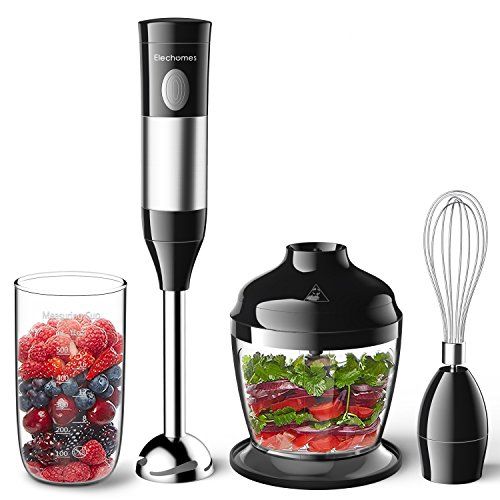
Related Post: Homemade Baby Food with Quinoa »
Gourmet Sweet Potato and Pasta Baby Food Recipe
- 1 peeled sweet potato
- 1/4 cup cooked pasta
- 1 tbsp. heavy cream and parmasan alfredo sauce (optional, ideal for babies 12 months +)
- pinch of salt
Peel a sweet potato (or several) and slice it up into chunks. Place it in a baking dish and add 1/2 cup water. Cover and bake at 400 degrees for 30 minutes until soft and golden brown.
Boil the pasta until extra soft, drain and coat with the (optional) Alfredo sauce. Make your own Alfredo sauce by mixing warm heavy cream with shredded Parmesan cheese until smooth. To be honest, I just grabbed a spoonful of Alfredo noodles from our own dinner for this baby food recipe.
Mix together a few chunks of baked sweet potato, a spoonful of cooked pasta, and a pinch of salt; blend until smooth. Don’t add too much pasta or it will suck up all the moisture and make your baby food thick and goopy.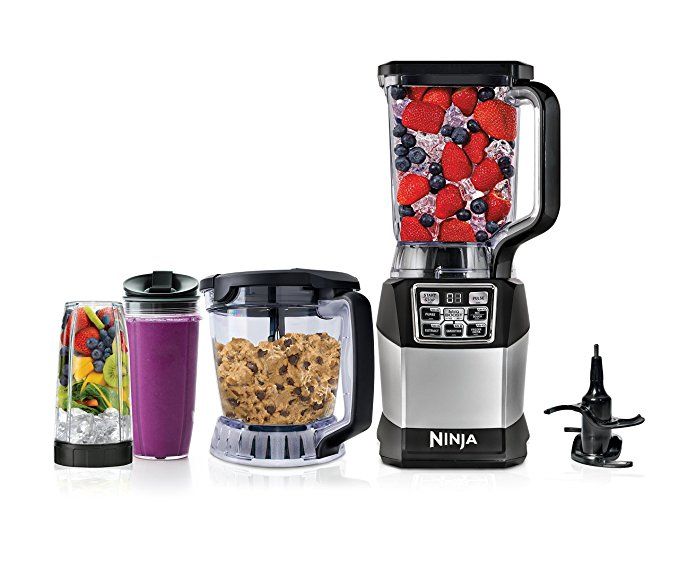
Tip! I often make a whole pan of baked sweet potatoes and save the cooked chunks in a container in the refrigerator to use for specific baby food combinations. This allows me to make baby food that’s fresh and ready to go. Baked sweet potato can be mixed with banana or applesauce for quick and fresh baby food combinations.
Homemade Chicken and Apple Baby Food Recipe
- 1 piece of soft cooked chicken
- Several pieces of steamed apple, or scoop of apple sauce
- Honey, agave nectar, or salt.
This is another baby food combination that was inspired by dinner. Blend together 1 piece of well cooked chicken that’s soft and a spoonful of apple sauce. You can add a spoonful of honey (for older babies) or agave nectar to sweeten it, or a pinch of salt to make a more savory baby food combination.
Babies less than one year old shouldn’t eat honey due to allergy sensitivities, so I often substitute agave nectar as a baby food sweetener.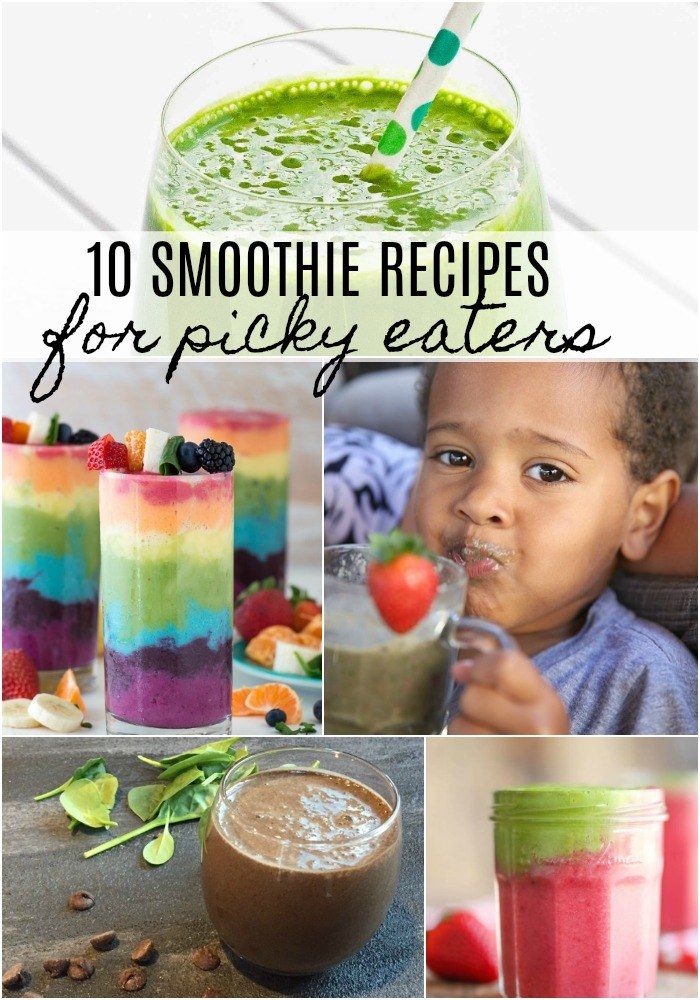 Many foods like sweet potato or butternut squash are naturally sweet enough. It’s easy to take parts of your own dinner and blend them together to create tastefully delicious baby food combinations.
If you like to have baby food on hand and not have to make baby food from scratch every day, make a large batch of single food purees that you can mix together. With these single food purees and fresh mix-ins, you can create all kinds of interesting combinations!
Single Baby Food Purees for Mixing
- Steamed sweet potato
- Steamed carrots
- Steamed and shredded chicken
- Baked acorn squash
- Baked butternut squash
- Baked peeled and sliced apples for homemade applesauce
- Pumpkin Puree
Fresh Baby Food Mix-Ins
- Mashed banana
- Fresh berries
- Avocado
- Mango
- Peach slices
My little guy loves diversity and gets tired of eating the same thing, so I try to make baby food meals interesting for him.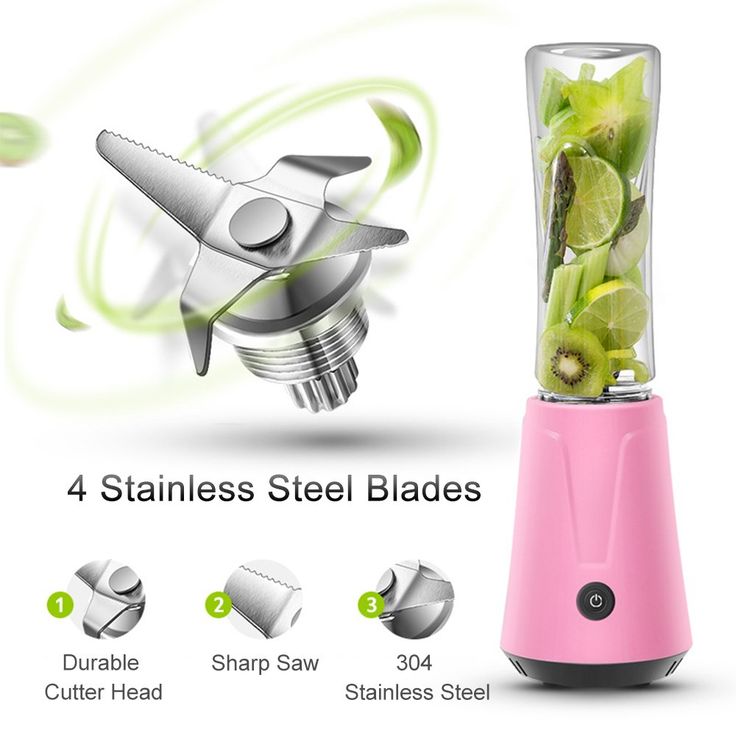 Offering a diverse selection of baby foods is a great way to encourage my baby to try new things too!
How I Make Baby Food (and stay sane): 6 months
This is not a post to tell you what to feed your baby, or to toot my baby food making horn. But I’m in the midst of the pureed food stage with my youngest, and have learned a few things that are making my life easier this time around. So – if you want to make baby food at home, read on!
My main reason for making baby food at home is to have control over the freshness and taste of the food. But also: store-bought baby food is expensive, man. Here’s a quick price comparison on a couple of items.
Squeezy pouch of organic apples (3.5 oz) – $1.39 or $.39/oz
2 lbs of organic apples (yielded 24 oz) – $2.99 or $.12/oz
Gerber container of [not organic] peas (7 oz) – $1.09 or $.15/oz
Bag of [not organic] frozen peas (yielded 16 oz) – $1. 29 or $.08/oz
As you can see, whether you choose to do regular or organic fruits and veggies, store-bought food can cost about 2-3 times as much as making it at home. If you have a tight grocery budget, that’s significant savings. If money isn’t an issue, but time is, you can look at buying your baby food as a small monthly investment to make your life less insane. ;o)
The tools you need are simple, and you probably already have them.1. A pot and a steamer basket. (You probably don’t need anyone to tell you how to steam something, but there are links to lots of recipes below in the Resources section.)
2. A food processor and/or blender. (I use these interchangeably – the food processor is perfect for fruits and veggies that get really tender, like apples, pears, butternut squash, and sweet potatoes. We have a Ninja blender and the single-serve smoothie cup attachment is great for things like peas and green beans because it gets even their skins extra smooth. )
)
3. Ice cube trays. (Mine are cheapo plastic ones. I freeze the puree for a couple of hours – or let’s be honest, until the next time I open my freezer – then dump the cubes into freezer bags!)
Build up a freezer stash gradually.Our doctor recommends waiting a few days between introducing new foods, which gives you the perfect opportunity to build up a freezer stash of a variety of foods over a couple of weeks.
- Like when you’re already in the kitchen prepping veggies. My daughter’s first veggie was butternut squash, since I was peeling and cutting one up for this side dish. I used the other half of the squash for her puree. Steaming it and whizzing it up in the food processor was extra dishes, but not really extra time. A couple of days later, I steamed fresh green beans for dinner and put a bunch in the blender for the baby.
- Or when you have help. On a Saturday when Jay was home, I peeled and pureed a huge bag of pears from Costco while he entertained the girls.
- Baby food for everyone! There are even some foods that our whole family enjoys in mashed form, like applesauce, cauliflower, and sweet potatoes. Then it’s just a matter of making a big batch and freezing some for future baby meals (and adding some seasoning to big people portions – I don’t add salt or butter to her food at this point).
I prefer this gradual method over a marathon day of making a bunch of kinds all at once (plus, I only have 3 ice cube trays).
Thaw just what you need.I like that I can easily adjust portion sizes instead of dealing with a fixed amount in a store-bought container. My ice cube trays make 1-oz cubes, so it’s easy to just pull out a few to thaw. I use these cute glass containers by Innobaby, and try to remember to thaw them the night before in the fridge, but it only takes a few seconds in the microwave even if they’re still partially frozen. (If you do use the microwave, it’s really important to thoroughly stir the puree to eliminate hot spots and to test the temperature before feeding the baby.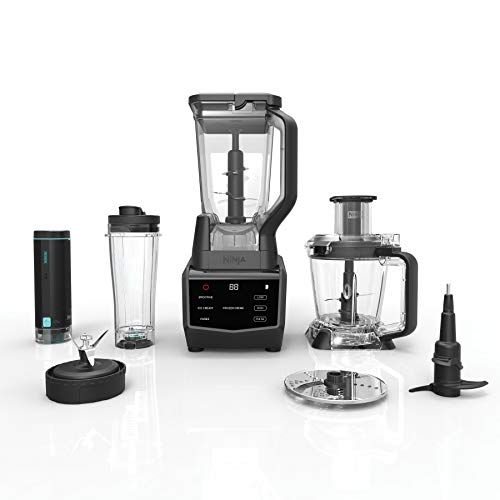 )
)
With my older daughter, I got all fancy making combination purees. But…sometimes she just hated them, even if she liked the ingredients separately. This time around, if I want to mix something, I just thaw one cube of apples and one of butternut squash, for example. I use the pouches at the store as inspiration for flavor combinations!
Pea and pear combination.
These are some of my favorite web resources for more info and recipes!
Momtastic’s Wholesome Baby Food site. This page gives a great step-by-step for making purees, and I also go here for info about when to introduce various foods.
Weelicious is a great place to find baby food recipes (and ones for the whole family)!
Baby Center’s age-by-age guide to feeding your baby is so helpful to me.
Annabel Karmel‘s books and website were recommended by our pediatrician – here’s a link to her recipes for 6-9 months.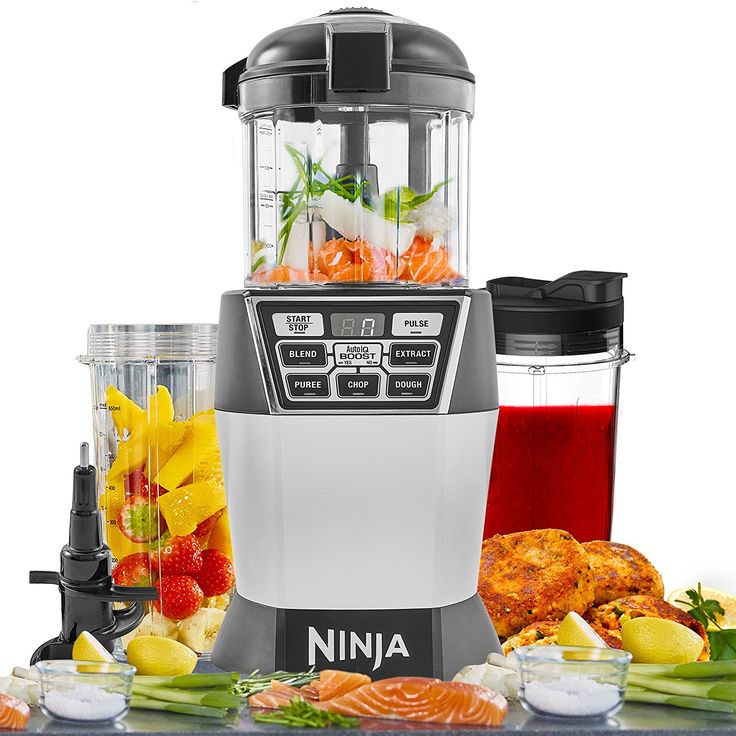
Notes:
Please consult your child’s doctor about how and when to introduce solid foods.
Our doctor recommended that we not make carrots, spinach, or beets at home because of possible exposure to nitrates from the soil these foods are grown in. (Baby food companies test for nitrate levels.) However, according to the American Academy of Pediatrics, infants are at risk when they are 3 months or younger (and they don’t recommend solids at that age, anyway). See the very wordy article here. So I don’t actually heed that advice. :o)
This post contains an affiliate link, which means that Amazon will give me pennies if you buy from my link.
1
What to cook in a blender, the best recipes for a blender
Cooking can be easy and creative if you have a blender in the kitchen. Many are accustomed to associate it with a device for making mayonnaise and various sauces, but those who know a lot about healthy eating have long been using it at home to prepare healthy meals.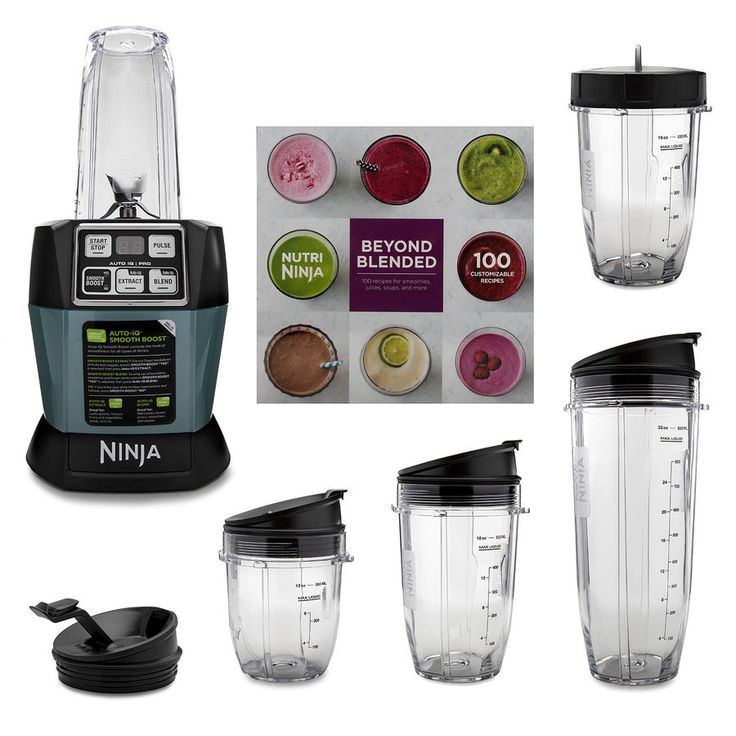
Blender types
Depending on the type of blender, you can prepare completely different types of food. Distinguish:
- stationary;
- submersible.
Stand blenders are shaped like a bowl with a knife attachment inside. It is good for preparing cocktails, smoothies, baby food, as well as crushing ice, whipping proteins with sugar, and even making minced meat. The immersion model has various attachments that help you cook a variety of dishes with ease.
The base attachment looks like a blender leg with a two-bladed knife at the end. To prevent splashing, the knife is closed with a cap, so it is safely used to work in different containers: both narrow and wide. The basic nozzle is most often used for making vegetable and fruit puree soups, sauces, smoothies and baby food. At first, it became very popular in the USA among bartenders and was used by them to create alcoholic cocktails. Later it gained popularity all over the world.
To prepare a cocktail with the foot attachment, place the ingredients in a tall, narrow glass and immerse the blender itself in it. You need to beat for about 30 seconds. The result is a drink of a homogeneous consistency. To get a super-nutrient drink, you just need to increase the preparation time to 1 minute.
For long life, the attachment should not be used to grind super hard ingredients. Also, at high speed, drive the foot inside the container smoothly. For beating eggs, it is recommended to use the low-speed mode of operation of the device.
For long life, the attachment should not be used to grind super hard ingredients.
The cube cutter is used to create cubes from fruits and vegetables. It is convenient to cook salads with it. It may not be in all models, but its presence greatly facilitates the preparation of dishes such as Russian salad, vinaigrette, okroshka and others. All you need for this is a two-liter container and a nozzle for cubes. Manufacturers recommend chopping boiled vegetables or fruits (rather than raw) with a cube cutter so as not to clog the blender.
The chopper attachment is useful for chopping onions, garlic, nuts or meat. If you want to cook minced meat without veins, sauce or just chop greens, then you will need this particular nozzle. It comes in different sizes: compact, medium and large. Compact are suitable for grinding ingredients up to 0.3 l, medium - up to 0.5 l, large - up to 1 l.
To determine the size of the grinder, it is desirable to know in advance how much food will be processed at a time. In some cases, it is better to choose models with two shredders. For example, to cook minced meat, you need to focus on choosing a large chopper with a double knife. The ice crusher is perfect for crushing ice or frozen juice. It looks like a knife with serrated blades at the end.
The whisk attachment is normally needed for making creams, whipped cream, dough, biscuits and omelettes. It looks like a form of specially twisted aluminum rods. In addition to it, a container bowl is usually attached. This nozzle must be used very carefully, do not press hard on it to avoid deformation. Therefore, do not abuse the speed limits and do not put much pressure on the bottom of the bowl surface.
Mashed potato attachment makes the dish fluffy and airy. It consists of a punching net and knives. With its help, various types of puree of a homogeneous consistency are prepared without any mechanical effort.
Hook for kneading dough. It is rarely attached to the set, but is necessary for housewives who often pamper their relatives with pastries and other delights from the dough.
Daily Recipes
What can I cook with a blender in just a few minutes? We offer some useful recipes for every day for cooking with a home blender.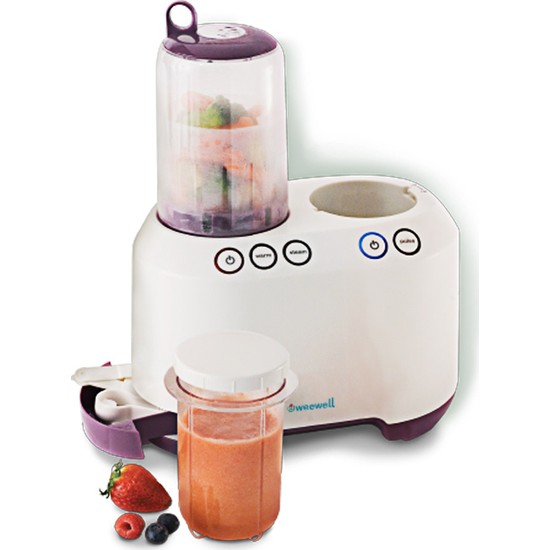
The most delicious, simple and healthy smoothie. Berry smoothies are especially good for toddlers and schoolchildren. It is enough to combine 5-6 strawberries, 10 cherries, half a banana and a glass of kefir in a bowl. All components must be whipped for one minute until a bubbly homogeneous mass is obtained.
An unusual and very healthy green smoothie made from parsley, avocado and pear. To get a vitamin drink, a bunch of parsley, an avocado and a large green pear are added to the bowl. Everything is poured with a glass of warm water and beaten to a homogeneous consistency. You can pour such a drink into low wide glasses and garnish with mint or lemon balm.
In the cold season, a drink made from milk, banana and honey will help out perfectly. It will increase immunity, strengthen weak hair and improve brain function. For cooking, two very ripe bananas, a raw chicken egg, a tablespoon of honey and 70 ml of warm milk are mixed in a container. All ingredients are whipped with a blender until a homogeneous mass is obtained. For a beautiful culinary effect, the resulting drink is served in tall glasses with frosted glass.
Some cool recipes for the Multi Air Fryer - Cooking without oil for cooking. The food is fragrant, delicious, healthy and bakes very quickly. To diversify it, check out unique and simple recipes that any beginner can handle. You should definitely try at least a few dishes that are simply impossible to refuse!
Garlic Baked Potatoes
Are you ready to try fragrant and airy crispy potatoes made with an air fryer? Small pieces of garlic with parsley will add piquancy and completeness to the food. Treat the whole family to this simple but incredibly delicious American dish that takes only 35 minutes to prepare and requires a standard set of products:
- 3 potatoes
- 1-2 tbsp olive oil
- 1 tbsp salt
- 1 tbsp garlic
- 1 tsp parsley
First, wash the potatoes well, as they will bake with the skin on, which can then be eaten.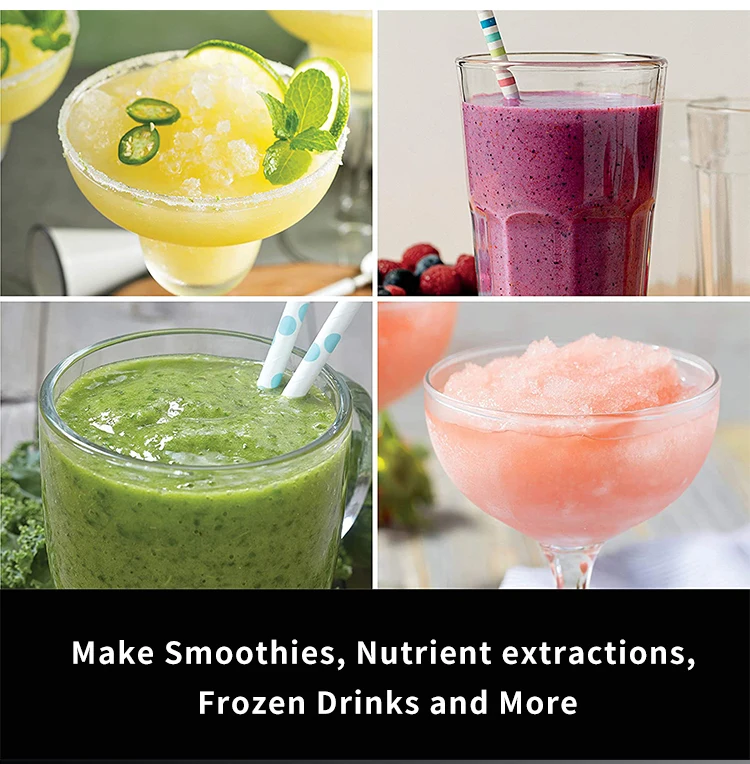 Make small holes with a fork, pour olive oil, evenly sprinkle salt, grated garlic. Place in a fryer for 35-40 minutes at 200 degrees. Check with a fork, or all places are well baked. You can remove the skin from the top a little, adding sour cream, chopped parsley, butter, cheese or bacon - all to your taste.
Crispy Brussels sprouts
A low calorie yet delicious recipe that even those who don't really like sprouts will love. Be sure to note that it is better to cut a large fruit in half in order to bake well. Even if you don't have any special cooking skills, you only need 15 minutes and a few ingredients:
- 2 cups Brussels sprouts, preferably cut in half
- 1 tbsp olive oil (or maple syrup)
- 1 tbsp balsamic sauce
- 1/4 tbsp sea salt
- vinegar
Place cabbage seasoned with oil or syrup, balsamic dressing, a little vinegar to taste and salt in a bowl. You need to fry for no more than ten minutes, at a temperature of 204 degrees. Stir after five minutes and check for readiness, repeat after three minutes. This is important so that the cabbage does not burn and does not begin to become covered with a black crust.
Chicken Fried Rice
This deep-fried dish is perfect for a full and hearty meal. Treat yourself to Chinese cuisine, only healthy and made with love at home. The recipe is also suitable for adherents of a healthy diet, because roasting does not require oil. Ingredients needed:
- 3 cups cold boiled white rice
- 1 cup frozen peas and carrots
- 6 tbsp soy sauce
- 1 tbsp vegetable oil
- 1 cup chicken, boiled and diced
- half a glass of onion, diced
Place the cooked rice in a bowl and stir in the vegetable oil and soy sauce, mix thoroughly. Next, add vegetables and meat: carrots and peas, onions and chicken. The main thing is to bake the dish in a dish with a non-stick coating.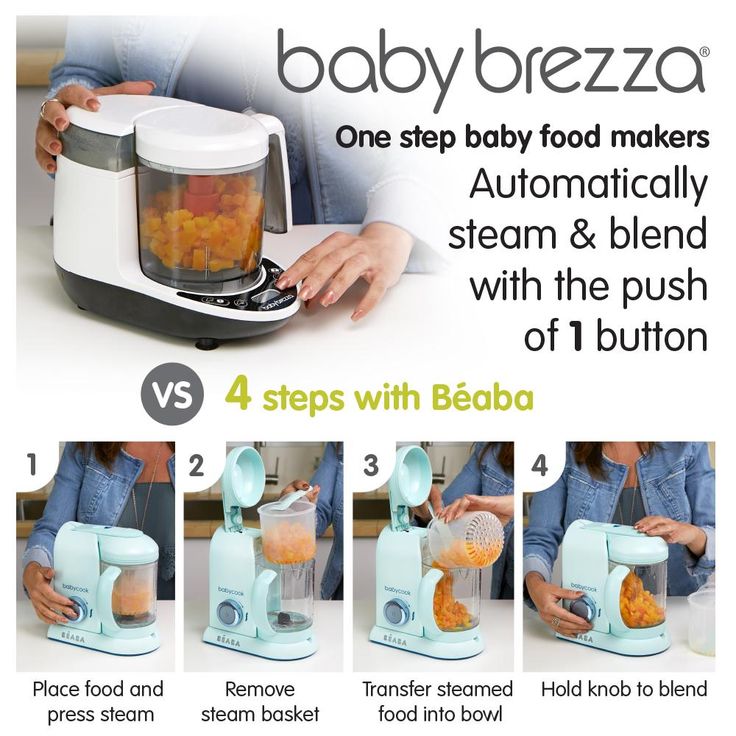 Set the cooking time to 20 minutes and preheat the air fryer to 182 degrees. The timer will notify you when you can start eating!
Spicy chicken empanadas
Would you like to taste the delicate empanada patties with a thin layer of dough and a hearty filling? This Mexican dish can be prepared using an air fryer. Stock up on the following ingredients:
- 1 pack of frozen dough sheets
- 1 cup shredded grilled chicken
- half a glass of grated cheddar cheese
- 1/4 cup chopped green onions
- half cup chopped cilantro
- 2 chopped jalapenos, pre-peeled
- half tsp minced garlic
- half tsp ground cumin
- 2 tsp hot sauce
- salt and pepper to taste
- 1 egg (beaten with 1 tbsp water)
For the sauce:
- half a cup of sour cream;
- 1 tbsp chopped green onion
- 1/2 cup chopped cilantro
- 1/4 tbsp cayenne pepper
- 1/4 tbsp smoked paprika
- salt to taste
In a deep bowl, combine cooked chicken, cheese, onion, jalapeno, cilantro, garlic, cumin, hot sauce, salt and pepper. Roll out the dough sheet on a floured surface. Use a 5" round cutter and cut as many pieces as possible. Roll out and cut until the dough is finished. (You should get about 10 circles from each sheet).
Place 1 tbsp in the middle of the dough. spicy chicken, brush the edges with egg. Fold in half, making a semicircle, firmly press the edges with your fingers. Then flatten them slightly with a fork so that the filling does not fall out. Brush the surface again with the egg. Bake at 200 degrees for about 10 minutes. Serve hot with prepared sauce.
Pickled Cucumber Chips
Salty and crunchy cucumber chips with spicy spices - you won't find these in the store! Chips always seem unhealthy, but everyone will be surprised when they learn that the recipe does not use oil and fat. Few Ingredients Required:
- a glass of coarsely chopped pickled cucumbers
- 2 eggs
- 2/3 crushed breadcrumbs
- 1/3 grated Parmesan
- 1/4 tsp dried dill
Cut the pickles into sufficiently thick slices, let them dry on a dry towel or napkin. Whisk the eggs in a bowl and stir in the breadcrumbs, parmesan and dill. Whisk well again and stir. Dip the cucumbers into the mixture and coat separately in the remaining crumbs. Bake for about 10 minutes at the highest temperature. The dish is served! Serve in a pretty bowl.
Fried catfish
The air fryer will delight fish lovers, whose taste changes beyond recognition, and the fillet just melts in your mouth. In addition, this method makes the dish less high-calorie, so it is suitable for girls on a diet. For cooking you will need:
- 4 catfish fillets
- fish seasoning
- 1 tbsp olive oil
- 1 tbsp chopped parsley
Rinse and dry the fish. Put seasoning in a bowl, catfish on top. Next, cover the container with a tight lid and shake it so that the fillet is completely covered with sauce. Drizzle olive oil over the top. You need to fry for about 10 minutes in a grill heated to 200 degrees, then turn the fish over and cook the same amount. Turn over again and hold for another 2-3 minutes if desired. Sprinkle parsley on top and enjoy!
Shrimp
Let's not dwell on seafood, because you can cook wonderful fried shrimp with a spicy sweet chili sauce. What you need for cooking:
- 1/2 kg raw and peeled shrimp
- 1 egg white
- 1/2 cup flour
- 3/4 breadcrumbs
- 1 tsp paprika
- salt and pepper to taste
- food spray
Place flour, egg white and breadcrumbs in separate containers. Season the shrimp with spices, alternately dipping into the prepared bowls with the listed ingredients. You should not put it in flour completely, just touch it lightly from all sides, the same with protein. In crumbs, on the contrary, you need to dip well. Use cooking spray to spray. Bake at a temperature of about 200 degrees for about 4 minutes, turn the shrimp over and cook the same amount in a burnt pan. After spending half an hour cooking, you will fully meet your expectations, especially choosing the right sauce for the dish.
Seasoned Pepper Chicken
Pampering yourself in everyday life is so easy when you have a fryer at hand. Fragrant and hearty chicken breast with spices will appeal to almost everyone and will become their favorite dish. For this you will need:
- chicken breast
- 2 lemon peels and juice
- 1 tbsp chicken seasoning
- 1 tbsp minced garlic
- pinch of pepper and salt
First, let's prepare a container: you need to lay foil on the bottom and pour seasoning and lemon peel on it. Prepare the breast by removing any remaining bones and fatty areas, if any. Salt and pepper well on each side, rub seasonings thoroughly. Place on foil and seal the meat completely to preserve the flavor of the dish. In a deep fryer preheated to 180 degrees, bake for about 15 minutes and immediately start dinner until the food has cooled.
Greek Spice Pie
- dough
- minced vegetables and meat to taste
- 3 eggs
- 200 g spinach
- 1 onion, minced
- 100 g Feta cheese, diced
- 1 tbsp basilica
- 1 tbsp oregano
- 1 tbsp thyme
- salt and pepper
Season vegetables and meat with pepper and salt, mix well.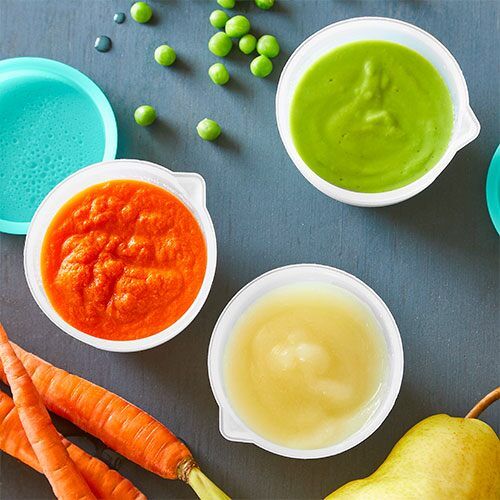 Place them on a paper kitchen towel to remove moisture. Mix with seasonings and herbs, as well as feta cheese. Add two eggs and keep stirring. Place the filling evenly on the rounded piece of dough and cover with the same sheet. Brush with the remaining egg. Bake for 20 minutes at 180 degrees and immediately run to serve!
Potato snacks
Soft and tender potato snacks with a crispy crust and onion seasoning will sell like pies. Everyone has time and ingredients to cook:
- 4 large potatoes
- 1 bow
- 4 eggs
- 1 tbsp starch
- 1 tsp salt
- half tsp black pepper
- half tsp baking powder
- grape seed oil
Peel and grate potatoes on a medium grater, place in cool water. After that, finely grate the onion, dry it with a towel. Beat eggs separately and add salt, pepper, starch, baking powder and grated onion to them. Drain the water from the potatoes, add the remaining liquid to the onion mixture.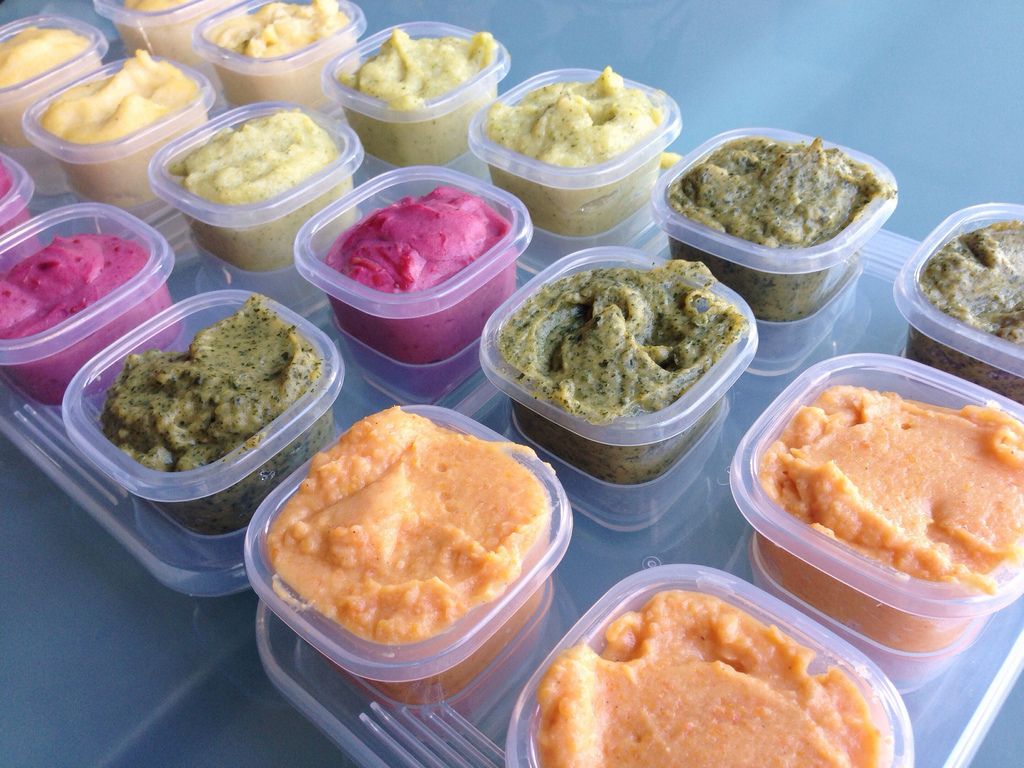 Mix all ingredients. Grease a silicone tray with oil and place potatoes evenly, bake at 180 degrees for about six minutes. Drizzle with oil and then cook four more, serve with sour cream or sauce.
Sweet potato chips
In addition to potato dishes, thin and tasty chips that do not require special culinary skills are an excellent option. You will need:
- two potatoes, thinly sliced
- 1/4 cup olive oil
- 1 tbsp ground cinnamon
- salt and pepper to taste
First you need to cut the potatoes as thinly as possible, it is convenient to use a food processor for this. Hold the pieces for half an hour in cold water. After you need to dry well, sprinkle with salt, pepper and cinnamon (if you want), generously dip in oil. Place on the grill and bake for about 20 minutes, shaking the pan every 7-8 minutes. For cooking, set the temperature to 200 degrees. These chips are usually served with ketchup.
Stuffed Halopene Peppers
Moderately spicy and seasoned with a delicate creamy filling, the pepper will be a satisfying addition to breakfast or lunch. The dish is healthy, simple and incredibly tasty. Ingredients needed:
- 10 jalapeno peppers, cut in half
- cream cheese
- 1/4 cup fresh parsley
- 3/4 cup breadcrumbs
The recipe is very simple: mix half of the crumbs with cream cheese, sprinkle with chopped parsley. Fill the peppers with the mixture, as for stuffing. Sprinkle the remaining crumbs on top: for a better taste and a beautiful presentation. For cooking, 6-8 minutes are enough in a deep fryer heated to 180 degrees. Let the dish cool and enjoy!
Cauliflower with Sauce
Don't worry, if you love cauliflower, this easy and healthy recipe is just for you! All you need is:
- 4 cups of cauliflower
- 1 cup breadcrumbs
- 1 tsp sea salt
- vegan butter
- buffalo sauce
- choice of sauce for serving
First, melt the butter, whisk it with the Buffalo sauce. Mix crushed breadcrumbs with sea salt. Alternately dip the cabbage first in the first mixture, then in the second. Preheat the grill pan to about 270 degrees and bake the dish for 14-17 minutes, shaking occasionally so that it does not burn. Dip kale in your favorite sauce.
Fried chicken leg
Healthy and yet so satisfying chicken leg is never too much for dinner. In order to start cooking, you need to stock up:
- 8 chicken legs
- 50 g gluten-free oats
- 50 g cauliflower
- 1 big egg
- 50 g coconut milk
- 2 tbsp thyme, oregano and mustard powder
- 1 tbsp cayenne pepper
- salt
Season chicken with salt and pepper to taste and rub with coconut milk. The rest of the ingredients, except for the egg, need to be beaten in a blender at low speed so that they are sufficiently chopped. As a result, the chicken must first be dipped into the resulting mixture, then into a container with a beaten egg, and again into the mixture.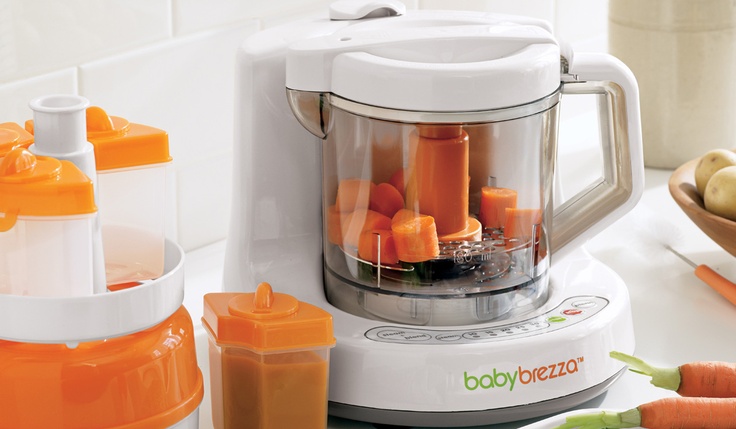 Cook for about 20 minutes in a grill preheated to 180 degrees, you can hold it for another five minutes at a temperature increased by several degrees, for a spicy and crispy crust.
Basil Crispy Croutons
Hot and hearty croutons are almost everyone's favorite breakfast dish. It turns out that you can cook it with the help of a deep fryer. You will need:
- 1 baguette, cut into cubes
- 2 tsp olive oil
- 2 tsp lemon juice
- 1/2 tsp dried oregano
- 1/2 tsp dry basil
- 1/2 tsp granulated garlic
- a little salt and pepper
Bread cubes are placed in a bowl and seasoned with olive oil and lemon juice. Then everything is simple: pour the remaining spices and mix thoroughly. Bake for 5 minutes at a temperature of 200 degrees, periodically shake the container. These croutons, prepared in just a few steps, are delicious sprinkled on top of your favorite salads.
Kale Chips
Chips can be made with just about any ingredient, and kale is no exception.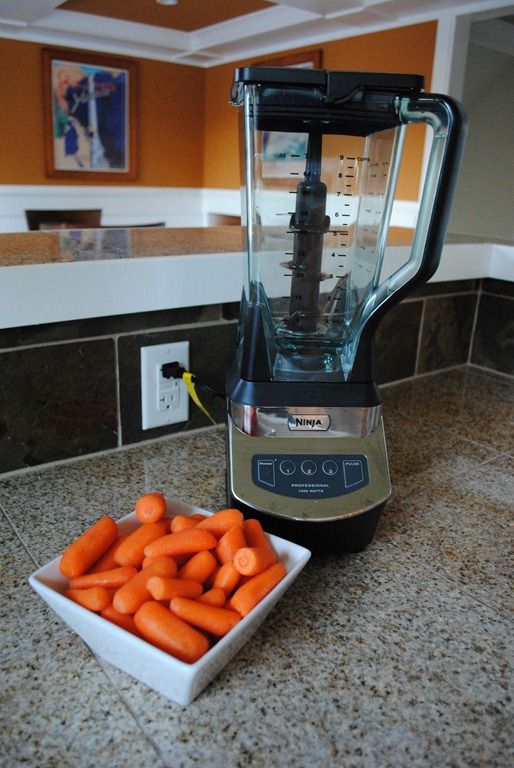 The recipe is as simple as possible:
- 4 cups cabbage
- 2 tbsp olive oil
- 2 tsp seasonings to taste
- 1 tbsp breadcrumbs
- 1/4 teaspoon salt
Mix olive oil, seasoning, breadcrumbs and salt, then dip cabbage into it. Next, bake in a grill that does not need to be preheated. It is enough to set the temperature to 190 degrees before cooking and fry for about 4-5 minutes, be sure to shake it so that the chips do not burn. They are suitable as a separate dish, and as an addition to the main one.
Quick Baked Breakfast Bags
If you can't imagine your diet without baking, then this recipe will surely please you. It is also simple and understandable even for beginners. From the ingredients you need to prepare:
- a package of puff pastry
- 4-5 eggs
- 1/2 cup chopped sausage
- 1/2 cup Cheddar cheese
Boil the eggs in the pan as you cook them for scrambled eggs, you can add sausage to also fry them.