What do you feed baby brine shrimp
Growing Brine Shrimp for Tropical Fish Food
Brine ShrimpBrine shrimp deserves to be considered by the tropical fish industry as the single most important food item in the whole world. This is due to the fact that brine shrimp contains an unbelievably high amount of energy. If not for brine shrimp, the tropical fish industry might not be what it is today. To help larval tropical fish have a good start, newly hatched brine shrimp is used by almost all individuals who breed tropical fish at home as well as at nearly all fish farms.
Article Contents
What Are Brine Shrimp?
Small Crustaceans. Brine shrimp is the common name that refers to a water animal belonging to crustaceans, which are identified by their multiple pairs of legs as well as their hard exterior shell. Commonly used for feeding tropical fish raised in aquariums, brine shrimp usually grows no more than 1.30 centimeters in length. Several varieties of brine shrimp exist, but all of them are considered to belong to a single species under a single genus (Artemis). They are generally characterized by their compound eyes, which are stalked, as well as their tapered bodies, which consist of a trunk to which eleven pairs of leaflike legs are attached.
Adaptable Creatures. Brine shrimp are different from true shrimp and cannot be found in the oceans but they can be found in many bodies of water in the world, especially inland salt waters. What is so fascinating about these crustaceans is their ability to easily adapt to fluctuations in water salinity. Brine shrimp can live without difficulty in a body of water which has a higher salinity level than sea water. They also have high tolerance for a water environment which has only one tenth of the salinity found in marine waters.
Easy Prey. The Great Salt Lake harbors vast windblown lines of brine shrimp, which generally occur in large numbers. Their small size makes them easy prey to larger water animals and this is why they are not found in oceans. Brine shrimp can flourish in inland saline habitats, in which their predators do not live.
Bearers of Highly Resistant Eggs. The female brine shrimp carries a brood pouch in its body. Under favorable conditions, the female liberates all her active young shrimp from this pouch. Female brine shrimp may also lay their eggs without having them fertilized by sperm. When brine shrimp eggs do get fertilized, they may hatch right away or are made to undergo a drying process (to make them viable for a number of years). Brine shrimp eggs are able to tolerate harsh environmental conditions; this quality gives them the ability to hatch without difficulty in saltwater as well as their usefulness as tropical fish food.
Why Brine Shrimp Is An Essential Food for Tropical Fish
A diet which consists of live baby brine shrimp has been tried and tested to be effective in raising many types of tropical fish. There are several reasons for baby brine
Brine Shrimpshrimp being an ideal food for baby tropical fish (or “fry”). One is the natural movements of brine shrimp, which attracts baby tropical fish into eating them.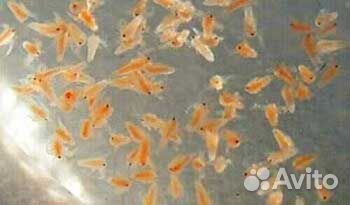 Another reason that makes baby brine shrimp good for baby tropical fish is the naturally high levels of protein that it contains. Brine shrimp is also rich in other nutrients that have not been subjected to any form of processing method, such as those undergone by freeze-dried foods, pellets, and commercial flakes.
In addition to that, baby brine shrimp can be easily digested. They also have the ability to survive for several hours when placed in a tank filled with baby tropical fish. This ensures that the tropical fish are provided a continuous supply of food, and that they get to grow in a tank in which the water’s good quality has been maintained. A number of commercial fish foods easily dissolve in water and affect its quality.
How to Make a Brine Shrimp Hatchery
What are referred to as brine shrimp eggs are actually cysts which swell with water when they become wet. The cysts start to hatch at 78°F after about eighteen hours to one day. Since the baby brine shrimp have incomplete digestive and excretory systems at this point, they cannot take in and process any food.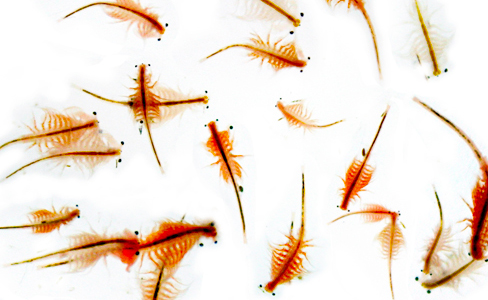 This, and the fact that their bodies are packed with energy, makes them perfect as food for tropical fish.
Equipment Needed: Hatching brine shrimp cysts is a simple process which allows one to easily make one’s own brine shrimp hatchery. To construct it, one will need to prepare a number of equipment. A small glass tank will serve as the hatching tank for the baby brine shrimp, and another glass tank that is larger in size will serve as their growing tank.
Other supplies needed include a large stiff plastic sheet, a small tapping screw made of stainless steel, airstones to provide a dedicated air supply for the two glass tanks, a large bag of sea salt, a container filled with brine shrimp eggs, and a handy flashlight. One may add a third glass tank to the list if the brine shrimp are to be grown up to their adult stages.
Directions:
1. The hatching tank needs to be divided into two parts, with one part taking up two-thirds of the tank’s area. Use the large stiff plastic sheet for this purpose to serve as the divider. In the center portion of the plastic divider, make a hole that is 1 ½-inch in diameter. This hole will be where the baby brine shrimp will easily swim through. After making the hole, set aside the divider to start working on the hatching tank itself.
2. Blacken the two-thirds portion of the tank as well as its lid. The goal here is to create a lightless area while still allowing light to pass through the remaining one-third portion of the tank.
3. Make a cover for the hole in the tank divider by cutting a disc of plastic that is big enough to go over it. Then use a drill to make small holes both in the disc and in the divider itself. Doing so will accomplish the idea of having the disc function as an eyehole in the hatching tank that, when swung into position, will cover up the hole in the divider. This prevents light from entering the darkened portion of the tank.
4. Place the divider inside the tank, making sure to get it securely attached and achieves a snug fit.
5. Measure the entire tank to determine its actual size. Use the figure in order to calculate how much sea salt is needed to create saltwater that is strong enough to allow the baby brine shrimp to hatch. Make sure to follow the instructions indicated in the sea salt bag so that a salt concentration that is a bit higher required by marine fish is achieved. Since the chlorine and chloramines in chlorinated water are toxic to the baby brine shrimps, it is important to use only water that has been stripped of chlorine.
6. Place the eyehole in position so that the blackened portion of the hatching tank becomes truly dark.
7. In case the room where the hatching tank for the baby brine shrimps is placed is cold, have a heater installed in order to maintain a water temperature that hovers between 65 to 70 degrees Fahrenheit.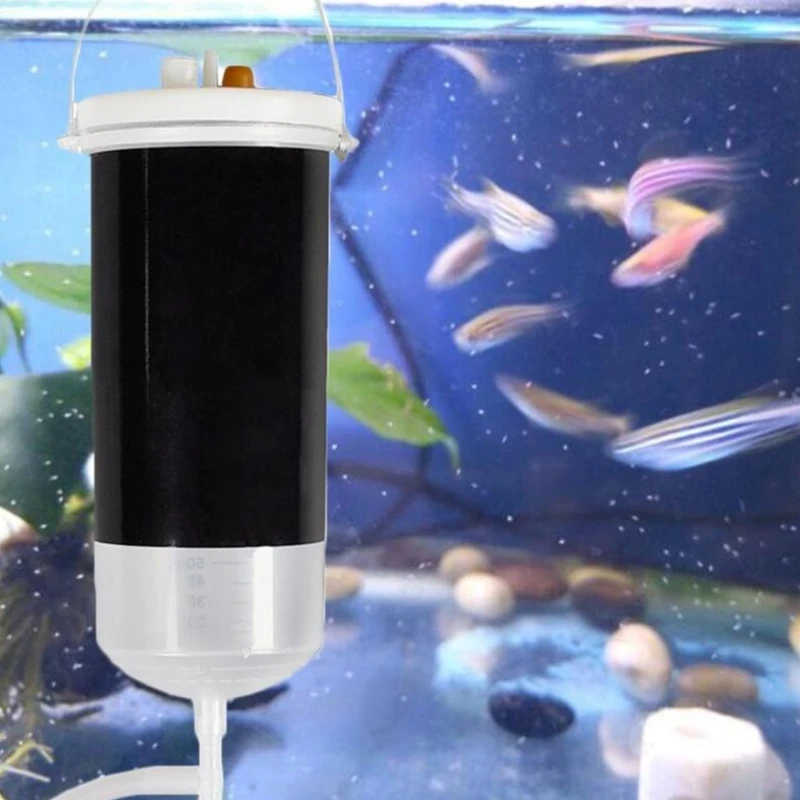
8. Set up the airstones inside the hatching tank, specifically in the dark area of the tank. Turn on the airstones after installing them successfully.
9. To the dark portion of the hatching tank, pour about 1/4 teaspoon of the brine shrimp eggs. Ensure that the airstones are functioning well in order to keep the eggs afloat on the water; it is important that the eggs are prevented from setting on the bottom of the tank.
10. Place the lid on the tank to cover it, and then allow the eggs to float in complete darkness for one day and twelve hours. When the time is up, check the baby brine shrimp eggs, which usually hatch after 36 hours to two days.
11. Prepare the growing tank by filling it with saltwater. Make sure it has the same salt concentration as the saltwater used in the hatching tank.
12. Do not blacken the growing tank, and do not place any divider in it. Since light is beneficial for growing brine shrimp, it is recommended that the growing tank is placed near a light source such as a window.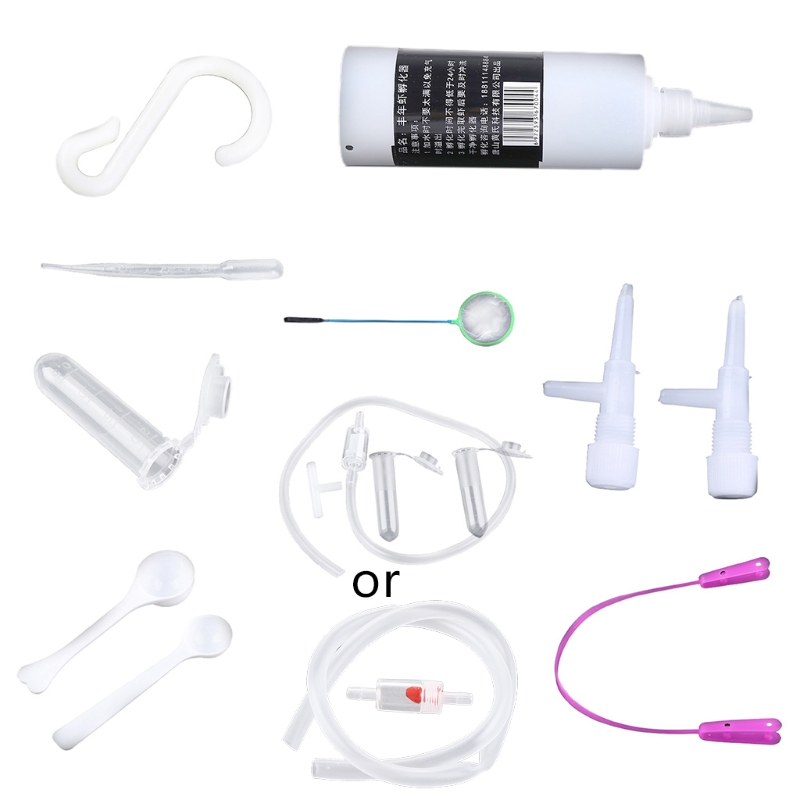
13. To ensure water movement inside the growing tank, make sure to install an airstone. If the room in which the growing tank is situated is cold, set up a heater that prevents the water temperature inside the tank from dipping or rising from around 65°F to 70°F.
14. The moment the brine shrimps have hatched from their eggs, allow the eggs to settle first by turning off the airstone inside the hatching tank. Remember, though, to turn the airstone back on at a later time. Open the eyehole the moment the brine eggs have settled on the bottom of the tank.
15. Encourage the brine shrimps to swim through the eyehole by turning on a flashlight and placing it near the non-darkened portion of the tank. Doing this will get the live brine shrimps transferred to the light side of the tank while keeping the dead brine shrimps as well as any unfertilized eggs and shells within the darkened area.
16. Remove the live brine shrimps by carefully siphoning them off. Transfer them to a net, and then place in the growing tank (Some of the live brine shrimps can be set aside in order to be used as feed for tropical fish.).
17. It is important to remove any eggs, shells, and dead brine shrimps from the darkened part of the hatching tank. To keep the brine shrimp hatchery going, some new eggs should be added each time the tank is cleaned.
It usually takes 24 hours for brine shrimp eggs to hatch at temperatures of 80°F to 82°F. Getting any lower from these temperatures should be avoided; otherwise, this will result in longer hatching periods. It is also important not to go beyond a temperature of 86°F, or else it would risk damaging the young brine shrimps.
How to Feed the Brine Shrimps
Besides using brine shrimps (at their baby stage) to feed tropical fish, they can also be grown to adulthood when fed properly. Because the digestive system of a brine shrimp is not yet fully developed in the first 24 hours of its life, no feeding is needed yet during that time.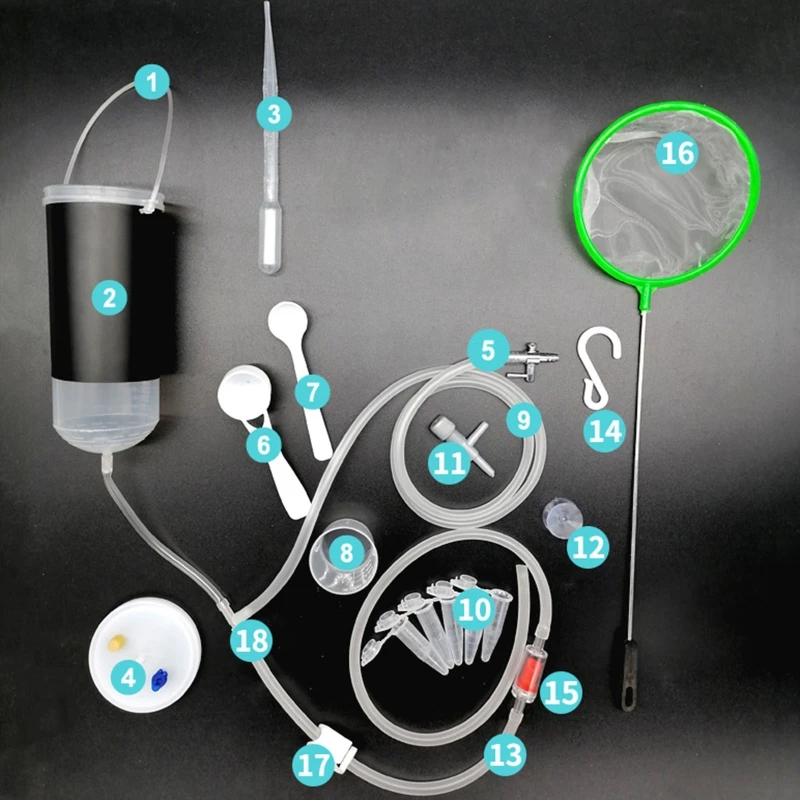 Growing brine shrimp are actually easy to feed since they are not fussy when it comes to their food. One can feed them almost any type of food such as whey, yeast, commercial fry food, soybean powder, wheat flour, fish meal, and even egg yolk. What is important is that the food used in feeding them is easily digestible by the brine shrimps but not easily dissolved in water, which is why powdered milk is not an option. One should also also avoid overfeeding the brine shrimp as doing so can damage the quality of the water in the growing tank.
How to Feed Brine Shrimp to Baby Tropical Fish
Many young tropical fish will only eat the food fed to them if that food is moving. As soon as the baby brine shrimps are hatched, stop the aeration process inside the tank by unplugging the pump, allow the baby brine shrimp immediately to settle, siphon them out, place them in a net, and then feed them directly to the baby tropical fish by pouring into their tank.
How to Feed Brine Shrimp to Grown Tropical Fish
The one thing to keep in mind when feeding grown tropical fish is that the baby brine shrimps are to be rinsed before use. Run them under tap water and then place them in a container filled with water taken from the tropical fish tank. Doing so will help get the brine shrimps cleaned as well as prevent any trouble with changes in acidity. Similar to feeding the baby tropical fish, one should follow the rules on not overfeeding grown tropical fish.
What do Brine Shrimp Eat? Feeding Guide
Brine shrimp – the food your fish eats. If you want to grow brine shrimp as live food for your guppies, you need to know how to grow the shrimp. In the wild, these packs of protein eat tiny planktonic algae that they get from the water. As for living in captivity, brine shrimp has a diversified diet. You can feed them several things, as you’ll see in the paragraphs below!
What to Feed Your Brine Shrimp?In short, brine shrimp can eat the following foods:
- Egg yolks
- Soybean powder
- Yeast
- Powdered spirulina algae
- Anything small enough that is nutritious
Brine shrimp isn’t too picky with its food.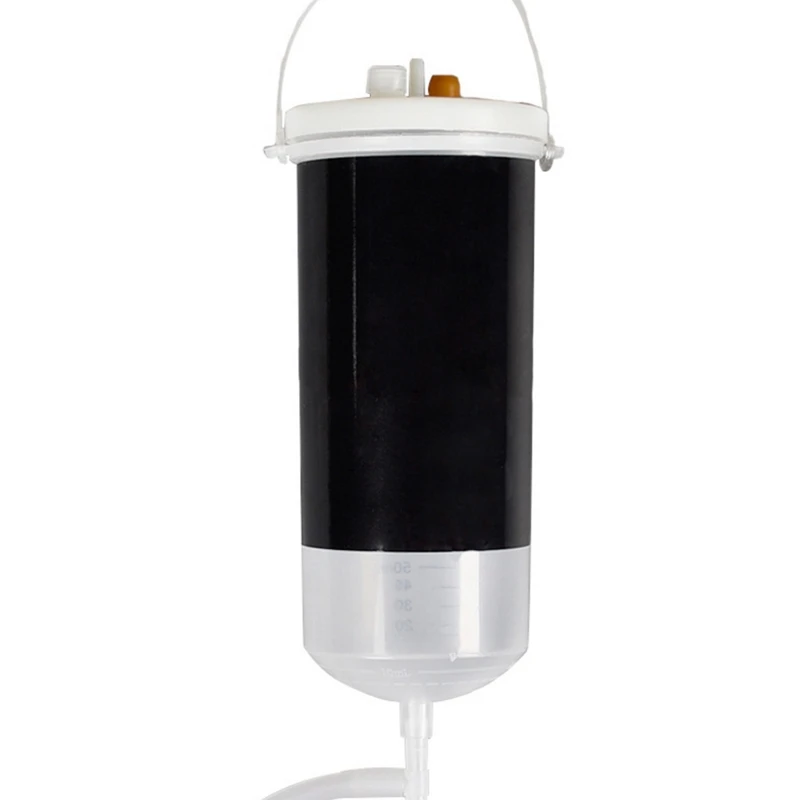 It’ll eat anything that they can get their tiny grabbers on. As long as it’s small enough, not poisonous, and nutritious, the shrimp will eat it. Make sure to crumble any food you offer them. If the pieces are too large, the shrimp won’t be able to eat them.
During the first moments of life, the brine shrimp will start eating the egg yolk that they hatched from. This will last them around 24 hours, after which you’ll have to feed them. However, this is the moment when they’re most nutritious to fish. After they eat the egg yolk, their fat content rises a lot.
You can also feed them green water algae and Infusoria. However, you should pay attention to the types of green water algae you offer to the shrimp. Some algae species are indigestible. It’s better to stick to egg yolks, yeast, soybean powder, powdered spirulina algae, and fish meal.
How Often do Brine Shrimp Need to Eat?Brine shrimp should eat daily. Theoretically, these tiny nuggets can eat on a 24/7 basis because they’re filter feeders. However, don’t put too much food in their container because it may cause the water parameters to go out of sync. Feed them once a day with some egg yolk or spirulina powder, and that should be enough.
However, make sure all the food you give to them is powdered accordingly. The particle size of the food is much more important than the food itself. As long as it’s nutritious, the brine shrimp will eat it. Some people feed the shrimp less often due to the surplus of food in their container.
How Long Can Brine Shrimp Go Without Food?Brine shrimp can live without food for 1-3 days after they eat their egg yolk. If you leave them any longer without food, they’ll die. All your efforts will have gone to waste if the shrimp die. Make sure you feed them daily with small bits of food. It’s great to make a habit of offering food daily.
If you know you’ll miss a day, put more food in their tank so the surplus is enough for the next day. When you come back, make sure you check the water parameters, though.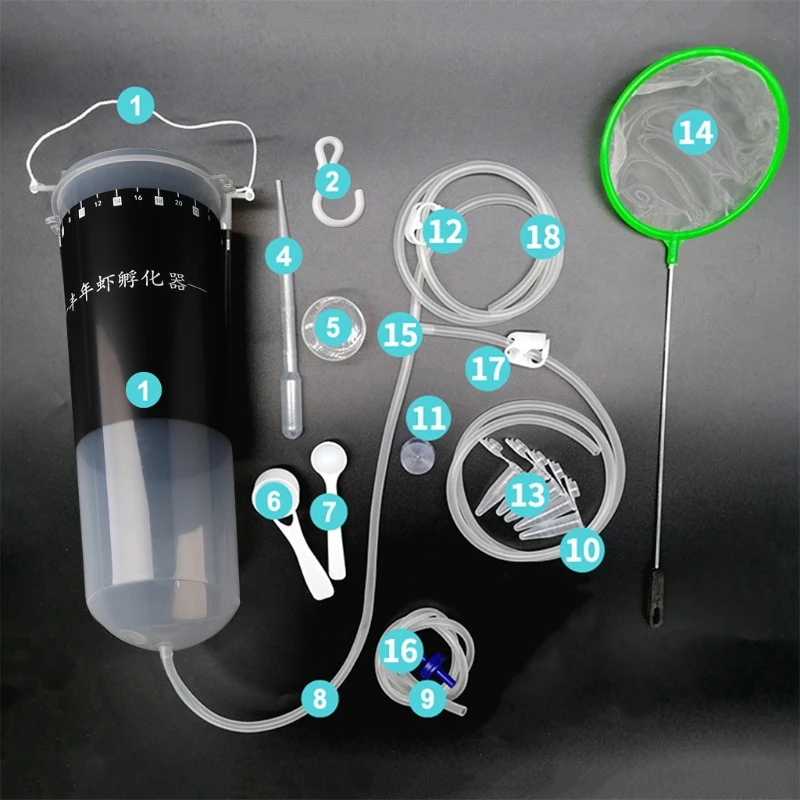 The extra food may have sent them out of whack.
Yes, they do. In the wild, brine shrimp eats microscopic planktonic algae. When in captivity, they can still eat algae but it’s a hit and miss. Some algae are indigestible to them, so you should do some research beforehand. If you find the right algae, your brine shrimp will have a great time. They’ll grow fast and healthy in a couple of weeks.
ConclusionBrine shrimp likes any nutritious food that’s particle-sized. If the food is too large for them, they can’t eat it. You can feed them with egg yolk, yeast, soybean powder, powdered spirulina algae, and even fish meal. You should try to feed your brine shrimp daily because they’re one of the best sources of live food for fish!
Leave any questions below and I’ll reply as soon as possible!
Top 10 Live Foods for Aquarium Fish | Aquarium World
If you are looking for the very best food for aquarium animals, most experienced aquarists will agree that there is nothing better than live food. This premium quality food is the closest to what fish eat in nature and has many benefits. The movement of food encourages fish to eat, which is especially useful if they are underweight or growing and need to consume more nutrients than usual.
In addition, hunting enriches your aquarium animals both physically and mentally, and allows you to see interesting behavior that may not be shown when feeding flakes. Finally, live foods are one of the fastest ways to prepare fish for breeding. Learn about these 10 popular live foods and how to grow some of them at home.
1. Artemia baby shrimp
Peacock minnow fry eat brine shrimp When it comes to raising fry or encouraging adult fish to spawn, you can't beat brine shrimp babies. These tiny marine crustaceans are born with highly nutritious yolk sacs filled with protein and healthy fats. To hatch them at home, simply soak brine shrimp eggs in salt water, which will take about 18-36 hours at a water temperature of 23-28°C. When you see hundreds of tiny pink dots floating around, shine a light on the base of the hatchery to attract brine shrimp and separate it from the eggshell. nine0003
2. Snails
Sand snailsMany fish, such as pufferfish, char and larger South American cichlids, like to eat live snails. The pufferfish's snail shells help grind down its ever-growing teeth so they don't grow back too long. To ensure a constant supply of these aquatic gastropods, establish a separate aquarium or bath as a breeding facility for physella acuta , coil snails and sand snails. They need hard water with higher pH and GH or they may develop holes in their shells. If you have soft water like we do, we prefer to use 3-5 cm of crushed coral as a substrate and then dose mineral supplements such as Wonder Shell or Seachem Equilibrium as needed. We then feed Pleco Banquet Blocks, Nano Banquet Food Blocks and other high calcium fish foods. nine0003
3. Acetic oysters
Typically, spawning fish such as tetras, rainbowfish and killifish produce tiny fry that are too small to eat normal fry food. Acetic oysters are harmless white roundworms that are very easy to breed and ideal for feeding fry until they are large enough to eat Artemia babies.
Simply fill a wine or long-mouth bottle with 50% apple cider vinegar, 50% dechlorinated water and a few apple slices. Once the vinegar oysters have multiplied enough, you can harvest them by adding some filter floss and dechlorinated water to the neck of the bottle to make the oysters float out of the vinegar into fresh water. Then use a pipette to remove some of the oysters and feed them to the fish fry. nine0003
4. Microworms
Parrot cichlid fry eat microworms Banana worms, annelids and microworms are nematodes or roundworms that are also used as food for live fish. They are slightly larger than vinegar oysters, but still smaller than brine shrimp, so they can be fed as tiny fry. We like to grow these crops in small plastic instant mashed potato containers. Cut a breathing hole in the lid of a plastic container and fill it with filter thread to prevent unwanted pests from entering.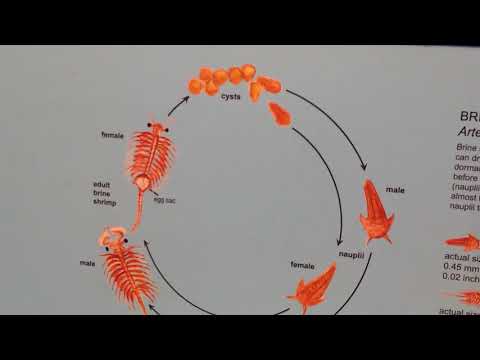 To collect them, simply run your finger along the walls of the plastic tub where the microworms have climbed, and then dip your finger directly into the aquarium to feed the fish. nine0003
5. Daphnia
These aquatic crustaceans are approximately 1–5 millimeters long and are therefore excellent food for small and medium-sized fish. They reproduce fairly quickly, so to keep the water parameters stable and prevent population declines, we recommend keeping them in as much water as possible. For water changes, use old aquarium water or old dechlorinated water, as these are very sensitive to chlorine.
In addition, prolonged exposure to light and lower temperatures around 20°C are preferred for optimal reproduction. Daphnia are filter feeders, so whenever the water is no longer cloudy with food, give them active dry yeast, green water, or spirulina powder. They are easy to collect by slowly scooping up water with a small-mesh aquarium net. nine0003
6. Infusoria
What do most newborn fish eat in the wild? Usually microorganisms such as microalgae, protozoa and invertebrate larvae.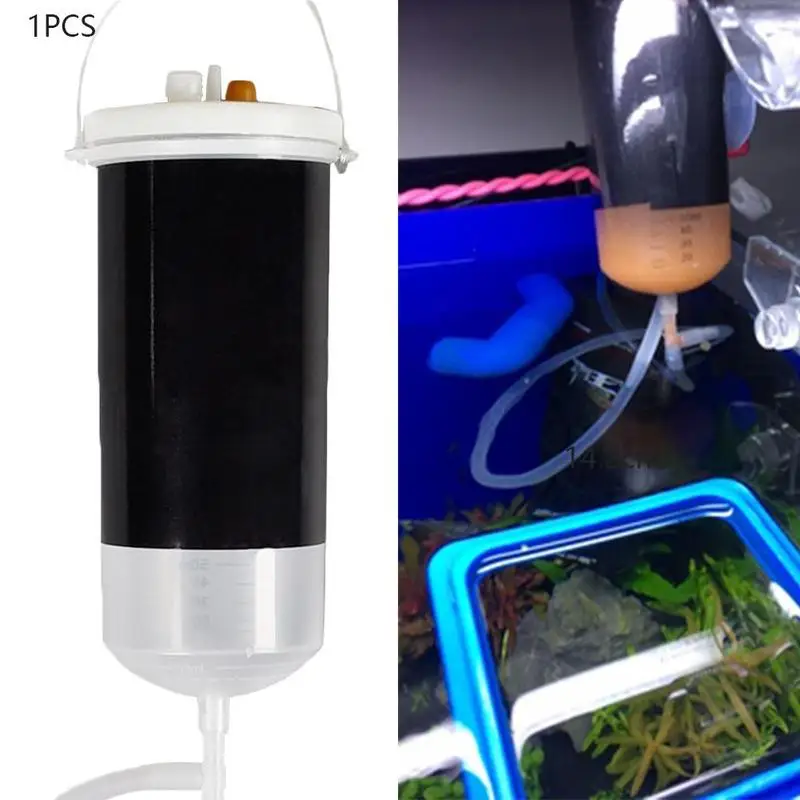 Therefore, many fish farmers grow their own cultures of freshwater plankton (i.e. ciliates) to feed the tiny fry. There are many methods, but one of the most popular is to fill a large jar with a few liters of old aquarium water and squeeze some flour out of the filter material.
Add a 3 cm piece of banana peel or ½ teaspoon of instant yeast to feed your ciliates. For faster results, heat the water to 26-27°C and after a couple of days you will see tiny moving dots. If the water turns from cloudy to clear, then the ciliates eat up all the food you provide, and the culture is ready to be harvested. Suck out some water with a pipette and feed it to the fry.
7. Aquatic worms
Live aquatic worms Lumbriculus variegatus are excellent food for bottom dwellers and many breeders find this to be the best way to improve the condition of corridor catfish. They can be difficult to propagate at home, which is why farms in the United States grow large-scale cultures of aquatic worms in artificial ponds.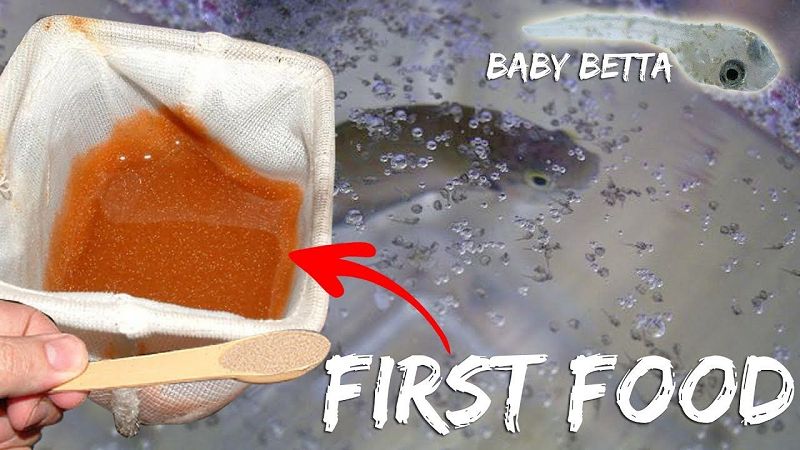 You can usually buy worms either at your local fish store or online directly from farms. When you receive them, pour the worms into a fine mesh fishnet and rinse thoroughly with dechlorinated water chilled to 4-13°C. nine0003
Keep the worms in a wide, shallow container to avoid crowding them more than 3 cm high. Pour enough cold dechlorinated water to cover the worms and place the container (without the lid) in the refrigerator. To keep your worms alive until they are fed to your fish, repeat this process of washing the worms every day with pre-chilled, dechlorinated water or they will quickly contaminate the water. nine0003
8. Grindal worms and nematodes
Once your fry are done with vinegar oysters and microworms, you can switch to grindal worms (about 0.5 mm in diameter) and nematodes (about 1 mm in diameter). Start by sterilizing the substrate (such as organic potting soil, peat moss, or coconut fiber) from mites and other pests. You can use the oven to heat the dirt for 30 minutes at 82-93°C, or dampen the substrate and microwave it in 9-minute intervals.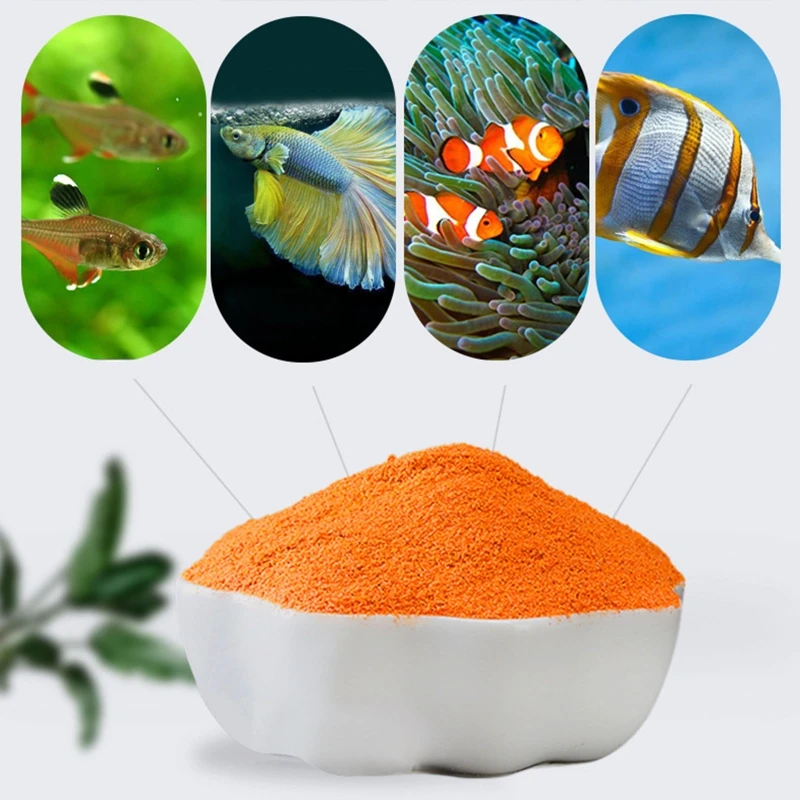 0 seconds until it reaches 82-93°C.
Place the substrate in a plastic container or tub and cover until cool; add some dechlorinated water to dampen it some more if needed. Then add a starter worm culture and some food (such as bread and yogurt, oatmeal, instant mashed potatoes, or even fish food) to the surface of the substrate. Place the cup lid on top of the food. Next, cut a breathing hole in the lid of the plastic container and glue a piece of cloth to close the hole and prevent pests from entering. Finally, place the lid on the plastic container. nine0003
Grindal worms thrive at room temperature 21-24°C, in which case the nematodes should be stored at around 13°C in a cool cellar or refrigerator. To collect them, remove the lid of the deli cup on top of the food, rub off a few worms with your finger, and dip them into a small bowl of water to rinse them out before feeding the fish.
9. Insects
Large mealworm larvae Insects and insect larvae make up a large part of the natural diet of many fish, and their exoskeletons provide good roughage that helps improve fish digestion.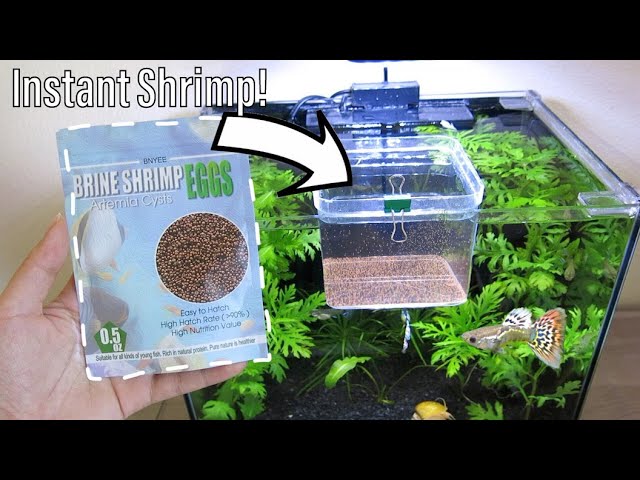 You can buy food insects like crickets, cockroaches, and mealworms from pet stores, and some people even raise their own cockroach colonies. Dung and earthworms are sold at some pet and fishing stores, and can also be grown at home. nine0003
To collect insects from the wild without introducing potential parasites, place a bucket of dechlorinated water outside and wait for the mosquitoes to lay their eggs. Use a fine mesh net to collect mosquito larvae from the surface of the water, and remember to harvest every day or they will turn into adult mosquitoes.
10. Live fish
In general, forage fish are known to have a higher chance of spreading disease in your tank, and most people don't bother with quarantine of forage fish. In addition, goldfish and minnows contain high levels of thiaminase and when consumed in high amounts can prevent your predatory fish from getting enough thiamine (or vitamin B1) and cause all sorts of health problems. To avoid nutritional deficiencies, it is important to provide a variety of diets, rather than constantly feeding one type of food. nine0003
However, some hobbyists raise their own food fish at home to minimize the risk of infection. For example, livebearers (or live-bearing fish) breed very quickly, so removing some of the offspring will help prevent the colony from becoming too large. When breeding neocardine shrimp, it may be necessary to cull less bright individuals to ensure that line quality improves over time. Feeding live fish or invertebrates is not for everyone, but it is a natural part of being a predator. nine0003
Most live cultures can be purchased online or from local hobbyists, so find out what foods are right for your fish and try them out. In addition, we recommend that you always create additional cultures so that you have a backup in case the first culture fails and becomes unviable.
Breeding brine shrimp at home
Artemia is eaten by fish swimming in the water column and at the bottom. It is good because it is easily bred at home. It contains many trace elements, vitamins, amino acids, and lipids. For breeding, you will need crustacean eggs, which can be bought at the store. There are two types: ordinary and decapsulated. nine0003
Decapsulated eggs do not have a protective shell, but do not die during breeding. Due to the lack of protection, the crustacean grows fatter. After all, he does not need to spend strength on the destruction of the shell. But with such eggs you need to be careful. Fish will be happy to eat such brine shrimp. But pets that have fallen to the bottom will not eat decapsulated eggs. For breeding artemia at home, only eggs that have been stored for no more than 2-3 years are suitable. In this case, 50-80% of crustaceans will hatch. nine0003
Preparing to breed artemia at home
First of all, buy all the necessary equipment and materials to create the Weiss apparatus:
- 2-liter plastic bottle with a cone-shaped neck
- bottle holder
- compressor, tubes, sprayer
- crustacean eggs
- sea or table salt
- lamp (desk lamp will do, will also serve as a heater) nine0079 thermometer
Wash well and then dry the selected container. Cut off the bottom, adjust the stand so that the bottle does not fall. Drill a hole in the lid for the tube, put a sprayer on it and insert it into the compressor. The air flow is necessary to enrich the incubation medium with oxygen and remove carbon dioxide (metabolic products), as well as to constantly mix the eggs in the water column. The taper is necessary to avoid dead zones during mixing. Not far from the installation site, there must be a socket into which you can connect the necessary equipment. nine0003
Add salt to settled water (20 g per 0.5 l of water). Use a refractometer to measure the salinity of the water in the tank. If it is not there, then add salt to settled water, and then pour it into a container. By selecting the lamp power, achieve a water temperature of about 25-28 degrees. As soon as the temperature is constant, you can populate the crustaceans.
If the temperature and salinity of the water are favorable, the brine shrimp will hatch within 24 hours.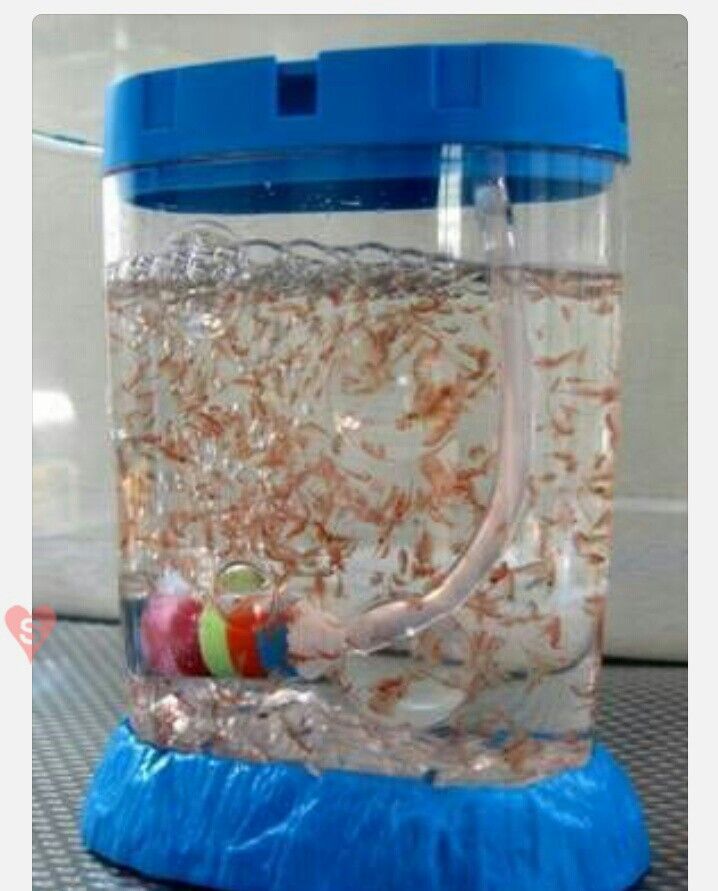
How to maintain the right habitat for crustaceans
Always have a supply of settled salt water on hand. Water should be changed once a week. To do this, take a flashlight or table lamp and shine in one place. Artemia will float into the light, and by this time you draw water from the other end of the container and drain.
Wash the filter sponge every 3 weeks in well-prepared settled salt water. Don't forget to check the water temperature in the aquarium. Make sure the water in the container is clean.
Artemia ready kits
Ready-made kits for rearing crustaceans are available. Sera offers aquarists the basic Sera Artemia Breeding Kit.
Sera Artemia Breeding Kit A more advanced set is offered by the German brand JBL - JBL ArtemioSet. The set includes a flask, a stand, a compressor, a faucet, tubes, a sieve. It is unique in that, in addition to the set, you can buy many accessories, such as one or more JBL Artemio 1 flasks, 0.15/0.3/0.6/1.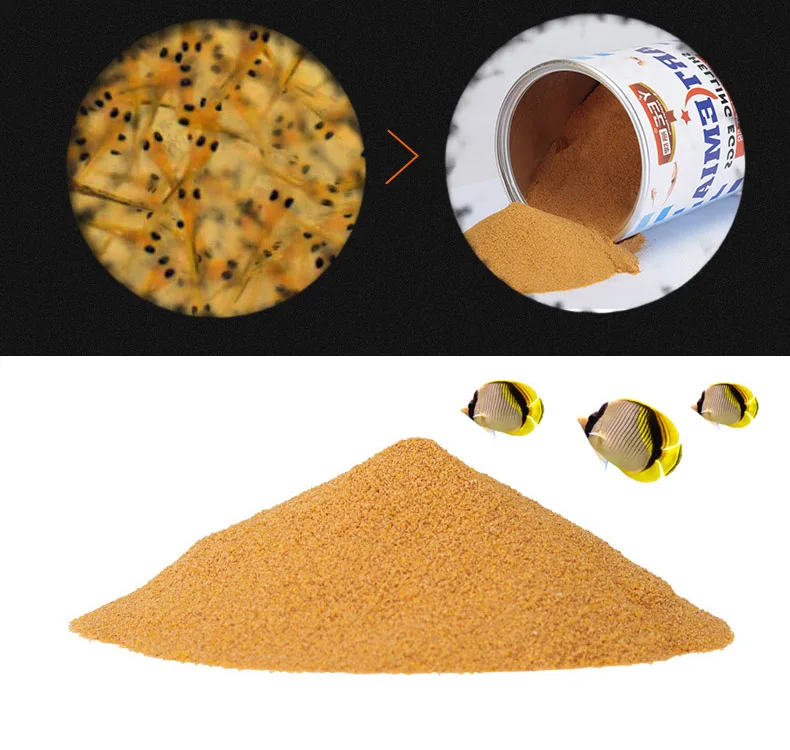 0 mm Artemio 4 sieves, eggs, crustacean food and salt. nine0003 JBL Artemio 1 (container for JBL ArtemioSet extension)
What and how to feed the crustaceans
Breeding crustaceans are fed with a special food intended for growing Artemia and other small crustaceans. You can buy it at a pet store.
Yeast, egg powder, milk powder, pureed spinach or lettuce leaves, spirulina flakes can be used as food. Feed is given in small portions. When the water becomes cloudy, the amount of feed given is reduced, and part of the water is urgently changed. nine0003
How to prepare brine shrimp
After a week, small cysts will grow and become excellent food for adult aquarium fish. Artemia nauplii are used as food for fry, which are caught on the second day after the eggs fall into the water. To catch live brine shrimp, you need to turn off the filter and wait 10 minutes. During this time, empty cysts will begin to float on the surface, unhatched ones will settle to the bottom, and living ones will float in the middle layers of the water.