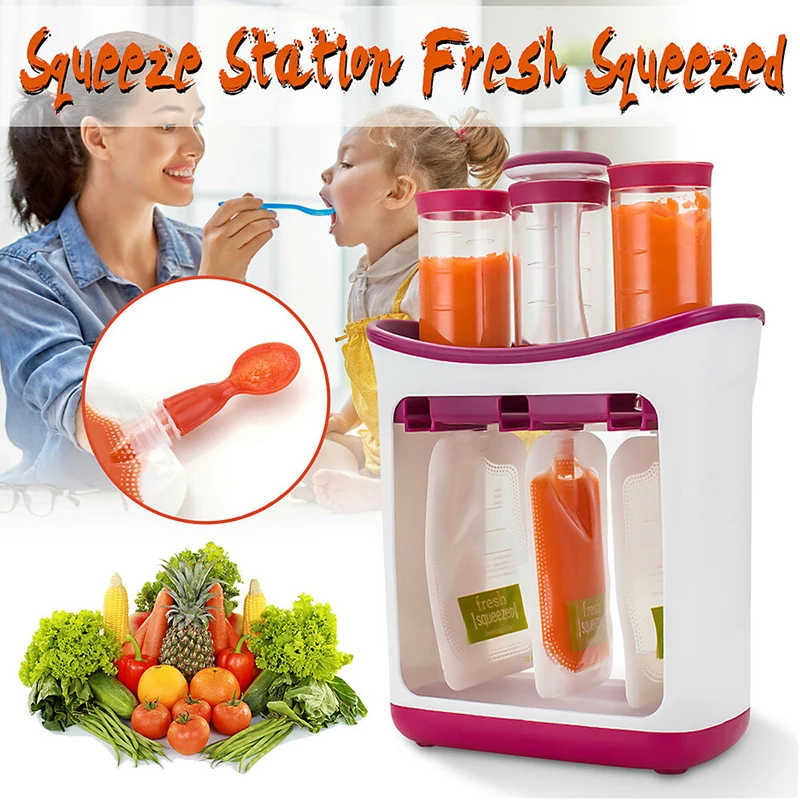
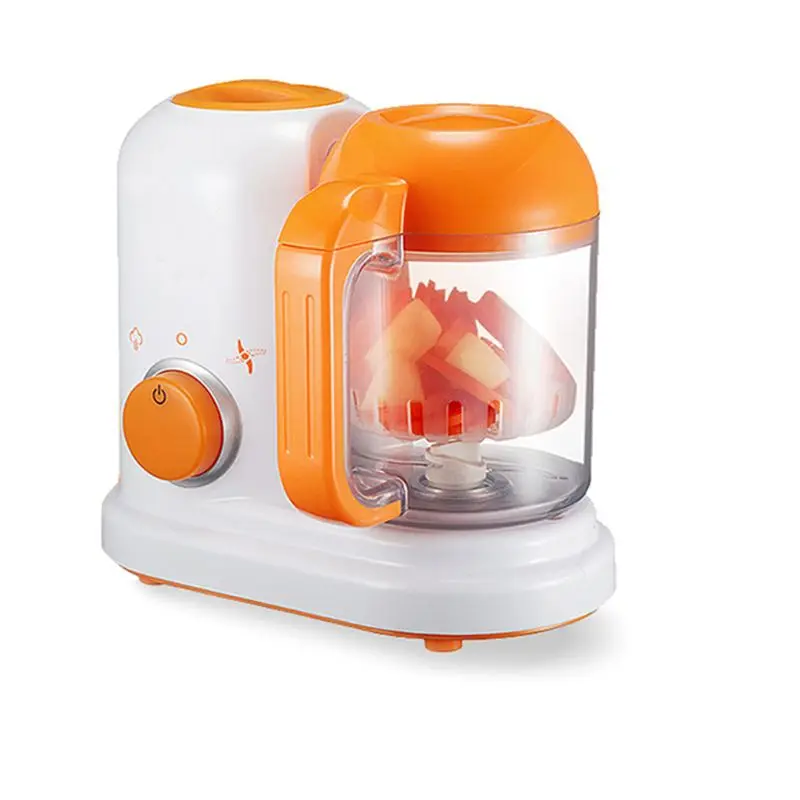
Bpa free baby food processor
6 Best Baby Food Makers to Buy in 2020
So, you've decided to make your own baby food—what a great idea! Not only might it save you some money in the long run, it can also be healthier than some store-bought varieties. It will be a whole lot easier to make your own if you have a baby food maker. We asked thousands of Pampers Parents to vote for their favorite baby food makers; here are the results.
What Is a Baby Food Maker
Factors to Consider When Buying a Baby Food Maker
We asked Pampers Parents what their top factors were when choosing the best baby food maker:
6 Best Baby Food Makers
Thousands of Pampers Parents voted on the best baby food makers. Discover the pros and cons of each so you can pick the best one for you and your baby. Here are the reviews:
1. Nuby Garden Fresh Mighty Blender
Most of the baby food makers on this list allow you to steam-cook inside the machine's blender bowl, which Pampers Parents loved. Unfortunately, this isn't an option with the Nuby, which at its heart is simply a blender. Nonetheless, the Nuby does include a steamer basket insert, which you can place in the batch bowl with food and microwave it. That does somewhat address the issue. Although the Nuby lacks the steaming/cooking option, it does make up for it with quite a few add-ons, including a flexible freezer tray that has nine compartments, six food storage containers, two feeding spoons, a spatula, and a cookbook. It includes two different work bowl sizes: a short cup for small batches and a big bowl for large batches, which you can freeze for later.
Highlights: In addition to a regular blade, there's also a milling blade for finely grinding cereals and oatmeal for your baby's breakfasts. All parts are BPA-free.
Price*: about $59.99 on Amazon.com
Pampers Parents pros and cons:
All parts are BPA-free.
Price*: about $59.99 on Amazon.com
Pampers Parents pros and cons:
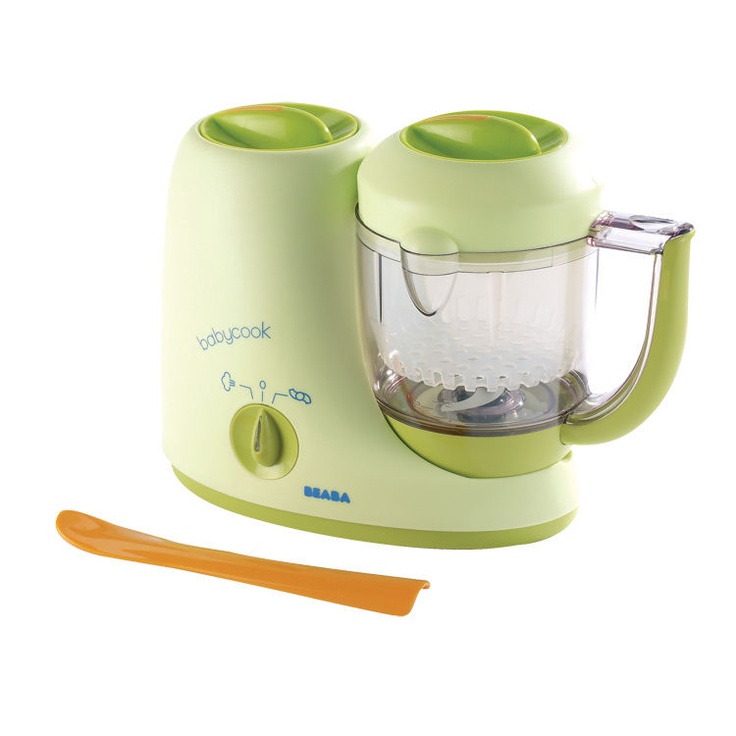
2. BEABA Babycook Plus 4-in-1 Steam Cooker and Blender
The steam-heating system is powerful enough to cook a variety of foods in under 15 minutes, which the manufacturer claims helps the foods retain their vitamins and nutrients.
Simply place the food in the work bowl's steaming basket for cooking, and empty it back into the work bowl for pureeing once it's cooked. It's possible that this two-step process may not be to your liking. Some of the baby food makers on this list allow you to steam and puree in the work bowl without having to transfer the food.
Each of the two work bowls has a 4.7-cup capacity, allowing you to prepare quite a few servings of baby food at a time. It includes a spatula, mixing lid/smoothie filter, and a booklet with recipes for homemade baby food.
Another neat feature that’s great for busy parents: The machine automatically shuts off when the food is cooked and an audible beep lets you know when it's done.
Highlights: It's available in three colors: gold (pink), white, or cloud (gray). The parts are free of BPA, lead, and phthalates. Price*: about $199.95 on Amazon.com Pampers Parents pros and cons:
3. Duo Meal Station Food Maker 6-in-1 Food Processor
Pampers Parents loved that this baby food maker includes two steaming trays so you can cook two different foods on top of one another. Any liquid that remains in the container under the food trays can be used to thin the food you're pureeing, capturing some of the nutrients that escaped during the steaming process.
To steam the food, add water to the steamer base on the left side and the LCD screen will let you know with an audio alert when you’ve added enough—no measuring or guesswork needed! When the food is steamed and ready to puree, simply transfer the food to the three-speed blender on the right side for quick work. This sleekly designed machine only comes in gray and doesn't include any additional accessories. So, that's something you may need to take into account.
Highlights: All the attachments can easily be cleaned in the dishwasher. Price*: about $159.99 on Amazon.com Pampers Parents pros and cons:
4. Baby Brezza Glass Baby Food Maker
The four-cup work bowl is made of glass, which appealed to many Pampers Parents who didn't like plastics coming into contact with their babies' food. Pampers Parents also pointed out that unlike plastic, the glass bowl doesn't absorb smells or become discolored from use. The control panel is very easy to use, and features three settings: steam only, blend only, and automatically blend after steaming. The steam tank is easy to fill and remove for cleaning.
Highlights: The baby food maker includes a spatula and recipe booklet. The work bowl and blade are both dishwasher safe.
Price*: about $98.99 on Amazon.com
Pampers Parents pros and cons:
The work bowl and blade are both dishwasher safe.
Price*: about $98.99 on Amazon.com
Pampers Parents pros and cons:
5. Sage Spoonfuls Baby Food Immersion Blender and Food Processor
The whole set is lightweight and easy to transport if you want to take it with you when you travel. It's also easy to clean, as all the attachments can be put in the dishwasher. This baby food maker can puree fruits, vegetables, meats, and even nuts. You can even use it to puree soups, smoothies, and sauces that the whole family can enjoy. The manufacturer cautions that the power buttons shouldn't be held down for more than 30 seconds when you're using the blender as it may cause the motor to overheat, so you’ll need to be extra careful.
Highlights: All parts are free of BPA, phthalates, lead, and PVC. Price*: about $38.99 on Amazon.com Pampers Parents pros and cons:
6.
 Cuisinart Baby Food Maker and Bottle Warmer
 The work bowl hold four cups of food, which means you can make big batches of baby food to freeze for later. The blade inside the bowl stays locked even when you tip the bowl upside-down to get out the last bits of pureed food. Other features include automatic shut-off, which kicks in when all the water has evaporated. There's an easy-to-use dial with an LED light indicator to let you know when the bottle has been fully warmed. The motor is powerful enough to chop and puree a variety of foods.
Highlights: The baby food maker comes with a spatula, an integrated measuring cup to help you determine how much water is needed for the bottle warmer or food steamer, a baby bottle adapter ring for skinny bottles, and a recipe booklet. All materials that come into contact with food are BPA-free. Price*: about $73.99 on Amazon.com Pampers Parents pros and cons:
The Bottom Line
All the baby food makers on our list have a lot going for them. Comparing the things that are most important to you like price, size, safety, features, and accessories will help you pick one that’s right for you and your baby. We hope the insights from Pamper Parents help make your decision easier.
Recall Notice
Review this article:
15 Best Baby Food Makers Of 2022, And A Buying Guide
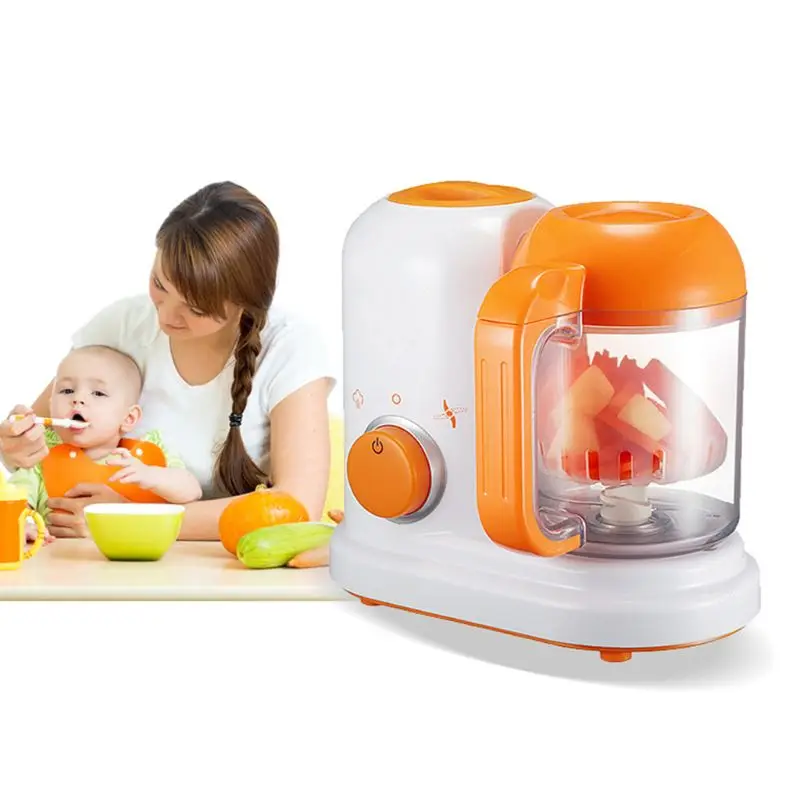
Baby food machines can make cooking for babies easy and less time-consuming.
All products recommended on MomJunction are independently selected by our editorial team. If you make a purchase through any of these links, we may receive a commission. Learn more about our product selection process here.
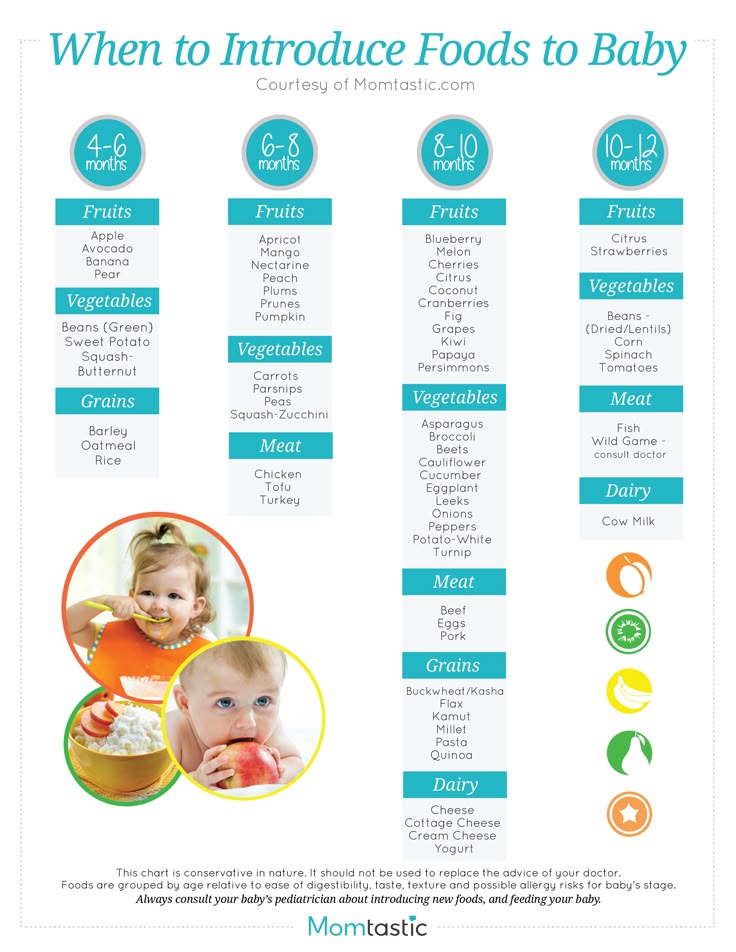
The best baby food makers help you make any food easy to eat for babies and toddlers. This food appliance is great for babies aged over six months, especially when you start introducing solids to them.
If you plan to get a processor home to make delicious purees for your baby, here is a list of the best baby food makers that you may consider purchasing. Read through this post, as we also tell you about the features you should consider when choosing the right baby food maker.
Our Top Picks
Best User-Friendly And Easy Operation: Baby Bullet Food System
Best Feature-Rich: Beaba Baby Cook Food System
Best Automatic-Blend Function: Baby Brezza Baby Food Maker
Best Single-Dial Operation: Cuisinart BFM-1000 Baby Food Maker
Best Hand-Held Motor: Sage Spoonfuls Baby Food Maker
Best Microwave- and Dishwasher-Safe: NUK Mash And Serve Baby Food Preparation Bowl
Best Multipurpose: Kalorik Baby Food Maker
Best Accessories And Steamer Basket: Nuby Mighty Blender
Best Compact And Easy-To-Clean: Munchkin Baby Food Grinder
Best Precision Blade: QOOC Mini Baby Food Maker
15 Best Food Makers
1. Best User-Friendly: Baby Bullet Food System
Buy on Amazon
The food maker ships with six storage cups with dials on them to mark the date you made the food. Its simple operation settings make it user-friendly. You can make purees from pre-cooked fruits, vegetables, and grains and store the prepared puree directly in the blending bowl by covering it with a lid. You can also transfer it to a cup that ships with the blender. Check out this product review video and pick the best-suited one for your needs.
Pros
- Comes with a standard blade for fruits and vegetables and a milling blade to blend grains to make cereals for the baby
- Includes a silicone tray with slots that allow you to store the prepared puree in batches
- Blending cup can be detached from the base containing the motor
- Non-toxic plastic is free of phthalates and BPA
Cons
- Motor may not be powerful enough
- Accessories may not be easy to clean
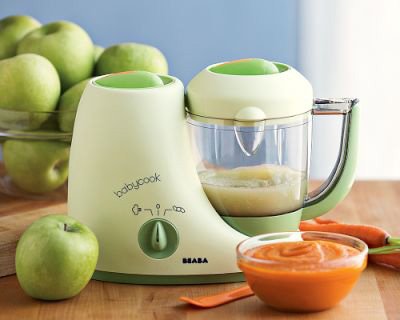
2. Best Feature-Rich: Beaba Baby Cook Food System
Buy on Amazon
The single food maker has four features: steam, cook, blend, and reheat.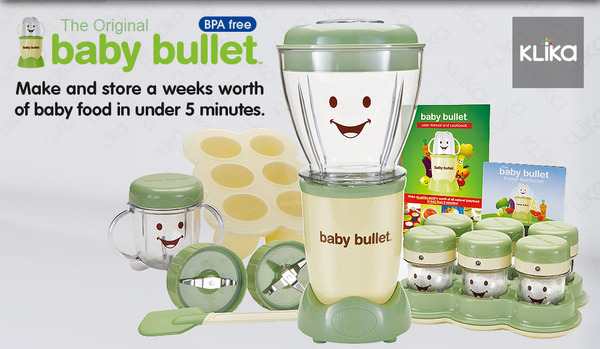 It takes only 15 minutes to convert the food from a raw state to a puree that is edible for babies. The time is the same even for food items such as chicken and potatoes that take longer to cook. Food items go into the steaming basket, which keeps the food separate from the water reservoir and prevents it from becoming too moist. Steam is condensed to water and collected into a stainless steel reservoir that helps conserve water. Watch this video to get a detailed review of the product.
Pros
- Can process various food items, including fruits, vegetables, meat, and fish
- Includes a cooking basket, spatula, and a mixing lid
- Free of BPA, lead, and phthalates
- Auto shut-off cooking timer
Cons
- May not be easy to use
- Bowl may not be durable
Related: Best Baby Food Pouches
[ Read : Beaba baby milk bottle warmer Review ]
3.
 Best Automatic-Blend Function: Baby Brezza Baby Food Maker
Buy on Amazon
You can steam and blend the food in this machine. It can be set to automatically blend the food after steaming it first. This convenient machine can process all kinds of fruits, vegetables, and meat. Add the chopped food items, steam for the desired time to cook it, and blend – all of it in one single container. Check this video to learn more about the product.
Pros
- Steaming-blending bowl and blending blades are dishwasher-safe
- Made of durable plastic and metal
- All materials are free of BPA and phthalate
- Includes three reusable food pouches
- Removable water tank
Cons
- May not be user-friendly
- May not be easy to clean
4. Best Single-Dial Operation: Cuisinart BFM-1000 Baby Food Maker
Buy on Amazon
Features:
- Three-in-one operation: streams, blends, and can also warm the baby’s bottles.
- It can steam fruits, vegetables, and meat. Auto-off function switches off the food maker when water in reservoir evaporates entirely. It prevents overcooking of the food.
- A steam blade distributes steam for cooking the food.
- A single, large cooking bowl performs both the functions of steaming and chopping.
- A single dial to control all the operations, which makes the processor user-friendly.
Related: Best Baby Food Storage Containers
5. Best Hand-Held Motor: Sage Spoonfuls Baby Food Maker
Buy on Amazon
The machine comes with two components: a food processing bowl and an immersion blade, both powered by a hand-held motor. You can process the food in the blending bowl or use the immersion blade. The dual processor helps you make an ultra smooth puree. You can also use the immersion blade for blending in general, other than for making baby food, which makes this processor highly versatile.
Pros
- Can process a wide variety of pre-cooked foods such as vegetables, fruits, and meat
- Stainless steel blade and motor have a quiet yet powerful function
- Made of materials free of BPA, PVC, phthalate, and lead
- Immersion blade and food processing bowl are dishwasher-safe
Cons
- Might splatter sometimes
- Might require more water for proper blending
6.
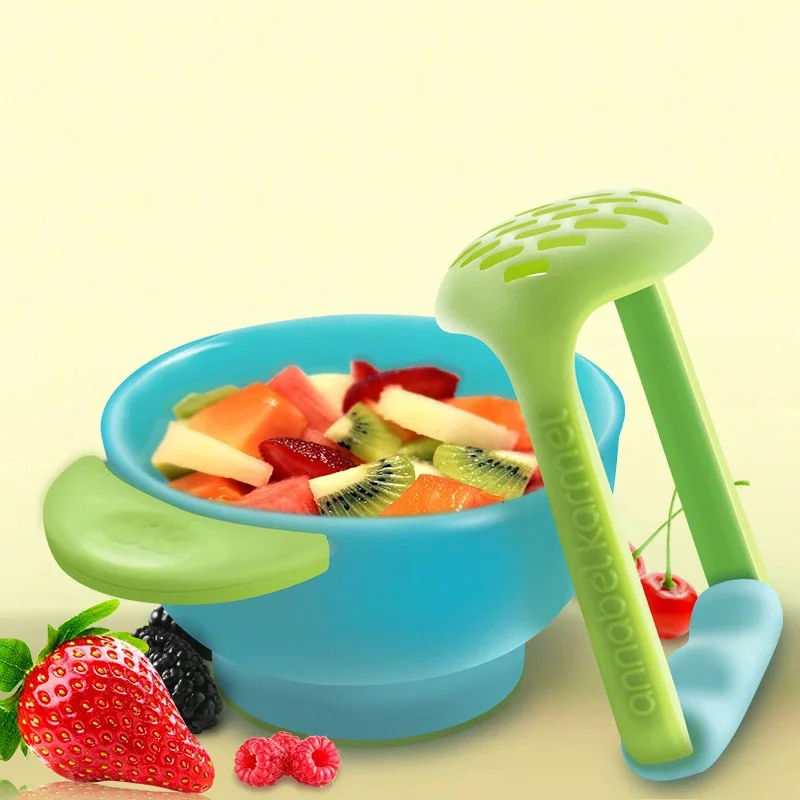
 Best Microwave- and Dishwasher-Safe: NUK Mash And Serve Baby Food Preparation Bowl
Buy on Amazon
Here’s a simple, manual, pestle and mortar-style baby food maker to mash cooked vegetables or fruits and convert them into soft baby food. There are two components: the mashing bowl and the masher, making the product highly portable. Moreover, its manual function means you do not need electricity for operating it.
Pros
- Bottom of the mashing bowl is grooved so that the food does not slide away
- Masher has a large comfortable handle to apply optimum pressure
- Made of non-toxic, BPA-free plastic
- Microwave- and dishwasher-safe
Cons
- Might have only one lid for two bowls
- Handle may not be durable
7. Best Multipurpose: Kalorik Baby Food Maker
Buy on Amazon
Kalorik’s multi-purpose baby food maker can be used for steaming, heating, defrosting, and blending food. It can also be used to sterilize baby pacifiers. The single food processing bowl can be used for all the functions, and you can blend a food item immediately after steaming it, without having to transfer it to another container.
Pros
- Allows you to defrost food in the bowl
- Includes a pacifier stand to sterilize pacifiers in the bowl
- Powerful motor can blend fruits, vegetables, and meat
- Easy to clean
Cons
- Steaming capacity may be low
- Could have been more user friendly
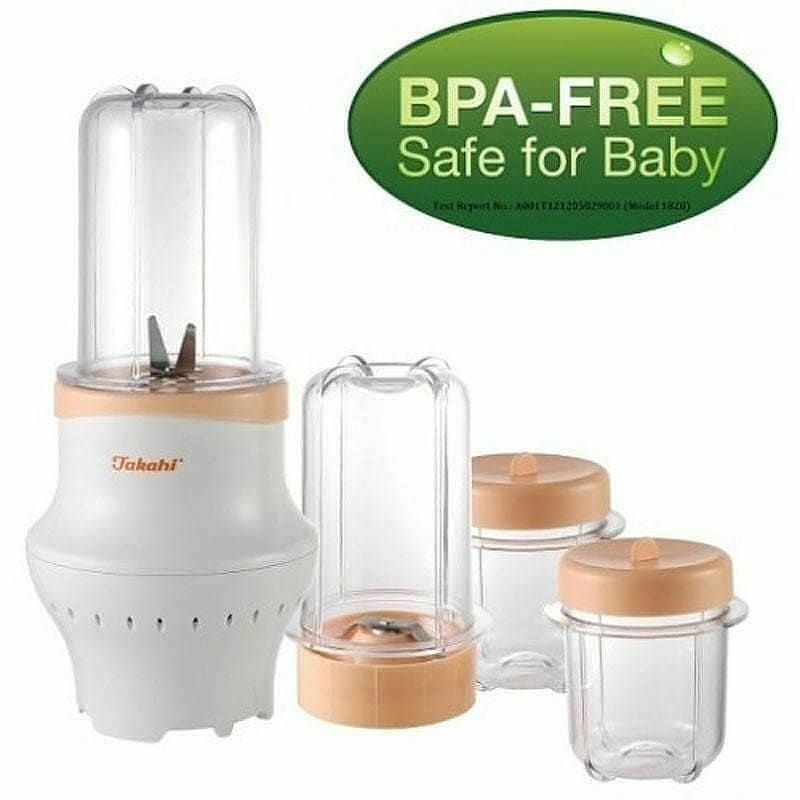
8. Best Accessories : Nuby Mighty Blender
Buy on Amazon
The machine has a large batch bowl to make large quantities of baby food. You also get a small, single batch bowl when you want to make only one serving of the food. The powerful motor and blades allow you to make very fine purees for babies, as well as coarse food for older infants and toddlers.
Pros
- Includes a measuring cup, spatula, two long feeding spoons, six food storage cups, and a freezing tray with six storage slots
- Has two blades: one for blending fruits and vegetables, and the other for milling cereals to make porridge
- Steamer basket lets you steam vegetables and fruits in a microwave before processing it in the food maker
- Includes a free cookbook
Cons
- Blades might rust
- No start or off buttons
9. Best Compact : Munchkin Baby Food Grinder
Buy on Amazon
The simple, easy-to-use baby food grinder can turn cooler food into purees without the need for electricity or batteries. Put cooked fruits, vegetables, or meat into the processing bowl and turn the hand crank to grind the food into a puree.
Pros
- Compact design
- Easy to clean and dishwasher-safe
- Made of non-toxic, BPA-free plastic
- Portable and lightweight
Cons
- Grinding handle may be short
- May be messy
10.
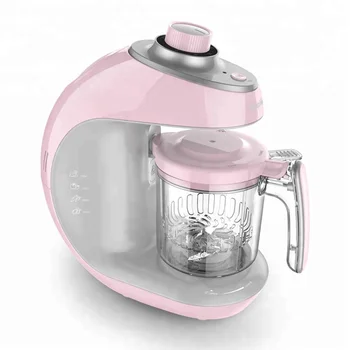
 Best Precision Blade: QOOC Mini Baby Food Maker
Buy on Amazon
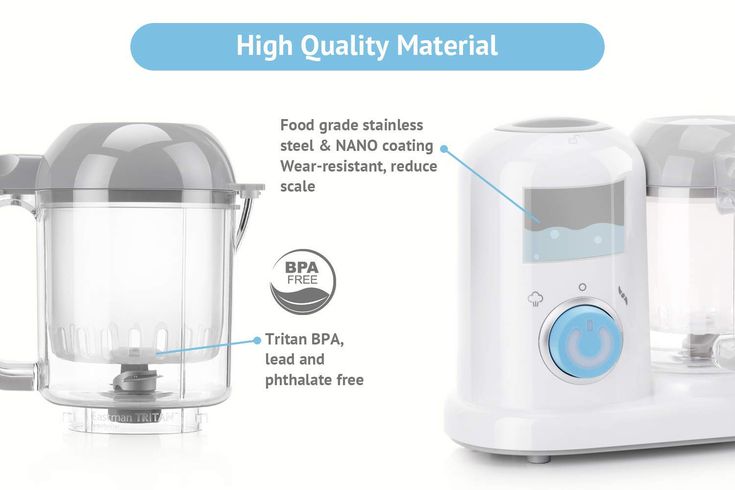
The processor for baby food has four features: steaming, blending, heating, and defrosting. Its single processing bowl can be used for all functions. Moreover, its precision blade and a powerful, yet quiet, motor blend smooth purees that the baby will love.
Pros
- Stainless steel water reservoir is resistant to scaling
- Auto shut-down feature
- Safety lock feature prevents water from boiling if the processing bowl is not placed correctly
- BPA-, lead-, and phthalate-free
- Includes accessories such as a measuring cup, steaming cup, spatula, and cleaning brush
Cons
- May not have a beeping timer
- May take time to blend foods
11. Best Even Heating: Maxkare Baby Food Maker
Buy on Amazon
Features:
- A multi-purpose baby food maker that you can use for a wide range of functions, from steaming to blending, using a single processing bowl.
- The food processing bowl is designed to provide even heating and cooking of the food placed within.
- A removable basket goes within the main bowl thus making steaming convenient.
- The blades are designed to blend food into different textures, from thin purees for infants to coarse food for older toddlers.
- All the materials used in the making of this food maker are FDA-approved and are free from BPA, lead, and phthalate.
12. Best Capacity: Baby Brezza Glass Baby Food Maker
Buy on Amazon
This machine has one processing bowl for all functions, eliminating the need to transfer food. The bowl is entirely made of glass. It has three-in-one functions: steam, blend, and both at once. You can set the food maker to blend automatically, after steaming.
Pros
- Free of BPA and phthalate
- Easy controls
- Easy-to-remove water tank
- Prepares food in ten minutes
- Large four-cup capacity
Cons
- May not be durable
- May not be easy to clean
13.
 Best Safety Lock : Infanso Baby Food Maker
Buy on Amazon
The food maker has all the features for processing baby food: steaming, manually controlled chopping, blending, and auto-stirring. You need to fill the main bowl with water and press the auto-clean button. The food maker rinses itself automatically. Its blades let you blend a wide variety of foods; you can blend smooth purees to coarse food for older infants and toddlers.
Pros
- Safety-lock feature prevents the food processing bowl from working if the lid is not placed correctly
- Free of BPA, phthalate, and lead
- Dishwasher-safe
- Digital control panel provides information about the functions, with controls for all the features
Cons
- Steam basket may not be stain-free
- May not be rust-free
14. Best LCD Screen: Mliter All-in-one Baby Food Maker
Buy on Amazon
The machine’s five-in-one functions include steaming, sterilizing, blending, defrosting, and reheating.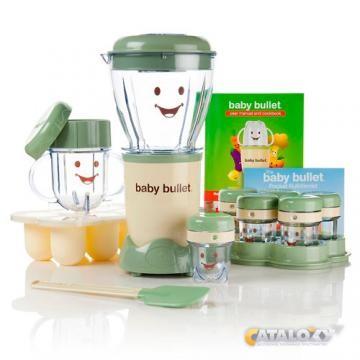 It processes a wide variety of foods including fruits, vegetables, and meat. The digital touch controls with an LCD screen provides essential information about the functions of the food maker.
Pros
- Water tank window makes it convenient to check the water quantity within the water reservoir
- Safety lock feature prevents the device from functioning if the bowl is not correctly set
- Food-making bowl and blades are dishwasher-safe
- Water reservoir is made of stainless steel and rust-proof
- Made of FDA-approved materials that do not contain BPA, phthalate, and lead
Cons
- Might require restarting often
- May be smaller than you expect
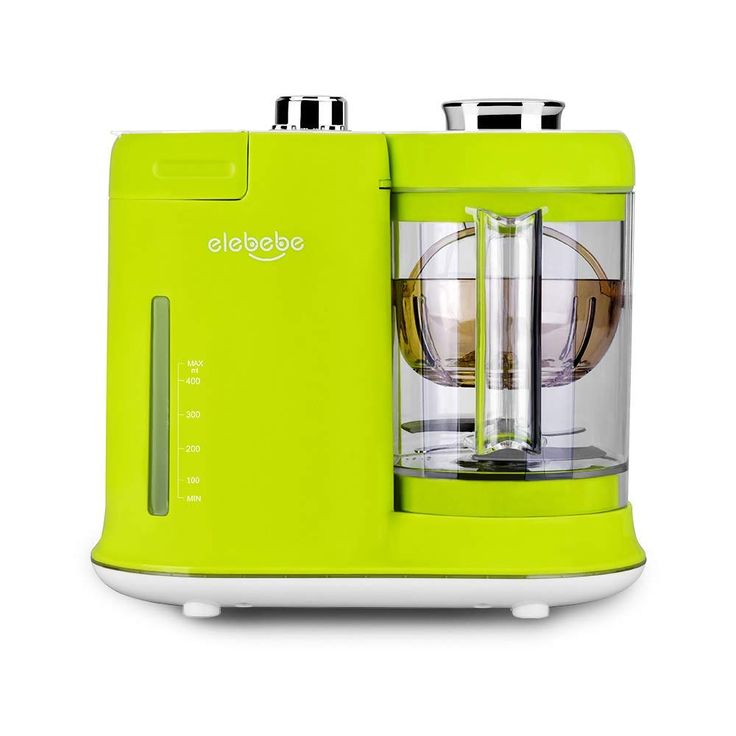
15. Best Non-Toxic: Elebebe Baby Food Maker
Buy on Amazon
Features:
- Multi-purpose functions. A separate steaming basket lets you steam the food in the main bowl.
- You can steam a wide variety of foods including potatoes and apples.
- The blade can blend food to a smooth puree or thick, coarse food as well. Easy-to-clean and maintain design.
- Made from materials free of BPA, phthalate, and lead.
What Is A Baby Food Maker?
A baby food maker is a food processor that can blend solid food into purees that a baby and a toddler can easily eat. Baby food makers may also have additional features for steaming or cooking the food items (fruits and vegetables) before you blend them into a puree.
How To Choose A Baby Food Maker?
Look for the following features that can improve the functionality of a baby food maker.
- Cooking or steaming feature: Cooking and steaming feature allow you to cook the fruit or the vegetable before pureeing it. Several baby food makers have this as an in-built feature.
- Warm and heat option: Warming or heating features make it convenient to reheat the prepared purees.

- Attached serving or storage cup: You can remove the blending cup and feed the baby straight from it. The container comes with a lid to cover the food so that you can store it for later. This feature removes the hassle of transferring the puree into a cup before serving it to the baby.
Why Trust MomJunction?
Vibha Navarathna, a pregnancy, nursing, and children’s product enthusiast, believes in providing accurate information to her readers through deep research and analysis. In this post, she has come up with a list of the best baby food makers that may enable you to make food for your little one quickly. Each recommended product is high-quality, safe, and unique. Vibha describes the products in detail and provides a buying guide to help you choose the right food maker.
Baby food makers make it simple to cook healthy meals for your adorable little ones. They are quick and efficient, which comes in handy on busy days.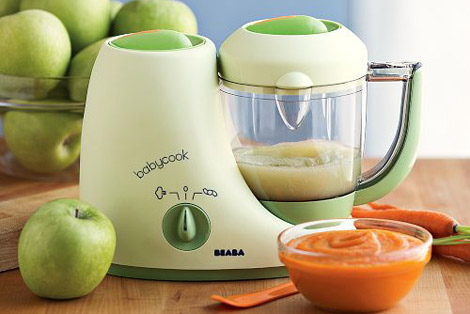 When purchasing baby food makers, carefully examine their characteristics to analyze whether they are appropriate for your needs. Always choose a food maker that allows you to reheat your meals so that you can serve the most nutritious food to your baby.
Did you ever use a baby food maker to prepare food for your baby? Do let us know about your choice of food maker in the comment section below.
Recommended Articles:
- Best Baby Formula Makers
- Best Baby Spoons For Feeding
- Best Baby Formulas For Newborns
- Best Baby Diaper Brands
The following two tabs change content below.
- Author
Vibha is a coder turned content writer. She holds a Masters degree in Computer Applications from Osmania University, Hyderabad and a certificate in 'Introduction To Child Psychology'. Her passion for writing fresh and informative content made her a full-time writer. Holding certifications in content writing and creative writing, she writes on electronics, baby and health products for MomJunction. Apart from...
View Profile ›
Mini Cookee Processor
Contents:
• Main unit with water container
• Blade shaft cover
• Water container cover
• Cap
• Steam basket
• Bowl cover
• Chopper bowl
• Blades
Blade spacer
• Retaining ring
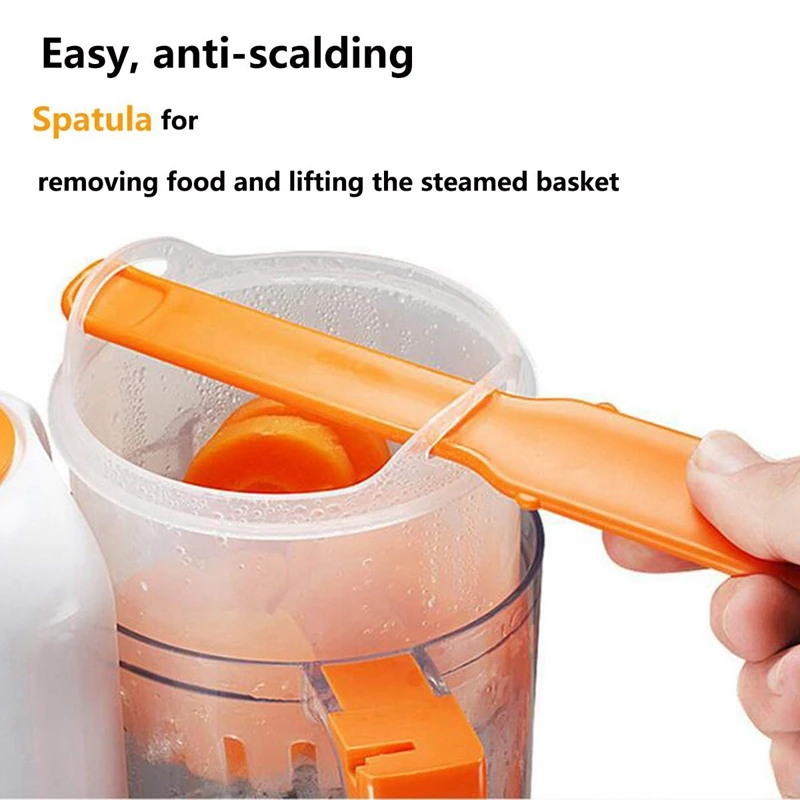
• Spatula
• Power cable
• Instruction manual
• Clean the instrument after each use.
• Never immerse the main unit in water.
• Do not use abrasive cleaners.
• Never pour bleach or chemical sterilizing solutions/tablets into the instrument.
CLEANING PROCEDURE
Always unplug and remove the chopper bowl.
1. Remove the chopper bowl cover.
2. Remove the blades.
3. Rinse all parts under running warm water and reinstall all parts.
WARNING!
After each use, clean all parts that come into contact with food in hot water with detergent.
All parts except the main unit are dishwasher safe.
If necessary, use a dry cloth to clean the main unit.
Check the water container and clean if necessary.
Check the steam outlet and clean if necessary.
Always keep the water container dry.
The AGU Cookee mini processor is designed to sterilize bottles and accessories at home.
To do this, in the "Sterilization" mode, follow these steps:
1. Fill the water container.
2. Place the items to be sterilized in the steam basket.
3. Place the basket in the bowl, put the lid on the bowl and turn it counterclockwise.
4. Insert the bowl into the main body of the appliance and turn it counterclockwise until it stops.
5. Press the steam button.
6. When the cooking process is completed, turn off the water heating by releasing the steam button. To do this, lightly press the button.
7. Open the lid and remove the basket using a spatula.
All parts except the main unit are dishwasher safe.
If necessary, use a dry cloth to clean the main unit.
Processor components are BPA free.
Please follow the rules for safe use of the device and read the instructions. Before using the processor to prepare baby food, place the appliance on a dry, flat surface out of the reach of children to ensure a stable position and reduce the vibration and noise level of the appliance.
If the problem persists, please contact the service center.
Here are a few tips to help you get your appliance back up and running quickly:
• Make sure there is water in the container.
• Chopper bowl may not be installed correctly. Install the chopper bowl into the main unit and turn counterclockwise. The hole in the chopper bowl and the steam outlet must be aligned.
• Chopper cover may not be installed correctly. Install the chopper lid and turn counterclockwise until the lid locks into place.
- If you have ruled out all the above causes, but the problem persists, please contact the service center.
Here are a few tips to help you get your appliance back up and running quickly:
• Make sure there is water in the container.
• Chopper bowl may not be installed correctly. Install the chopper bowl into the main unit and turn counterclockwise. The hole in the chopper bowl and the steam outlet must be aligned.
• The chopper cover may not be installed correctly. Install the chopper lid and turn counterclockwise until the lid locks into place.
- If you have ruled out all the above causes, but the problem persists, please contact the service center.
- Maximum heater power - 400 W
- Motor power - 120 W
AGU MFP6 mini food processor functions:
• sterilization of bottles and accessories;
IMPORTANT SAFETY INSTRUCTIONS
READ ALL INSTRUCTIONS CAREFULLY BEFORE USING THE APPLIANCE FOR THE FIRST TIME AND RETAIN FOR FUTURE USE.
- Remove all packing materials and promotional labels before using the appliance for the first time.
- Do not place the appliance near the edge of a bench or table during operation. Make sure the surface is flat, clean and free of water, flour, etc. Vibration during operation may cause the appliance to move.
- Handle the appliance and attachments with care - remember that the blades and discs are razor sharp and should be kept out of the reach of children.
- Be careful when handling sharp cutting blades, when emptying the bowl and when cleaning.
- Always check that the instrument is fully assembled before starting work. The instrument will not work if it is not properly assembled.
- Switch off and unplug the appliance before changing accessories or moving parts.
- Always disconnect the instrument from the power source when it is left unattended and before assembling, disassembling or cleaning.
- Always use the instrument with the lid tightly closed.

- Always check that the spindle is in place before attaching a quad blade, dough blade, reversible shredder, adjustable vegetable cutter or potato peeler.
- Do not push food into the input tray with your fingers or other objects. Always use the supplied food pusher.
- Do not use any attachments other than those supplied with the instrument.
- Do not attempt to operate the device in any way other than as described in this booklet.
- Please do not crush ICE in the processing bowl. This will damage the blades. We recommend that you use an ice crusher.
- Some tough mixtures, such as dough, may cause the work knife to rotate more slowly than usual. If this happens, do not process for more than 30 seconds.
- Do not process or mix hot or boiling liquids - allow the liquid to cool before placing it in the processing bowl or blender jar.
- Do not use the appliance on slippery, unstable or uneven surfaces such as the sink drain board.
- To reduce the risk of electric shock, do not immerse the power cord, plug, or motor base in water or any other liquid.
- Do not move the device when it is switched on.
- Do not place any part of the appliance in a microwave oven.
- Do not fill the processing bowl or blender bowl above the marked liquid or grind level. Always add drier or thicker ingredients before adding liquids.
- Never remove the cover while the appliance is in operation. Always turn off the appliance before removing the cover.
- Keep the instrument clean. Follow the cleaning instructions in this book.
IMPORTANT SAFETY INSTRUCTIONS FOR ALL ELECTRICAL APPLIANCES
- Unwind the power cord completely before use.
- Do not allow the power cord to hang over the edge of a table, counter, touch hot surfaces, or become knotted.
- Cleaning and maintenance should not be carried out by children without supervision.
- This appliance must not be used by children. Keep the appliance and its cord out of the reach of children.
- Children must not play with the appliance. • The devices may be used by persons with reduced physical, sensory or mental capabilities, or lack of experience and knowledge, if they are supervised or instructed in the safe use of the device and understand the hazards. involved.
- This appliance is intended for domestic use only. Do not use this appliance for purposes other than its intended use. Do not use in moving vehicles or boats. Do not use outdoors.
- Installation of a residual current device (circuit breaker) is recommended to provide additional protection when using electrical appliances. It is desirable that a safety switch with a rated residual operating current not exceed 30 mA.
is installed in the electrical circuit that feeds the device. • It is recommended to inspect the instrument regularly. Do not use the appliance if the power cord, plug or appliance is damaged in any way.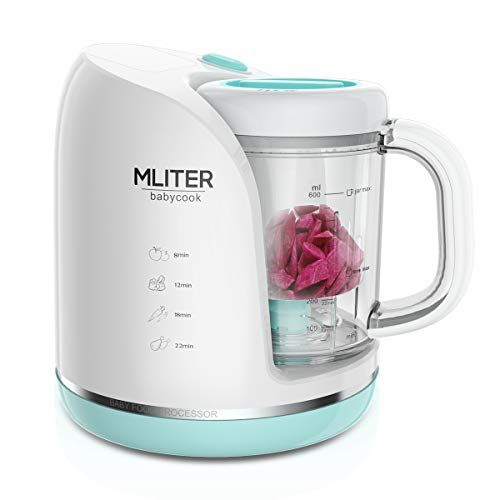 Return the entire unit to your nearest Breville Authorized Service Center for inspection and/or repair.
 - All maintenance work (except cleaning) must be performed by an authorized Breville service center.
- Breville Authorized Service Centers can be found on our website www.Breville.com.au Alternatively, you can contact the Breville Customer Service Center on 1300 139798 or email. [email protected] Consult your electrician for professional advice.
FOR HOUSEHOLD USE ONLY SAVE THESE INSTRUCTIONS
Components
- Food pusher small
Use for small ingredients handling. It also serves as a measuring cup for ingredients. - Large food pusher
Food pusher A and B consists of 2 parts. To unlock and separate the 2 pieces, turn the small button counterclockwise. - Feed chute
- Lid processing
- Processing bowl
Holds 11 cups for dry ingredients and 8 cups for thick liquid ingredients (e.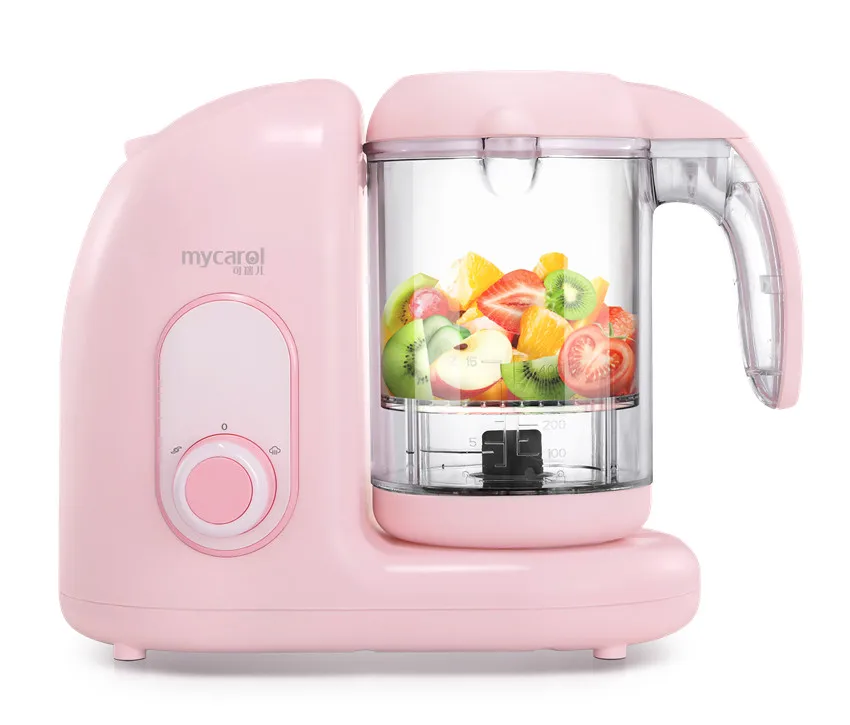 g. soups). The processing bowl is fixed on the base of the engine when turned clockwise.
 - Motor base
High torque for reliable results. - Speed dial
2 speeds and pulse. - Non-slip rubber feet
- Inner measuring cup
Remove to add ingredients while blending. - Breville Assist™ Cap
Cap with ring for easy removal. - BPA Free 1.4 Liter Blender Jar
- Potato Peeler
Quickly clean batches of 6-7 potatoes in 30 seconds. - Dough Blade
A dull knife for smoother mixing of dough ingredients. - Quad®™ Blade
Fast action for even chopping, blending, whipping and processing a variety of ingredients. The Safety Brake System quickly stops the Quad® blades if the cover is opened unexpectedly. - Adjustable Slicer
Fine cut with 24 thickness settings from 0.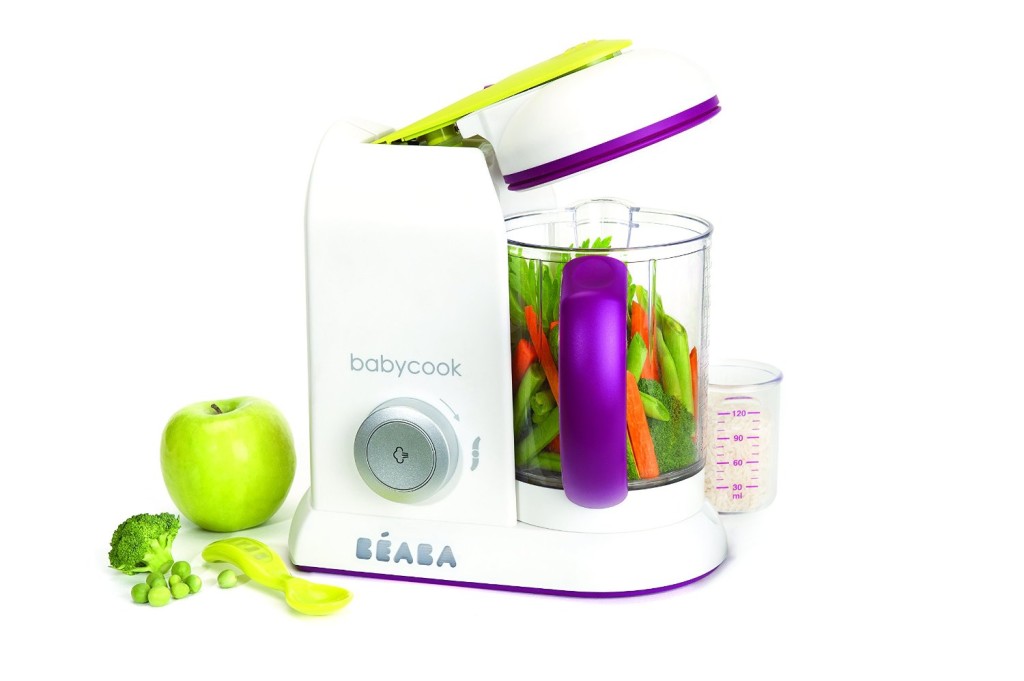 3mm to 8.0mm.
 - Fine and Coarse Reversible Chopper
- Spindle
Use with all blades and discs.
BLENDER CONNECTION
The blender jar is part of the Kitchen Wizz 8 Plus (BFP580) only. If you have purchased the Kitchen Wizz 8 (BFP560) you will have all the other tools and accessories except for the blender jar.
BREVILLE ASSIST™ PLUG
Your Breville appliance comes with the unique Breville Assist™ plug, a convenient finger hole design for easy removal from the socket.
POTATO PEELER
- Potato peeling made easy
Take the hassle out of potato peeling. The Breville Peeler will peel potatoes in batches of 6-7, depending on the exact size. Peeling happens very quickly and can end sooner than expected. Follow the progress and it should be done in 20-30 seconds. - Size matters
The best potato size to use is about 65mm x 65mm, which is about the size of this illustration.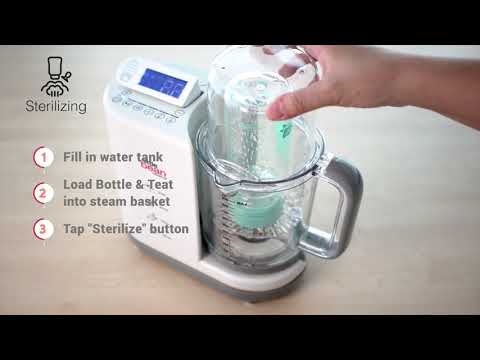 Choose potatoes that are round, not elongated. Use a whole potato, as cutting potatoes in half or quarters will create square edges that won't peel effectively. Using rounder potatoes will reduce waste.
 - Positioning the cleaner
Place the spindle in the bowl, then the cleaning knife on top. Position the puller with the curved side up and the support ribs down. - Loading potatoes
Spread 6-7 potatoes evenly on top of the peeler. The potato should have enough room to roll freely and purr. If the potatoes are packed too tightly, peeling will not be as effective. Keep in mind that peeling works best with a whole batch of potatoes, and peeling just a couple of potatoes will not be as effective. Close the lid before starting and never load potatoes through the chute. - How long to peel
Potatoes are very quick to peel, with most potatoes taking 25-30 seconds. Less time in the peeler means less waste, but you may need to manually remove the eyes with a paring knife. More time in the peeler will remove a thicker layer, including most of the eyes.
assembly
BEFORE USING FOR THE FIRST TIME
- Before using the food processor or blender for the first time, remove all packaging materials and promotional labels. Make sure the POWER button is OFF and the instrument is unplugged.
- Be careful when handling blades and discs as they are very sharp.
- Wash the processing bowl, processing lid and all attachments in warm soapy water using a soft cloth. Rinse thoroughly and dry. The nozzles can be washed in the dishwasher.
- When using the appliance for the first time, you may notice an odor coming from the engine. This is normal and will disappear with use.
- Always use the appliance on a dry, level work surface.
- Place the work bowl on the motor base so that the handle lines up with the picture ALIGN THE HANDLE on the motor base.
- Turn the bowl clockwise until the handle locks forward.
 The processing bowl should now be securely locked in place. The food processor will not work if the bowl is not properly secured.
 - Spindle required when using ALL discs and blades. Failure to use the spindle will result in parts being damaged, and improper use may cause parts to fuse.
- Before putting the lid on the processing bowl, position the spindle over the sleeve in the center of the processing bowl. Then place your chosen blade or disc over it. The blades descend below the disks.
- Place the lid on the work bowl so that the ALIGN | The LOCK graphics on the lid and handle are combined. To CLOSE the lid, hold the chute and turn it clockwise to match the handle pieces.
- To use the blender (in the BFP580), place the blender jar on the motor base, aligning the ALIGN graphics. Turn clockwise until the handle locks in front.
functions
SPEED CONTROL
Many recipes work best with a combination of speeds with occasional pulses.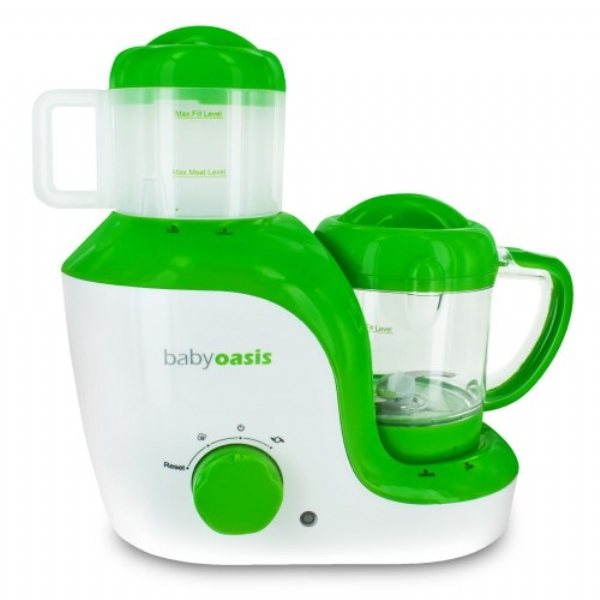
PULSE
Instant high power burst.
LOW
Low speed for mixing more delicate products and good for mixing wet and dry ingredients.
HIGH
High speed is ideal for blending smoothies (in a blender) and other fine-textured mixtures (in a food processor).
OPERATION
The food processor will only operate if the processing bowl or blender is properly secured. To prevent premature engine wear, always use the control dial to turn the food processor on and off.
Tips
- After processing, wait until the blades/discs have stopped moving before opening the lid. To ensure safe handling, turn off the appliance and unplug it from the socket before handling the blades.
- When removing the blades/discs, lift them up by carefully grasping the plastic sleeve in the center.
- If the volume (when blending) is below the maximum mark, the inner measuring cap can be removed and oils/liquids added while the blender is in use.

- Care must be taken when mixing large volumes or thin liquids as splashing may occur through the center cap area.
- Run the blender only for the required time. Don't mix the ingredients.
- Use the PULSE setting if the food is too thick or coarse to circulate in the blender jar.
- Do not exceed the maximum mark when adding food and liquids to the blender.
- Ingredients may stick to the sides of the blender jar. To push food back onto the blades, turn off the blender and unplug it from the outlet. Scrape down the sides of the pitcher with a plastic spatula, then continue mixing.
- If moisture or liquid appears on the motor base during blending, turn off the blender and disconnect the plug from the wall. Remove the blender jar and immediately wipe the motor base with a dry cloth or paper towel.
- The maximum number of ice cubes that the blender can process is 8 cubes from a standard ice tray.
- Use the PULSE function for foods that require only short bursts of power, such as crushing nuts and crushing ice.
- When mixing drinks with ice cubes or frozen fruit, use PULSE in short bursts.
- Thicker blends will purée more effectively if the jug is ¼ - ½ full.
- Do not use metal utensils as they may damage the blades or the blender jar.
- Do not mix heavy mixture for more than 10 seconds. For general mixing tasks, do not mix for more than 1 minute at a time. If you need to blend longer, turn off the blender and blend the ingredients before starting again. This rest will help protect the engine from wear.
- The blender does not knead the dough or crush the potatoes.
- When mixing warm ingredients, do not place more than 2 cups at a time.
- Do not mix hot or boiling ingredients. Allow food to cool to lukewarm before placing it in the blender. This is to protect against sudden bursts of steam that could cause the lid to move.
- When mixing warm ingredients, cover the lid with a kitchen towel and press down firmly.
OVERLOAD PROTECTION
- The motor is protected against ignition by a circuit breaker.
 If the appliance is overloaded or runs for too long, the motor may overheat and stop.
 - Unplug and let cool for 30 minutes. After cooling down, you can use the food processor as usual again.
- Please note that some hard mixes (such as bread dough) may cause the blade to rotate more slowly than normal. In this case, do not process for more than 1 minute.
- If the blades or discs become stuck with food during processing, unplug the power plug immediately before removing the stuck food. If this happens more than once, the bowl may be overloaded. Try processing in small batches.
PEELING POTATOES WITH THE PEELING DISC
- Size and shape matter when using the peeling disc. Choose round (rather than long) potatoes and aim for a diameter of about 65 mm. There is a sizing guide at the beginning of this manual.
- Place the puller on the spindle. Position the puller with the curved side up and the support ribs down.
- Uncovered, spread the potatoes evenly over the disc. Peeling works best when the peeler is fully loaded, making sure the potatoes are in a single row around the edge. Do not fold or cram extra potatoes in as they need room to roll.
- Use only whole potatoes, do not use potatoes cut in half or quarters.
- Install and close the lid before cleaning and never load potatoes through the chute.
- Keep an eye on the potatoes during cleaning as they may run out faster than expected. For minimal waste, eyes may be left, which can be removed with a paring knife.
GRINDING WITH THE QUAD® BLADE
Micro-toothed four-sided blade grinds raw and cooked foods to the desired consistency, from coarsely chopped to finely chopped. Blades process very efficiently and many large tasks may take less time to process than expected. Always remember to place the Quad spindle and blade in the processing bowl before adding food. Avoid over-processing by checking consistency frequently.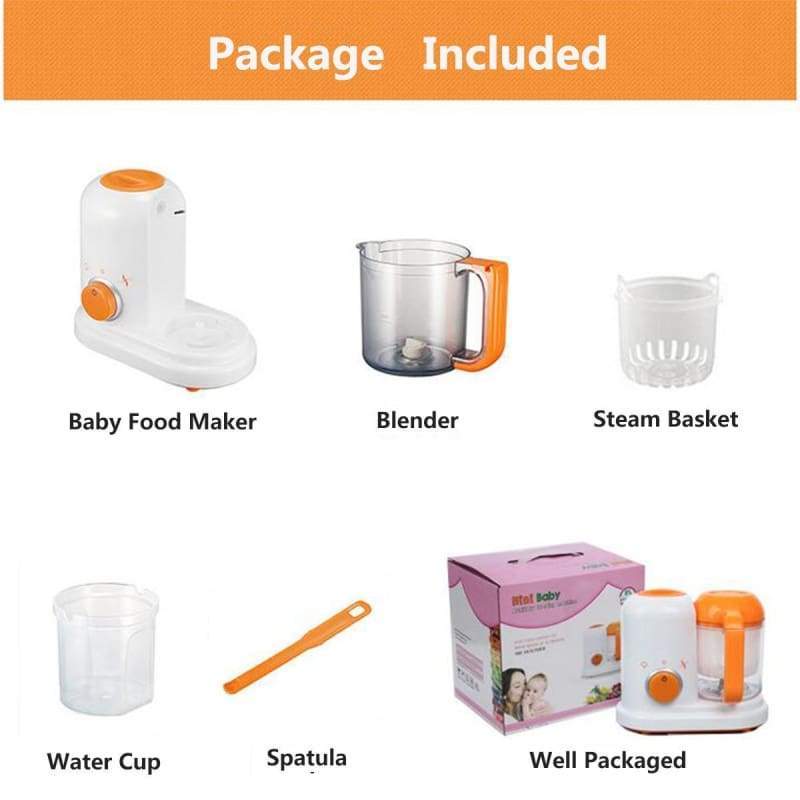 For many applications, we recommend using the PULSE button as it may take only a few seconds to fully process the food to the desired consistency. If necessary, turn off the power and scrape the sides of the bowl with a spatula to ensure even processing.
- Raw vegetables, fruits and cold meats
Cut food into 2.5 cm cubes. Cook no more than 5½ cups at a time using the PULSE button in 1-2 second intervals until chopped to the desired size or consistency. - Raw Meat, Chicken and Fish
Trim excess fat and cut food into 2.5 cm cubes. Make sure all bones are removed. Chill well in the freezer until firm, as this will help cut through the food more easily. Process no more than 1 kg of raw meat at a time. At this power, the engine should run no more than 30 seconds at a time. Use the combination of the START and PULSE buttons until you grind or grind to the desired consistency. - Garlic, chili and ginger
Peel the garlic cloves and process them whole. Leave the chiles whole or remove the seeds for a milder pepper. Peel and cut the ginger into 2.5 cm cubes. Other hard herbs such as lemongrass or galangal, peel and cut into cubes or pieces 1 to 2 cm in size. The size should be smaller for hard or denser herbs. Process with the PULSE button in 1-2 second intervals until you grind to the desired consistency. When adding garlic, chili, or ginger to other ingredients, toss whole pieces into the small feed chute while the engine is running.
 - Leafy herbs
Wash and dry the herbs thoroughly. Remove any rough stems. Process no more than 2 bunches of herbs (about 4 cups) at a time using the PULSE button in 1-2 second intervals until blended to the desired consistency. Use leafy herbs right away for the most flavorful results in your recipe. - Peanuts
Process no more than 4 cups of shelled nuts at a time, using the PULSE button in 1-2 second intervals, until crushed to the desired consistency.
- Dried fruit
Dried fruit can be sticky and stick to the blades during processing. We recommend putting dried fruit in the freezer for about 10 minutes before processing. Brew up to 2 cups at a time using the PULSE button in 1-2 second intervals until blended to the desired consistency. If chopping fruit to add to the cake mix, process the fruit before making the cake mix. Add some flour (from the amount of flour in the recipe) to keep the fruit from sticking to the Quad blade. We do not recommend chopping large dried fruits such as dates and figs. - Soft breadcrumbs
Break stale bread into pieces (fresh bread will stick to the blades). Process no more than 4 slices at a time, using the PULSE button in 1-2 second intervals, until you grind to the desired consistency. For best results when making breadcrumbs, add one slice at a time. - Dried breadcrumbs
Tear the bread into pieces and toast in the oven until golden brown and crispy.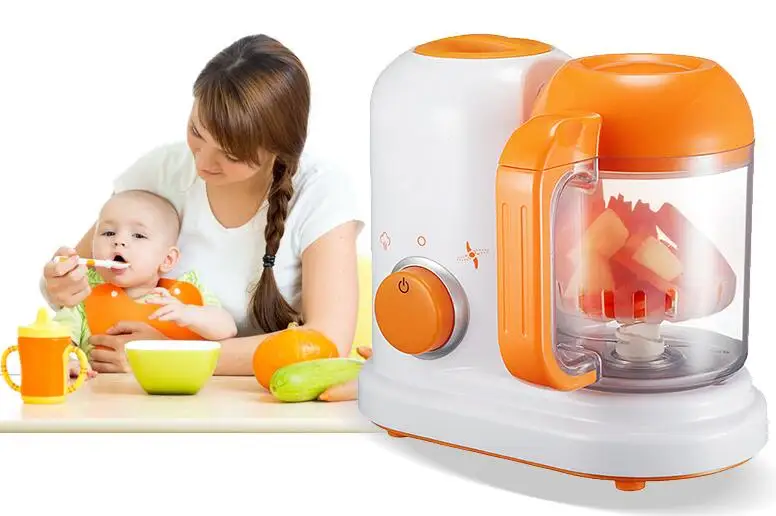 Do not overdo it. Process no more than 4-6 slices at a time using the PULSE button at 1-2 second intervals.
 - Biscuit Crumbs
Break cookies into quarters and weigh no more than 250 g. PULSE in 1-2 second intervals until crushed to desired consistency. As an alternative to dough for sweet or savory pies, you can use sweet or savory biscuit crumbs. Do not handle very hard biscuits as this may damage the blades.
- QUAD® BLADE CLEANER
Micro-toothed four-sided knife purifies raw and cooked foods to the desired consistency, including baby food. The knives work very efficiently and reduce the time needed to puree many tasks.
Remember to place the Quad blade in the processing bowl before adding food. Carefully remove the Quad blade after mashing the food and use a spatula to scrape off food stuck to the blade and bowl. - Baby food
Clean and cut vegetables and meat into 2.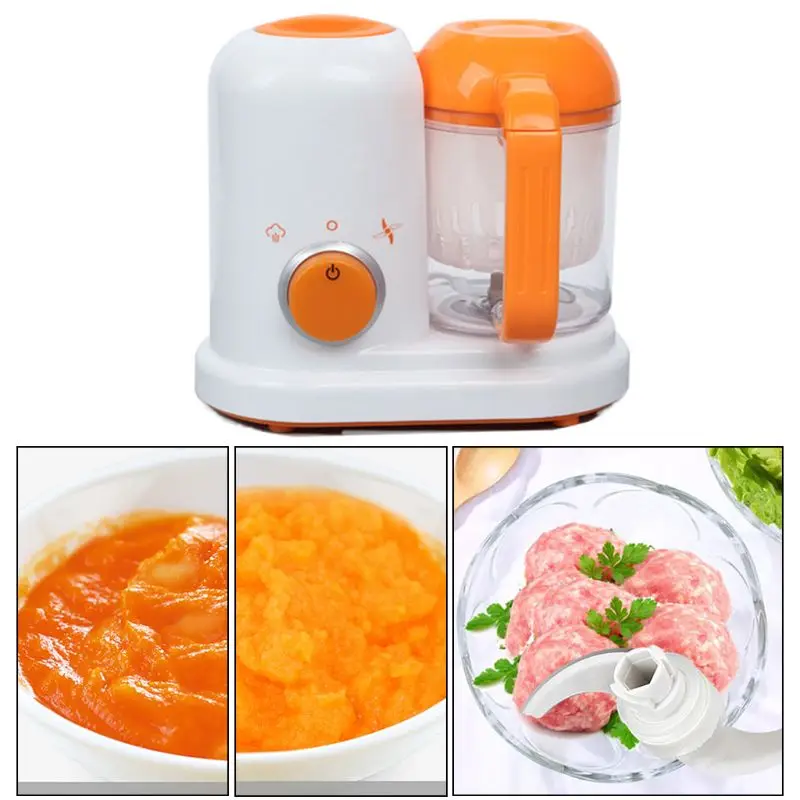 5 cm cubes. Cook vegetables and meat before processing. Cook no more than 5½ cups at a time with the START button at intervals until the food is smooth and uniform. Broth, milk or sauce can be added through the small hopper if the mixture becomes too thick. Surplus baby food can be frozen in ice cube trays and packaged in disposable freezer bags ready to use.
 - Peanut Butter
Process no more than 4 cups of shelled nuts at a time using the START button until they are ground to the desired consistency. The volume of nuts decreases after processing, for example 2 cups of nuts make approximately 1 cup of nut butter. Natural nut butter (without the use of stabilizers) separates on standing and must be stirred prior to use. - MIXING WITH QUAD® BLADE
Quad blade mixes ingredients for cakes, batters and cookie dough.
Always remember to place the Quad spindle and blade in the processing bowl before adding food. - Butter and Biscuit Dough
Place the softened, chopped butter and sugar into the processing bowl. Press the START button until the mixture becomes slightly creamy. With engine running, add eggs one at a time through the small hopper, mixing well after adding each egg. Remove the lid and add the liquid and dry ingredients to the mixture. Process with the PULSE button until it folds flat. Clean the sides of the bowl as needed. Don't recycle. Add chocolate chips, nuts, dried fruits, etc. after the main mixture is done. Use the PULSE button in very short pulses until the additions are combined. Don't overdo it as these larger ingredients will break down quickly.
 - Instant Cakes and Batter
Place all ingredients in the bowl, starting with the liquids, being careful not to exceed the MAX LIQUID level. Process with the PULSE button until it folds flat. Clean the sides of the bowl as needed. Don't recycle. This method can also be used for melt and mix muffins, bagged muffin mixes, and pancake batter. - Pastry dough
Put the flour and chilled diced butter into the processing bowl.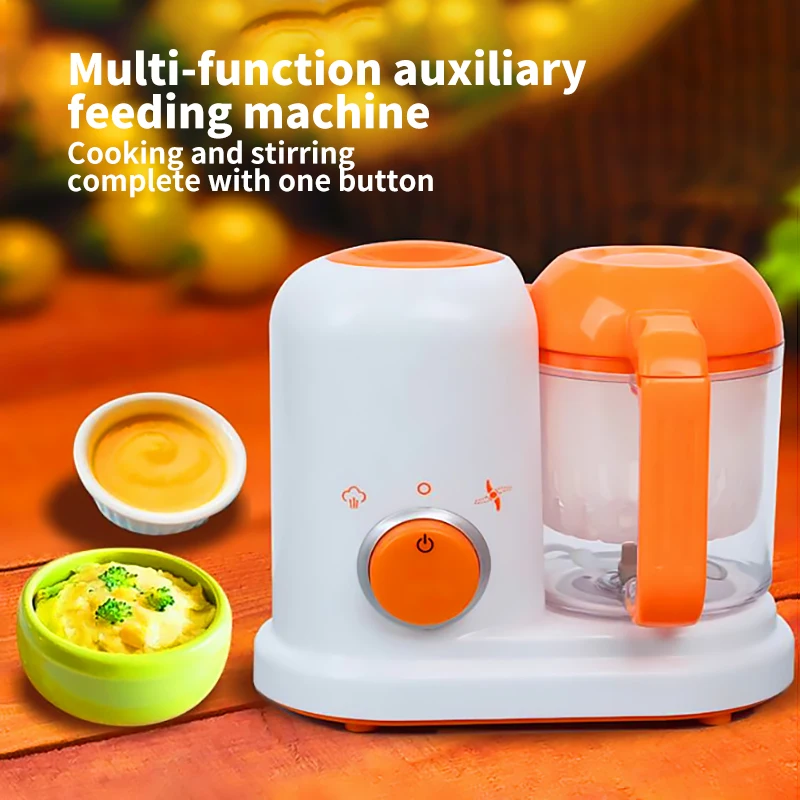 Do not process more than 2 cups (300g) of flour at intervals by pressing the START button until the oil has been absorbed into the flour. Gradually add fluid through the small filling chute while the engine is running. Stir until the mixture forms a ball.
 - MIX WITH DOUGH BLADE
Remember to put the spindle and dough blade into the bowl before adding food. The edges of the plastic dough blade create a softer action for mixing the dough ingredients. The dough blade is designed to pull the gluten strands rather than cut them and should be used for all yeast and any other doughs that require kneading. - Bread or Pizza Dough
Place flour and dry ingredients in the processing bowl, including instant dry yeast. The food processor can process up to 1kg of flour, however for best results we recommend not processing more than 6 cups (800g) at a time. Process with the START button at intervals. Gradually add fluid (including oil, if applicable) through the small filling chute while the engine is running. Stir until the mixture forms a soft, elastic ball of dough. Transfer the ball of dough to a lightly floured surface and knead for another 5 minutes, if necessary, until soft and pliable. When processing more than two dough ingredient recipes (800 g flour), allow the motor base to cool for a long time before kneading again to prevent overloading the motor. Place the dough in a large, oiled bowl and cover. Put in a warm place until it doubles in size. Turn the dough out onto a lightly floured surface and knead again until it is smooth and elastic. Form the dough, then let it rise in a warm place before baking.
CUTTING, GRIDING AND GRINDING
IMPORTANT INFORMATION
Spindle must be used with all blades and attachments.
- Adjustable slicer
The adjustable slicer cuts food to the same thickness. It can be adjusted up to 24 settings, from very small (0.3mm) to thick (8.0mm). To adjust the slicing thickness, hold the adjustable slicing disc on the outer edge with one hand and turn the adjustment disc on the underside with the other hand.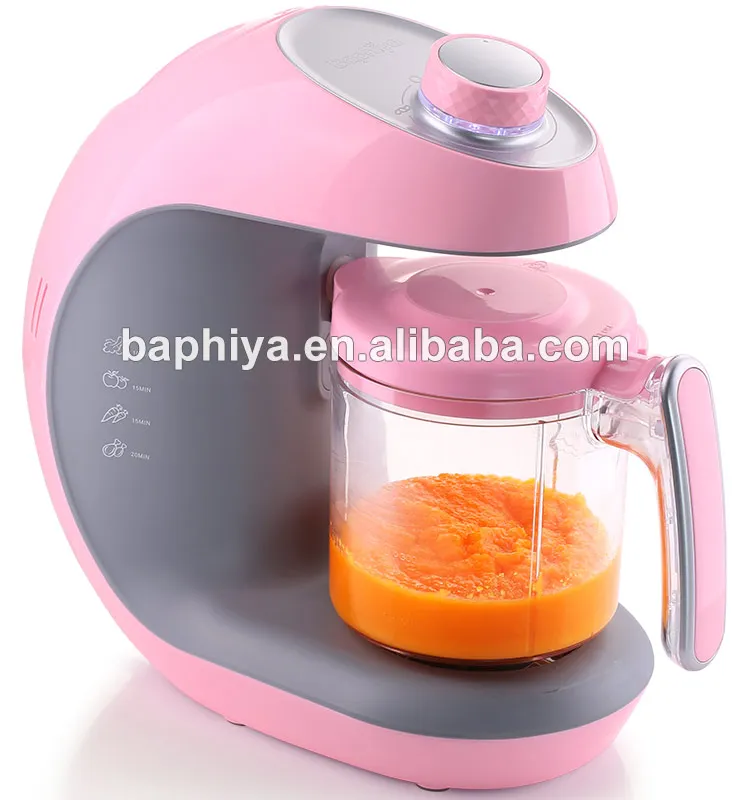 The arrow indicates the thickness of the slice you have selected.
 - Reversible grater and chopper
This disc has many small blades on both sides of the disc. Align the disc so that the larger holes face up for more prominent results, or the smaller holes face up for thinner results. Discs are labeled showing which side is facing up.
INGREDIENT MANAGEMENT
It is important to position products in the chute to get maximum control and best results. The gutter can be packed to fill the width of the gutter. The food should fit snugly to keep it upright in the chute, but not so tight that the food can't move down the chute. For long, thin foods such as carrots, cucumbers, zucchini, etc., use the small input tray. This will prevent the ingredient from tipping over while slicing.
- Pressure
When processing, never press the food down the chute as this may damage the discs. Press lightly on soft foods such as tomatoes and bananas. Use medium pressure for harder foods such as potatoes and apples. Press hard on hard foods like parmesan cheese and deli meats like salami.
 - Round fruits and vegetables
Prepare fruits or vegetables by washing and peeling them (if necessary). Small fruits and vegetables should be trimmed at one end so that the food will lie flat inside the input tray. Large fruits and vegetables may need to be cut in half to fit in the chute. - Long fruits and vegetables
Prepare fruits or vegetables by washing and peeling them (if necessary). The ingredients can be cut in cross section to get round results. Use the small and medium hopper or stack the ingredients vertically in the large hopper. The ingredients can be cut lengthwise to make ribbons. Use the large hopper and trim ingredients if necessary so that they lie flat in the hopper when the disc is turned on. Pack the large loading tray horizontally. - Leafy vegetables
Cut the cabbage into wedges according to the size of the hopper. For salad, separate the leaves, then roll and pack vertically in the loading tray.
 - Cheese
Care must be taken when processing cheese in a food processor. Soft cheese such as mozzarella, partially freeze until firm. This will help prevent disc jamming. Round cheeses such as mozzarella must be cut off at one end so that they lie flat in the feed chute with the disc. Hard cheeses like parmesan should be checked first to make sure they are not too hard (to avoid damaging the blades). The cheese should be easily cut with a sharp knife and peeled before processing. Wedge-shaped cheeses such as Parmesan can be packed side by side to form a rectangular shape in the chute. - Deli meats
Cut pieces to fit the height of the feed chute. The length must not be longer than the MAX CHUTE FILL chart. Pack the package cut side down. For hard cured sausages such as salami and pepperoni, trim off one end and process one sausage at a time through the small or medium feed chute, depending on size.
- Grated chocolate
Break the chocolate bar into small pieces and cool until firm. Pack in a small loading tray and then grate with a coarse or fine grater (do not use a square knife or adjustable cut).
Overlay chart
NOTE: This mix chart is to be used as a guide only. The blender attachment is part of the Kitchen Wizz 8 Plus (BFP580) only.
Food Processing Manual
See Basic Processing Methods for more information on food preparation and processing. For specific recipes, see the recipe section.
Care and cleaning
For safety reasons, unplug the power cord after use.
Blender jar, processing bowl and lids
To prevent food from drying on the blades and jar as soon as possible after use: • Rinse the jar and lid and wash them separately in warm soapy water using a soft cloth or bottles.
- Take care to rinse all detergents from the jug after cleaning.
- It is most effective to wash the jug immediately after use.
- Blades and discs
Blades and discs are razor sharp, do not touch. Always use a spatula or brush to remove food or clean blades. - Motor base
To clean the motor base, wipe it with a soft, damp cloth, then dry thoroughly. Remove food debris from the power cord. - Cleaning products
Do not use abrasive pads or cleaners on the motor base or jug as they may scratch the surface. Use only warm soapy water and a soft cloth. - Dishwasher
The blender bowl, work bowl and lids can be washed in the dishwasher from time to time (only the top rack), but regular washing in the dishwasher is not recommended, as long exposure to aggressive detergents and high temperatures can shorten the service life. plastic services. . - Stubborn food stains and odors
Foods with strong odors such as garlic, fish, and some vegetables such as carrots may leave an odor or stain the bowl or lid. To remove, add warm soapy water and fill up to the MAX LIQUID mark. Set aside to soak for 5 minutes without submerging the entire bowl. Then wash with mild detergent and warm water, lift well and dry thoroughly. Store the bowl with the lid open.
 - Memory
Place the large food pusher (with the small pusher inserted) into the storage tray. Store the food processor upright with the bowl and lid in place but not locked. Blocking the bowl and lid can put unnecessary strain on the safety interlock. All accessories should be stored in a safe place out of the reach of children to avoid accidental cuts. It is not recommended to store discs in a drawer with other utensils. For BFP580: Store accessories in the included storage box by placing the Quad blade inside the bowl. For BFP560: Store the Quad blade inside the bowl, with the adjustable slicer on top. These blades are very sharp and the bowl provides natural protection. Do not place anything on the food processor during storage.