Pressure cooker for baby food
Easy Homemade Baby Food in your Instant Pot
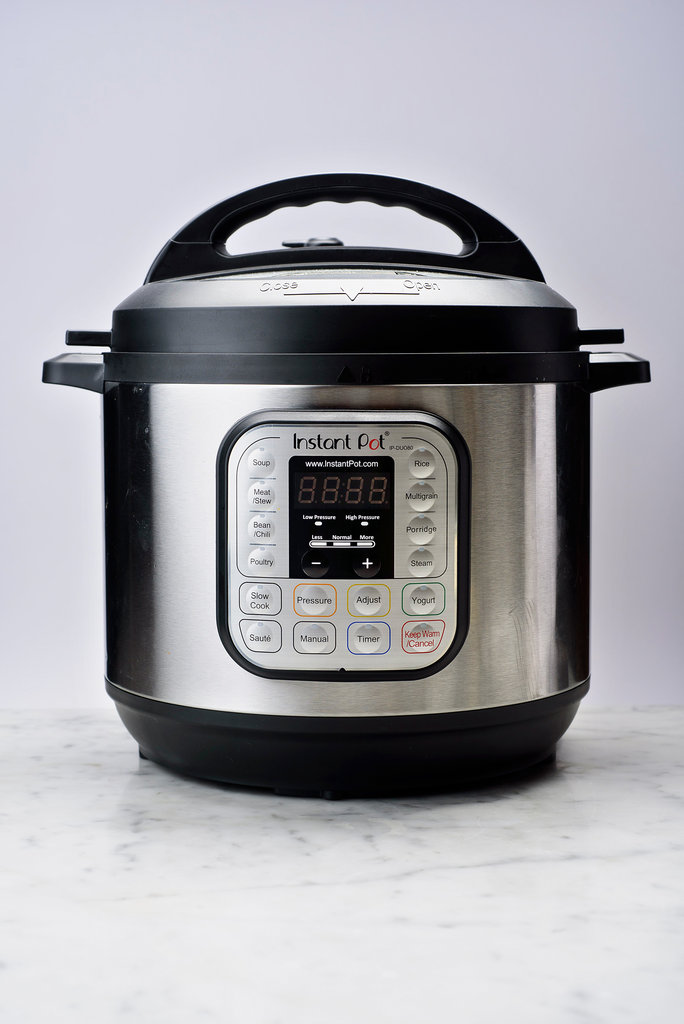
Jump to RecipeDid you know that you can make healthy, nutritious baby food right in your Instant Pot? Instant Pot Baby Food is a cost-effective and low-effort method for cooking nutritious meals for your baby at home.
My little munchkin is now almost eight months old. I started her off with pureed baby food that I made in the instant pot at about 6 months, and now slowly transitioned her to enjoy more textured food.
With my older one 6 years back, there was no instant pot, and I can say for sure that making baby food in the instant pot has saved me so much time.
Instant Pot Baby Food is a fantastic way to offer your baby a variety of nutritious foods while saving both time and money. In this post, I'll share how to make an array of stage 1 baby foods as well as a few ways to combine purees to please your little one's palate. If you're looking for more baby-friendly pressure cooker recipes, check out my post on how to make simple homemade yogurt in your Instant Pot.
- Why make Homemade Baby Food?
- When to Give Baby Food?
- How to Offer Homemade Baby Food?
- What kind of veggies and fruits can you include for Stage 1 Baby Food?
- How to Use the Instant Pot to Make Baby Food
- What bowls can I use in the Instant Pot?
- Tips for Pureeing Baby Food
- Storing Baby Food
- Homemade Instant Pot Baby Food Blends
- Other Homemade Instant Pot Baby Food Recipes to Try
- What to Avoid When Making Baby Food in Instant Pot
- How to thaw and reheat frozen baby food?
- Instant Pot Baby Food
Why make Homemade Baby Food?
There are so many reasons to make your baby's food at home in your Instant Pot. Not only will you save money (the price of those jars and pouches can really add up), but you'll be able to control the ingredients that go into your baby's food.
Plus, you'll be surprised at how many servings you can get from just one vegetable or piece of fruit, and if you plan well, you can make a big batch of baby food at a time, which will save you time in the long run.
When to Give Baby Food?
When your baby's pediatrician has given you the green light to begin letting your baby try solid purees it can be both an exciting and overwhelming time.
There's a lot of conflicting information on the web these days about when it's appropriate to begin feeding your baby solid foods and whether you should try baby-led weaning or purees. The most important thing to remember is that your baby is unique. It's best to make a decision that is right for your baby and your family.
If you do decide to follow the traditional route of feeding your baby purees, it's best to begin with thinly pureed vegetables and fruits. These are called stage 1 foods, and they're a great way to offer your baby new tastes and nutrients while teaching them the very early fundamentals of self-feeding.
As I mentioned earlier, I started off my daughter with purees (I did look at baby led weaning, but preferred to start with purees), then quickly transitioned to more textured foods.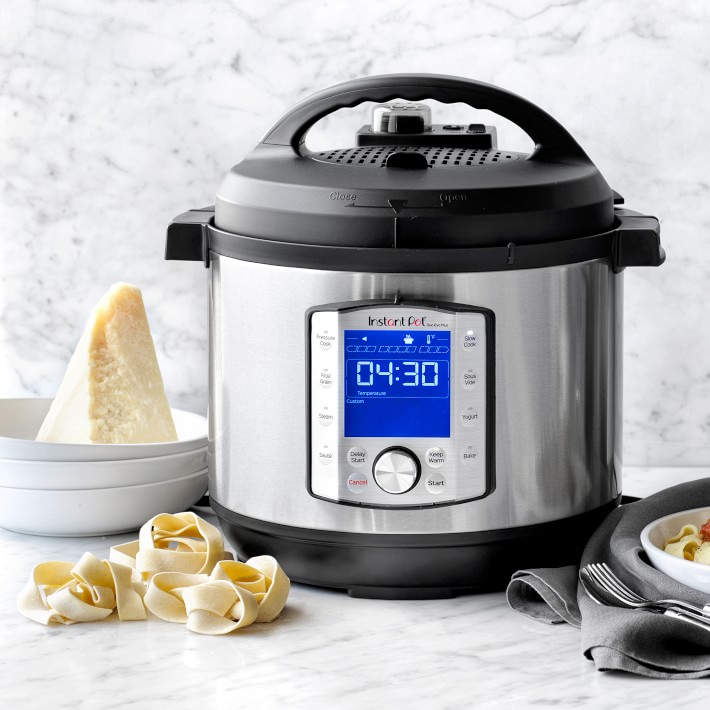
How to Offer Homemade Baby Food?
My baby is now 8 months and I have been using the Instant Pot to make baby food. We started by introducing one new food at a time, making sure there are no allergies, then zing a new food every 2 days.
The biggest thing to remember when starting your baby on new foods is that you'll need to start slowly. Not only does this give your baby a chance to learn without overwhelming, but it also helps to identify potential allergens so that you can avoid those foods in the future and come up with an appropriate action plan in case your child would come into contact with those foods in the future.
To start offering your baby new homemade baby foods stage 1, start with one single puree at a time, waiting a minimum of 24-48 hours before trying a new puree. Keep an eye on your baby's skin to identify potential rashes, hives, or other changes that could indicate an allergy. Additionally, it's helpful to notice any changes in your baby's breathing or swelling inside his or her mouth.
When in doubt, contact your pediatrician if you are unsure of whether you're seeing something that could indicate a food allergy.
What kind of veggies and fruits can you include for Stage 1 Baby Food?
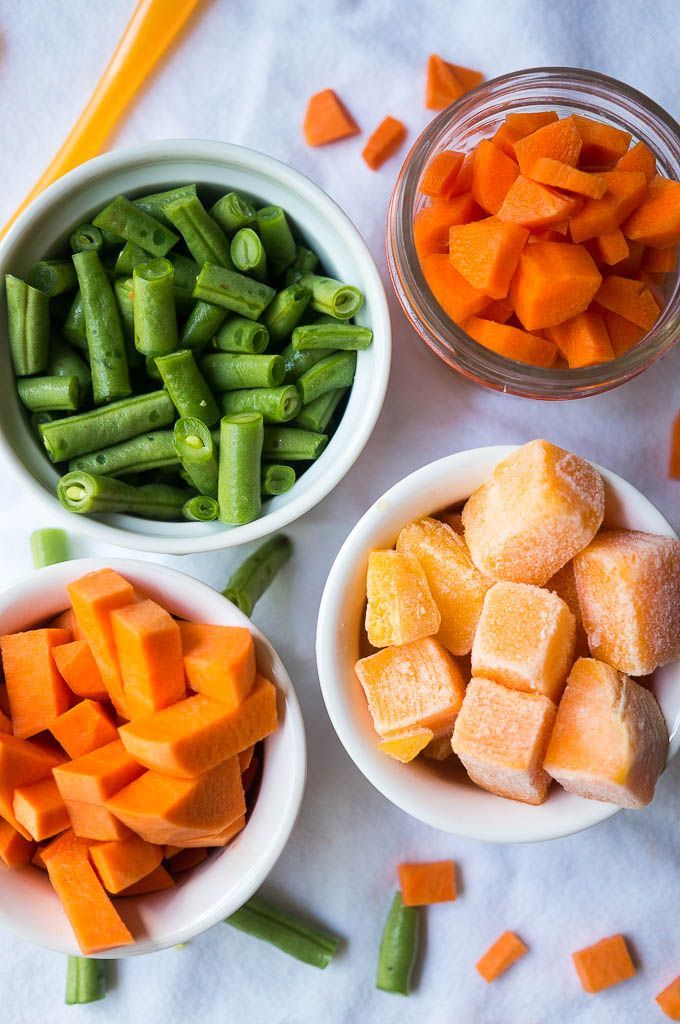
There are lots of options to start with when making stage 1 baby food recipes in the Instant Pot. Here are some ideas:
- carrot
- squash
- peas
- sweet potato
- apple
- pear
- green beans
- broccoli
- zucchini
- beets
- peaches
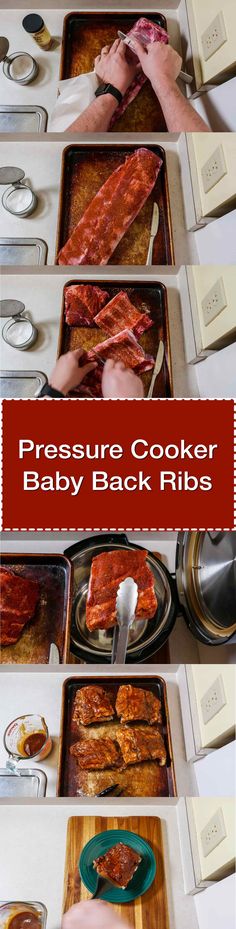
How to Use the Instant Pot to Make Baby Food
- Dice your choice of fruits and veggies into small, uniform pieces.
- Pour 1 cup water into your Instant Pot's steel insert, then place a low trivet in the bottom. Place 4 ramekins (or other oven safe bowls) filled with the diced fruits & veggies on the trivet.
- If there is space, repeat with a second layer of ramekins. You can also add a separating steamer basket between the 2 layers.
 Close the lid and set the vent to the sealing position. Cook on high pressure for 5 minutes. When the instant pot beeps, let the pressure release naturally.
- Remove the bowls with fruits & veggies carefully. Puree each ramekin separately to the desired consistency, then store as directed.
What bowls can I use in the Instant Pot?
It is recommended to use oven-safe bowls such as these ramekins in the instant pot for pot-in-pot cooking as shown above. I also like to use small steel bowls for cooking in the instant pot.
Learn more about the instant pot pot-in-pot method with this comprehensive guide!
Tips for Pureeing Baby Food
- Some purees are thicker and some thin depending on the water content of the fruit or vegetable. For example, sweet potatoes will render a much thicker puree while pureed zucchini is much thinner and more watery.
- It is best to add the least amount of water needed when pureeing so that you can add breastmilk or formula or water when serving as needed.
- Use a Baby Bullet, small blender, or food processor to blend the veggies and fruits.
Storing Baby Food
You can store your homemade Instant Pot Baby Food in the fridge or freezer. Follow these guidelines for storing baby food safely:
- In the fridge: Baby food should be stored in the fridge in an airtight container with a lid. I like to use small glass containers with lids for individual portions. It's easy to see what's inside each container and I can quickly grab a portion of baby food out of the fridge when I'm in a hurry.
- In the freezer: Spoon purees into ice cube trays, then cover and freeze for at least 24 hours. When the baby food is frozen, pop the cubes out of your ice tray and place them into zip lock baggies labeled with the type of food and the date the food was cooked. Frozen baby food will stay fresh for up to 3 months.
Homemade Instant Pot Baby Food Blends
You can also play with blending two or more flavors of purees to mix up your baby's meals.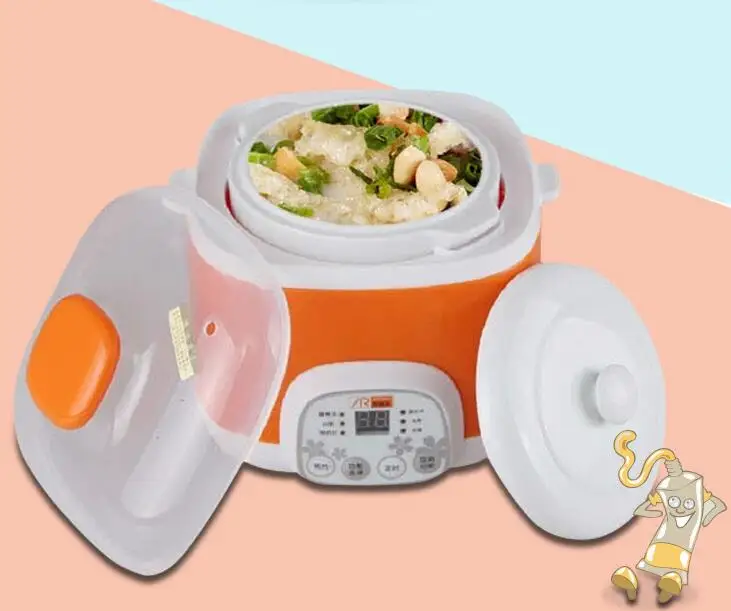 Here are some flavor pairings that go well together:
- Apple & carrot or butternut squash
- Squash and peas or green beans
- Pear & zucchini or apple & zucchini
- Sweet potato & apple
- Beets and butternut squash
Again, you can always add breast milk or formula to your homemade baby food purees for added liquid, fat, and nutrients. You can also add a small amount of unsalted butter to starchy foods like sweet potato & white potato for a little added flavor & fat.
Other Homemade Instant Pot Baby Food Recipes to Try
After working your way through the list above, you can start to play around with different blends, flavors, and textures.
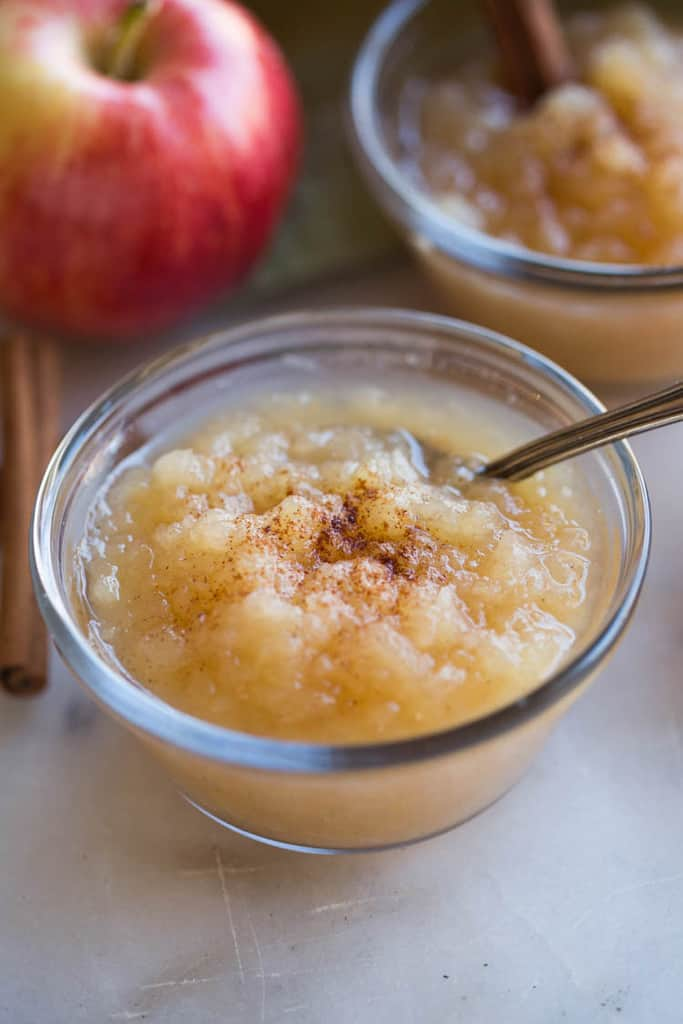
To add a little excitement to your baby's pureed apples, try my 4-ingredient Instant Pot Applesauce recipe.
You can also do potatoes as long as they are boiled to soft, then mashed or whipped with enough liquid to make them smooth. Check out my tutorial for boiling potatoes in the Instant Pot, and try adding a little breast milk or formula to get a smooth consistency.
Tip for making potato baby food: Keep in mind that you should be careful not to over-process your boiled potatoes, or they will turn into a glue-like paste. I recommend mashing them by hand or with an electric hand mixer rather than placing them in a blender or food processor.
Another great option is lentils, but be sure to puree them first before feeding them to your baby. He or she might not be ready for whole lentils even if they are cooked super soft.
Finally, you can also feed your baby pureed soups as long as they are not spicy.
What to Avoid When Making Baby Food in Instant Pot
While it might be tempting to season your baby's food, especially when making purees, it's best to wait until your baby is a little older before introducing any additives other than breast milk, formula, or a little added butter during cooking.
Remember that babies have sensitive tummies and their digestive systems may not be ready to handle things like chili and other spicy substances. Skip the salt & pepper too - they're unnecessary during infancy.
It is also best to avoid sugar and especially honey, as it can cause serious food borne illness in babies under 1 year of age.
How to thaw and reheat frozen baby food?
Take out as many cubes of food that the baby will eat within 1-2 days (do not refreeze thawed food). Thaw then in an airtight container (I prefer glass containers) and let them thaw in the refrigerator.
You can also microwave the food in the container or transfer to a small pan to warm on the stovetop. Make sure to stir the food well and check that the temperature is right before serving to the baby.
Hope you enjoy the benefits of making baby food in your instant pot!
Tried this recipe?Give a rating by clicking the ★ below
Instant Pot Baby Food
Meeta Arora
Did you know that you can make healthy, nutritious baby food right in your Instant Pot? Instant Pot Baby Food is a cost-effective and low-effort method for cooking nutritious meals for your baby at home.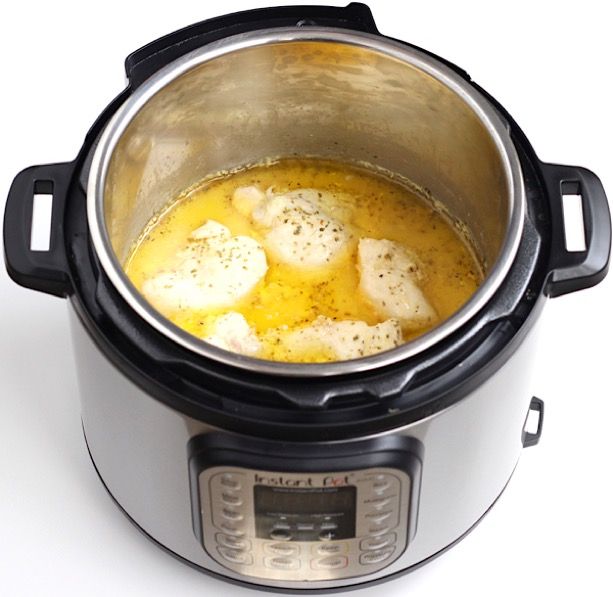
4.87 from 15 votes
Servings: 10
Calories: 26
Course: Main Course
Cuisine: American
Diet: Vegetarian
Method: Instant Pot/Pressure Cooker
Prep Time: 10 mins
Cook Time: 20 mins
Total Time: 30 mins
Instant Pot/Pressure Cooker
Ramekins
- ▢ ½ cup Carrot peeled and diced
- ▢ ½ cup Squash
- ▢ ½ cup Green peas frozen
- ▢ ½ cup Sweet potato peeled and diced
- ▢ ½ cup Apple diced (you can leave the peel on or remove it)
- ▢ ½ cup Pear diced (you can leave the peel on or remove it)
- ▢ ½ cup Green beans trimmed and diced
- ▢ ½ cup Broccoli diced
- ▢ ½ cup Zucchini chopped
- ▢ ½ cup Beets peeled and diced
Pour 1 cup water in the instant pot steel insert.
 Place a low trivet in the bottom.
Place 3-4 ramekins (or other oven safe bowls) filled with the diced fruits & veggies on the trivet.
If there is space, you can repeat with a second layer of trivets. You can also add a separating steamer basket between the 2 layers.
Close the lid with the vent in sealing position. Press the manual or pressure cook mode on high pressure for 5 minutes. When the Instant Pot beeps, let the pressure release naturally.
Remove the bowls with fruits/veggies carefully. Puree each food separately to your desired consistency, then refrigerate or freeze.
Tips for Pureeing Baby Food
- Some purees are thicker and some thin depending on the water content of the fruit or vegetable. For example, sweet potatoes will render a much thicker puree while pureed zucchini is much thinner and more watery.
- It is best to add the least amount of water needed when pureeing so that you can add breastmilk or formula or water when serving as needed.
- Use a Baby Bullet, small blender, or food processor to blend the veggies and fruits.
Storing Your Homemade Instant Pot Baby Food
- In the fridge: Baby food should be stored in the fridge in an airtight container with a lid. I like to use small glass containers with lids for individual portions. It's easy to see what's inside each container and I can quickly grab a portion of baby food out of the fridge when I'm in a hurry.
- In the freezer: Spoon purees into ice cube trays, then cover and freeze for at least 24 hours. When the baby food is frozen, pop the cubes out of your ice tray and place them into zip lock baggies labeled with the type of food and the date the food was cooked. Frozen baby food will stay fresh for up to 3 months.
Note: Nutrition facts are for 1 cup of carrots only.
Note: Nutrition values are my best estimates. If you rely on them for your diet, use your preferred nutrition calculator.
Calories: 26kcalCarbohydrates: 6gProtein: 1gFat: 1gSaturated Fat: 1gSodium: 44mgPotassium: 205mgFiber: 2gSugar: 3gVitamin A: 10692IUVitamin C: 4mgCalcium: 21mgIron: 1mg
Keyword baby food instant pot recipes, instant pot baby food
Tried this recipe?Share your photo and tag @PipingPotCurry or #pipingpotcurry
Instant Pot Baby Food (15 Puree or BLW Recipes)
Home » Feeding Style » Baby Food Purees » Stage One » Instant Pot Baby Food (15 Puree or Baby-Led Weaning Recipes)
Instant Pot Baby Food: a quick and nutritious way to make baby food purees or finger foods for baby-led weaning! Up to 6 different baby foods made in 3-minutes! Great for 4 months and up!
Instant Pot Baby FoodMaking your own homemade baby food couldn’t be easier with the Instant Pot!
Using this time-saving kitchen tool, we are able to cook 6 different baby food purees or finger foods for baby-led weaning in 3-minutes – with only the touch of a button #mindblown!
If you are looking to save time and money, while making your little one delicious and nutritious baby food – then you are in the right spot!
If you are just starting out making your own homemade baby food – welcome! I’m so happy you are here! On this blog I have everything you need to know to get you started making homemade baby food — from the guide to baby food stages, the ultimate guide to baby food purees and baby-led weaning, 10 best first foods for baby, the best baby food storage and more! Great for 4+ months as well as baby-led weaning!
Instant Pot Baby Food Video
Watch this video to see step-by-step instructions on how to make baby food in your instant pot!
Reasons to Love Using the Instant Pot for Baby Food- great Stage 1 Baby Food
- also great for Baby-Led Weaning
- small batch cooking
- saves time
- easy hands-off approach
- saves money
- can cook multiple fruits and veggies at the same time
- can mix and match purees for stage 2 purees
You can cook almost any fruit or veggie in the instant pot that you would steam on the stovetop. Here are list of my favorites.
- sweet potato
- carrots
- broccoli
- zucchini
- squash
- beets
- red pepper
- peas
- green beans
- asparagus
- apple
- pear
- peaches (frozen or very firm work best)
- mango (frozen or very firm work best)
- cherries (frozen work best)
Let me be clear here – there is no right or wrong to feed your baby!
Purees are the more traditional way to start feeding baby and include cooking and blending down fruit, veggies and grains into a smooth puree that you feed to your baby. On the other hand, baby-led weaning is a newer concept where you give baby chunks of food and let them feed themselves.
Both feeding techniques are driven by the simple principle of introducing baby to new foods to develop eating skills and expose baby to different flavors and consistencies – they just go about it different ways.
Read: if you want more information check out my Guide How to Make Homemade Baby Food Purees or my Guide on Finger Foods for Baby.
How to Use the Instant Pot to Make Baby FoodHere is a quick step-by-step overview of how to make baby purees or foods for baby-led weaning. You can find more in-depth instructions below.
- Prep Instant Pot: pull in the Instant Pot and add the trivet to the bottom.
- Prep Produce: peel and chop produce according to directions. Add the prepped produce to separate ramekins. If making a bigger batch of a baby food, you can use a steamer basket.
- Water: add in water to the bottom of the instant pot.
- Layer: if using ramekins, place 3 ramekins on top of the trivet and then place another layer of 3 ramekins on top of the bottom row.
- Cook: lock the lid on tight, place the valve in the sealing position.
 Selection the Manual High Pressure and set the time for ____ minutes.
 - Quick Release: Once the timer is up, quick release the pressure, turn off the Instant Pot and remove lid. Let the ramekins cool for a few minutes.
- Puree for Baby Puree: transfer the cooked produce to a blender, food processor or larger bowl and puree. Since the produce is very tender, you can also just mash it with the back of a fork.
- Strain for Baby-Led Weaning: if you are serving the produce whole for baby-led weaning, you will want to strain out any liquid that is at the bottom of the ramekin.
- Eat: serve the puree or store for another meal.
Here is a quick guide on how to store baby food, for more detailed information, including my favorite storage trays, check out my Best Baby Food Storage post.
REFRIGERATORYou can store these purees in the fridge for up to 4 days.
- Let the puree cool.
- Transfer puree to an airtight container and place in the fridge. I like using these smaller 4-oz containers so you can have a single serving at your ready.
- If using larger containers, make sure you use a clean spoon to scoop out the amount of puree needed for a feeding, do not warm up the entire container if you don’t plan on feeding it all to baby.
These purees can be frozen for up to 4 months.
- Spoon puree into a freezer storage container (these are my favorite freezer trays and these are my favorite glass storage containers) – do not overfill.
- Place the lid on the storage container or cover with a piece of saran wrap and label with date and recipe name.
- Place the tray into the freezer and let freeze completely – preferably overnight.
- Pop-out the baby food cubes and place in a zip-lock baggie or stasher bag – don’t forget to re-label the baggie or stager bag with the name and date of the puree for future reference.
Label Tip: Don’t forget to label your purees before you place them in the fridge or freezer with the name and date you made them. Take it from me, you will completely forget when and what is in your freezer by the end of the week;).
How to Store for Baby-Led WeaningREFRIGERATORYou can store these finger foods in the fridge for up to 4 days.
- Let the finger foods cool.
- Transfer to an air-tight container and place in the fridge.
Some finger foods can be frozen for up to 4 months. The hardier vegetables such as carrots, sweet potatoes, green beans, beets, squash, etc, are super easy to freeze. Tender fruit and veggies such as pears, red peppers, zucchini are a little tougher as they tend to get mushy when frozen. But if you are freezing a bunch of other veggies from this cooking batch, I would give it a try to see what your baby will eat.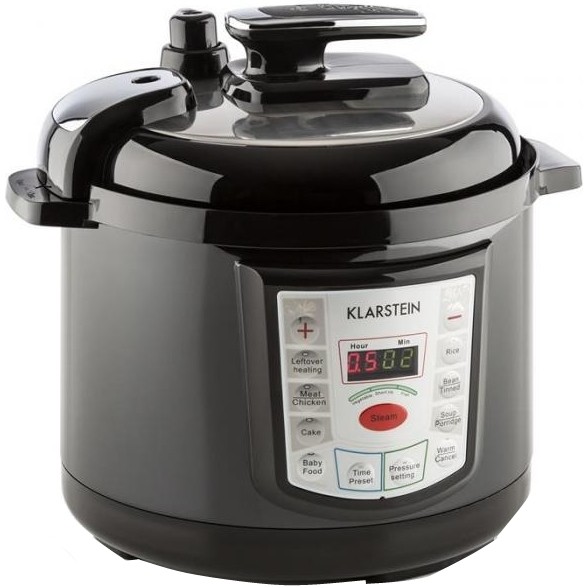
- Place the produce you want to freeze on a parchment-lined baking sheet and place in the freezer for 2-4 hours.
- Take out the baking sheet and transfer the produce to a zip-lock baggie, stasher bag or air-tight container. Flash freezing the produce will help it from sticking to each other.
While these single purees as delicious as is, it’s also super easy to mix and match with other nutrient-dense baby food purees. When baby is ready, give these fun flavor combos a try!
- Sweet Potato + Beet + Banana
- Broccoli + Pear
- Peas + Mango + Avocado
- Green Beans + Peas + Banana
- Red Pepper + Sweet Potato + Mango
- Squash + Peach
- Beet + Banana
- Asparagus + Avocado
- Sweet Potato + Carrot + Mango
- Green Beans + Peas + Broccoli
- Beet + Carrot + Pear
Adding Spices: if you would like to add a pinch of cinnamon, nutmeg, cloves, mild curry powder, cumin, etc, I would add it to the puree while you are mixing together your combination purees, not while coooking.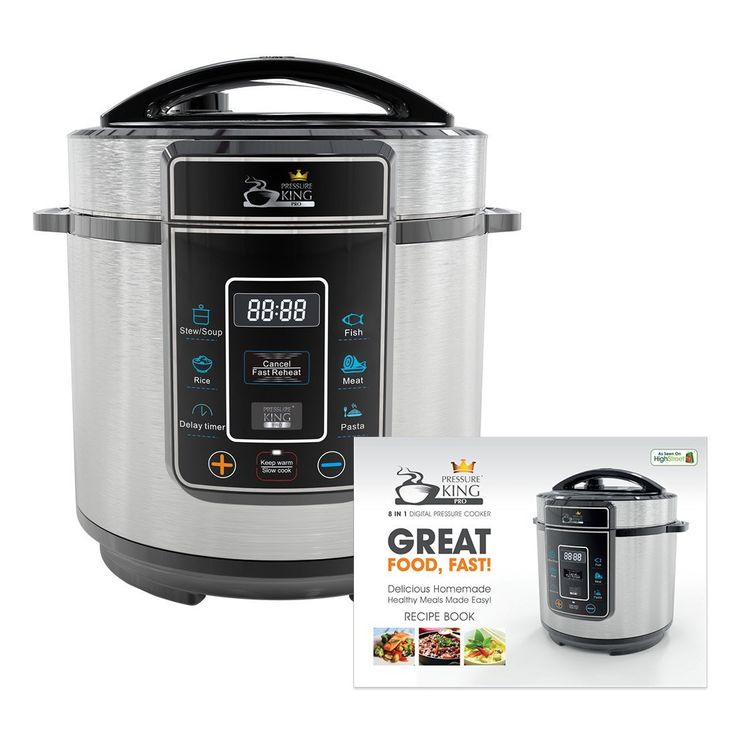 This gives you more flexibility on which spices you can add in.
- Ramekins: I love these 10oz ramekins as I can easily fit 6 of them in my instant pot at the same time. The size and depth of your brand of Instant Pot and ramekins will determine how many will ultimately fit in there. If you don’t want to invest in a set of ramekins for just this recipe, you can use any bowl or jar labeled as “oven-safe” and some popular brands are Pyrex, CorningWare, Anchor Hocking and canning jars.
- Chopping: if you are going to puree your fruit and vegetables, then I would roughly chop them into cubes as you will be able to fit more produce into each ramekin. If you are going to serve as finger foods – then I would slice them into 2-3″ strips. Exceptions: for beets, I would chop into smaller chunks and then once cooked I would either mash with a fork (creating a pancake of sorts) or dice into “pea” size shapes.
 For zucchini, I would slice into rounds, cook and then before serving cut into “pea” size shapes. I have found that strips of beets and zucchini don’t always hold up as well and can get super mushy.
 - Blending: since you are making such a small quantity of baby food with this method, I have found that using a food processor or handheld emersion blender work the best to get a smooth puree. You will want to also drain any liquid from the ramekins before transferring them to another bowl or food processor to blend. If the puree is too thick, you can add the liquid back in a little at a time.
- Chunky – Stage 3 Puree: since this method makes the produce super tender, you can easily mash the produce with the back of fork for a chunky stage 3 baby puree.
- Sweet Potato for Baby – 6 Delicious Ways
- Best Yogurt for Babies (plus, 9 ways to flavor plain yogurt)
- 9 Best Organic Baby Food Pouches (expert review)
- 10 Super Starter Baby Food Recipes (plus FREE ebook!)
- Instant Pot
- Ramekins
- Blender or Food Processor
- Freezer Tray
- Storage Containers for Fridge
- Stasher Bag
Vegetables
- 1 1/2 cups broccoli florets
- 1 1/2 cups sweet potatoes, peeled and cut into 2-3" strips for BLW or cubes for puree
- 1 1/2 cups carrots, peeled and cut into 2-3" strips for BLW or cubes for puree
- 1 small zucchini, cut into rounds, peeling is optional
- 1 1/2 cups squash (butternut, acorn, winter), fresh or frozen works – peeled and cut into 2-3" strips for BLW or cubes for puree
- 2 medium beets (red or golden), peeled and cut into 2-3" strips for BLW or cubes for puree
- 1 red pepper, cored and cut into 2-3" strips for BLW or cubes for puree
- 1 1/2 cups peas, fresh or frozen
- 1 1/2 cups green beans, fresh or frozen, trimmed and cut into 2-3" strips for BLW or small strips for purees
- 1 1/2 cups asparagus, fresh or frozen, trimmed and cut into 2-3" strips for BLW or small strips for purees
Fruit
- 1 medium sweet apple, leave the skin on and cut into 2-3" strips for BLW or peel and cut into cubes for puree
- 1 medium pear, leave the skin on and cut into 2-3" strips for BLW or peel and cut into cubes for puree
- 1 1/2 cup peaches, frozen or very firm work best, peeled and sliced
- 1 1/2 cup mango frozen or very firm work best, peeled and sliced
- 1 1/2 cup pitted cherries, frozen work best
Base of Instant Pot
- 1 cup water
Prep Instant Pot: plug in the Instant Pot and add the trivet to the bottom.
Prep Produce: peel and chop produce according to directions. Add the prepped produce into separate ramekins. If making a bigger batch of baby food, you can use a steamer basket.
Water: add in 1 cup of water to the bottom of the instant pot.
Layer: if using ramekins, place 3 ramekins on top of the trivet.
Second Layer: you can either add another row of ramekins or a steamer basket filled with additional food.
Cook: lock the lid on tight and place the valve in the sealing position. Selection Manual High Pressure and set the time for 3 minutes.
Quick Release: Once the timer is up, quick release the pressure, turn off the Instant Pot and remove the lid. Let the ramekins cool for a few minutes until you can safely touch them, they will be hot.
Puree for Baby Puree: using a slotted spoon, transfer the cooked produce to a blender, food processor or larger bowl, leaving any liquid in the ramekin.
 Puree until smooth adding liquid to the puree in small quantities as needed. Since the produce is very tender, you can also just mash it with the back of a fork for a chunkier puree.
Strain for Baby-Led Weaning: if you are serving the produce whole for baby-led weaning, you will want to strain out any liquid that is at the bottom of the ramekin.
Eat: serve the puree or store for another meal.
Age: 4 months and up
Yield: roughly 30-40 ounces depending on how much you add to the ramekins or steamer basket.
Note on Chopping: if you are going to puree your fruit and vegetables, then I would roughly chop them into cubes as you will be able to fit more produce into each ramekin.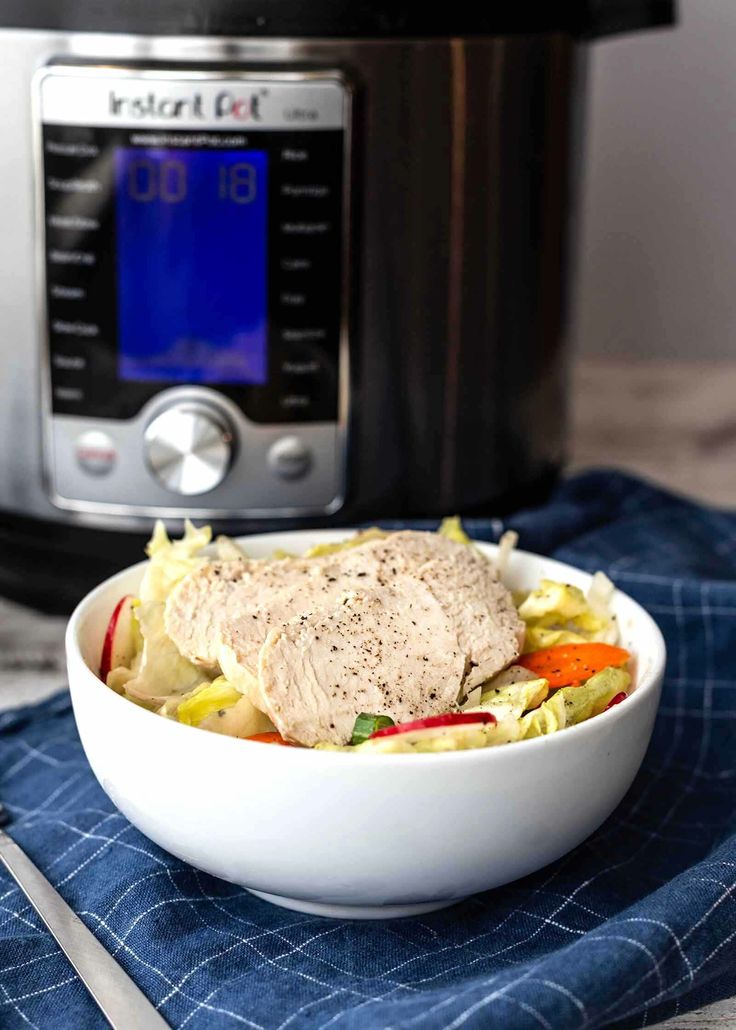 If you are going to serve as finger foods – then I would slice them into 2-3″ strips. Exceptions: for beets, I would chop into smaller chunks and then once cooked I would either mash with a fork (creating a pancake of sorts) or dice into “pea” size shapes. For zucchini, I would slice into rounds, cook and then before serving cut into “pea” size shapes. I have found that strips of beets and zucchini don’t always hold up as well and can get super mushy.
Note on Ramekins: I love the 10 oz ramekins as I can easily fit 6 of them in my instant pot at the same time. The size and depth of your brand of Instant Pot and ramekins will determine how many will ultimately fit in there. If you don’t want to invest in a set of ramekins for just this recipe, you can use any bowl or jar labeled as “oven-safe” and some popular brands are Pyrex, CorningWare, Anchor Hocking and canning jars. You can also use any steamer basket in the Instant Pot if it fits.
Blending: since you are making such a small quantity of baby food with this method, I have found that using a food processor or handheld emersion blender work the best to get a smooth puree. You will want to also drain any liquid from the ramekins before transferring the produce to another bowl or food processor to blend. If the puree is too thick, you can add the liquid back in a little at a time.
Storage: you can store the purees or the finger foods in the fridge – store in an airtight container in the fridge for up to 4 days. Freezer – can be frozen for up to 4 months. See post above for more details.
Did you make this recipe?
Tag @babyfoode on Instagram and hashtag it #babyfoode!
Pin Recipe Email a Friend
Multicooker REDMOND RMC-01: characteristics, description, instructions
Multicooker REDMOND RMC-01
specifications
Programs and functions
Model description
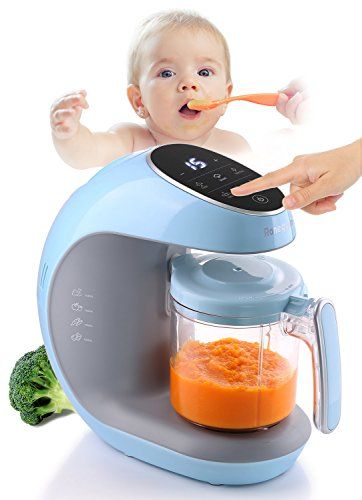
REDMOND RMC-01 is the first multicooker designed specifically for preparing meals for children from a very early age.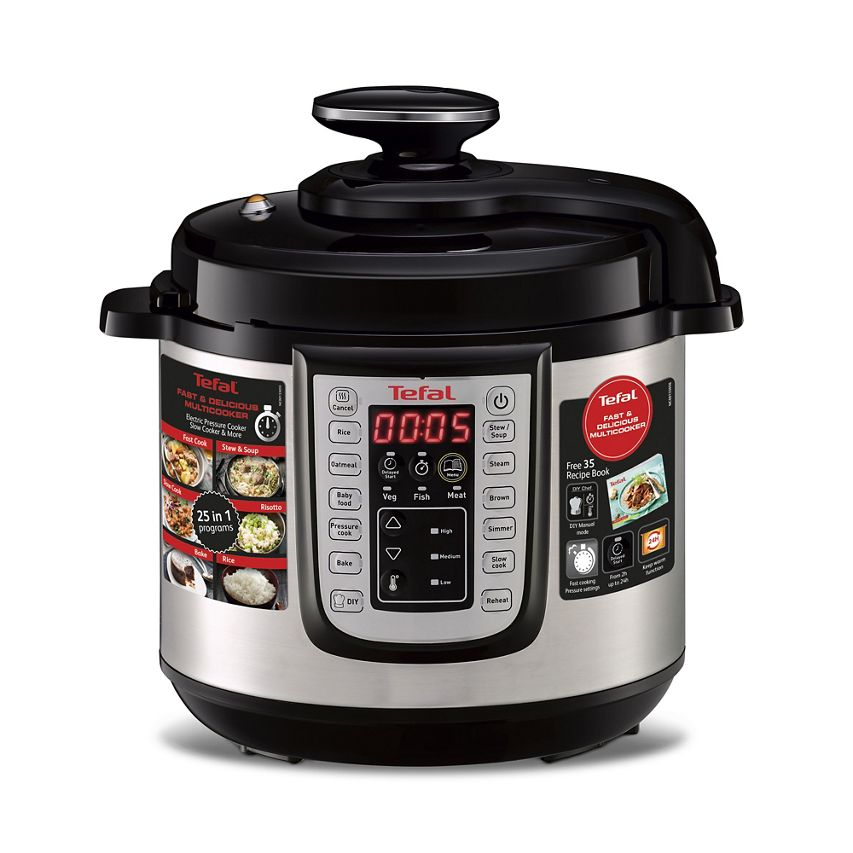
With a capacity of 2 liters, you can prepare small portions of food for your little one. With this multicooker, it is convenient to sterilize baby bottles and nipples, warm up milk formulas, and cook meals for the whole family without spending hours at the stove.
Spend as much time as possible with your baby, and the multicooker REDMOND RMC-01 will take care of his healthy and tasty food!
Specifications
| Power | 350 W |
| Voltage | 220-240 V, 50 Hz |
| Bowl included | RB-C200 |
| Bowl volume | 2L |
| Bowl cover | Anti -stick ceramic |
| Display | LCD, monochrome digital (Russian) with backlight |
| Preparation technology | Heat processing without pressure |
| 0 | |
| yes | |
| color | white (decorative) |
| Packing size (l-w-h) | 32 x 27 x 25. 5 cm 5 cm |
| Weight (in packaging) | 3.4 kg |
| The number of programs | 7 automatic |
| The functions of maintaining finished dishes (Avtopodogrev) | is there , up to 24 hours |
| Auto keep warm off function | yes |
| Reheat dish function | yes |
| Delay start function | there is, up to 24 hours |
| Complete: | - Multicar with a bowl of |
| - a container for steaming | |
| - measuring glass | |
| - scoop | |
| - scoop/spoon holder | |
| - power cord | |
| - instruction manual | |
| - Service book | |
| - Book "160 Recipes" | |
| Additional features: | |
| - Bakes of bread | |
| - cheese preparation | |
| - dough proofing | |
| - pasteurization of liquid products | |
| - dish sterilization | |
| - baby food warmer | |
| 2 year warranty | |
| * The manufacturer has the right to make changes to the design, packaging, as well as to the technical characteristics of the product in the course of improving its products without additional notice of these changes.  | |
7 cooking programs
-
Rice/cereals
-
Yoghurt
-
Par
-
Milk porridge
-
Soup/stewing
-
Baby food
-
Baking
Buy online
- Instructions (PDF , 1.
 9 MB )
Device control via the Ready for Sky app
Why is Bluetooth and not Wi-Fi?
Recipes in your phone: Mobile app “NEW Cooking with REDMOND”
Mobile application R4S Gateway. Remote control.
Learn more
Multicooker for baby food: selection and reviews
› ›
A multi-cooker is a useful and quite compact device that will allow mom to cook almost any dish from the children's menu.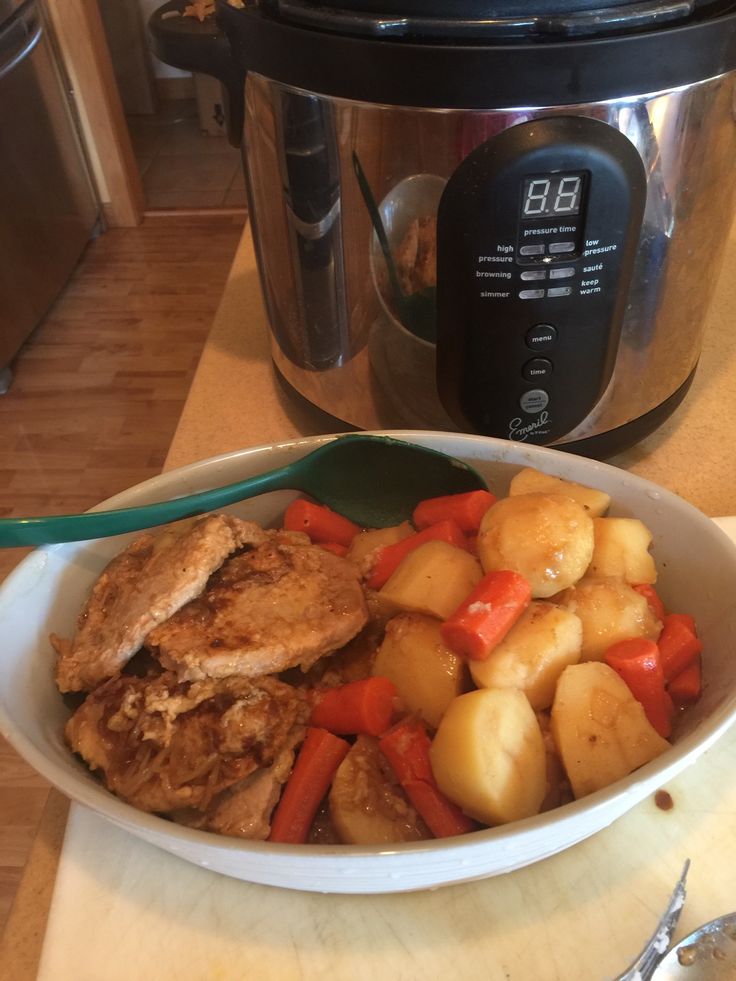 But how to choose the right model?
Photo: depositphotos.com. Author: Jim_Filim.
Contents
- Advantages
- Varieties
- Table of demanded modes
- What is important when choosing?
- Overview of popular models
- Parent reviews
Benefits
- Save time. Every mother knows that with the advent of the baby, free time disappears without a trace. The slow cooker allows you to save precious minutes, and even hours, by greatly simplifying the cooking process: just put the products indicated in the recipe in a container, and the device will extinguish or fry them on its own.
- The non-stick container of any modern multicooker is easy to clean: nothing burns in it, so it is enough to clean the walls and bottom with a soft sponge and wipe the entire surface with a dry towel.
- The "Delay start" mode is remarkable in that you can put the food in the appliance in advance, and the cooking will start at the right time.
 At this time, you can sleep, go to the shower or play with the child.
 - The "Auto Keep Warm" feature keeps food warm for as long as you need it without having to reheat dinner.
- Save money and space in the kitchen. A multi-cooker for children with a set of necessary options will eliminate the need to buy a sterilizer, a yogurt maker, a pressure cooker and a bottle warmer.
- The Baby Meal function allows you to quickly prepare food for your baby. However, the slow cooker will also provide healthy and tasty food to nursing mothers who are forced to adhere to a rather strict diet.
Varieties
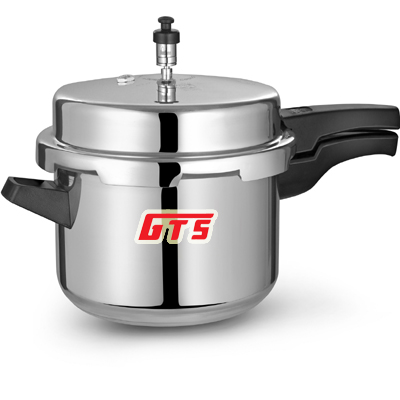
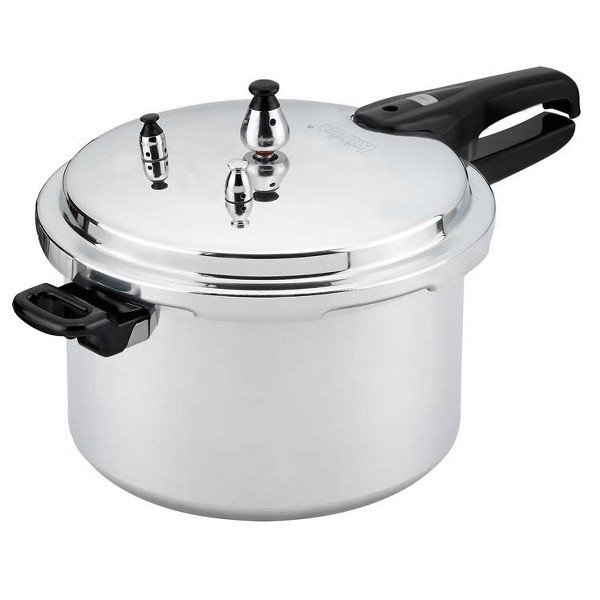
- There are two types: regular and pressure cooker. The multi-cooker-pressure cooker has a steam valve that allows you to regulate the pressure and maintain the temperature up to 115 ° C. As a result, the cooking speed is significantly reduced.
- Devices are also divided by operating modes. But, as a rule, the functionality of any multicooker is much wider than can be understood from the labeling of the buttons or a brief technical description on the manufacturer's website.

- Today on sale you can find both the so-called children's multicookers and ordinary adults. The differences between them are in the volume of the bowl and power.
Key multicooker features for new parents:
- "Rice" - allows you to cook pasta, dumplings, pilaf, dumplings, potatoes and vegetables;
- "Buckwheat" - suitable for cooking any cereals;
- "Steam cooking" - the mode is convenient for heating ready meals;
- "Baking" - suitable for browning meat, vegetables or fish;
- "Stewing" - can be used for stewing meat and vegetables, preparing children's soups, jelly and baked milk.
Many devices have additional functions for milk cereals, yogurt, baby food, etc.
Table of demanded modes
| Mode name | Features | What to cook |
|---|---|---|
| Buckwheat | Automatic mode: the device turns off by itself after the water evaporates. | Cereals requiring long cooking time: hard rice, buckwheat, pearl barley, millet.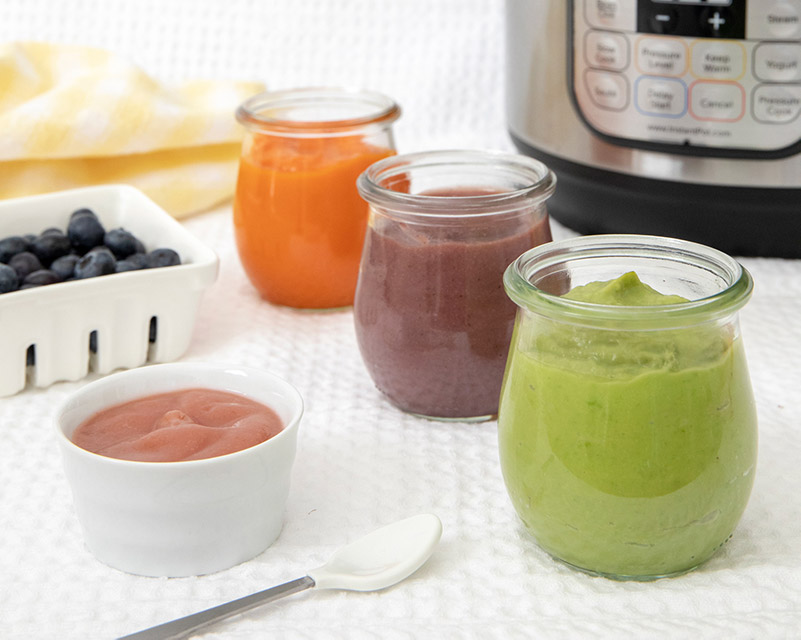 Legumes (peas, beans, chickpeas) - it is better to soak before cooking overnight. Legumes (peas, beans, chickpeas) - it is better to soak before cooking overnight. |
| Pilaf | Automatic mode. In the last 10 minutes, crisp frying is activated. | Pilaf, baked potatoes, fried dumplings, as well as cereals that boil quickly: soft rice (for example, arborio), buckwheat, corn grits, etc. |
| Milk porridge | min., suitable for whole grains) or manual. | Milk porridges made from whole grains of oats, rice, ground barley or corn grits, millet, pureed soups with a short cooking time. |
| Steam cooking | Uses a special simmer container. You can cook 2 dishes at the same time. | Vegetables, fish, manti, dumplings and dumplings, steamed eggs. |
| Baking | Operating temperature 180°C. Suitable for baking and roasting. Operates with the lid open. To get a crust, the pastry is turned over. | Baked goods (pies and mannas), fried meat, meatballs, fried potatoes, soup fries.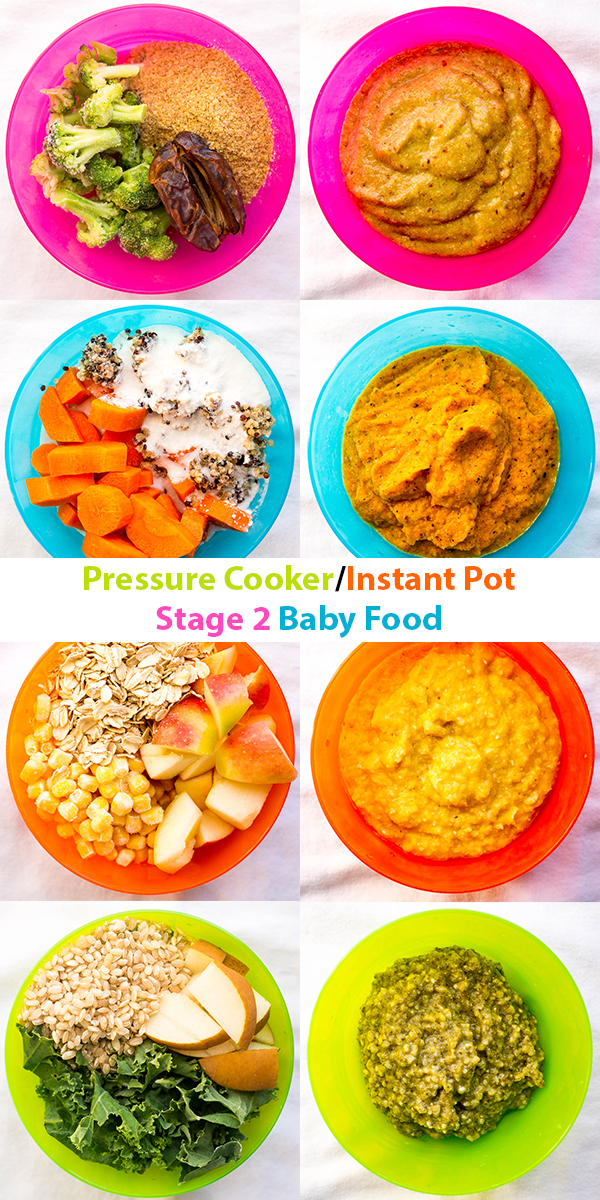 |
| Simmering | For long-term simmering at just over 100 °C. | Stews of meat and vegetables, soups that require a long cooking time, jelly. |
| Soup | Can be combined with steam cooking. Until the water boils, the heating is maximum, then it decreases. | Soups, compotes, minced meat dishes - meatballs, hedgehogs, soup base (if there is no “Baking” mode). |
| Multicooker | You can set not only the cooking time, but also the temperature. Suitable for experienced housewives and proven recipes. | All meals, including homemade yoghurts. |
| Roasting | High temperature to brown. | Fish, meat, cutlets, potatoes. |
| Simmering | Similar to braising. But with a more complex program designed for long cooking. | Jelly, home-made preparations, baked milk. |
| Paste | Divided into 2 steps. First, we pour water and wait for the signal from the device, after which we start the products.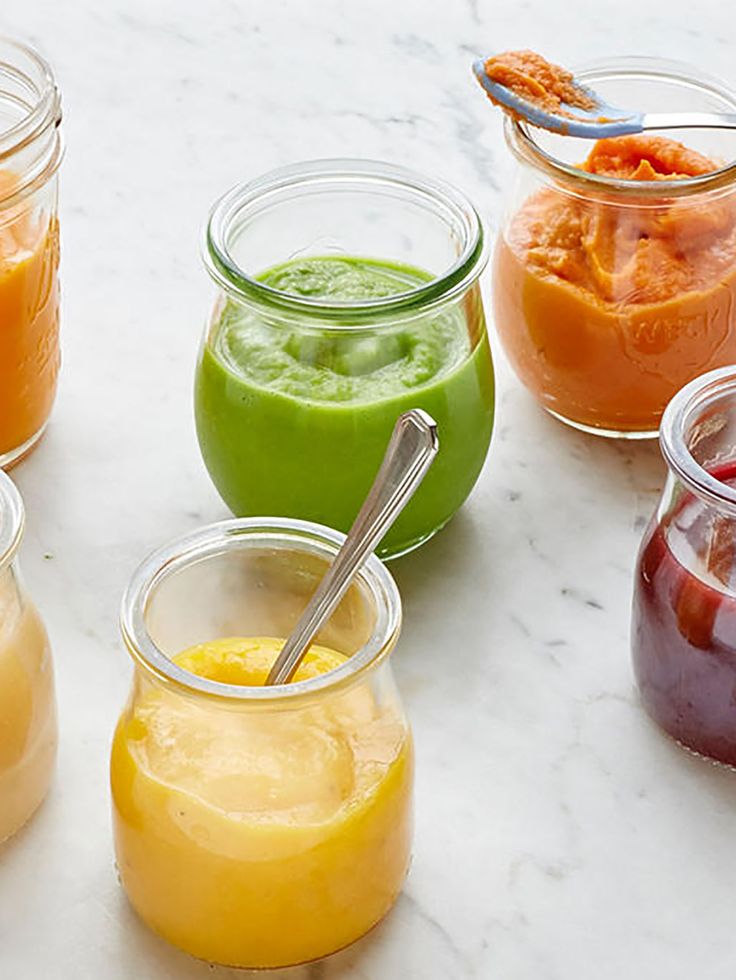 | Macaroni, sausages, dumplings, dumplings and other convenience foods. |
| Reheat | Not to be confused with the reheat mode, which starts automatically when other modes are completed. | Any food that needs to be reheated. |
What is important when choosing?
There are a few key things to consider when buying a multicooker.
- Bowl capacity. For small portions or baby food, a slow cooker with a bowl of 1 liter is suitable. It is better to entrust the preparation of dishes for a large family to a large device with a bowl of up to 6 liters. Please note: the smaller the vessel, the faster the food is cooked in it.
- Power. Average: 600-800 watts. It depends on the cooking speed. But due to the frequent use of high-power appliances, the electricity bill also increases. Therefore, for baby food, you can take a weak device. Looking to feed the whole family? 650 W will be enough for a company of 4-5 people.
- Cooking programs (usually 5-10). For young mothers, it is very important that the steaming and stewing functions are available. It is desirable that a mode suitable for milk porridge be present, as well as the "Baby food" option.
- Additional features. For mothers of infants, the following will be especially useful: delayed start, sterilizer and automatic heating. A slow cooker with such functions will allow you to sterilize and warm the bottles. And thanks to the delayed start, you can take a nap next to the baby while the device prepares your next meal.
- Security. A good unit is necessarily equipped with a sealed valve to protect against burns. Choose a slow cooker with a gentle steam release system.
Nice little things can also be included in the kit: recipe book, measuring cups and spoons, spatulas, steamer insert. But the more modes and additional inventory, the higher the cost. Don't forget about it.
Overview of popular models
There are quite a few multicookers for baby food on the market today.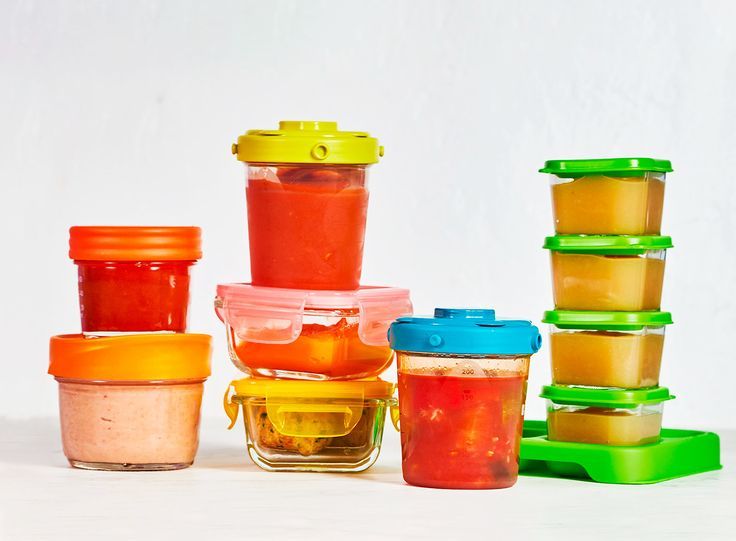 Consider the most popular models for moms.
- Philips HD3060. The model is distinguished by a small bowl (only 2 liters) and low power (330 W). There are cooking modes: scrambled eggs, cereals, pastries and yogurts. This children's multicooker also has a delayed start function, manual operation, cooking time adjustment, automatic food heating, touch control. Two protection systems are installed: from network failures and blocking from children. The kit includes: inner removable lid, carrying handle, cups for yogurt.
- Redmond RMC-01. Compact device of low power, equipped with a two-liter capacity. Of the additions useful for parents: the “Sterilizer” function and a book with children's recipes, spoons for liquid food.
- Marta MT-1960. More suitable for those who plan to cook for the whole family. The device has a power of 700 watts. And it has modes of stewing, baking, frying. But it also allows you to cook healthy children's food, as there is a double boiler mode and cooking various cereals.

- Redmond RMC-011. This model is an electric pressure cooker that can cook almost any baby food in minutes. Specifications: 2L bowl, 350W power, monochrome LCD display. Of the features: the device can be connected to a car cigarette lighter. A great option for those who like to travel with children. There are functions of delayed start and auto-heating. The number - 7 basic modes - includes: stewing, cooking soup, baby food and yogurt.
Parents' comments
Sergey Morkovnikov, Novosibirsk. I bought my wife a Philips multicooker. A bit pricey in my opinion, but my wife is very happy with it. Says baby mode replaces both sterilizer and bottle warmer. I know what he cooks in it for himself and for the child. And I prefer well-done food with a generous addition of butter. Lena Nevzorova, Kirov. I bought a multicooker from Redmond - and I'm not overjoyed! Saves a lot of time, many modes, but it is very easy to figure out what's what.