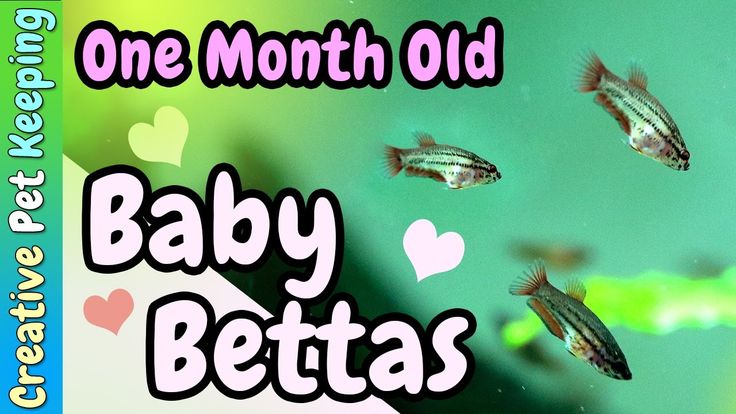
What do you feed baby fish fry
How to Feed Aquarium Fish Fry
By
Shirlie Sharpe
Shirlie Sharpe
Shirlie Sharpe is an aquatic expert and writer with over three decades of experience keeping and raising ornamental fish. She has consulted with The Minnesota Zoo and the National Aquarium. Shirlie has also authored a book on setting up aquariums.
Learn more about The Spruce Pets' Editorial Process
Updated on 12/02/19
Reviewed by
Nick Saint-Erne
Reviewed by Nick Saint-Erne
Dr. Nick Saint-Erne, DVM, is a highly accomplished veterinarian and writer who has treated zoo animals and exotic pets for more than 35 years. He has worked with the Centers for Disease Control and Prevention to improve pet store animal care among other endeavors. Dr. Saint-Erne is part of The Spruce Pets' veterinary review board.
Learn more about The Spruce Pets' Veterinary Review Board
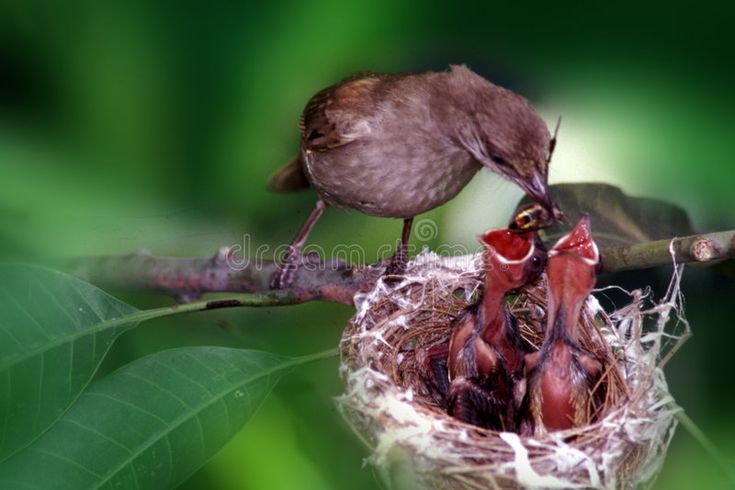
Kai Schreiber / Flickr / CC By 2. 0
The key factors to keeping the fry alive and healthy are keeping the water and environment clean, protecting the fry from adult fish, and providing proper nutrition. Most fish owners already know how to take care of the first two, but feeding fry is often the stumbling block that new breeders run into. Newborn fish cannot eat the same foods as the parents, so the challenge is providing the proper food until the fry grow large enough to eat standard foods.
Fry Type
Keep in mind that young fish will eat different foods at different stages of their development. Likewise, different species of fish have somewhat different needs. For instance, newly hatched Discus fry feed off their parents' slime coat for the first few days of life and therefore do not need to be fed until they have grown past that stage. It is wise to study the species of fish you are breeding to determine if the fry have special feeding requirements.
Taking a broader view, there are two general types of fry, those that are hatched from eggs and those that are born live. Fry that are born live are larger and have developed more fully than those hatched from eggs. Consequently, these live-born fry have a larger mouth than the typical fry hatched from an egg, and can, therefore, eat larger foods from the start. It is quite common for live-born fry to eat a finely ground version of the same foods as parent fish.
Fry from egglaying fish are smaller when they hatch and often are not free swimming for the first few days. In these cases they remain at the site where the egg was attached, feeding off their yolk-sac until they begin to swim free on their own.
Feeding Stages
Fry that are freshly hatched have very tiny bodies, and can only eat the smallest of foods. However, they are growing rapidly, and have demanding nutritional needs. This stage is particularly critical, as newly hatched fry can starve to death quickly. Some of the best foods at this stage are infusoria, freshly hatched brine shrimp, and green water. These foods must be available immediately when the fry hatch, as they cannot wait even one day for foods to be prepared.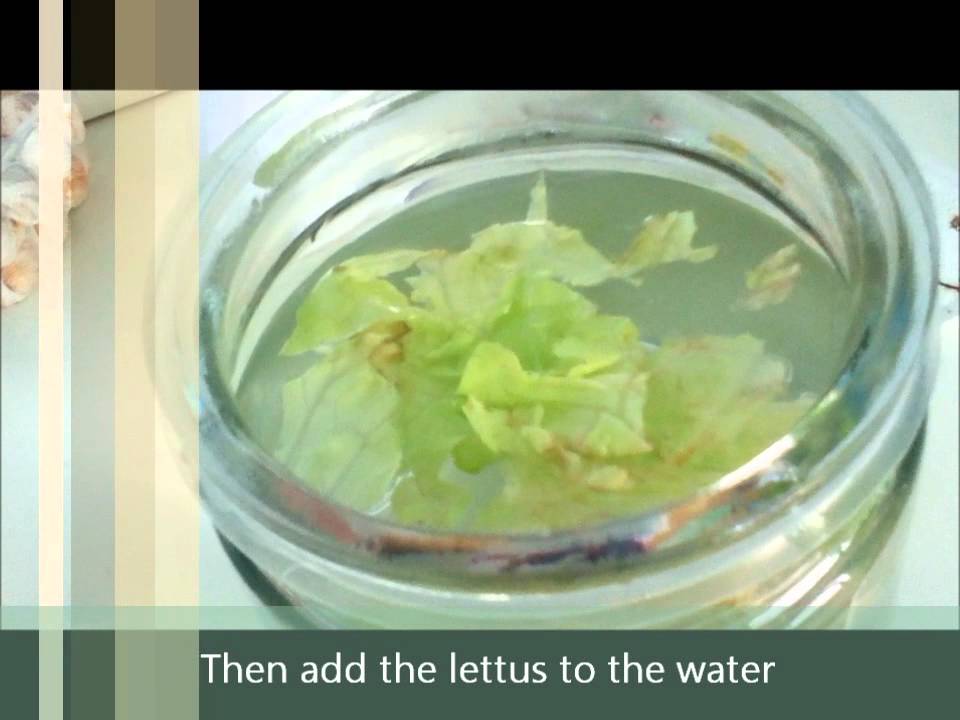 If the previously described foods are not available at the time the fry hatch, egg yolk preparations, and commercially prepared fry foods are good alternatives that don't require a lot of time to prepare.
Once the fry have passed the first week or two of life, they are generally large enough to eat similar foods as the parents, just in smaller portions. Virtually all purchased foods, either flake, pelleted, or freeze-dried, can be ground to a fine size that fry can eat. This article describes simple steps for creating your fry foods, using simple tools that you probably have on hand. As the fry grow larger, you can make the food particles larger until they can eat the same size food as the parent fish. Keep in mind that although the fry may now be eating the same foods as the parents, they need to be fed more often due to the small size of their stomachs.
Fry Foods
There are several basic high-quality foods that most fry will do well on. As previously mentioned, these foods must be on hand at the time the fry hatch, and the supply must be continuous until they can eat traditional foods. So prepare ahead of time to ensure you have what you need. Aquarium clubs come in handy when rearing fry, as there are often members who can help you in a pinch. If you want to breed and raise fish, consider finding a local club for support.
- Infusoria: Infusoria grows naturally in most tanks, particularly those with live plants. However, there may not be sufficient quantities to sustain the full hatching of fry. Therefore, it is helpful to culture your own infusoria to ensure having an adequate amount. This infusoria article from your Guide gives plenty of tips for growing your own culture.
- Brine shrimp: Few things can rival the nutritional value of freshly hatched brine shrimp or the appeal it has to virtually all fish. If you choose to raise it yourself, you will have to start the culture before the fry hatch and keep it going for a while to ensure the fry have sufficient quantities. Another option that owners use is a commercially prepared live brine shrimp preparation, or frozen baby brine shrimp.
- Green water: Green water is exactly what it sounds like, water with microscopic algae growth that turns it green. It makes excellent first food for young fry and is easy to grow. Simply take a gallon jar and fill it with aquarium water, scrape some algae out of your tank and add to the jar (if you have no algae, a bit of grass will suffice). Add a few drops of plant fertilizer, then leave the jar in full sun. Within a matter of days, the water should be green and teeming with microscopic nutrients that are ideal for your fry. Take a few ounces out of the jar for each fry feeding, and replace it with treated freshwater.
- Egg yolk: Egg yolk is a power-packed food that is easy to make into preparation for newly hatched fry. Hard boil an egg, take the yolk and wrap in a small piece of gauze, compressing it so small portions protrude through the cloth. Hang it in the tank and the fry will feed off it. Remove and replace daily for the first several days.
- DIY fry food: Live born fry, or fry that are a week or more old can usually eat finely ground foods, that you can prepare yourself.
- Purchased fry food: Commercially prepared fry foods.
Live-Bearer Development Period Inside Female and as Fry
Tiny Foods for Small Fry
Once fish eggs have hatched, you’ve only just begun the journey to breeding fish and raising their young. Keeping fry alive is far more difficult than getting their parents to breed, and after a successful mating this can be tedious and difficult.
For one thing, while most cichlid fish and livebearer fry are large enough to eat commercially prepared fish food at hatching time, most other fish, including rainbowfish, gouramies, gobies and tetras, require a smaller food source. In fact, the fry of these fish would barely be large enough to be a food source for cichlids and livebearers.
Also, many young fish will only eat food that is moving. You have a short period in which to adapt a young fish to nonmoving food before the fish will die. If you can keep it alive through this period, however, you typically can convert a fish to flake and other commercial foods when it gets older.
The following overview of many of the foods used by aquarists to feed their fry will help you keep your fry alive. Each of these foods provides enough nutrients that it could be used alone, but you should use several different foods when feeding your fry to help satiate their different appetites.
Prepared Foods
Prepared foods are not alive. Here, we will cover boiled egg yolk, powdered egg yolk, liquid fish food and commercial fry flake.
Boiled Egg Yolk
This is an easy, inexpensive food to use with young fry. It has the added bonus of not resulting in the unpleasant smells that live cultures often create.
To prepare this yolk food, start by hardboiling an egg. Remove the shell and egg white — all you need is the yolk. Place a small piece of the yolk in a small container with water (unused yolk can go into a sealed container in the refrigerator), and shake the container vigorously. When you agitate the water the yolk should dissolve, and you now have a suspended food that you can feed your fry.
If necessary, pass the mixture through a cloth to sift out any remaining larger pieces of yolk. You can then pour the egg yolk solution directly into the fish aquarium. It will typically remain suspended in the water for some time and will be eaten ravenously by most baby fish.
A single egg yolk could feed a batch of baby guppies for months. Of course, egg yolk won’t last that long in the fridge; discard any remaining yolk that begins to decompose. Also, do not add too much yolk to your mixture or add too much food to the aquarium, as it can cause pollution.
One problem with egg yolk is that some of the suspended yolk might be too big for the smallest fry to fit it into their mouths. Even after sifting, some pieces come out too large, so there may be less food to eat and more potentially water-fouling, uneatable food.
Powdered Egg Yolk
This is commonly available at pet stores, and you will find that powdered egg yolk is mixed with many other substances to help provide vitamins and minerals that can aid fish growth.
Powdered egg yolk can be added to an aquarium by sprinkling it directly on top of the water or mixing it with water before pouring it into the aquarium. Typically, if placed on the water surface, the food floats, whereas if you mix the food with water, it remains suspended for a short time before dropping to the bottom of the aquarium. Use both methods to maximize the opportunity for the fish to feed.
This food is excellent for small fish because it is much smaller than you could ever grind flake food. The actual size of powdered yolk is smaller than real suspended egg yolk, which can be very helpful when feeding the smallest of fry.
Liquid Fish Food
Liquid fish foods are foods that are already suspended in water. The particles tend to be too large for smaller fry to fit into their mouths, but there has been a shift toward smaller sizes. This new generation of liquid fry food has many hobbyists anxious for the final results. The initial results have been mixed, but these new liquid foods are small enough to be used in place of other small fry foods. Another plus for these is that they stay suspended long enough for small fish to eat them.
Commercial Fry Flake
Commercially available flake food for fry has been available for many years. Although fry flake foods are good for large fry, such as livebearers and most cichlid fish, they will not work well for small fry. The food is often as large as the fry themselves.
Cultured Foods
Live foods for fry include vinegar eels, microworms, baby brine shrimp and infusoria (both green water and zooplankton).
Vinegar Eels
Vinegar eels are a great food. They are easy to keep and very small (0.04 to 2 millimeters in length and 0.10 millimeter in diameter). Unlike microworms and other cultured foods, you can ignore your vinegar eel culture for weeks without killing off the culture.
A vinegar eel is actually not an eel — it is a nonparasitic roundworm, Turbatrix aceti, that can live in vinegar. Being a live food makes vinegar eels especially helpful in cases where fry will not accept prepared foods. Vinegar eels can live for a long time in aquarium water — often up to 24 hours — so they won’t pollute the aquarium water quickly and will provide a food that is available to your fry throughout the day.
Vinegar eels are so-called because they are cultured in apple cider vinegar. To prepare a culture, fill a quart or larger- sized jar half full of pure apple cider vinegar with no additives. Fill the remainder of the jar with water, preferably distilled or reverse osmosis water. Then add a couple of pinches of sugar or some apple slices, as this helps create food for the vinegar eels. After you’ve prepared your medium, add the eels to the mix.
Vinegar eel cultures are often available online and may be obtained through a local aquarium society. Let cultures grow about two weeks before harvesting.
It can be challenging to harvest vinegar eels.The vinegar that the eels live in is very acidic and can be deadly to fish, especially fry. Therefore, the eels must be removed from the vinegar. Given their small size, this can be tricky. You can purchase a small screen with holes small enough to allow the vinegar to pass through but not the eels, or you can try the long-neck bottle approach.
If you use the screen method, simply pour about half a cup of vinegar from your culture through the screen. You can then wash the vinegar eels off of the screen and into a cup to be dispersed among your fish aquariums. The long-neck bottle method involves using a bottle with a neck that is long and narrow. Fill the bottle with vinegar from the culture until it’s filled a little more than halfway up the bottle’s neck. Then put in a cotton ball, pushing it down until it is in the vinegar, but not submersed in it. Then add a little water above the cotton ball. The eels will move through the cotton into the water above, where they can be removed with a pipette or eye-dropper.
In either case, you will have a nontoxic food that is small and moving — and just great for newly developing fry. Because the vinegar eels are different sizes, there is likely to be a size for most every type of fry. However, it is likely that the smallest vinegar eels will not exist in sufficient quantity to act as your fry’s sole food source.
Infusoria: Zooplankton
Infusoria is not a single type of food; it is comprised of different types of organisms that are 0.02 millimeters and larger in diameter, depending on the species.
To create your own infusoria, place some hay, spinach or lettuce in a bottle of water, and put it in a sunny place. The problem with infusoria is that you have no control over what types of organisms are in the water, and some may be toxic to young fish. You could create a more usable infusoria by first boiling the hay, spinach or lettuce, and then introducing one of the paramecium species that is used as fish food. Aeration can be used to help decrease the decay and smell of the culture.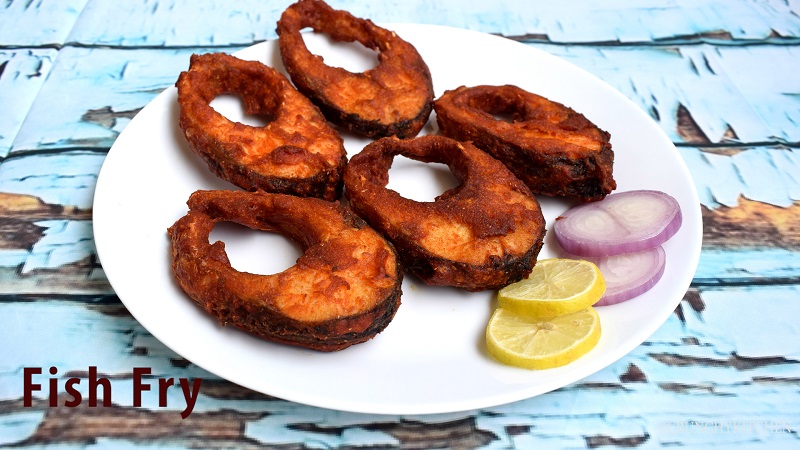 For cultures intended to be kept beyond a few days, siphoning the bottom of the culture out every couple of days will help prolong the life of the culture.
Several paramecium species may be used, and the culture of different species has a good bit of variation. If you purchase or obtain a culture of paramecium, ask about any special directions for keeping that particular species. Many can be kept simply by covering the jar that contains your “salad” mixture and putting the jar in a sunny place.
Fill a 1-quart jar with water and your food source. Add the paramecium to the culture. You should be able to use the culture after about four days. Pour it through a piece of cloth to remove the wheat/hay/lettuce/spinach gunk. The water that has passed through the cloth should not be toxic to fish, and it and the organisms in it can be added to your aquarium.
Infusoria cultures do not last as long as vinegar eel cultures, so start a new culture every few weeks to ensure that you don’t run out of food.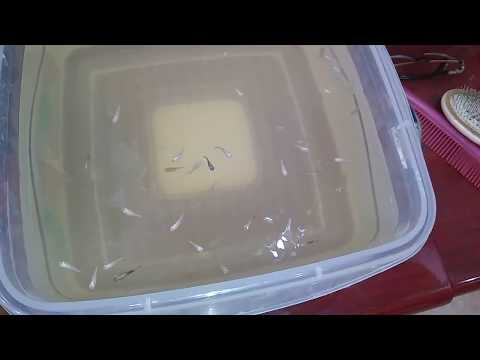 One of the biggest benefits of the paramecium is its extremely small size. It will produce a large amount of food at a very small size that will feed typically even the smallest of fry.
To avoid paramecium and other microscopic critters that are toxic or dangerous to fry, make sure you fully understand how to keep and feed your species before you begin feeding it to your fish.
Infusoria: Phytoplankton (Green Water)
Infusoria can be broken down into two categories. Zooplankton (discussed in the previous section) include microscopic living animals. Phytoplankton include microscopic plant material (0.02 to 2 millimeters in length). Aquarists speak of using green water as food, but they are actually referring to phytoplankton.
Green water is very easy to cultivate and extremely inexpensive. Simply take some water out of the aquarium (you should not need spinach, hay or lettuce for a culture if you use aquarium water), put it into a 1-quart jar, and place the jar in the sun. The sunlight will cause the water to turn green within a couple of days. When the water turns green, remove some and feed your fish. Then add some new aquarium water back to the culture to help maintain its longevity.
You’ll notice that this is very similar to how we cultured infusoria, and for good reason. Because they both contain microorganisms, we are relying on the replication of those for food. Any culture made from an aquarium will have both zooplankton and phytoplankton, but by increasing the direct sunlight by two to three hours, we encourage more phytoplankton to grow. On the other hand, if you keep the jar in an area that isn’t as well-lit, more zooplankton will grow.
Green water is among the smallest foods available, and many aquarists consider it indispensable when raising newly hatched fry that are too small to accept most other foods. Because the green water will float in the aquarium water, it can stay in the fish aquarium for a long time until it is consumed. One drawback is that the culture may suddenly collapse and need to be replaced. For this reason, it’s recommended to have multiple cultures “percolating” at the same time. It is also possible to order specific phytoplankton and grow them with more specific culturing and harvesting techniques.
Microworms
Microworms (Panagrellus redivivus) are small nematodes (0.05 to 2.0 millimeters long and 0.05 millimeter in diameter) that may seem initially too small for your baby fish (or too gross to touch). However, they have qualities that make them ideal candidates for growing fish.
To create a culture, mix about a tablespoon of corn meal with water until it forms a paste. Then add about a quarter-teaspoon of yeast. Place this mixture in the bottom of an empty peanut butter jar and add a culture of microworms. Screw on the lid, which should have holes punched into its middle. After a few days you’ll find that there are microworms crawling everywhere. Scrape them off the walls of the container with a razor blade or with your finger and feed them to your fish.
Fish eat these worms ravenously. Unlike vinegar eels, microworms will not live long in the water, so don’t overfeed. In addition to the microworms, the medium they live in may sometimes be introduced into the aquarium. If this happens, don’t worry; it, too, will be eaten by the fish and may provide another source of food for young fry.
Microworm cultures typically last about two weeks before they need to be replaced. You should not need to do anything to maintain this culture. As with green water, maintain two cultures at a time to avoid having any one culture crash.
Opinions vary on how to maximize a culture. Some people recommend using rolled oats instead of corn meal. Be aware that the smell of the culture is unpleasant. On the positive side, microworms are probably a better nutritional food for your fish than baby brine shrimp.
Baby Brine Shrimp
Newly hatched brine shrimp (0.08 to 0.12 millimeter) have been used in the hobby for years because of the ease of hatching and harvesting it. They are active in freshwater and can live in it for up to five days. There are many opinions on how to make the perfect brine shrimp hatchery. One way is to start with a 1-quart (or larger) jar of water and add about 2 teaspoons of sea salt per quart. Add about 17 ounces of brine shrimp eggs per quart, and aerate the water with a fish tank pump and some air line tubing. You may want to use an airstone, but be aware that doing so can cause problems if you use one that makes very fine bubbles. Ultra-fine bubbles can become lodged in newly hatched shrimp, causing them to float to the surface and suffer an untimely death.
Brine shrimp eggs hatch in 24 to 48 hours, after which the babies can be siphoned out and fed to your fish. Unplug the pump to stop the aeration, and allow the shrimp to settle to the bottom of the jar. Typically, hatched brine shrimp will congregate at or near the bottom of the water, and eggs will float. Use a piece of air line tubing to siphon the shrimp into a fine net or a cup (be careful not to siphon out any unhatched eggs). The little bit of saltwater you add to your aquarium while feeding brine shrimp is not a concern, but you can rinse the shrimp in freshwater if you wish.
It is discouraging to try to keep fry alive when they are so small and unable to eat what you can easily give them. But with a little work, you can create foods that will help get you through the difficulties of raising these small fish to adulthood.
Posted by: Chewy Editorial
Featured Image: Tony Terceira
Share:
Feed for aquarium fish fry, how and what to feed?
Food for aquarium fish fry
In this article, we will talk about starter food for fish fry. Nowadays, it is not difficult to raise the fry of any aquarium fish. The range includes excellent dry food for juvenile fish. For example, TetraMin Baby is a complete micro-flake food that combines high quality and functional ingredients. A complete diet for the daily feeding of ornamental fish fry up to 1 cm in length, which allows for healthy growth in the early stages of development.
We also note that virtually any "adult" food, rubbed with fingers into dust, is suitable for feeding fry.
Food for aquarium fish fry
At the same time, if you have the opportunity or raise elite fish fry, it is best to feed them live food. This is due to the fact that fry of many fish species eat only live prey, mainly because they do not perceive immobile food as food at all, at least at first. However, in some cases, fry can learn to associate the approach of an aquarist with food, and then, they will try everything that is offered to them. Suitable small live foods for rearing fry are ciliates, Artemia nauplii and microworms.
Infusoria (microorganisms) are essential as the very first food for tiny fry. Old aquariums overgrown with algae may contain a fair amount of naturally occurring microorganisms. But in spawning grounds, where conditions are usually more sterile, there are no ciliates and they have to be bred artificially. To do this, put some vegetable matter (usually crushed lettuce leaves) in a jar of water and place in a warm, sunny place, such as a windowsill. The water for culture of infusoria needs to be dechlorinated, it can be water from an aquarium, otherwise it is dangerous for the life of ciliates. When the water becomes cloudy, it should be added in small portions to the aquarium with fry using a pipette. Read more about this in article 9.0005 "Living Dust".
Aquarium fish fry food
Artemia nauplii is a very suitable first food for many fry or a second food for juvenile fry that can only feed on microorganisms at the first stage. Artemia have the dual advantage of being mobile in open water, highly visible and attractive, and their orange coloration usually showing through the transparent belly of the fry that have eaten them, indicating that these fry are getting enough food.
Aquarists usually breed Artemia nauplii themselves from eggs, which are available in pet stores. This process takes place in a container of salt water - it can be a large jar, a plastic lemonade bottle, or a specially purchased incubator. The required salt concentration may vary depending on the origin of the population (see package instructions). The culture needs intensive aeration for constant circulation of larvae. The container must be kept in a warm place at a temperature of 18.5-26.0 °C. The period of release of nauplii from eggs depends on temperature, but usually it is 36-72 hours.
To collect nauplii, turn off the aeration and place the light source as close as possible to the container at about half its height. The shrimp will congregate closer to the light, while the nauplius eggs and shed shells usually float on the surface of the water or sink and sink to the bottom. Thanks to this, the shrimp can be separated with a pipette or simply drained. Otherwise, some fry may swallow the shell or eggs and die. Water with nauplii should be filtered using a special sieve for live food or a small net with small cells, and then rinse the nauplii in clean water. Never pour the shrimp into the aquarium along with the water in which they were bred, as salt water can kill the fry. After harvesting the shrimp, aeration should be turned on again. The brine shrimp culture will provide food for two to five days depending on how much is required. A continuous succession of crops is necessary to ensure sufficient feed.
Note: Some aquarists suggest feeding the fry with a frozen cube of adult brine shrimp.
Food for aquarium fish fry
Microworms is a suitable food for fry and can be fed alongside or instead of Artemia nauplii. Breeding microworms is much more profitable than brine shrimp, since this culture is cheap and easy to propagate, representing an always available supply of food. Starter cultures can be obtained from other aquarists. The only drawback of these worms is that they cannot swim and sink, albeit slowly. True, the fry for the most part grab them immediately or swim to the bottom after them. For fry of bottom species, microworms are more suitable than brine shrimp nauplii.
Microworms are usually bred in a plastic container (margarine or mayonnaise box is suitable). A layer of oatmeal 1 cm thick is poured into the container, then moistened with boiling water to form a thick dough. Do not mix the dough, otherwise it will smear on the walls of the container, and they should be kept clean. When the porridge has cooled, add the microworm starter culture there. Close the container with a lid so that the culture does not dry out, but at the same time air can enter, and place it in a warm place (for example, on the lid of an aquarium). After a few days, the worms will multiply to such an extent that they will begin to crawl along the plastic walls of the container, not stained with porridge, and they can be collected from there with a finger, cotton swab or brush, and then rinsed with water into the aquarium.
Aquarium fish fry food
The microworm culture can remain active for three to six weeks, but after about ten to twelve days it begins to emit an unpleasant odor. Therefore, it is better to establish a new culture before the old culture reaches the stage of bad smell, because oats are cheap and divorce is expensive! This time, you can just use a tablespoon of the old culture as a starter culture. If a lot of fry came out of the eggs, then it is better to keep two or more cultures of microworms at the same time.
At the end of the article, remember that fry need to be fed frequently (some 8-10 times a day), but in small portions. So that in the spawning aquarium there are no food residues and, as a result, the growth of nitrogenous compounds .
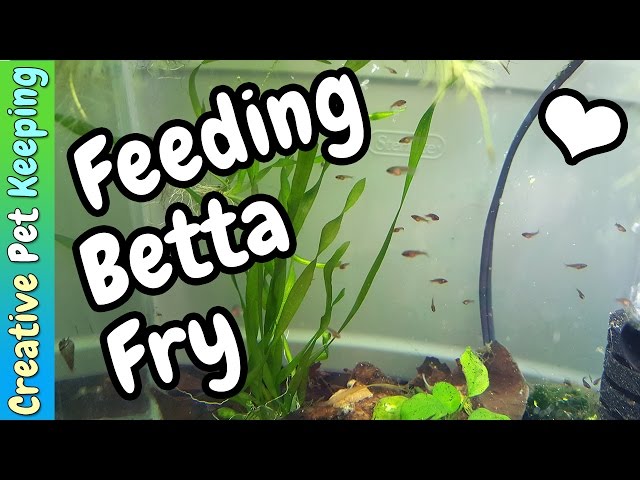
Feeds for fry and fish video review
See also:
003
How to feed goldfish
Homemade fish food recipes
Oak leaves, almonds, alder cones in the aquarium
Use of tea in the aquarium. Tricks!
Automatic fish feeders. Which is better?
Live fish food
Fish food species, recommendations
Category: Aquarium articles / Fish breeding | Views: 27 439| Date: 27-11-2018, 17:12 | Comments (0)
How to properly feed fish fry
-
Proper feeding of fry is the key to successful fish rearing.
In nature, the appearance of fry occurs at certain periods of time, when water bodies are saturated with organic substances.
 These substances stimulate the growth of many organisms and serve as food for fish and their offspring. When breeding fish in aquariums, the main condition for their rearing is the constant provision of fry with a sufficient amount of food.
 Frequency of fry feeding
A few hours after spawning, fry become quite independent, their first meal is various microorganisms living in the water column. However, it is absolutely necessary to take care of the balanced diet of the fish that have appeared, since it is the nutrition in the first weeks that determines what the adults will be like.
The feeding of fry differs from the feeding of adult fish by the constant presence of food in the aquarium. It is important not to feed too much at one time, but to distribute them in small portions throughout the day. In the first days, the fry are fed every 3 hours, gradually increasing the interval between feedings. By four weeks of age, feed up to three times a day.

Feed for fry
Feed for fry should not only be plentiful, but also sufficiently varied, containing the necessary amount of substances of plant and animal origin, vitamins, etc. It is preferable to start feeding live food to fry from the first days. They can be finely chopped bloodworms, ciliates, rotifers, brine shrimp. Surveys of aquarists show that brine shrimp nauplii are considered the best food for fry, but this food is not suitable for all newborn fish "in size".
To replace live food, it is desirable to use dry food of industrial production, which are sold in pet stores. The recipes of these feeds are made taking into account the necessary nutrients for the growth and development of fish, and the manufacturing process includes processing with ultraviolet rays. MicroMin and SeraMicron feed mixtures can be used already from the first days of fry life, and in a later period it is recommended to add TetraOvin mixture to the diet.
Sometimes egg yolks, curdled milk or powdered milk are used as a substitute for live food.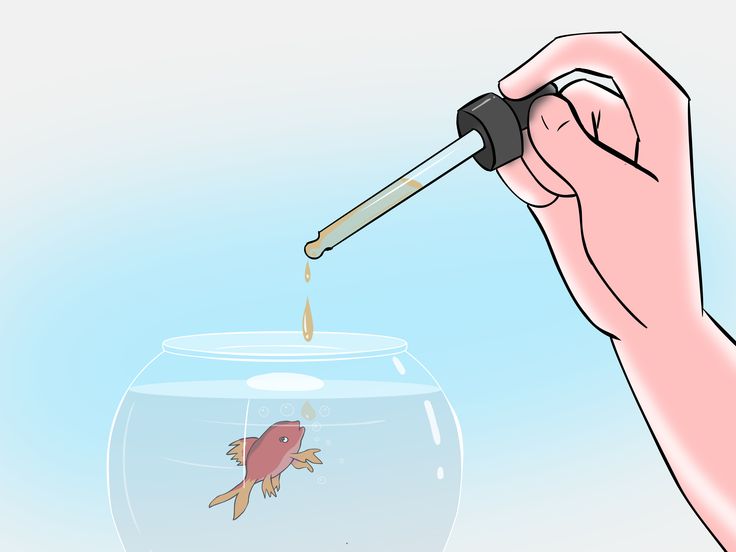 A piece of yolk from a boiled egg is ground in a small amount of aquarium water and poured into the aquarium. Fry eat yolk food well, but water is quickly polluted from such food, so it is better to use this method of feeding in cases where other food is not available.
 Unlike egg yolk, curdled milk does not damage the aquatic environment of the aquarium. To prepare food from yogurt, a small amount of it is poured with boiling water to curdle the milk protein. The resulting clot is caught with a net and washed with water, after which the net is lowered into the aquarium and shaken until a cloud of small food particles forms in the water.
For fry, milk powder is a nutritious protein food that is easy to prepare at home. The cooking process consists in placing a plate of milk on a boiling pot. After evaporation, a powder is obtained that does not dissolve in water for several hours and is completely eaten by the fry.
In conclusion, it should be noted that it is desirable to rotate the food for fry, and the remains of food should be removed, as this is a favorable environment for the reproduction of microbes and bacteria.
 It is also very important to regularly change the water in the aquarium with fry. Water, saturated with the waste products of fish, makes it difficult for their bodies to exchange substances and inhibits the development of fry.
 Recommended reading:
Advantages of the corner aquarium
For the most rational use of the area of the room for placing an aquarium, as a rule, not only standard interior solutions are used for such cases - shelving, ...
Aquarium cleaning
filterers. However, they are not able to completely remove harmful substances. Therefore, sooner or later...
Genoese Aquarium
Genoa is full of sights - this is due to the ancient history of the city. However, in Genoa there is an object that attracts tourists from all over Europe, which is not at all connected with the historical or...
The Platinum Arowana is one of the most expensive aquarium fish.